Synchronization
The Synchronization feature allows you to compare variables between specific moments in time of an environment, or between multiple environments.
Synchronization has a lot of use-cases, but it requires some additional context to ensure you use it the right way.
The purpose of the synchronization services is to give you a screenshot of whatever variables you select for an environment at a specific time. This makes it great to compare such variables between specific moments in time.
You might use these services to check what settings were altered over the course of one week.
While it is technically possible to use these services to copy the configuration from one environment to another, we recommend caution when using the services for this purpose. Settings are often bespoke to linked systems and there are no safeguards.
Available variables
Although it's easiest to manage this via Admin Suite, you can also make your synchronization via API. The areas of Suite that are available in the synchronization functionality are the following:
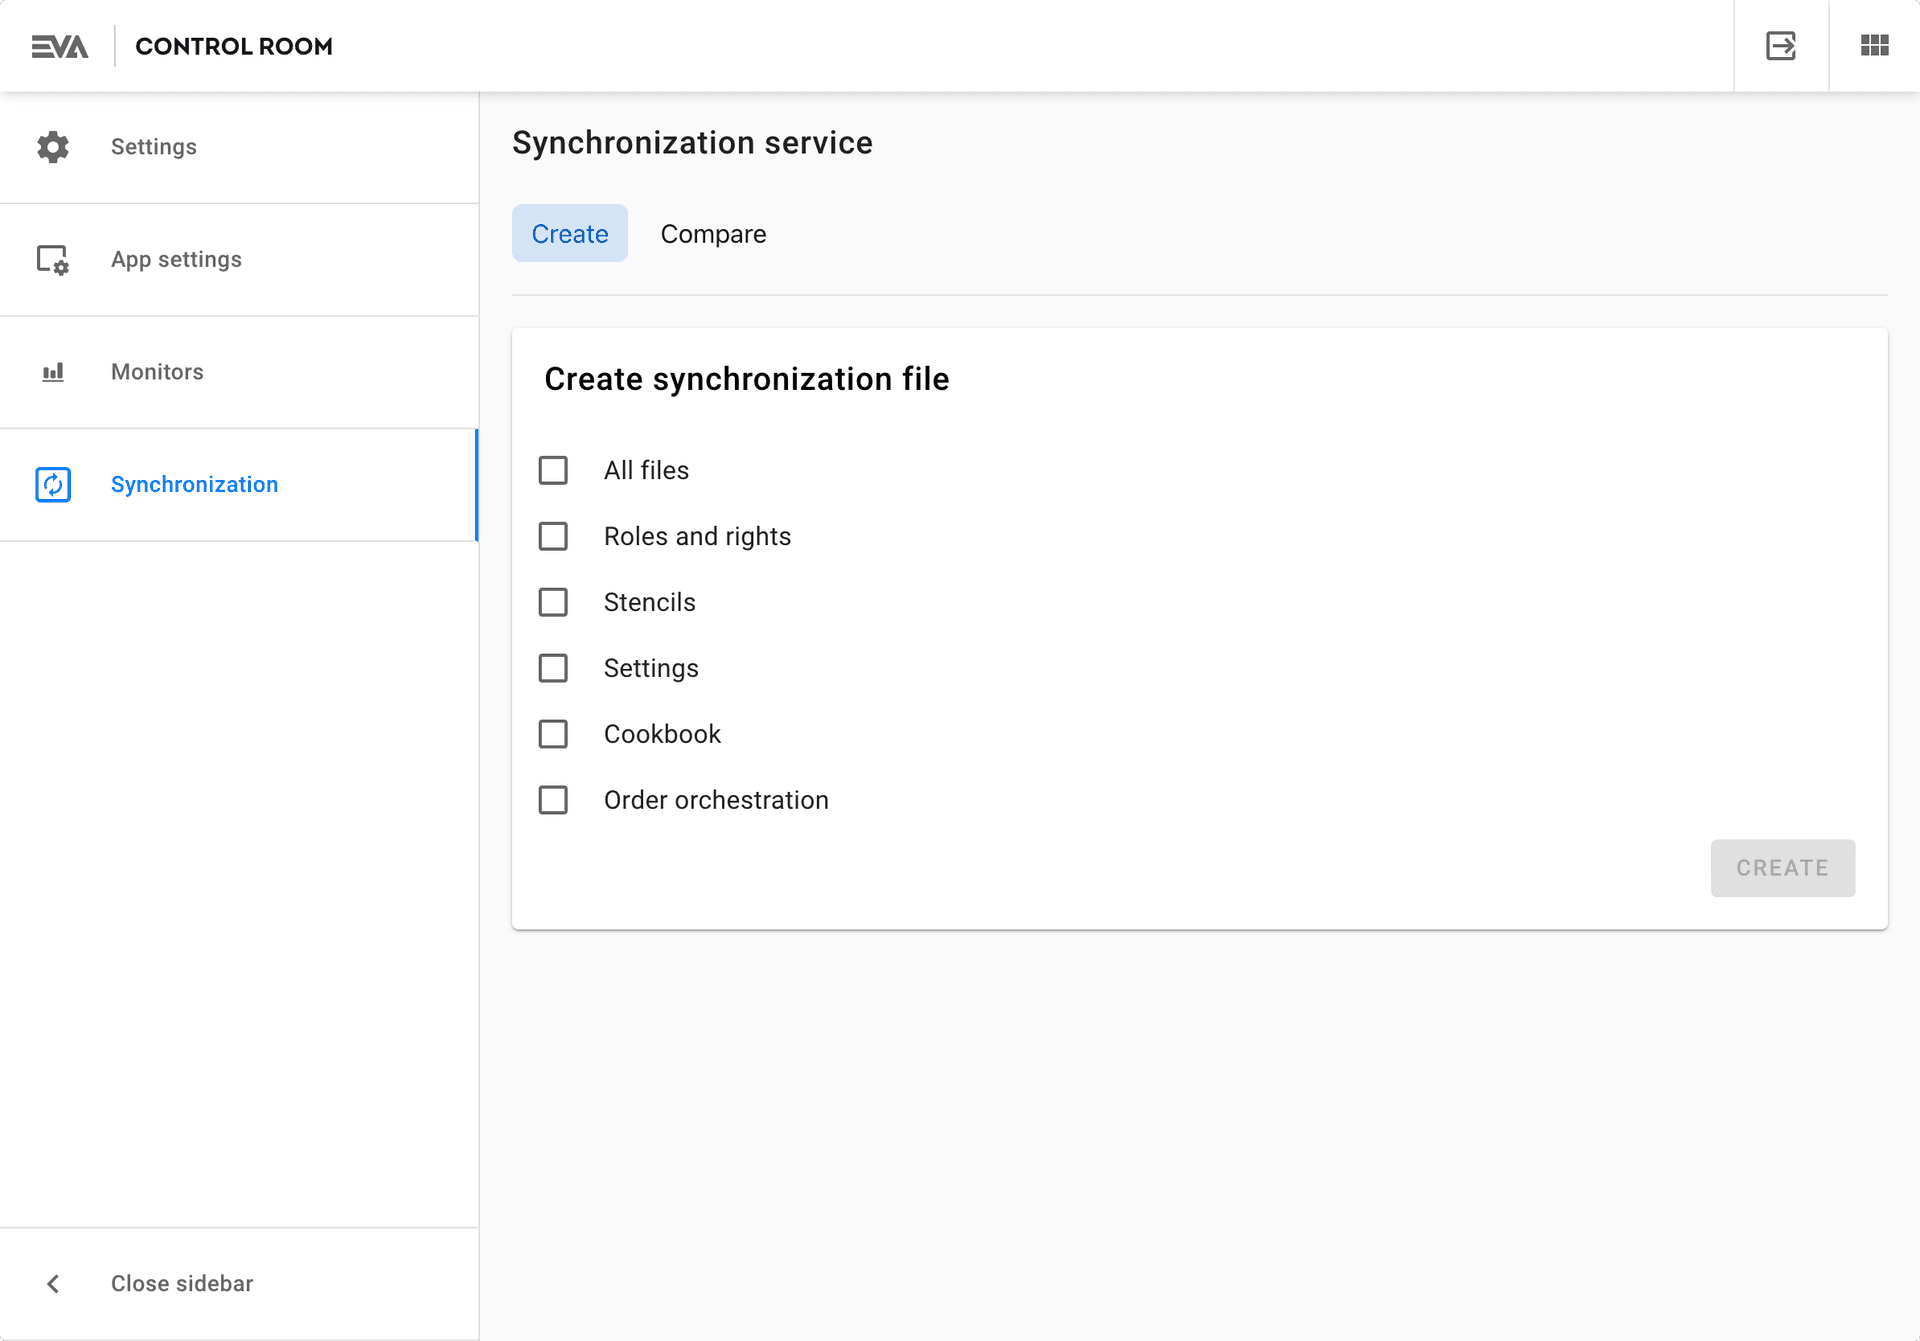
- All files
- Roles and rights
- Settings
- Order orchestration
In order to be able to access this chapter, you need the SynchronizationFiles permission.
Create a synchronization file
To start off the synchronization process, you first create a file containing all the areas of configuration which you would like to export.
The result of the Create file action, comes in the form a URL. This is the URL of a blob containing all the data you'll need in the following step. Simply clicking Done will automatically save the URL to your clipboard.
For safety reasons, generated blobs expire after 30 minutes. If absolutely necessary however, they can be downloaded and locally stored or manually hosted - just paste the URL in your browser.
Compare synchronization files
You'll now have to login to the environment you'd like to export the configuration to. After logging in, go to Synchronization once more, but now use the Compare tab. This tab accepts the same URL from step 1 and will allow you to compare the differences between the two environments before making any permanent changes.
To make it easier, use the Only show deviations slider, so as not to get overwhelmed by any configuration options which are already the same in both environments.
The result will be an overview of all the areas you selected in step 1, at least where they are different from one environment to the next.
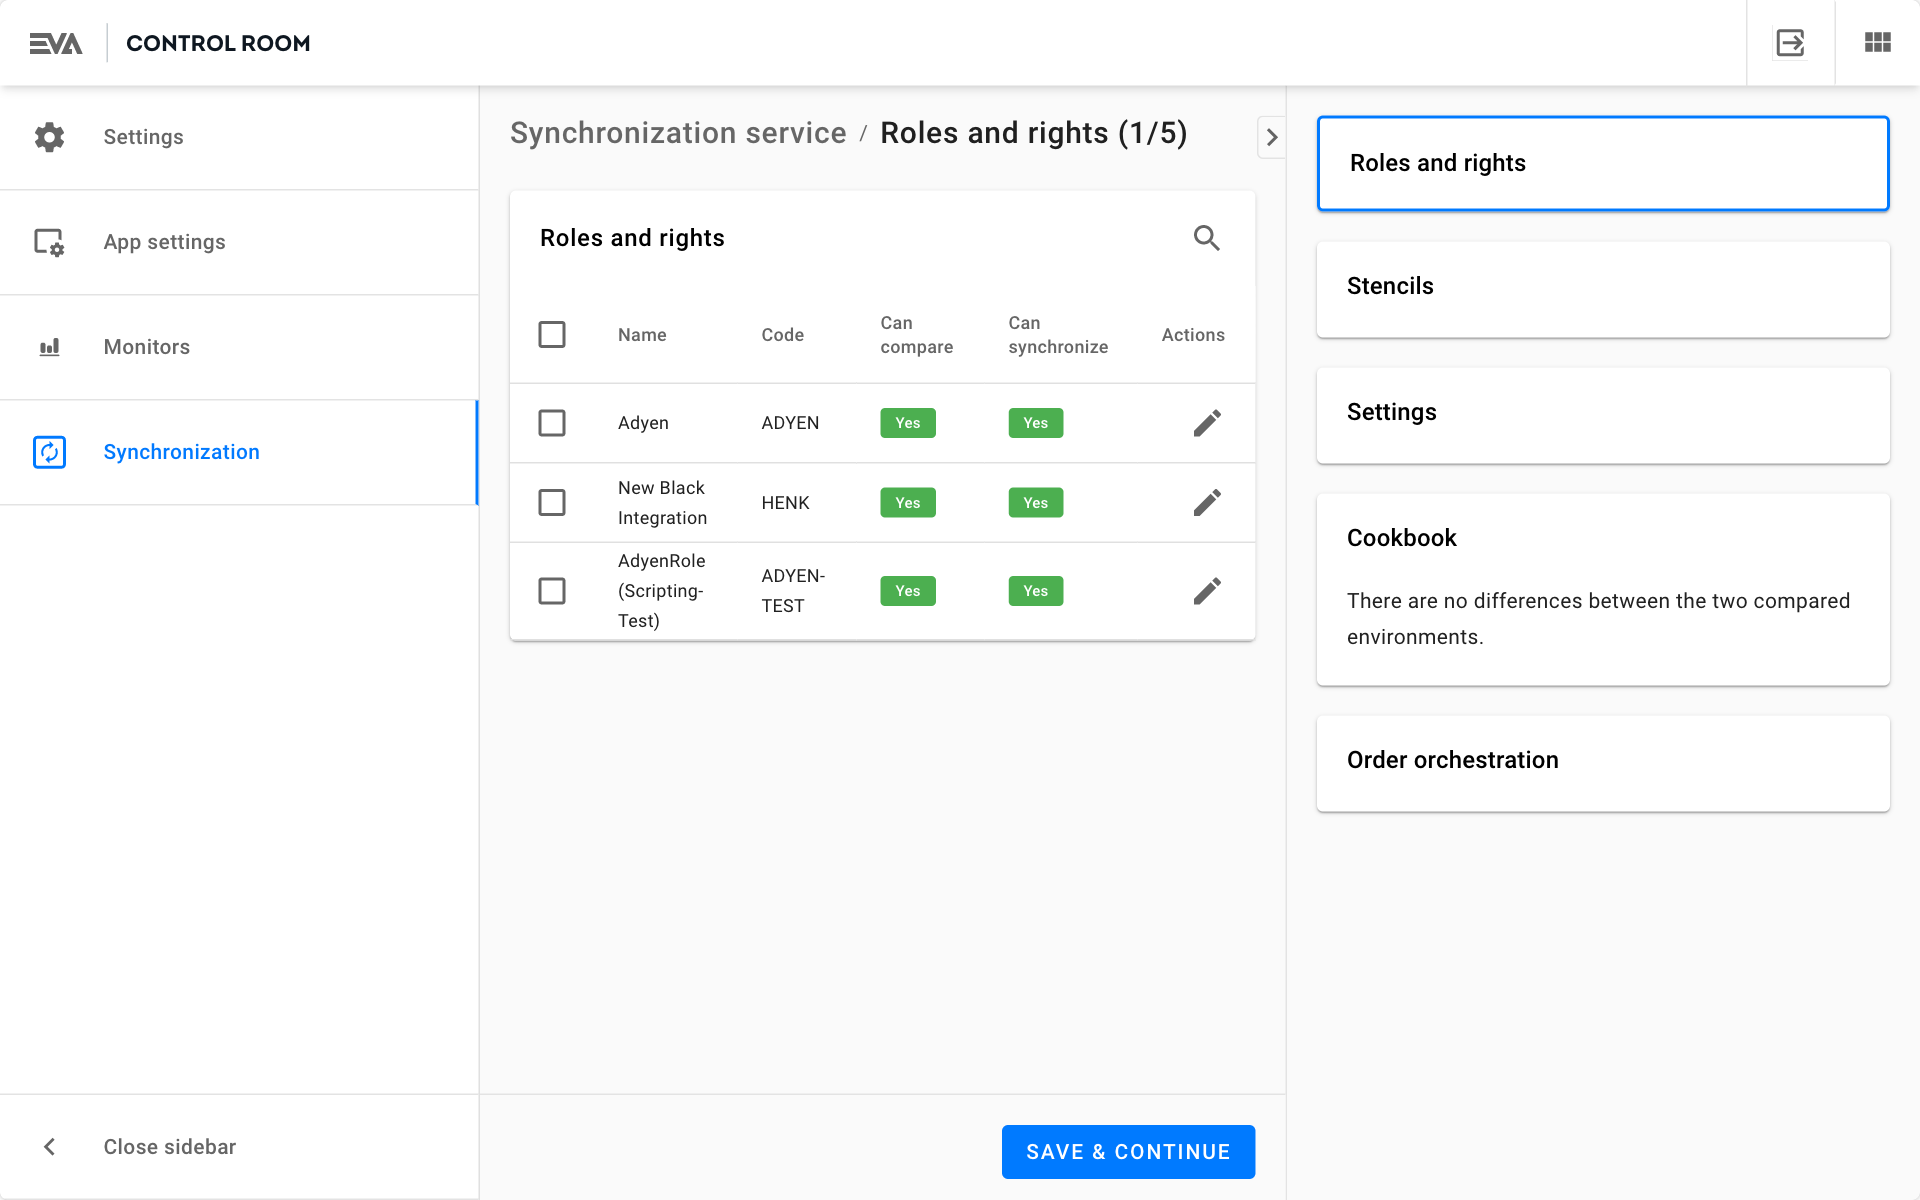
Click the area in the sidebar to check the differences for the various areas. Each area features a different modal, best suited to displaying its configuration. Remember that you can finetune all the configuration options here directly; you do not have to accept the values.
Once you're certain these are the stencils, settings, etc. you wish to import, click Save & Continue.