Basket
Using your basket
When you open the Companion App and login, the basket is the first thing to meet your eye. If you continue to any other tab via the hamburger menu, you can always find your way back to the basket by tapping the icon in the bottom left.
Your basket can be used to hold items before converting it into an order. These items can be added, or removed, in several ways. For one, you can use the app's scanner to scan a product barcode, but you can also search for a product by its name or enter its barcode manually. Removing a product from the basket is as easy as tapping the - button on the relevant product in the basket.
You can also move the products in unfinished orders back into the current basket, but you can read more on that in the Companion's Orders section.
Sometimes, when adding a certain product, you'll find that a serial number is required. In that case a new page will be shown. On this page you can either scan the serial number on the product itself, or enter it manually. By tapping the Update button you can link the serial number to the product.
Products can be removed from baskets by swiping those products to the left. Several options will show, one of which is the Delete button we need to remove products.
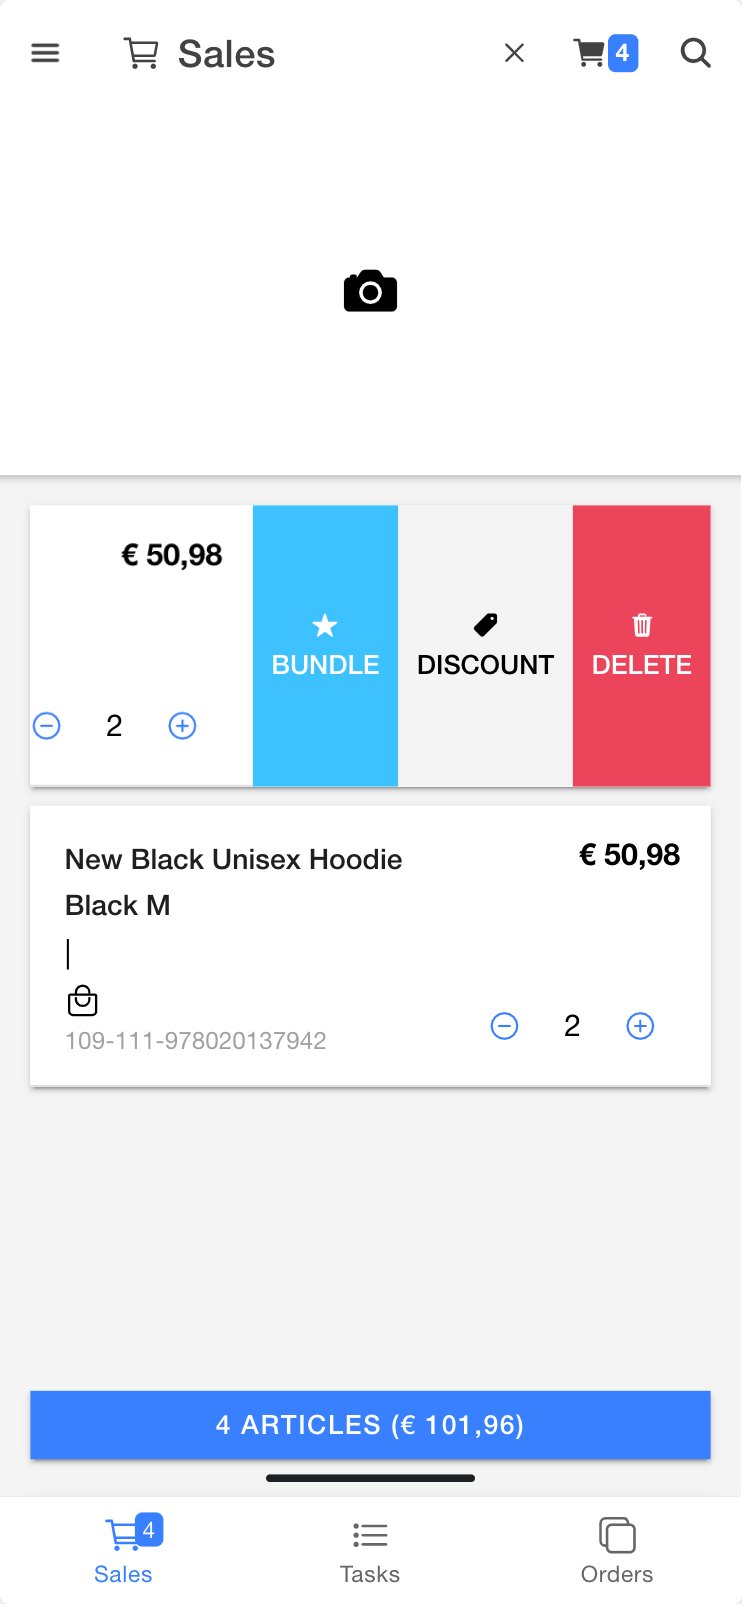
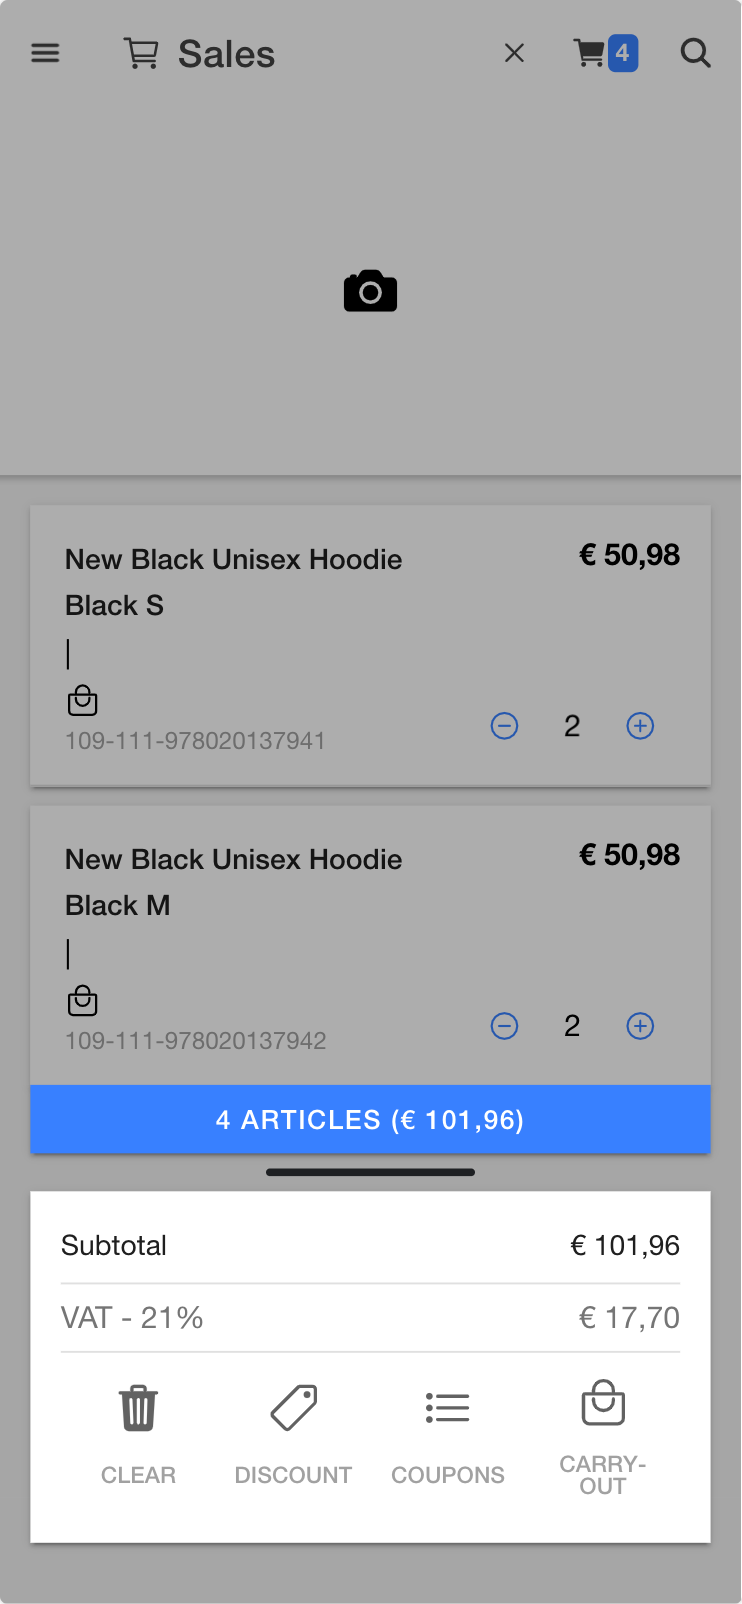
In the same picture you can see a gray bar below the basket summary statement. This is the action bar. By swiping this bar upwards, several more options will appear. One of these is the option Clear, which will let you empty your basket. All the other options will be described in the following chapters here below.
How prices are displayed in the Companion App is decided by several order settings you can change to your liking.
Adding a bundle product
As you you could see in the first picture in this chapter, swiping left on a product will bring up several product options. One of these is the Bundle option. If you click it, you'll see if there are any bundle options available for this specific product.
There is another way for you to add bundles as well, namely by searching for the bundle in the search bar and then clicking Configure.
Once on the bundle configuration page, you will see all compatible items per section and you can then choose an item for each section. You can finalize this by clicking Add to cart. This is best explained with a clothing example.
In this example you have three sections, with one or more compatible products in each section:
- Section top, with options for a red shirt, yellow shirt.
- Section bottom, with options for a blue jeans, black shorts.
- Section belt, with only the option for a brown leather belt
In order to add this bundle you can select any of the shirts and pants along with the brown belt to benefit from the whole bundle.
Configurable products (like one with sizes)
Some products are configurable (different from customizable) in the Companion App. Take for example a hoodie which a customer has added to the basket. You can check all possible versions of the product by clicking it in the basket, which will lead you to the Product Details page.
It starts off on the Logistics tab, where you can see all the product's current stock (and move stock around if you like), but we need the go to the other tab: Product Details.
The Product Details tab shows you the information of the product you just clicked, such as its identification number, description and, if available, its variants and potential bundles. You can filter through configurable products and define filter properties, filter values, and default filters.
When you click the View variants button, a new screen will appear in which all the product's available sizes and the current stock of that size will be shown. You can add different sizes to the current basket, but, you can also see the different variants (colors in this case) of the product by clicking the blue circle below the information window.
When scanning a product that is part of a bundle, you can decide whether to add it to the bundle or as a separate product on a distinct order line.

Adding a service product
You can add a service product by going to the hamburger menu and selecting 'Service products'.
What kind of service products are available can differ of course. Things we frequently see in this tab are services such as body treatments or skin repairs. You might also have special shipping costs listed here, such as white glove delivery.
Service products can be configured to require the input of a sales price or even cost prices.
Giftcard activation
The first step to activating a giftcard is by adding it to the basket. The most convenient way to do this is by scanning the giftcard's barcode. If the giftcards don't come with a barcode however, you will have to add the giftcard via the search bar. In the latter case you will be prompted for the giftcard number and the price, which will correspond to the giftcard's balance. The price range for this giftcard depends on the implementation in EVA.
When the giftcard is in the basket, but you want to change the card number or price, select 'Update'. The giftcard number can then be entered in the serial number field. This can also be done by scanning the card number barcode on the back.
Make sure not to scan the EAN/UPC in this step, since these are all the same for the physical giftcard product.
Once the order containing this giftcard is completed, the giftcard needs to be activated. There can be exceptions however, for example when the card number is not suited to activation (the EAN was scanned instead for example).
If you or the customer want to verify, you can double-check the balance by performing a 'Giftcard balance' request (Hamburger menu → Giftcard balance). A PIN is not required for this action, since PINs are used only when the customer uses a giftcard outside the store (e.g. website).
Note that you can only activate the giftcard once; it is not possible to reactivate it or to add amounts to the card after activation. In some cases deactivation is possible though. This can be done for example with a return order, although this is no longer possible after the card has been used.
If you want to implement giftcards, see Giftcards.
Adding a discount
Once you have created an order, there are several ways in which you can add a discount. There are discounts for specific product sets, coupons and manual discounts. We'll discuss the latter first.
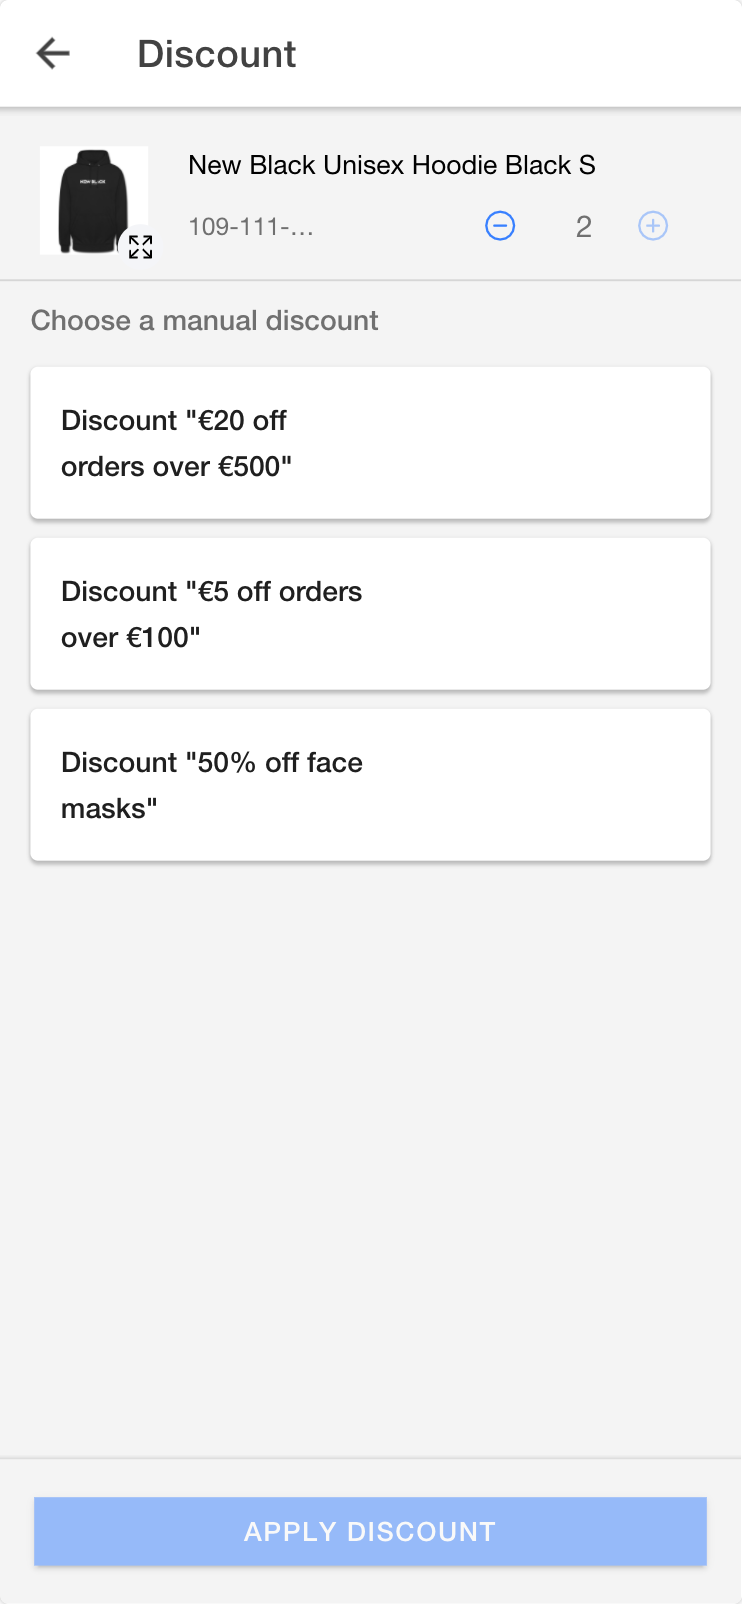
You can set a manual discount either via the specific order line, by swiping that product from right to left, or you can discount the entire order via the basket's action bar (right below the order total). When you have more than one of the same product (on the same order line) you can choose how many of those products to discount. When a user adds a manual discount to the entire order or an order line, the Companion App now posts the OrderID (and OrderLineID if present) in the payload to ListManualDiscounts.
When opening up the manual discount page via one of these two methods, you will see all configured discounts. What manual discounts are allowed, can be configured in the Admin Suite (Promotions chapter).
Aside from the manual discounts, customers can also use coupons to benefit from a discount. Coupons can only be entered via the order's action bar below the order total. Coupon related configuration options, such as availability and expiration times, are managed in the Admin Suite as well.
The last kind of discount is the one that is granted for specific sets of products. These are automatically added to your basket when you have added the products of that set. These discounts are also managed in Suite.
Custom requirements
As you may have read in the first chapter of this page, you may sometimes be prompted for a serial number when adding certain products. That is just one of many possible requirements you can specify for products. You may also for example want to sell a soccer themed jersey, which can be customized to include a specific name and number. Custom dimensions or jewelry inscriptions are other examples.
These products will show their custom fields in the basket, so the store employee can enter the required values. You can read more about these kinds of customizations in Product Management → Custom requirements.
Order options
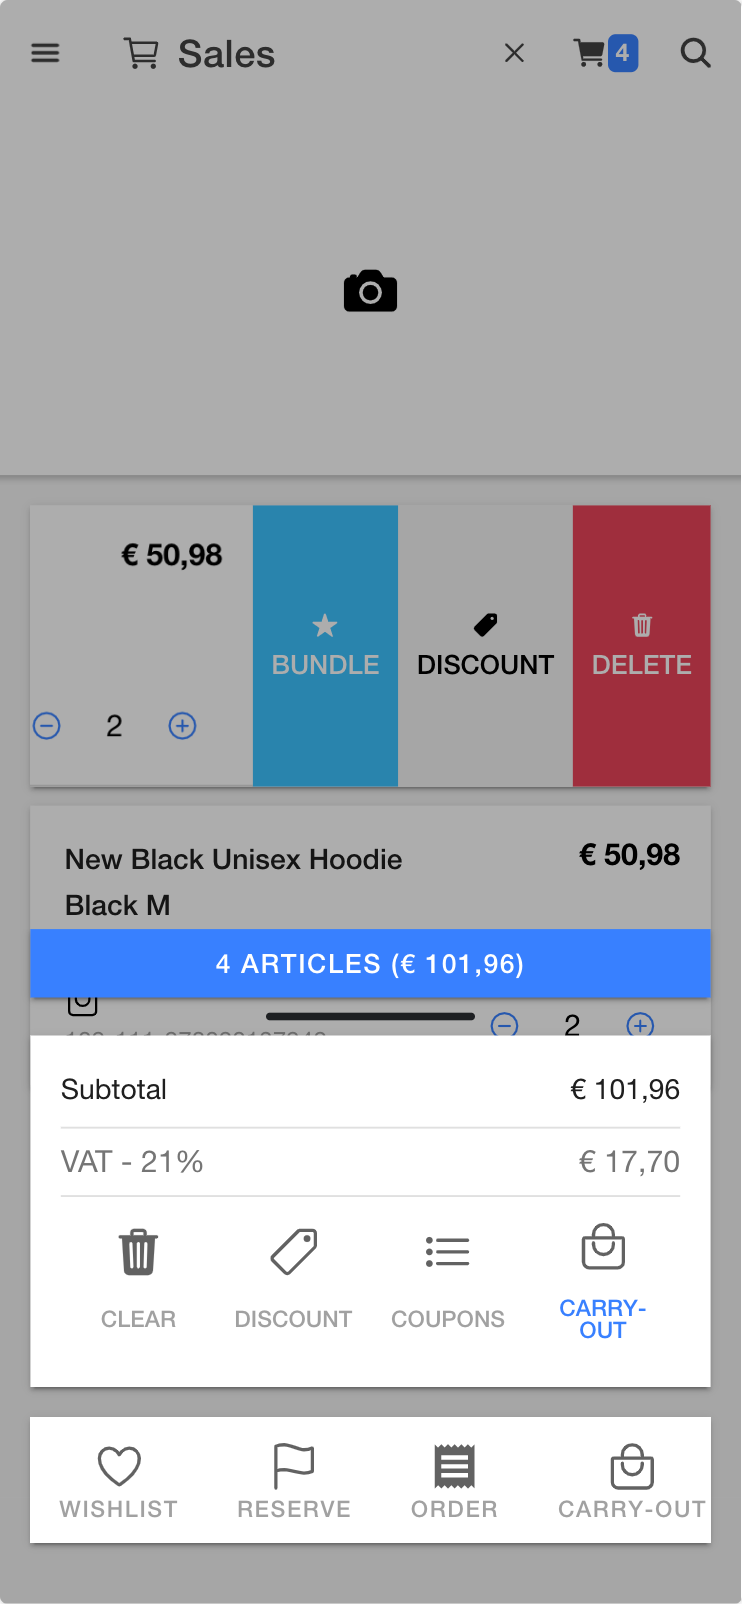
The order options can be selected by swiping the basket's action bar upwards from the bottom of the basket. By selecting Carry-out, the icon on the outer right of the bar, a new bar is displayed in which the other available delivery options can be selected. We make use of the following order options:
- Reserve: put the product(s) aside till the customer collects them in the store
- Order: place order from warehouse to store, to be picked up from store by customer
- Carry-out: sold directly from store stock and carried out by customer most common)
- Deliver: delivery order from warehouse to customer shipping address
By swiping a specific line to the right, you can change that line's type to another kind of delivery type. Whether this is allowed or not, depends on Orders:AllowMixed.
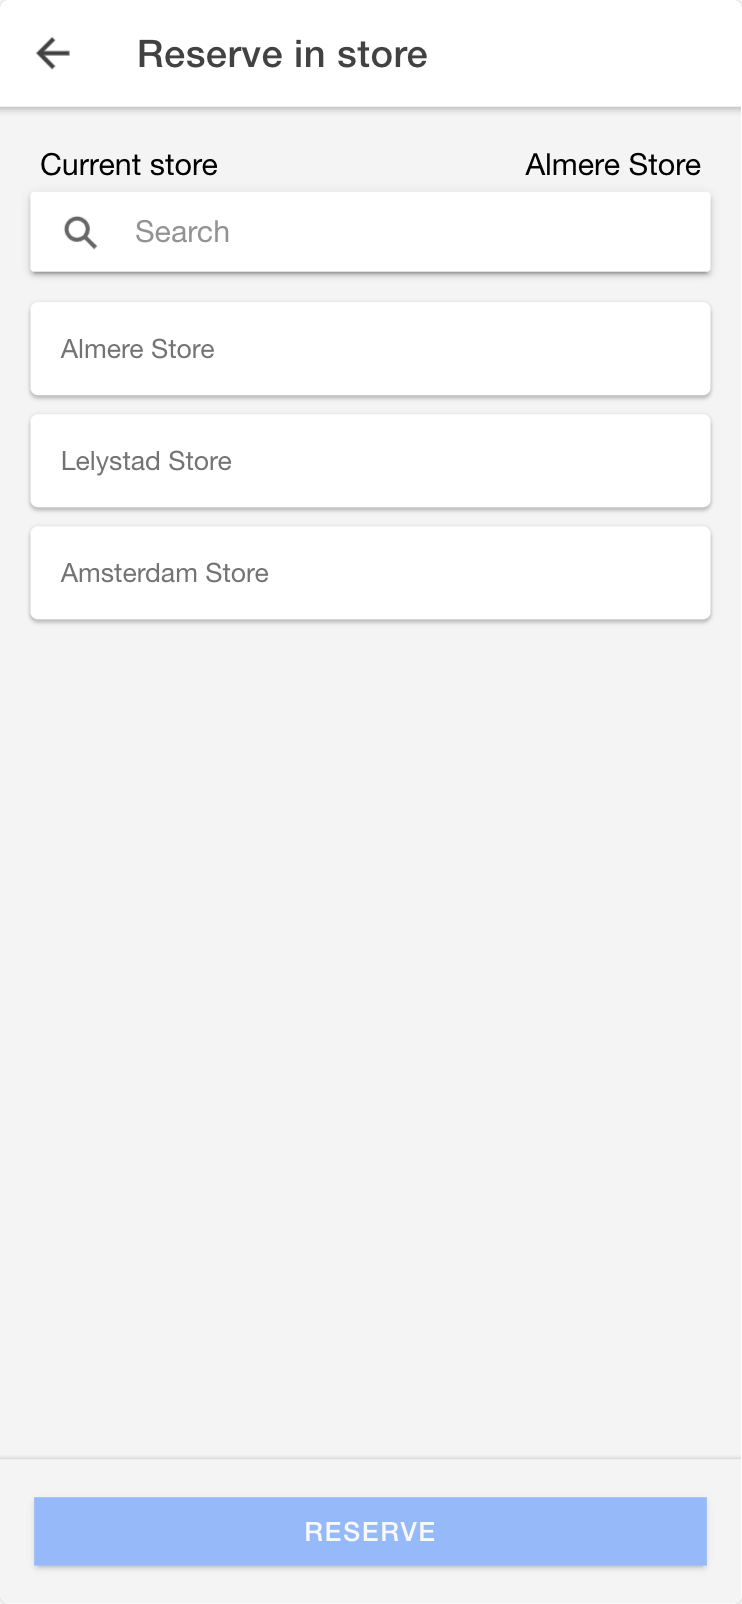
Reserve
The reservation flow can be used if a customer wants to pick up the order later. Place the order as instructed above. When the customer comes for pickup, either find the order in the order overview or scan the reservation receipt's bar code. Now place the order in the basket and finish the order.
When clicking the 'Reserve-in-store'-tile, the current store will be displayed at the top. More stores will be displayed based on their proximity.
Please note that for Deliver and Reserve orders it is mandatory to attach a customer to the order with a valid shipping address.
Order
When a product is added to the basket which turns out not to be in stock, a store employee can offer to order the product for the customer. Once the product arrives in a shipment, a reservation receipt will be printed. This can then be attached to the product and put aside.
In the contrary to the order type Ship, an Order as order type can only be created by attaching a customer to the order on the checkout page. This is a requirement to process the order.
Carry-out
When a product is added to the basket that is in stock, the standard shipping method will be Carry-out. You can create a carry-out order and optionally attach a customer.
Deliver (national delivery)
Deliver is used to order from warehouse stock and to deliver it to a customer's shipping address directly (national delivery). This will trigger a shipment from warehouse. When an e-mail address is added to the customer data, the customer will receive an order confirmation and shipping updates, just as if it were an online order.
Stock locations
You can get to the stock locations in several ways. The easiest way is to click the product in the basket. This will immediately show you the Logistics tab with the quantity of this product, divided over all possible stock labels.
Just below the stock labels, you'll see the three nearest stores with this product available and with the exact number of how much is available. You can even check how much more is available in other locations across the country by clicking 'View more'.
The other way to check a product's stock is by searching the product in question via the search bar. You can then click any of the versions (or variants, via the blue circles below the versions) and be guided to the Logistics tab of that product.
Regardless of how you get there, in the Logistics tab you can do a stock correction or move stock around to other stock labels. You can do so by means of the arrows symbol.
From within the Logistics tab, you can also check the availability of other variants of this product. You can do so by scrolling down and clicking 'View variants'. You will then see all product versions and variants and can check current stock of a variant/version by clicking it.
A product can have versions, say sizes of a t-shirt, but also variants, which can be the colors of that same t-shirt.
The main stock location is 'Sellable' as it shows the stock currently available for use in that store. Locations such as 'Reserved' are stock located in your store, but are not shown as available since they are already put aside for specific customers. Since damaged products will not be sold to customers anymore, we do not want those to show up as available stock either.
Items that are en route to your store will show as quantities 'In transit' and will be moved to 'Sellable' when the shipment is received.
Product search
By default, the search menu shows you some of the items you've recently searched for. After searching for a product, it can easily be added to your active basket.
There are a options that can impact your search functionality.

Using filter buttons
You can easily use the filter functionality to make the search only show stock that's currently in the store. Toggle the Only show products in-store button for this.
Changing search with (App) settings
There are many (App) settings which influence your search functionality. Read more about your options in our Searching products docs.
Products across stores in close proximity
Aside from all the settings to influence your searching, you can also have the search show products which are not available inside your store, but which are available in other stores.
To enable this list of stores with stock, you need to do some configuration. Expand the following section for a full overview.
Configuring the display of stock in other stores
This is not setup by default and requires a few easy steps to configure.
- Ensure Longitude and Latitude are setup in the Basic information of your stores. This is needed for making the proximity calculations.
- The Google Geolocation plugin is required for EVA to make calculations based on longitude and latitude.
- The opening hour template need to be of Type visiting.
- Your OU needs to be set to the Pickup Type.
- Configure your preferences for which stores should be displayed. See the table below for more information on the relevant settings.
| Setting | Description |
|---|---|
| GetShopsByProximityDefaultLimit | This number is used to limit the amount of stores returned. Otherwise, the limit is 10 |
| DefaultShopProximityRange | This number is used to limit the range of nearby stores. For example, setting it to 50,000 will limit the list of stores to those that are within 50 kilometers. |
Furthermore, keep in mind that the OU should of course be marked as Open and that you can only see stock of nearby stores which are in the same country as the (currently logged in) employee.
The available stores will now be listed in your front end by calling GetShopsByProximity while taking the above settings into account.
Product information
The product information screen allows you to check the following four tabs:
- Product status: this shows special states for the product, such as it being disabled for pickup or delivery
- Product overview: this shows the shelf containing this product, along with the stock label and the minimum and maximum required amount of it
- Ext. stock: all other stock locations for this product
- Product details: the barcode and publication version of this product
In some cases it also shows 'Print price label': here you select the amount of price labels you want to print for this product and on which station
You can find additional information about your product by clicking the 'information' symbol in the top right in your product details page.
Order takeover alerts
It's possible for multiple users to interact with the same order. This happens when for example an order is created on the Companion, but the consumer is sent to the POS to finish the transaction. In the meantime, the user on the Companion might still make (unwanted) changes.
To handle this, EVA notifies the active user whenever the order is being handled by another user. When prompted with this message, the user can choose to either continue working on the order, or to be detached from the order.
This (default) functionality can be influenced by means of the App:Order:ShowTakeoverAlert setting. Keep in mind that there are user types which - although technically employee type - are not actually employees but do trigger the alert. This can happen when using Riskified for example. Add its UserID to App:Order:IgnoreTakeoverUpdateUsers to prevent this from happening.