Basket
The Basket represents your current order.
The first page that opens up when you log in to the POS is the basket page, the bread and butter of POS.

Basket overview
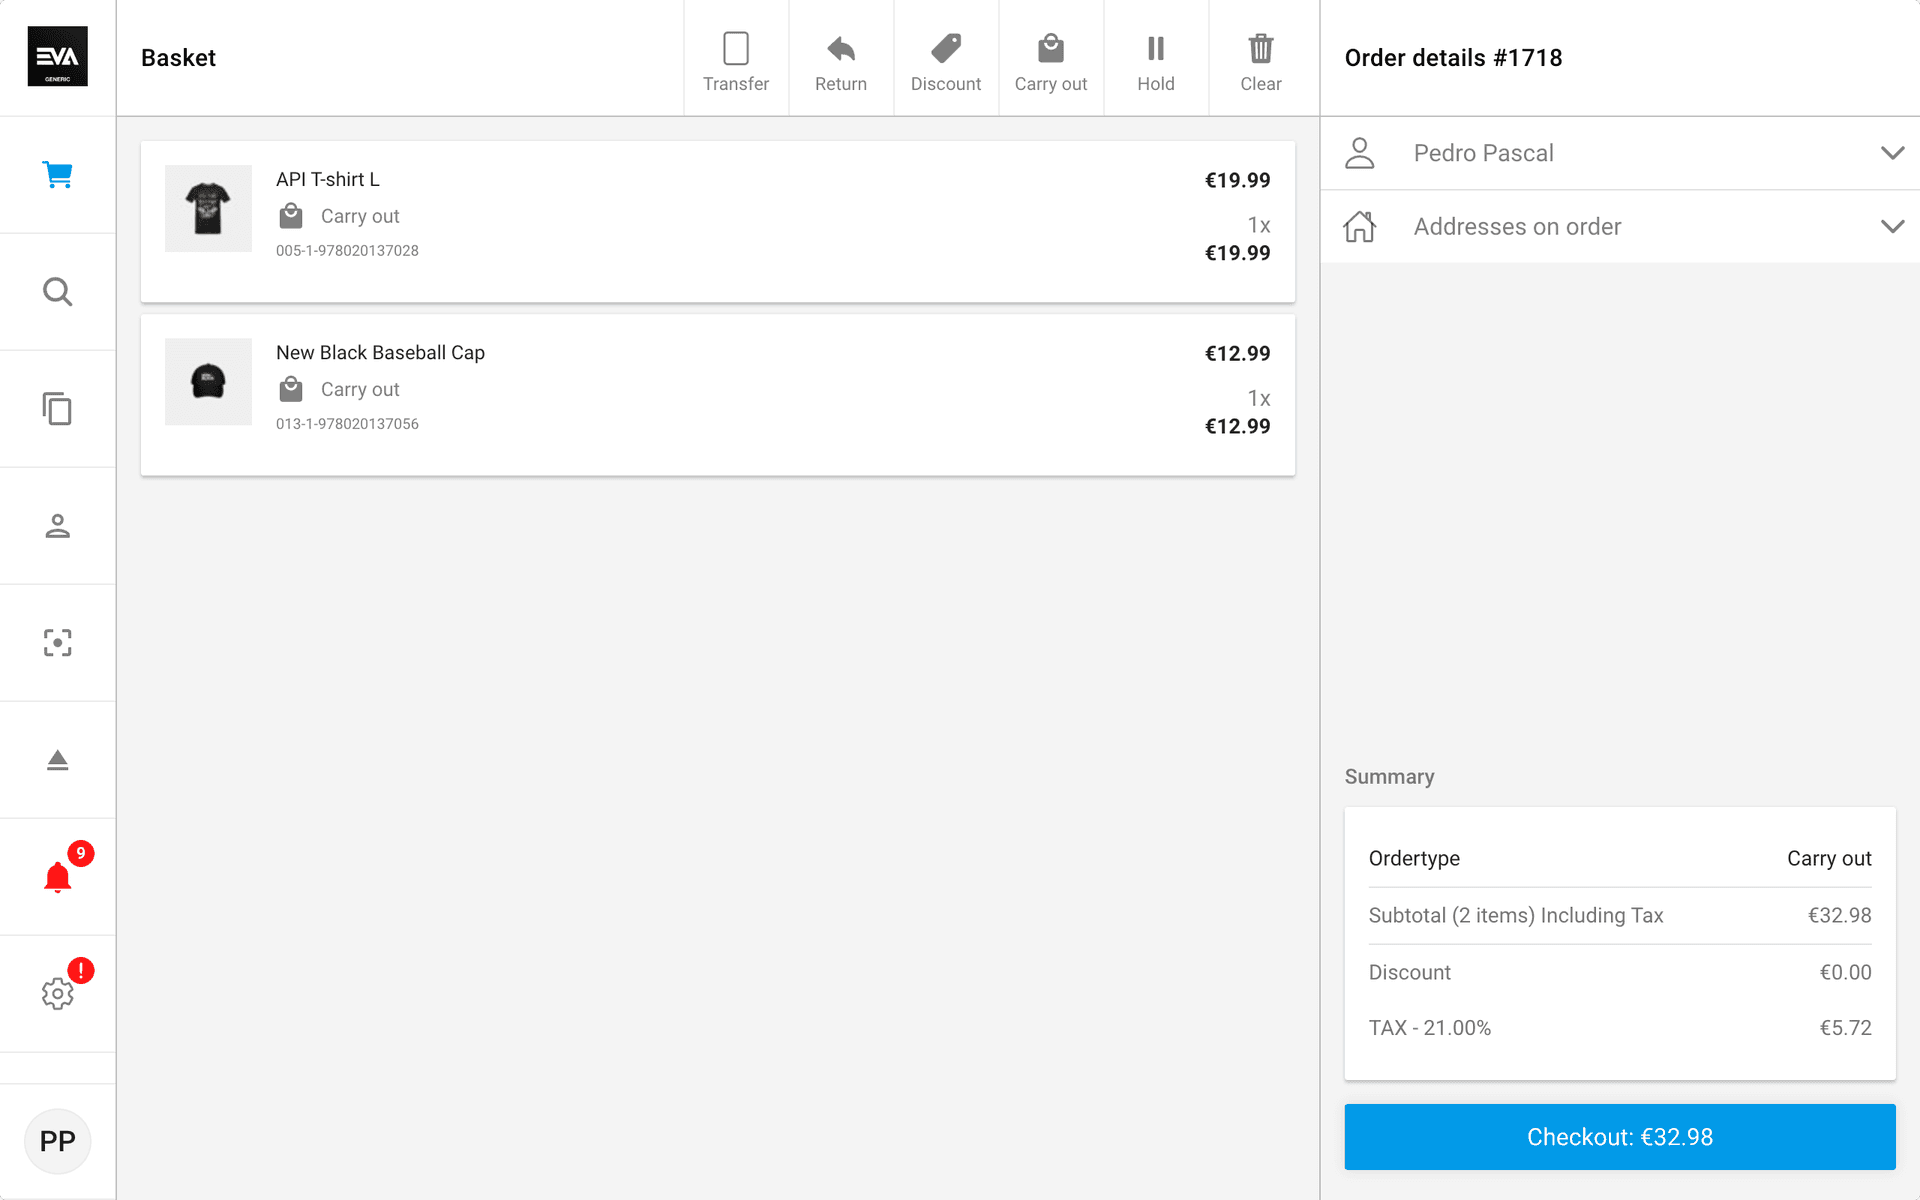
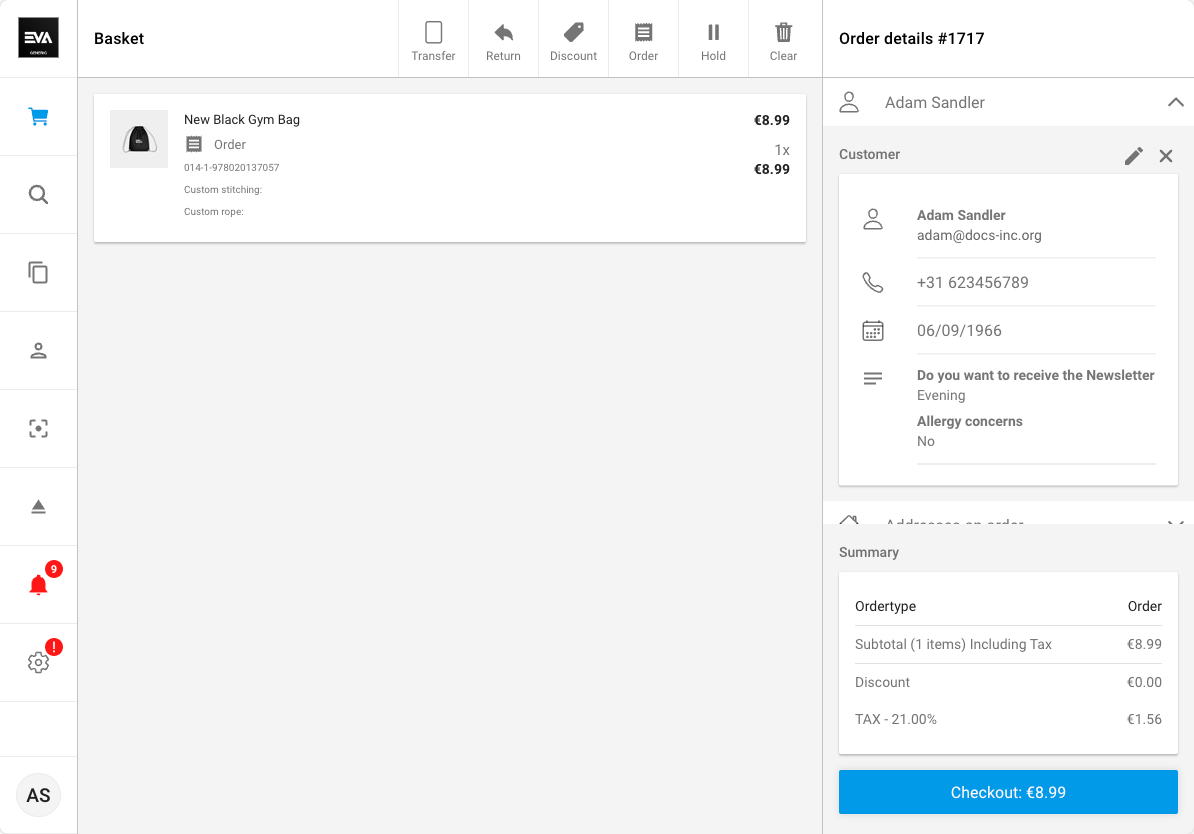
The basket is your fallback for all POS operations. The main purpose of POS is sales, and the basket will always reflect your current order. Here is an example with some items added to the basket:
You can influence the way order lines are displayed in POS and other front ends in a variety of ways:
| Setting | Displayed |
|---|---|
Orders:Display:ShowTotalAmounts | Show the TotalAmount on product card. |
Orders:Display:CombineBundlePriceOnParent | Sum up all the order lines within a bundle and use this on the parent bundle line. |
Orders:Display:SumOnFreeParent | Sum all childlines on the parentline when the parentline has a unitprice of 0. |
Orders:Display:ShowOriginalPrice | Return the OriginalPrice when available. |
Orders:Display:ShowUnitPrice | Return the UnitPrice. |
Orders:Display:UseNetAmounts | Use the net amounts for the TotalAmount values. |
Orders:Display:ShowFreeDiscountProductWithOriginalPrice | Show free discount products as 0, with an original price. |
Here, products with multiple quantities are consolidated into a single order line, unless they have specific product requirements or require serial numbers.
In a return basket, products with multiple quantities are always separated, as each order line must have its own set of requirements and serial numbers.
Right pane
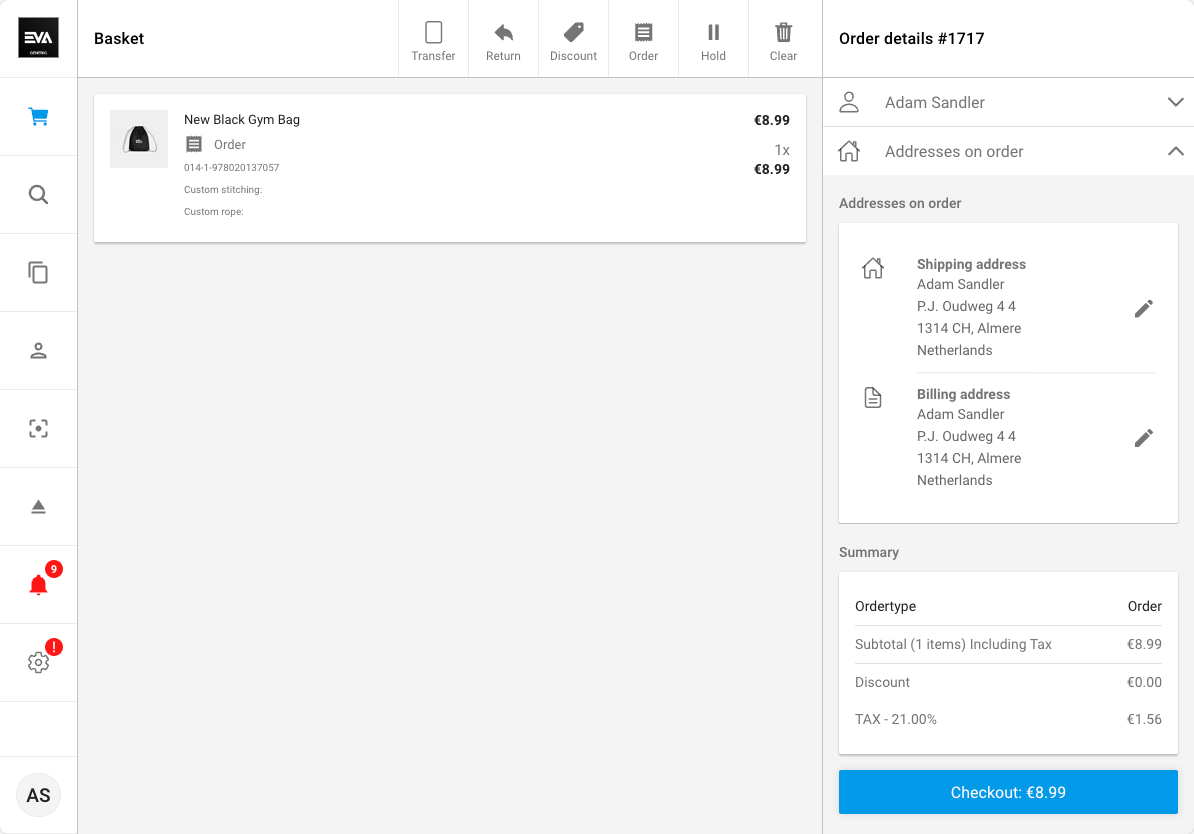
The right pane in the basket shows your order summary. The top part shows customer information (customer details, addresses, and subscriptions), the bottom part shows your order quantity and amounts.
If no customer has been added, a button to do so will be displayed. This button navigates you to the Customers menu, where you can search for existing customers, or create new customers and add them to your active basket. CFD can be used to ease the process of conducting a customer search.
If a customer has an invalid requirement, a red 'warning' icon will appear on the Customer tab to notify you.
Finally, the right pane contains a big blue button which navigates you to the Checkout when you're ready.
Top bar
The top of the screen also holds several options;
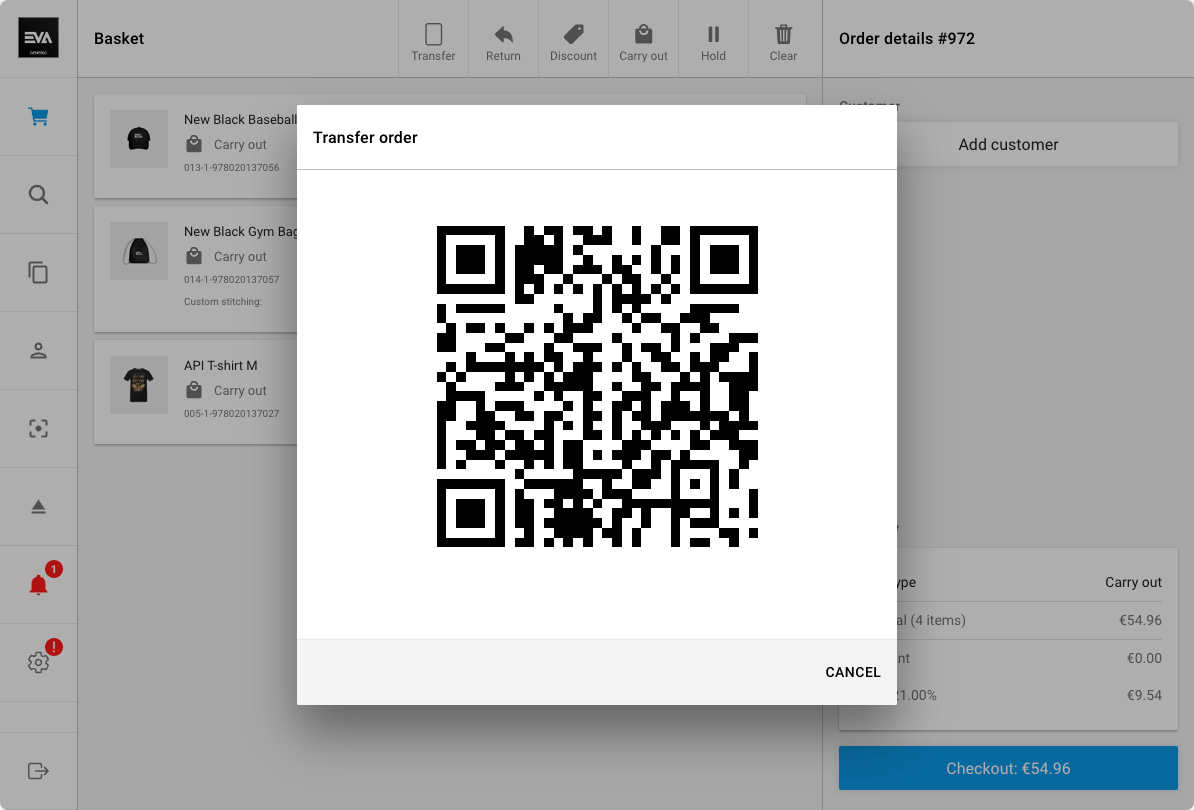
Transfer
This button displays a QR-code that can be scanned with our Companion App to transfer your order to that device.
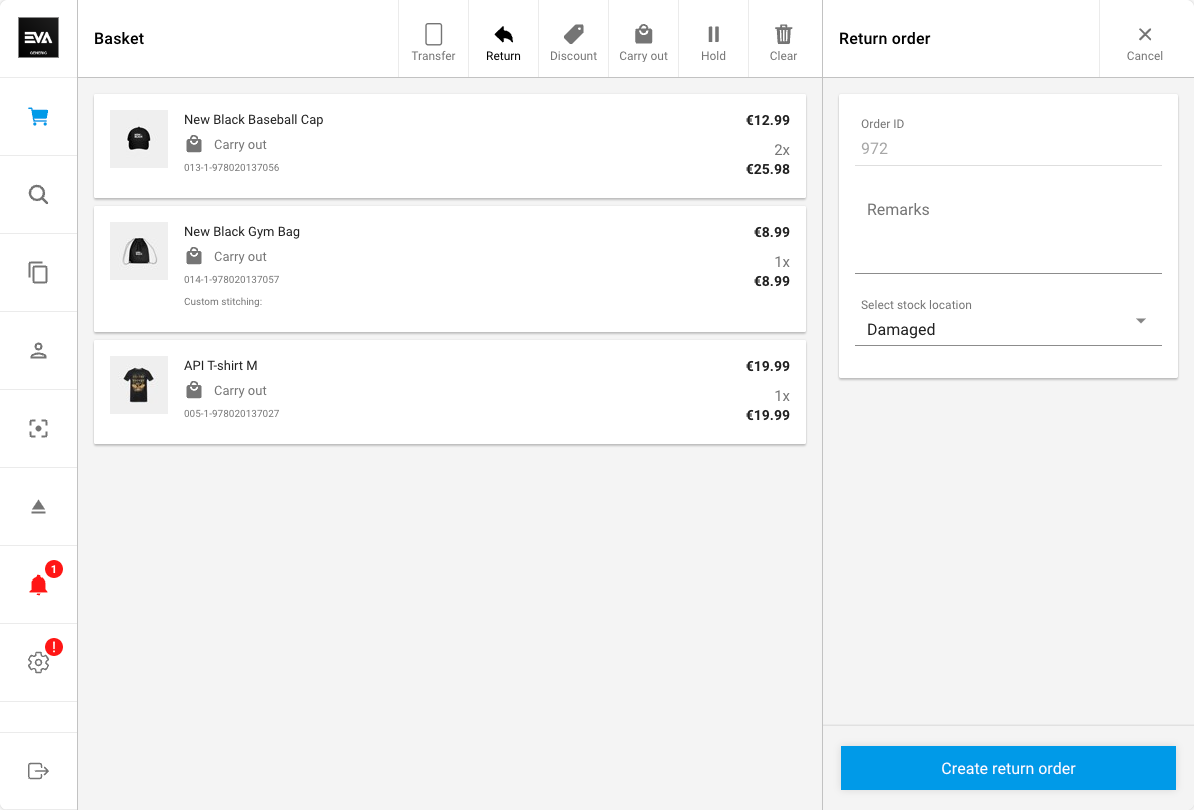
Return
Normally, return orders are created based on the original sales order from which the customer would like to return certain items. If there is no record of the original order however, return orders can be created in the basket and then transformed into a return order using this button. When doing so, you need to specify a remark and the stock label to which the items should be returned.
Note that a payment flow and a refund flow are largely the same. Depending on your settings however, not every refund can be performed - or at least not by every user. If you'd like to know more about this, or refunds in general, see: Refund flows.
You can also mark items for return individually to create a split order of a return and a purchase of a product. To do that, click on the product you want to mark for return and tap Return.
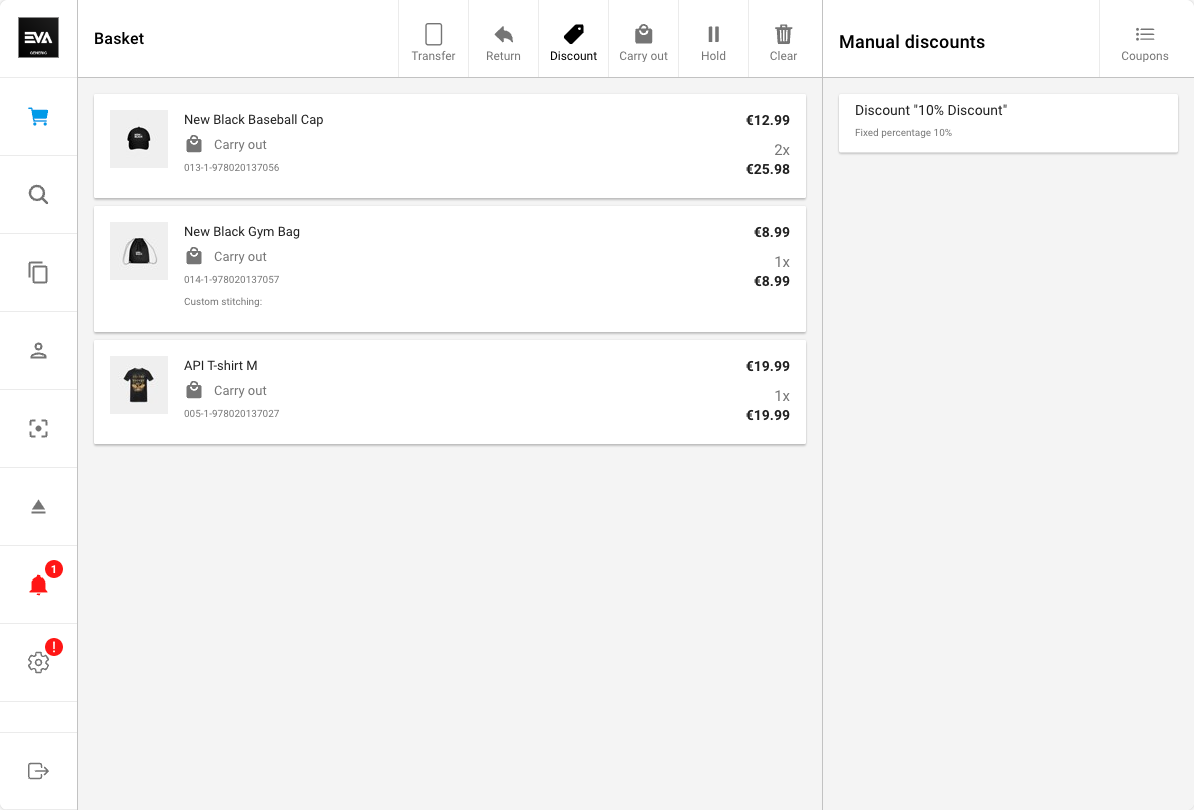
Discount
To apply manual discounts to your order, use the discount button. This will only display discounts that can be applied to the entire order. Order line discounts are visible only when applied to a specific line.
When the give a product discount is available and the requirements are met, POS will automatically add the gifted product to your basket.
Order and line action type
The Line action type button in the top bar can be used to change the line action types for the entire order.
On POS, By default, any order lines added to the basket are categorized as CarryOut. However, if no stock is available in your OU, the lines will be added as Order.
If type Deliver is selected, and you wish to be prompted with a list of shipping methods to choose from, set App:Checkout:AllowChangingShippingMethod to true. This will only work if you have more than one shipping method configured on the current organization unit, otherwise it would default to the one shipping method.
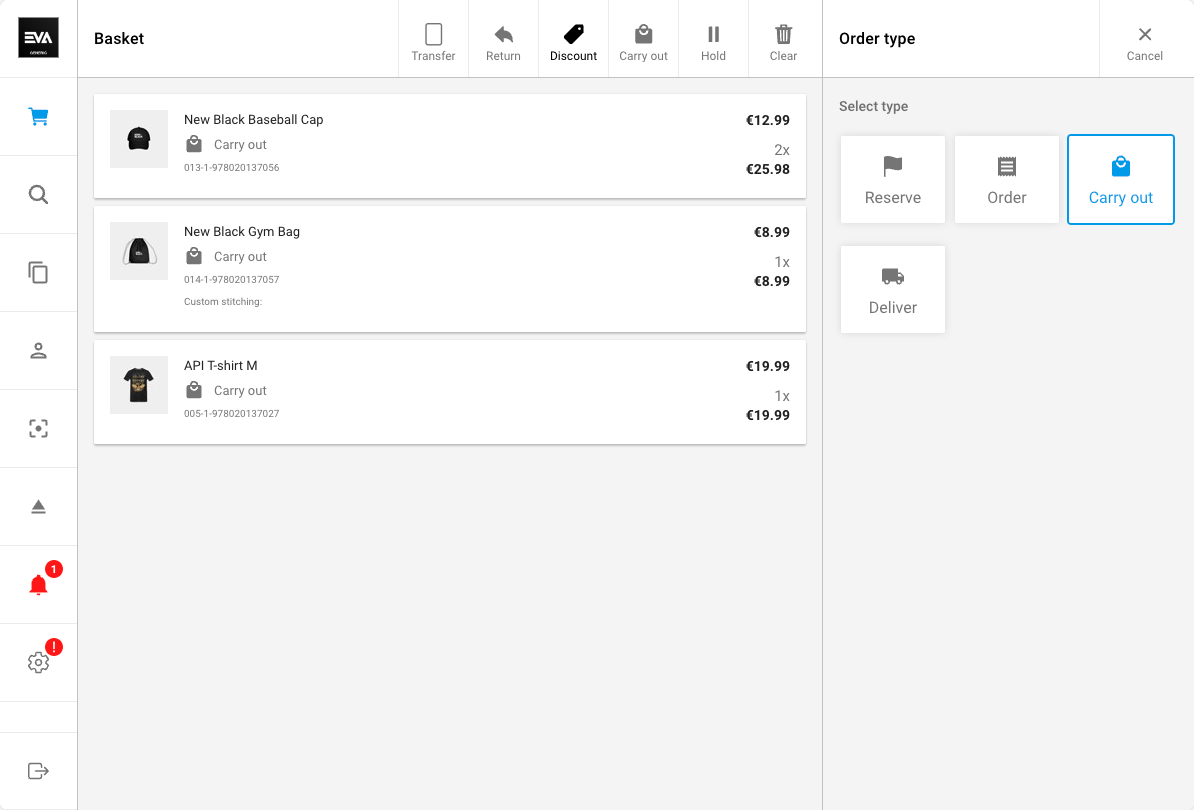
For a more detailed explanation on each order and line action type, read here.
Hold
Using this button, orders can be paused. When pausing an order, you can choose to print a receipt for the customer. This receipt is based on the SuspendedOrder Stencil template.

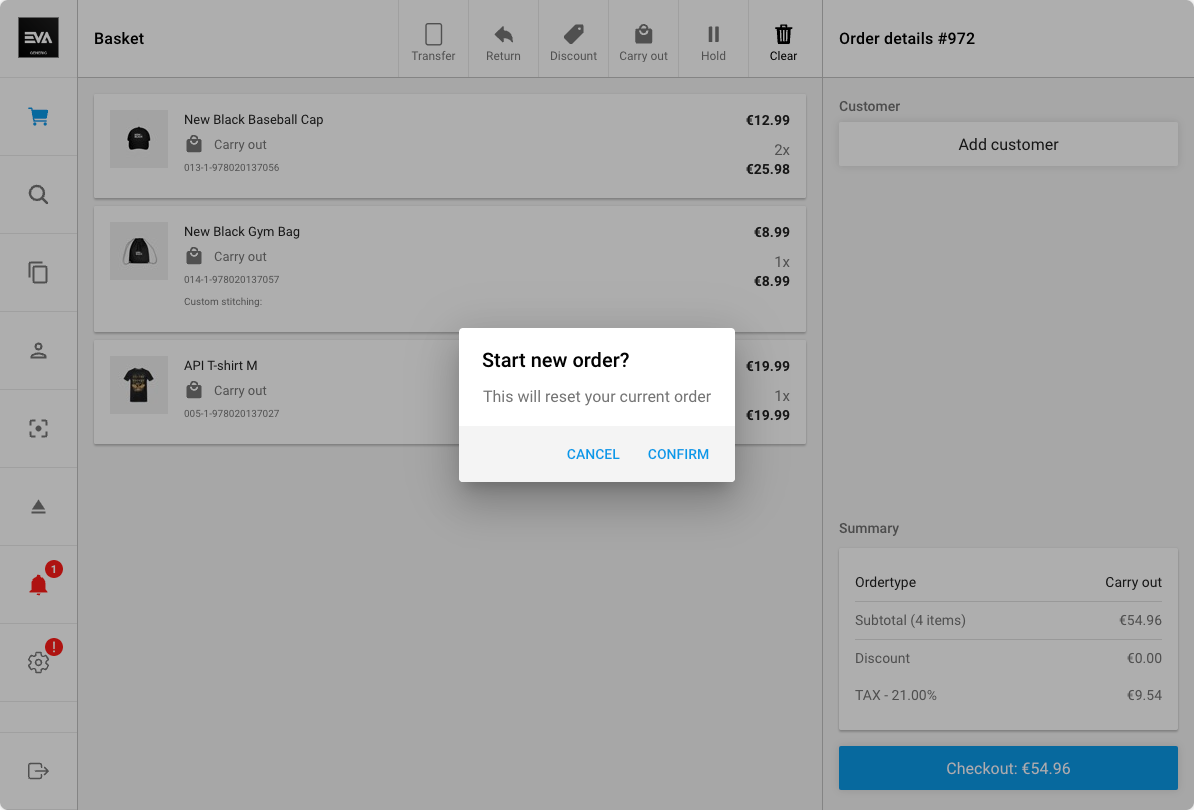
Clear
Use this button to clear your basket. Baskets will not be deleted, they can always be found back under Orders.
Customer information
Edit customer address
If you've added a customer to the order, you can directly edit their shipping and/or billing address in the basket. To edit one or both, use the 'Pencil' icon next to the address in the Address on order card.
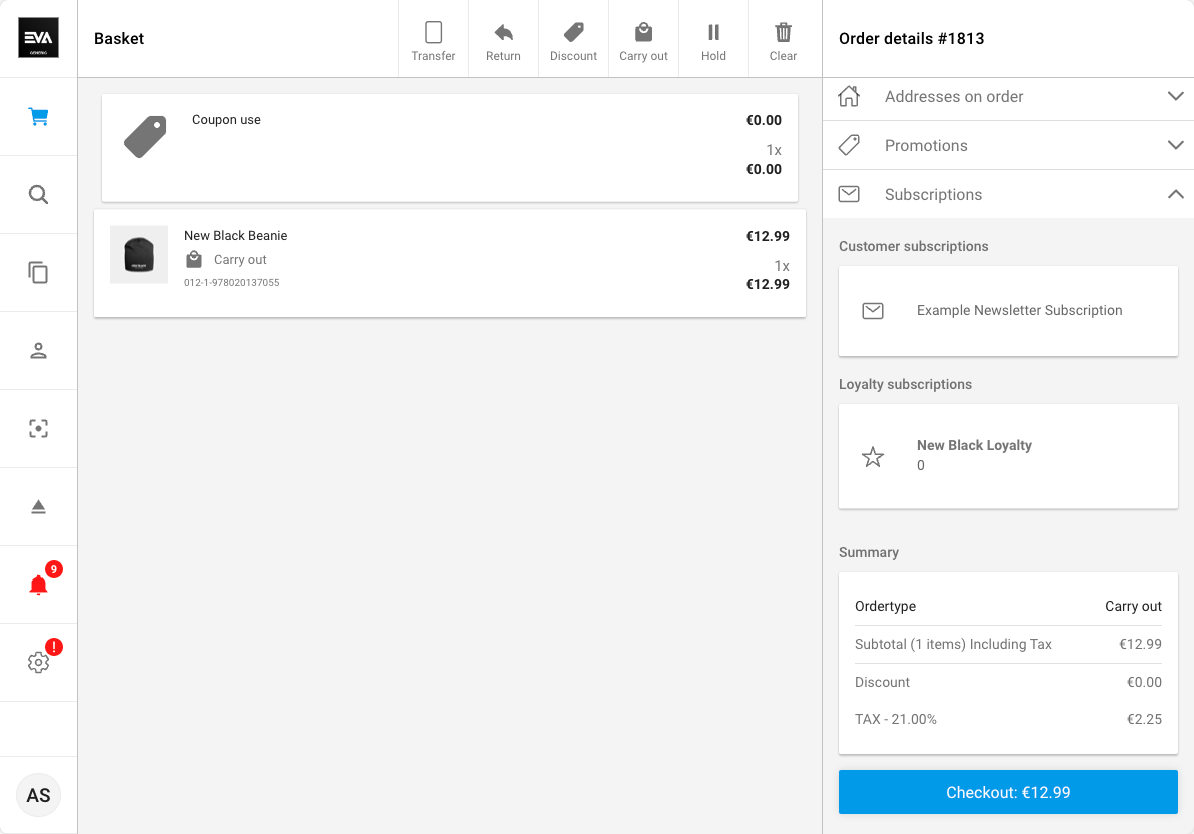
Customer subscriptions
If a customer is a part of any subscriptions or loyalty programs. It will be visible under the Subscriptions tab.
Checkout
Pressing the checkout button moves you to checkout. This doesn't really change anything about your basket, it does swap out your right sidepane for the checkout sidepane.
The checkout sidepane shows you the available order options and payment methods.
Read more about the checkout process here.
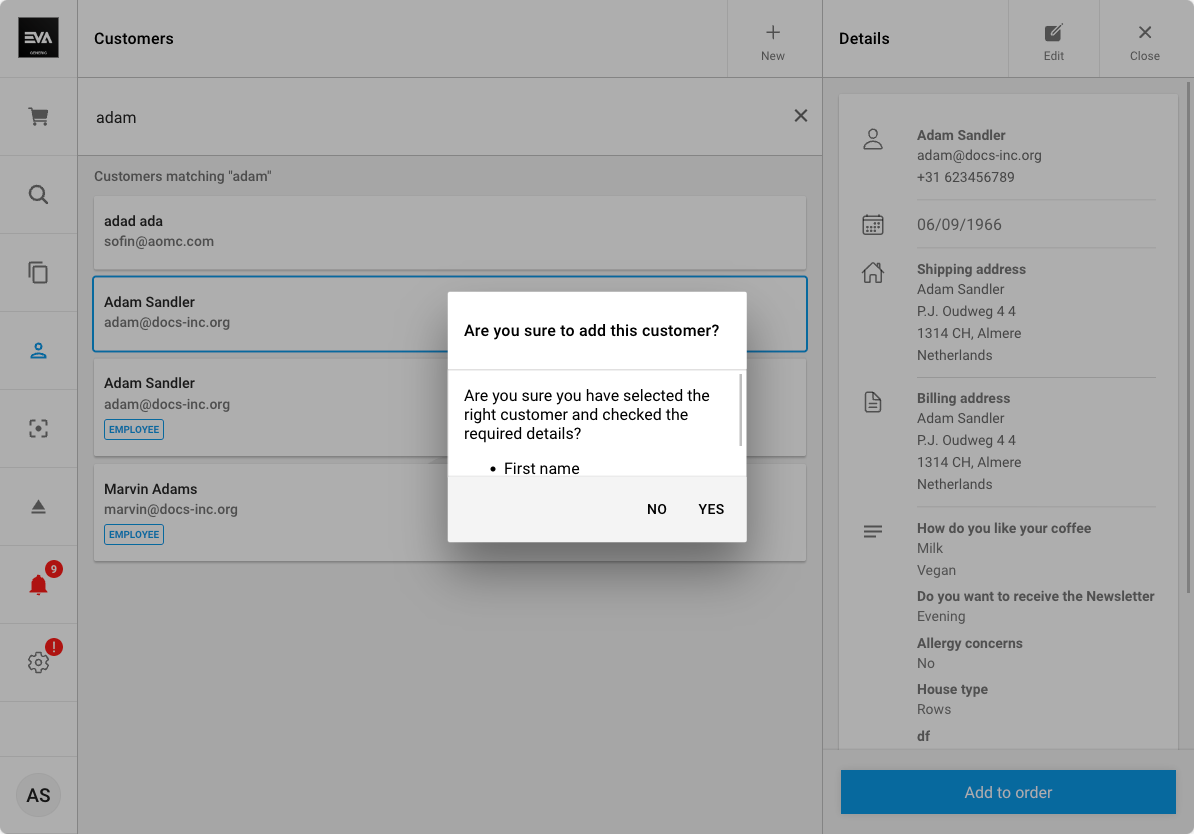
Confirm customer
With a setting called App:Customer:AreYouSureYouWantToBeAddingThisCustomer and a value true (default is false), you can control whether or not users are prompted with a request to confirm customer being added and their respective required details. The flow will then be determined based on the users choice (Yes: continue as usual and customer is added to the order. No: customer is not added and the flow returns to the preceding page for action).
Here is how this would look like:
Order takeover alerts
It's possible for multiple users to interact with the same order. This happens when for example an order is created on the Companion, but the consumer is sent to the POS to finish the transaction. In the meantime, the user on the Companion might still make (unwanted) changes.
To handle this, EVA notifies the active user whenever the order is being handled by another user. When prompted with this message, the user can choose to either continue working on the order, or to be detached from the order.
This (default) functionality can be influenced by means of the App:Order:ShowTakeoverAlert setting. Keep in mind that there are user types which - although technically employee type - are not actually employees but do trigger the alert. This can happen when using Riskified for example. Add its UserID to App:Order:IgnoreTakeoverUpdateUsers to prevent this from happening.