Customers
The Customers menu allows you to easily search through your customers, or create new customers.
Customer search
The menu sports a simple search field. You can search by name, phone number and/or e-mail address. To refine your search, you can use the side pane to specify which property you are searching on. It's also possible to search for customers by scanning any QR code containing their SSN, e.g. a driver's license.
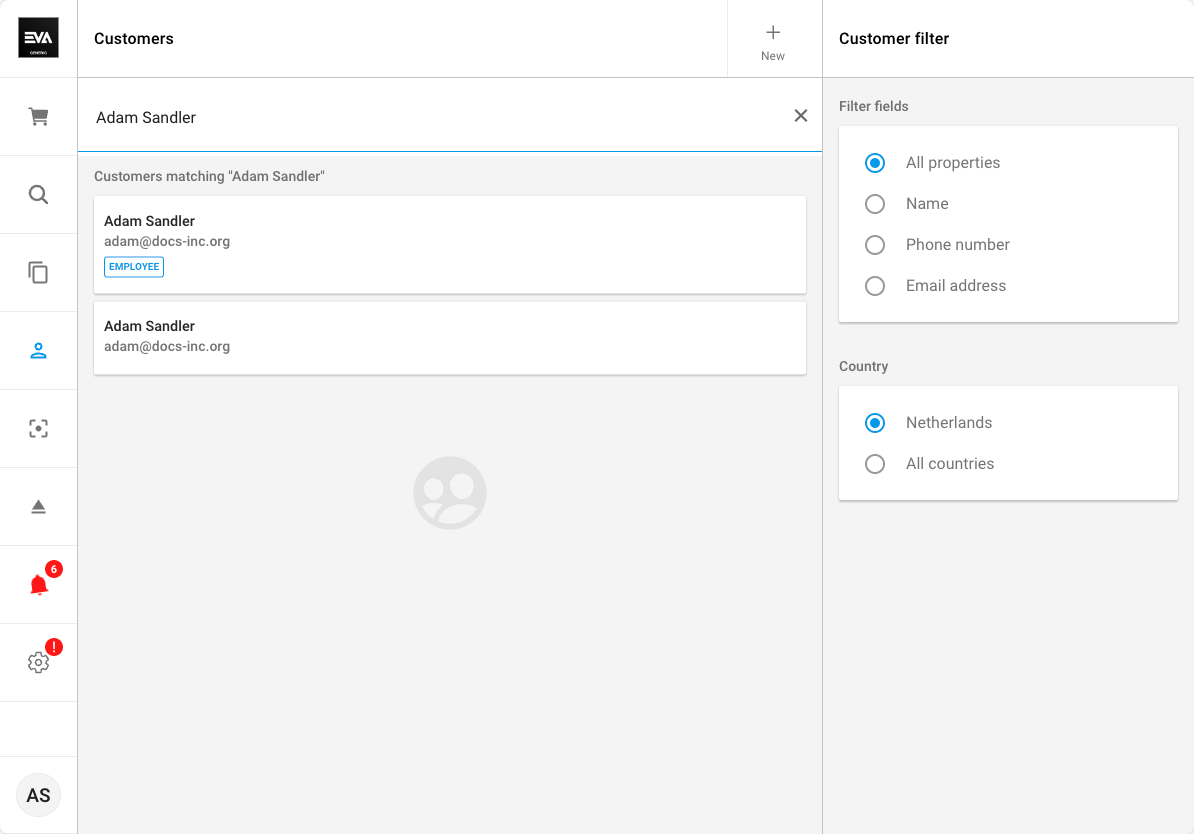
- If you want to prioritize the search of users based on the country of the OU, you can set
UserSearch:FilterOnCountryInStoresto true in the settings. Here you can also change the default used filter withApp:SearchUser:DefaultFilter. It can either be Name, PhoneNumber, or EmailAddress. - If
App:SearchUsers:HideCountryFilteris set to true, the Country card is hidden from the side pane filter fields. Vice versa, if set to false.
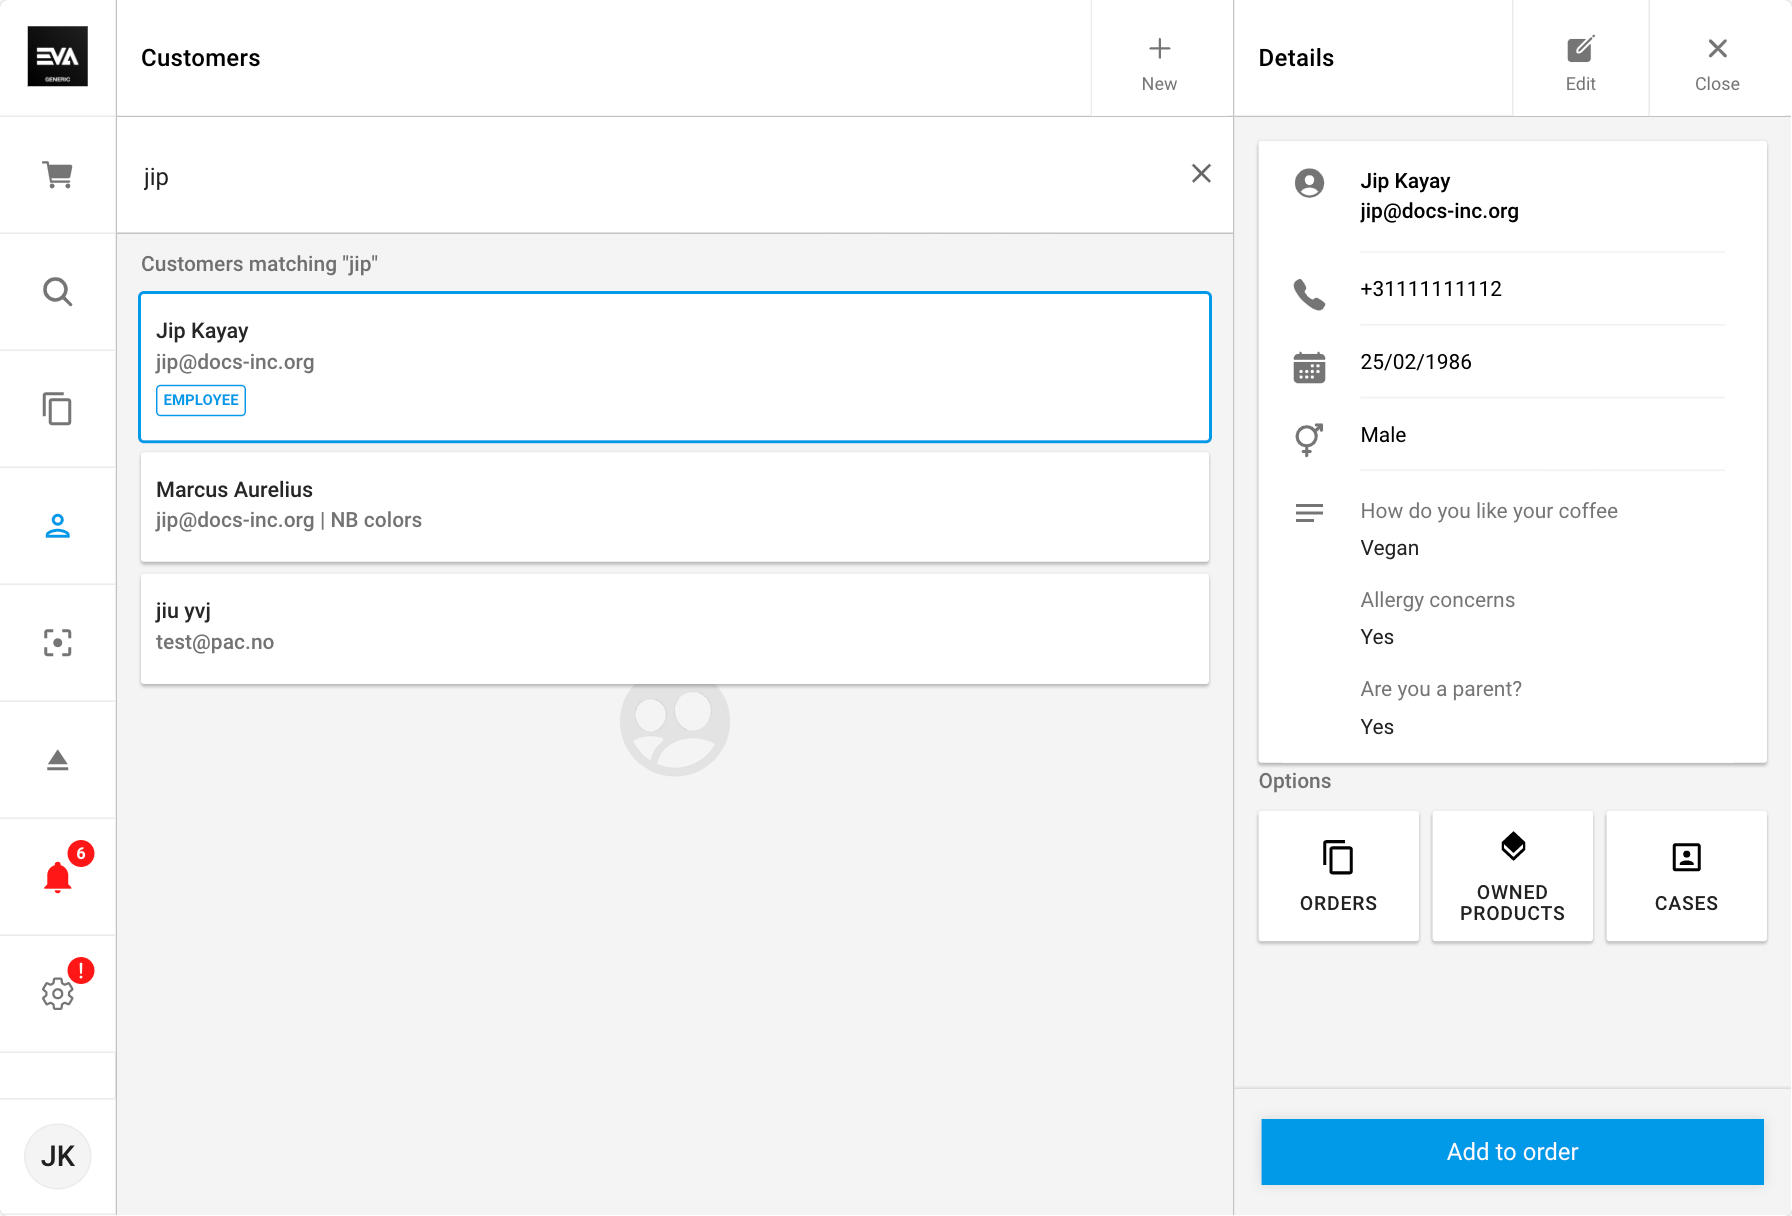
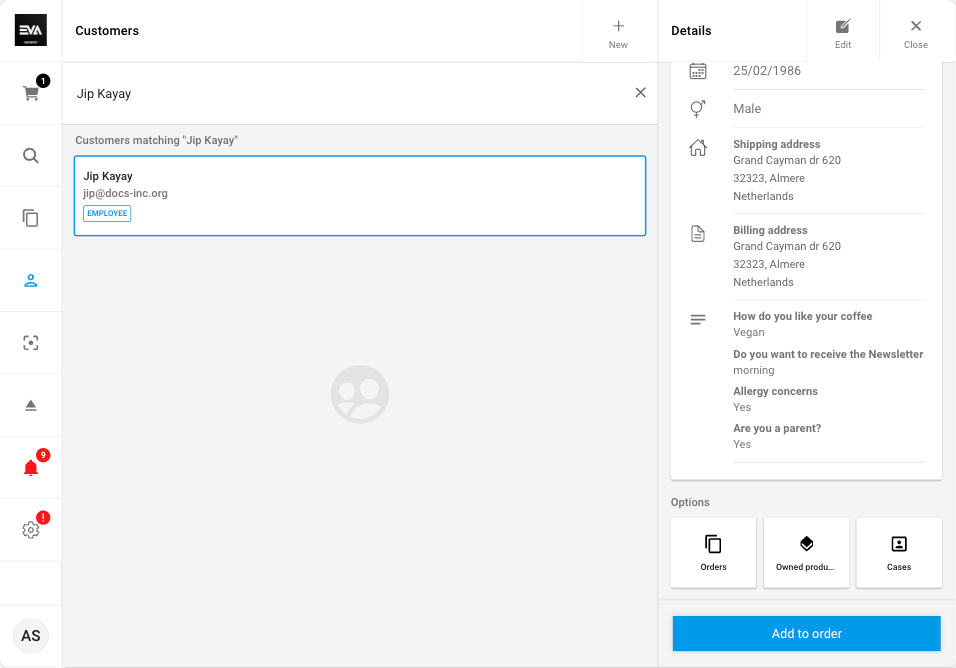
Clicking a customer will display their details in the right side pane, alongside the option to show their attached orders or cases.
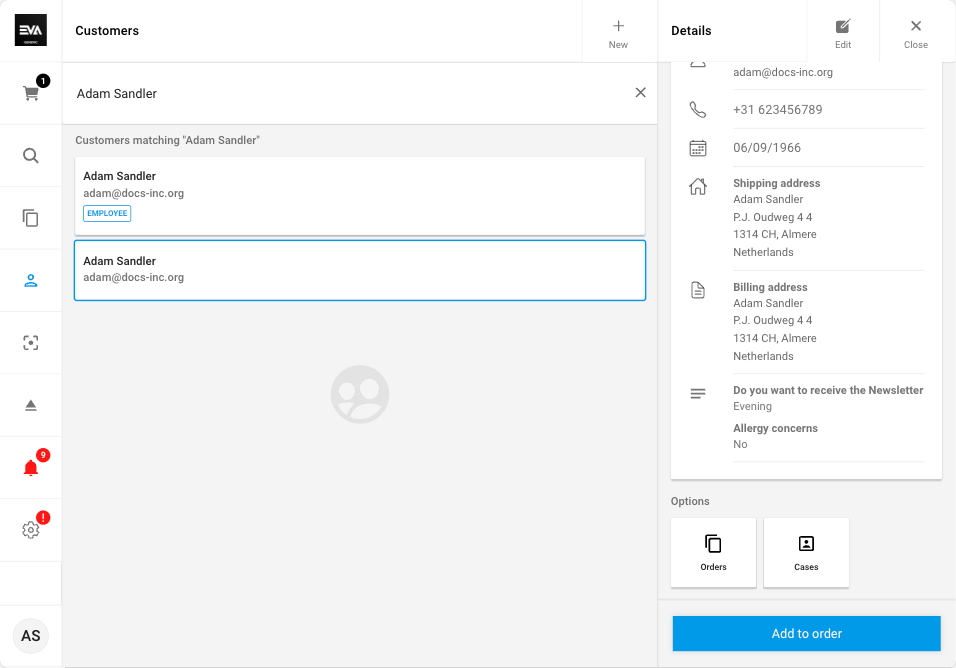
Should you prefer additional confirmation steps before adding a customer to an order, you can set App:SearchUsers:HideAddToOrder to true. This setting will result in the Add to Order button, next to the customers, being hidden. You can still add them to your order using the Customer details page.
Customer orders and cases
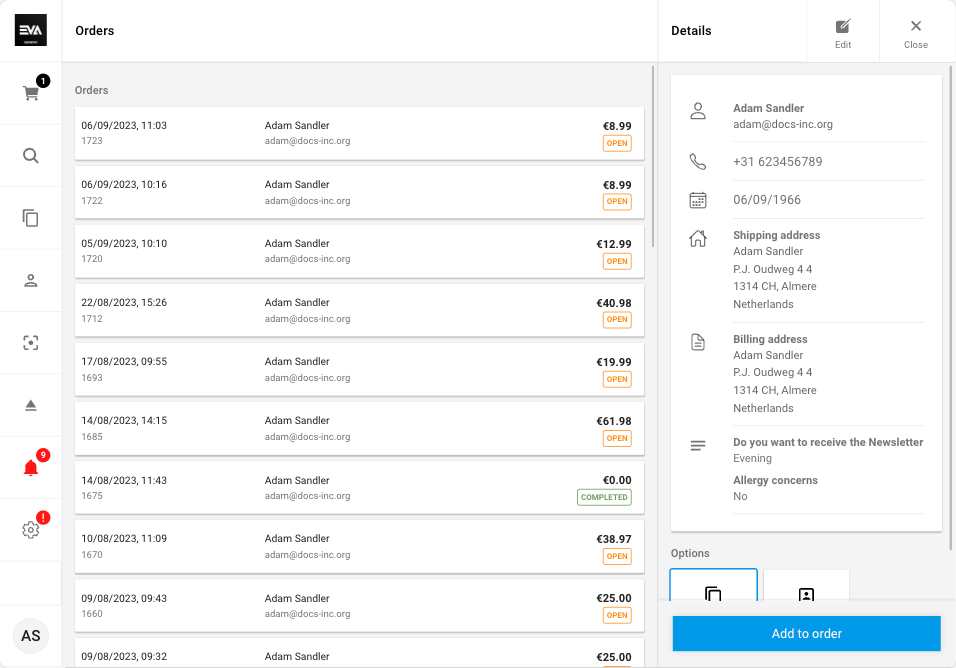
Clicking the Orders tile will open an overview of all orders to which the customer is attached. This overview works exactly like the regular Orders overview.
If the display of the Cases tile is enabled, it will always be shown next to the orders tile displaying all the customer's cases and/or allowing you to create a new case. See also Customer cases on POS.
Customer search on CFD
If a CFD is connected to the POS, you can let the customer search for themselves in the Search options. This option will display a pop-up on the CFD with an input field for the customer to type their email address and hit search. If a match is found, the POS will pop up the customer details, and you can add the suggested customer to the order. If adding the customer to the order fails, you will be notified.
An App setting called App:Customer:ShowSearchOnCFD with a value true (default value is false) is required in order to activate this feature. Once the setting is in place, POS users will be given an option to Search on CFD. Once tapped, your customer will be able to perform the search from the CFD using an email address.
Check docs on Set up Customer Facing Display for general configuration.
Edit customer
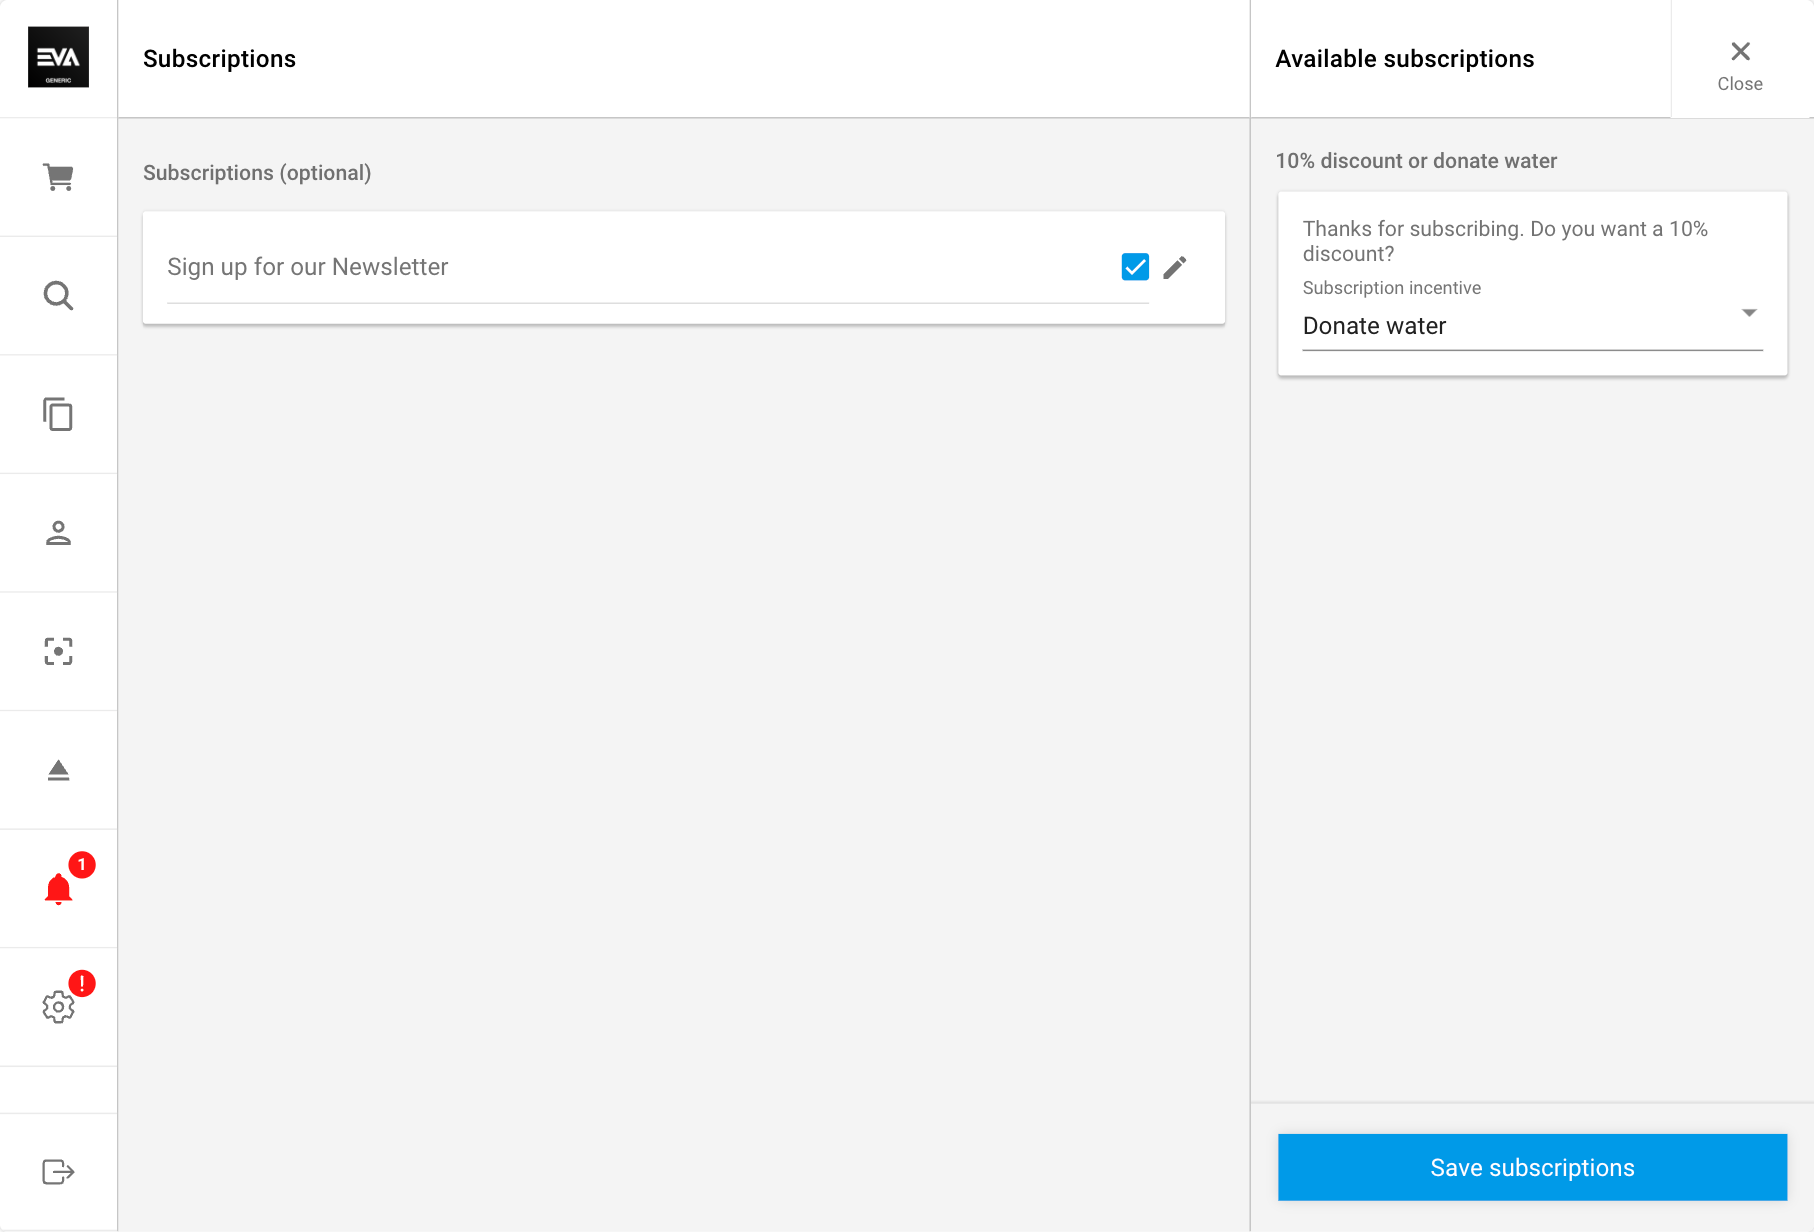
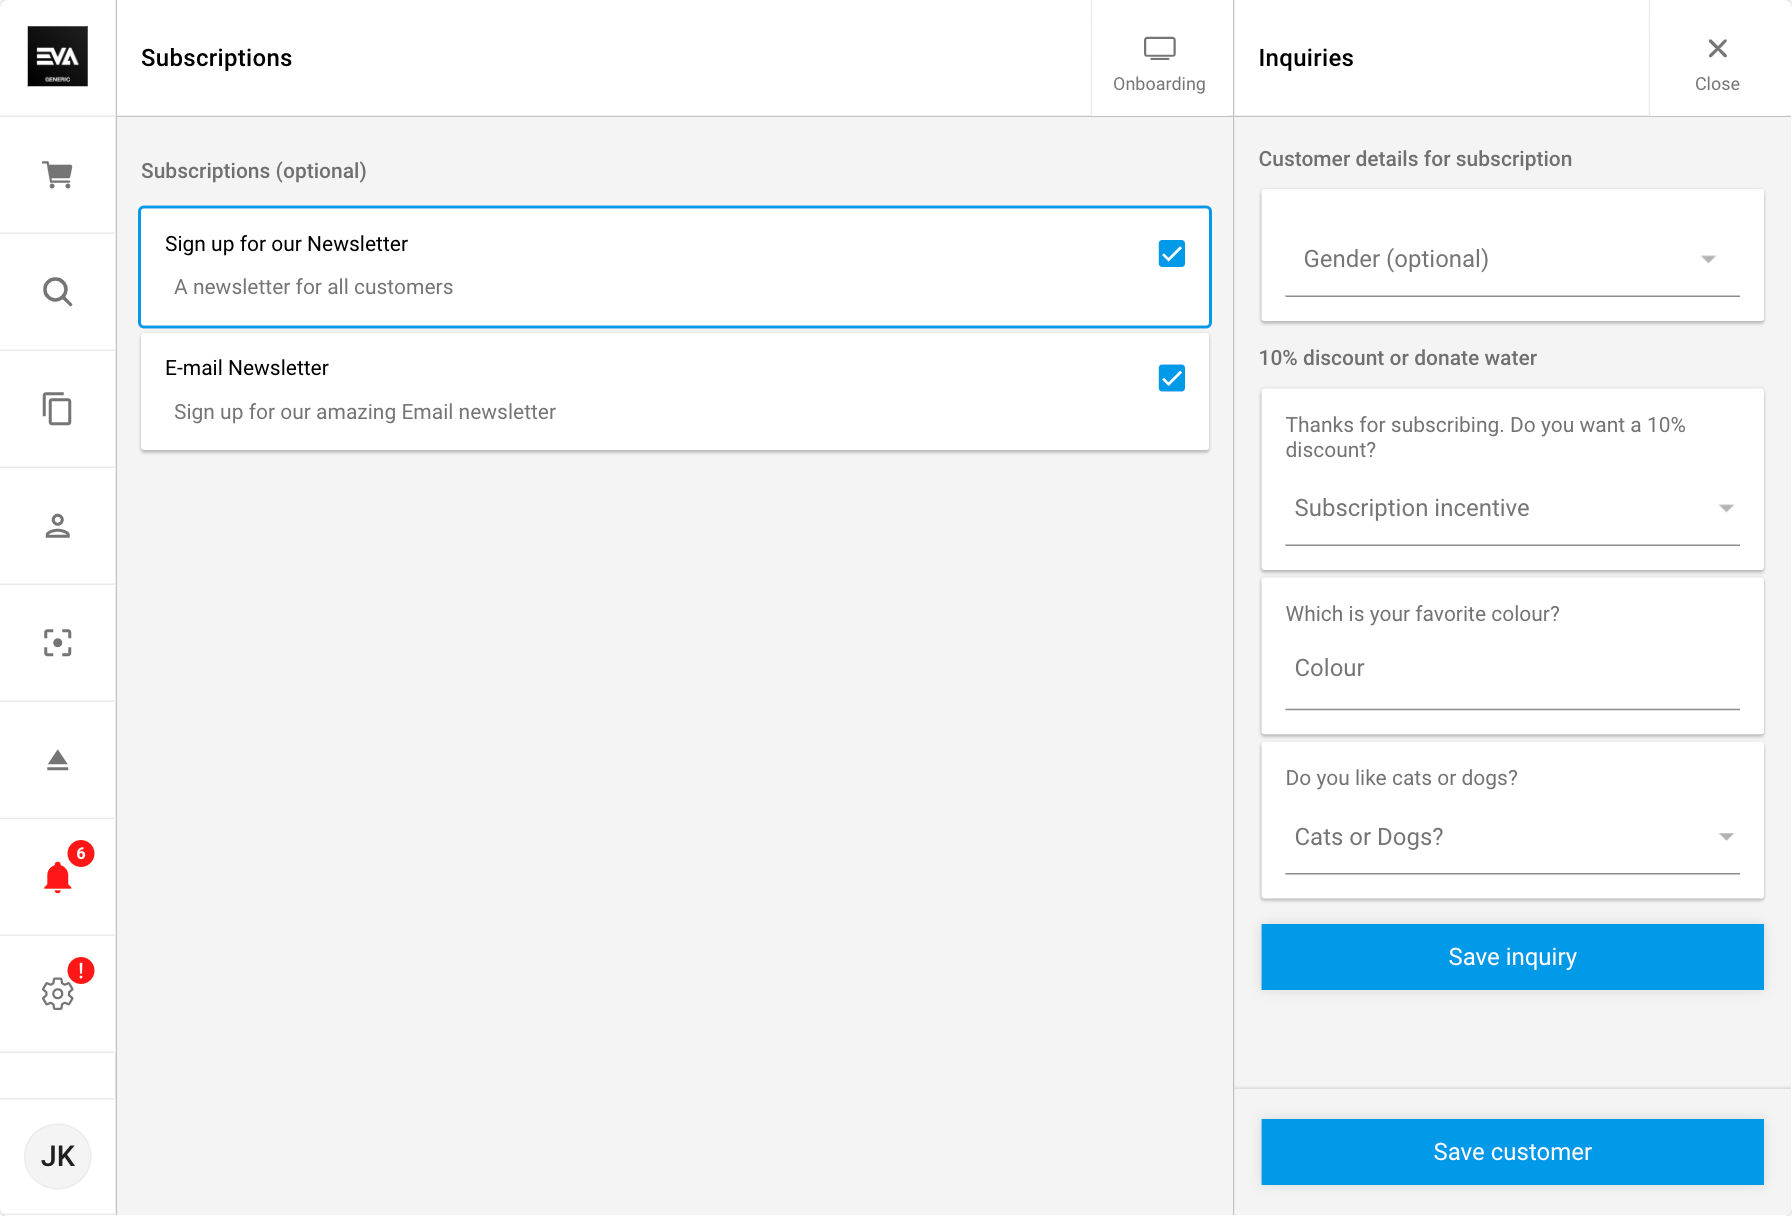
The second tile in the customer details pane allows you to edit the customer's information. If not all required fields are entered, you will be notified when saving. After you saved the customer data, you will also be able to sign them up for Subscriptions on the second page. Subscriptions they were once subscribed to but cannot resubscribe, are not displayed.
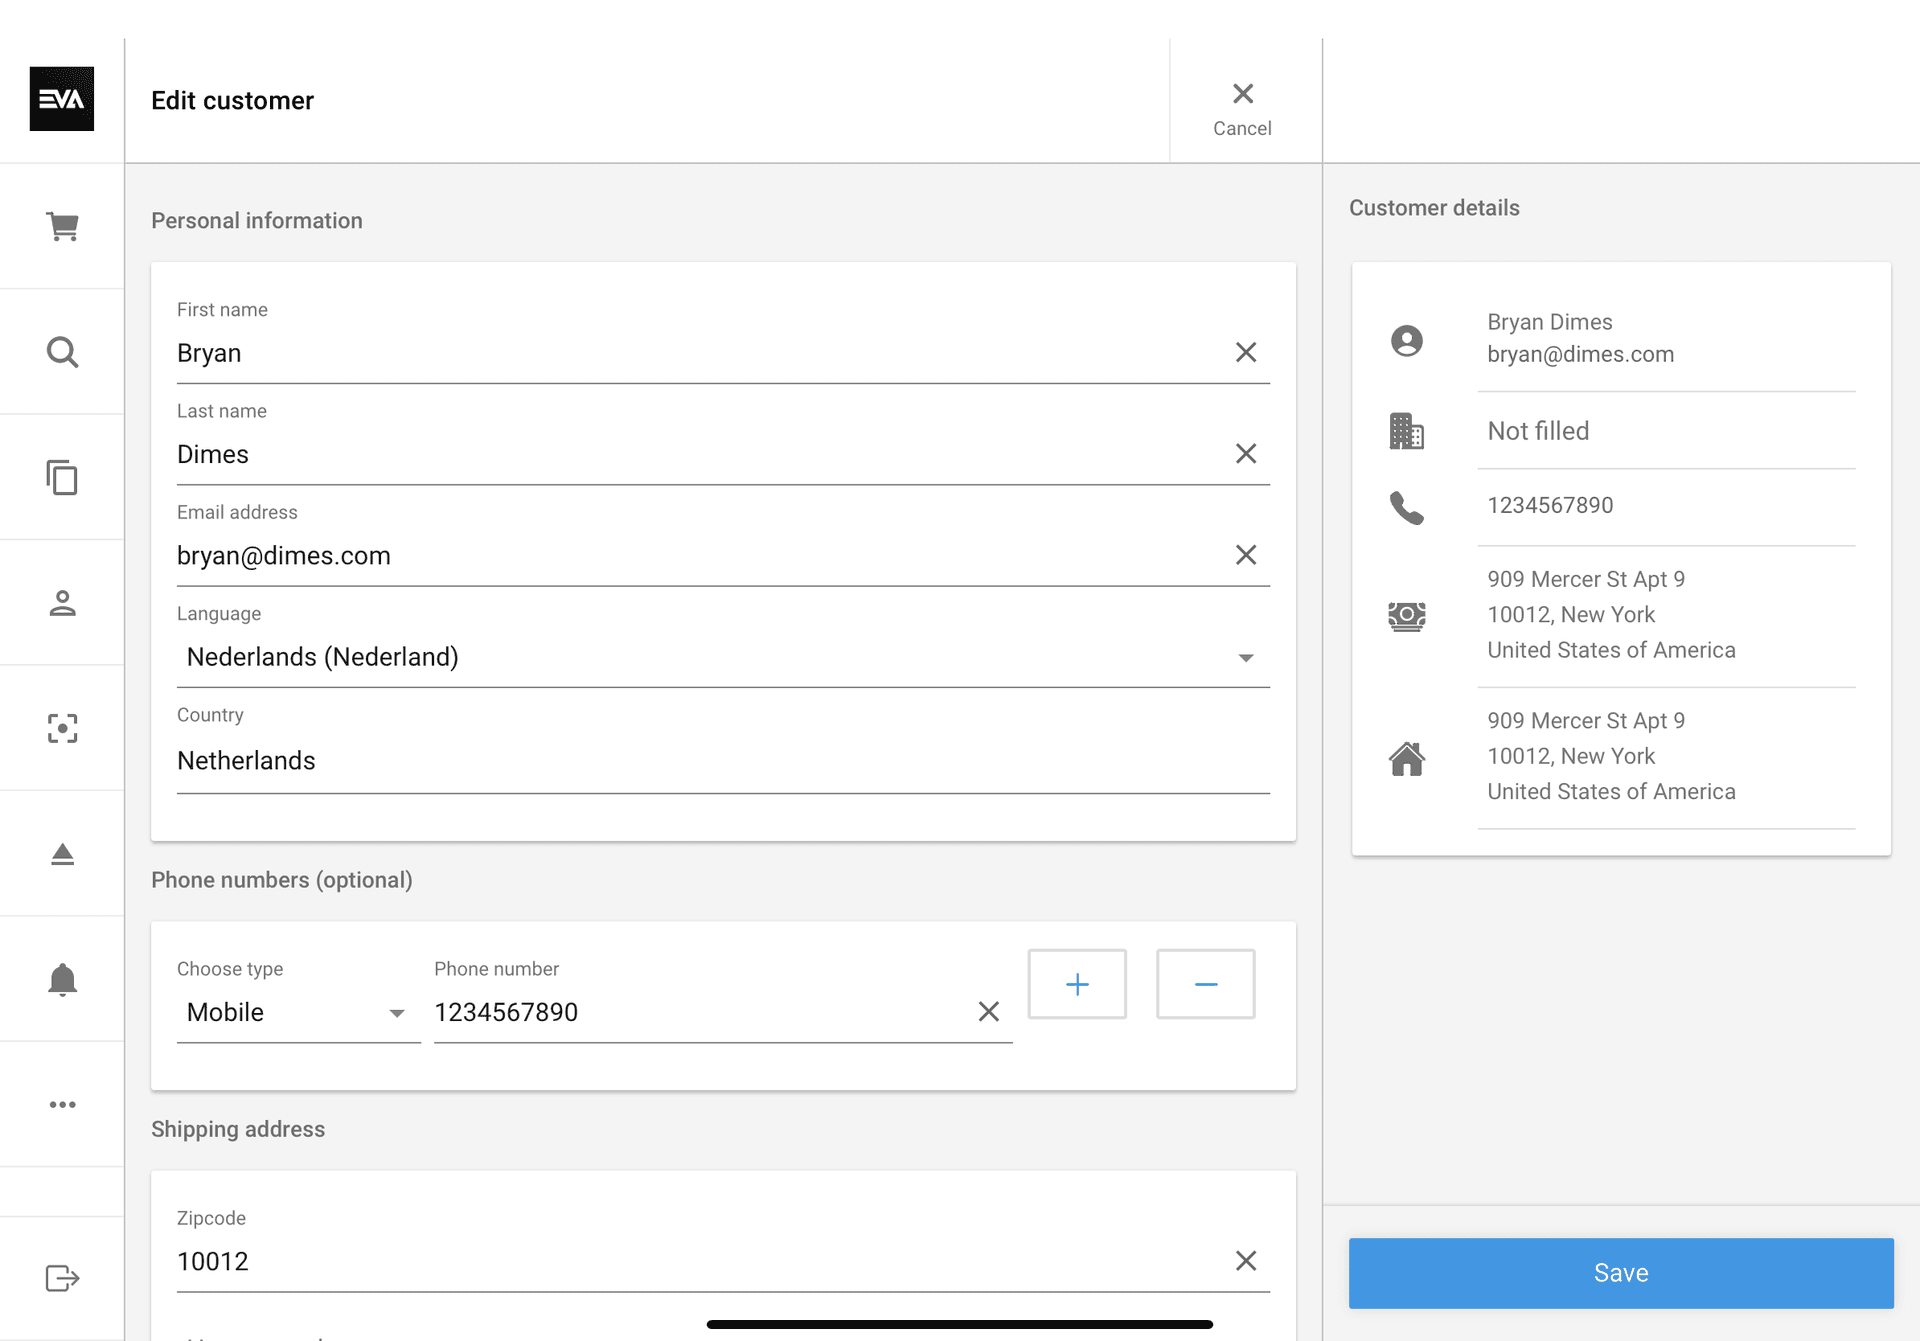
At the bottom of this page, you'll find a list of all addresses used by this customer. You can alter any address, delete it or change the default delivery/billing address. If you delete an address which is currently used as a default one, the default address will automatically change to the address that will remain. Note that if more than 1 address would remain, the default address cannot be deleted right away, since it would be unclear what address would have to become the new default. Either switch the default yourself, or delete addresses until only one remains (excluding the current default address).
Your address will be autocompleted based on the country of the shipping/billing address. This is still the case even when you select a country that is not the OU country.
When Customer:BlockChangeEmailAddress is set to true, POS & CFD will not allow employees to edit customer email addresses after they've been created.
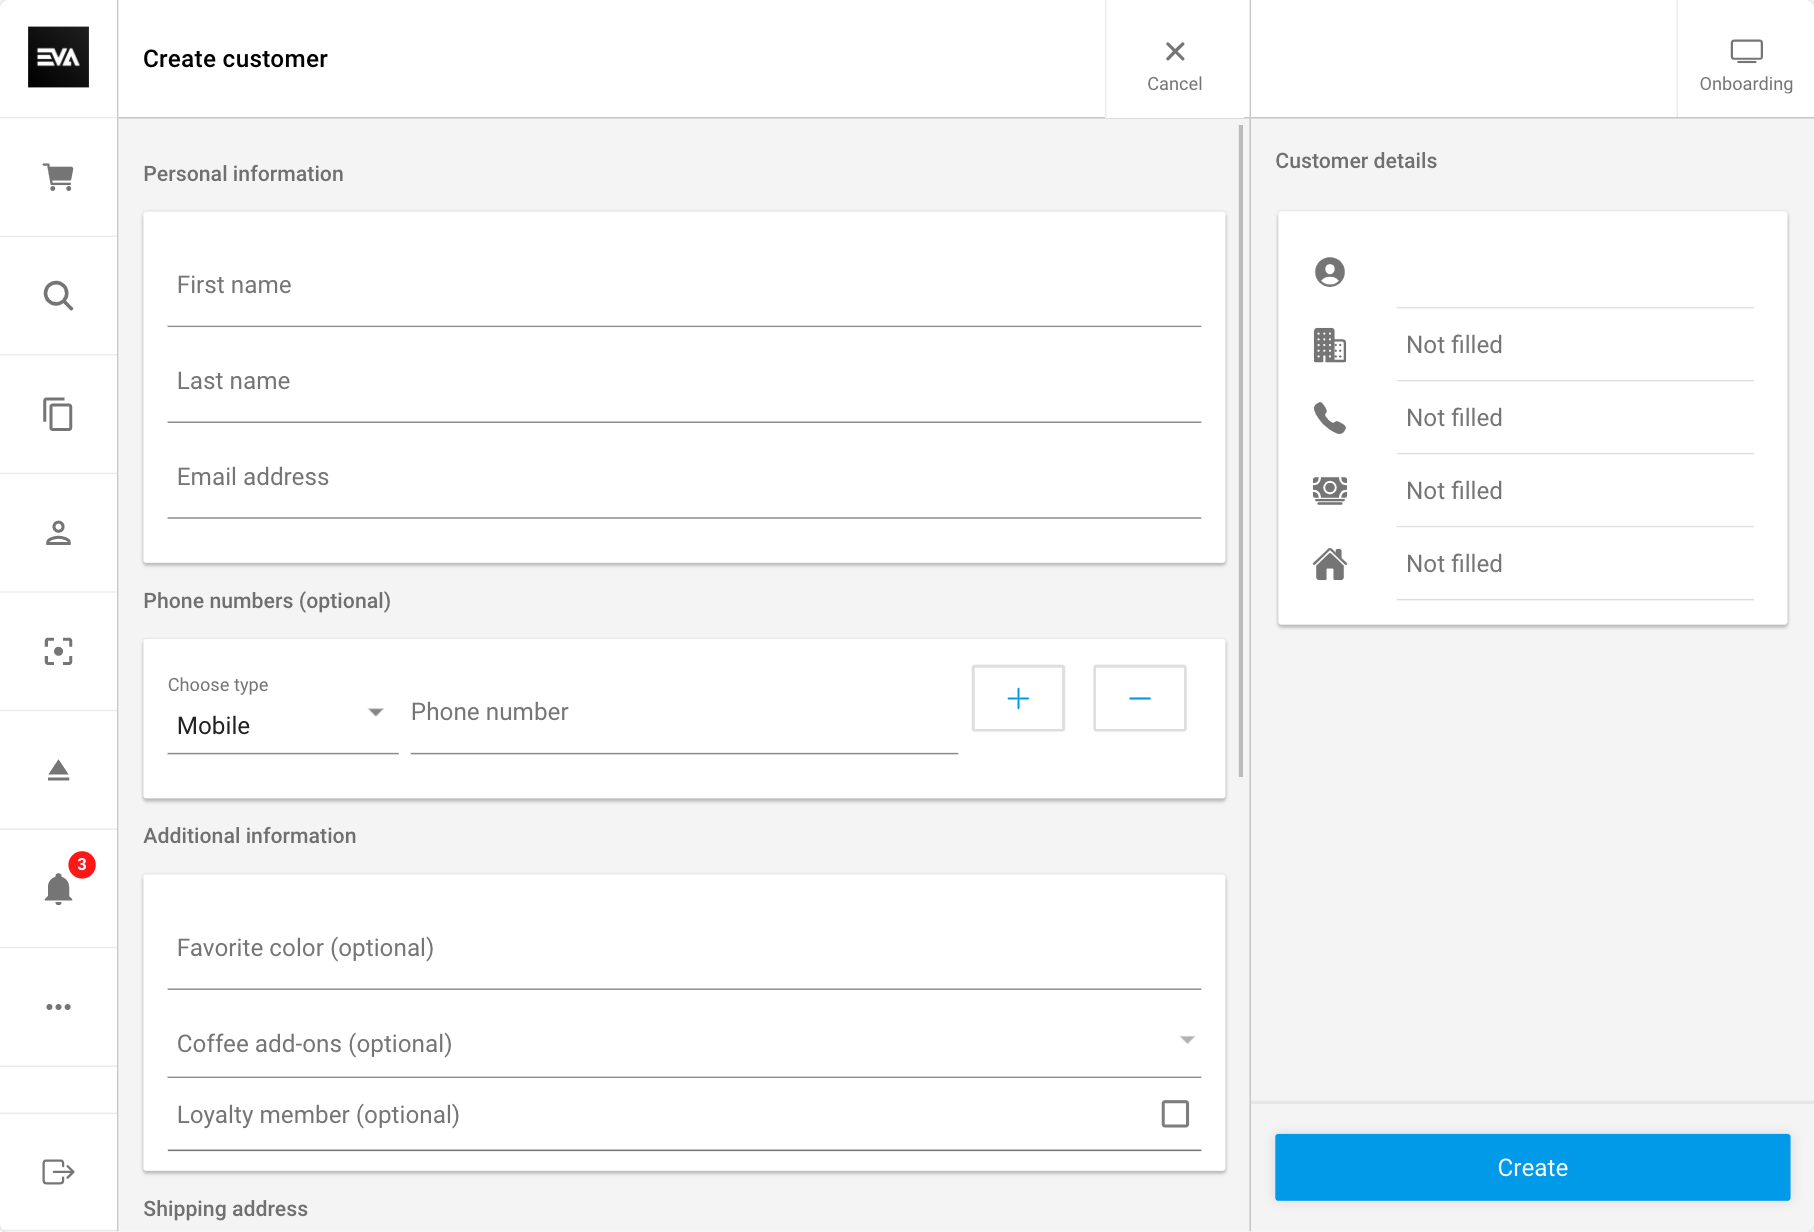
Adding customers
To add customers, press the +Add button on the main customer search menu. You will only be able to add new customers when all of the required fields are entered. Otherwise, the button to create the customer is disabled.
This screen is the exact same as the Edit customer screen, except for the fact that the fields are empty. Additionally - in contrary to the edit menu - the fields that are available here depend on your configuration of User requirements. It's also possible to autofill details for new customers by scanning any QR code containing their SSN, e.g. a driver's license. The latter does require use of a third-party service that stores information on SSN.
If there are Custom fields, based on the availability of a Default value, POS may prefill it when you are creating a new customer.
If you have Inquiries configured, those would appear on the second page of the customer creation flow.
CFD onboarding button
For your CFD a setting called App:Customer:ShowVerifyOnCFDButton can be activated by setting its value to true. Here is a guide on how to add a setting.
Once that setting is in place, an Onboarding button will appear on your POS (top right corner).
Once tapped, you'll be prompted with the fields of Customer details. Again, those fields will be based on your configuration of User requirements. You can then select which ones you want to prompt on CFD for your customer to fill in or verify.
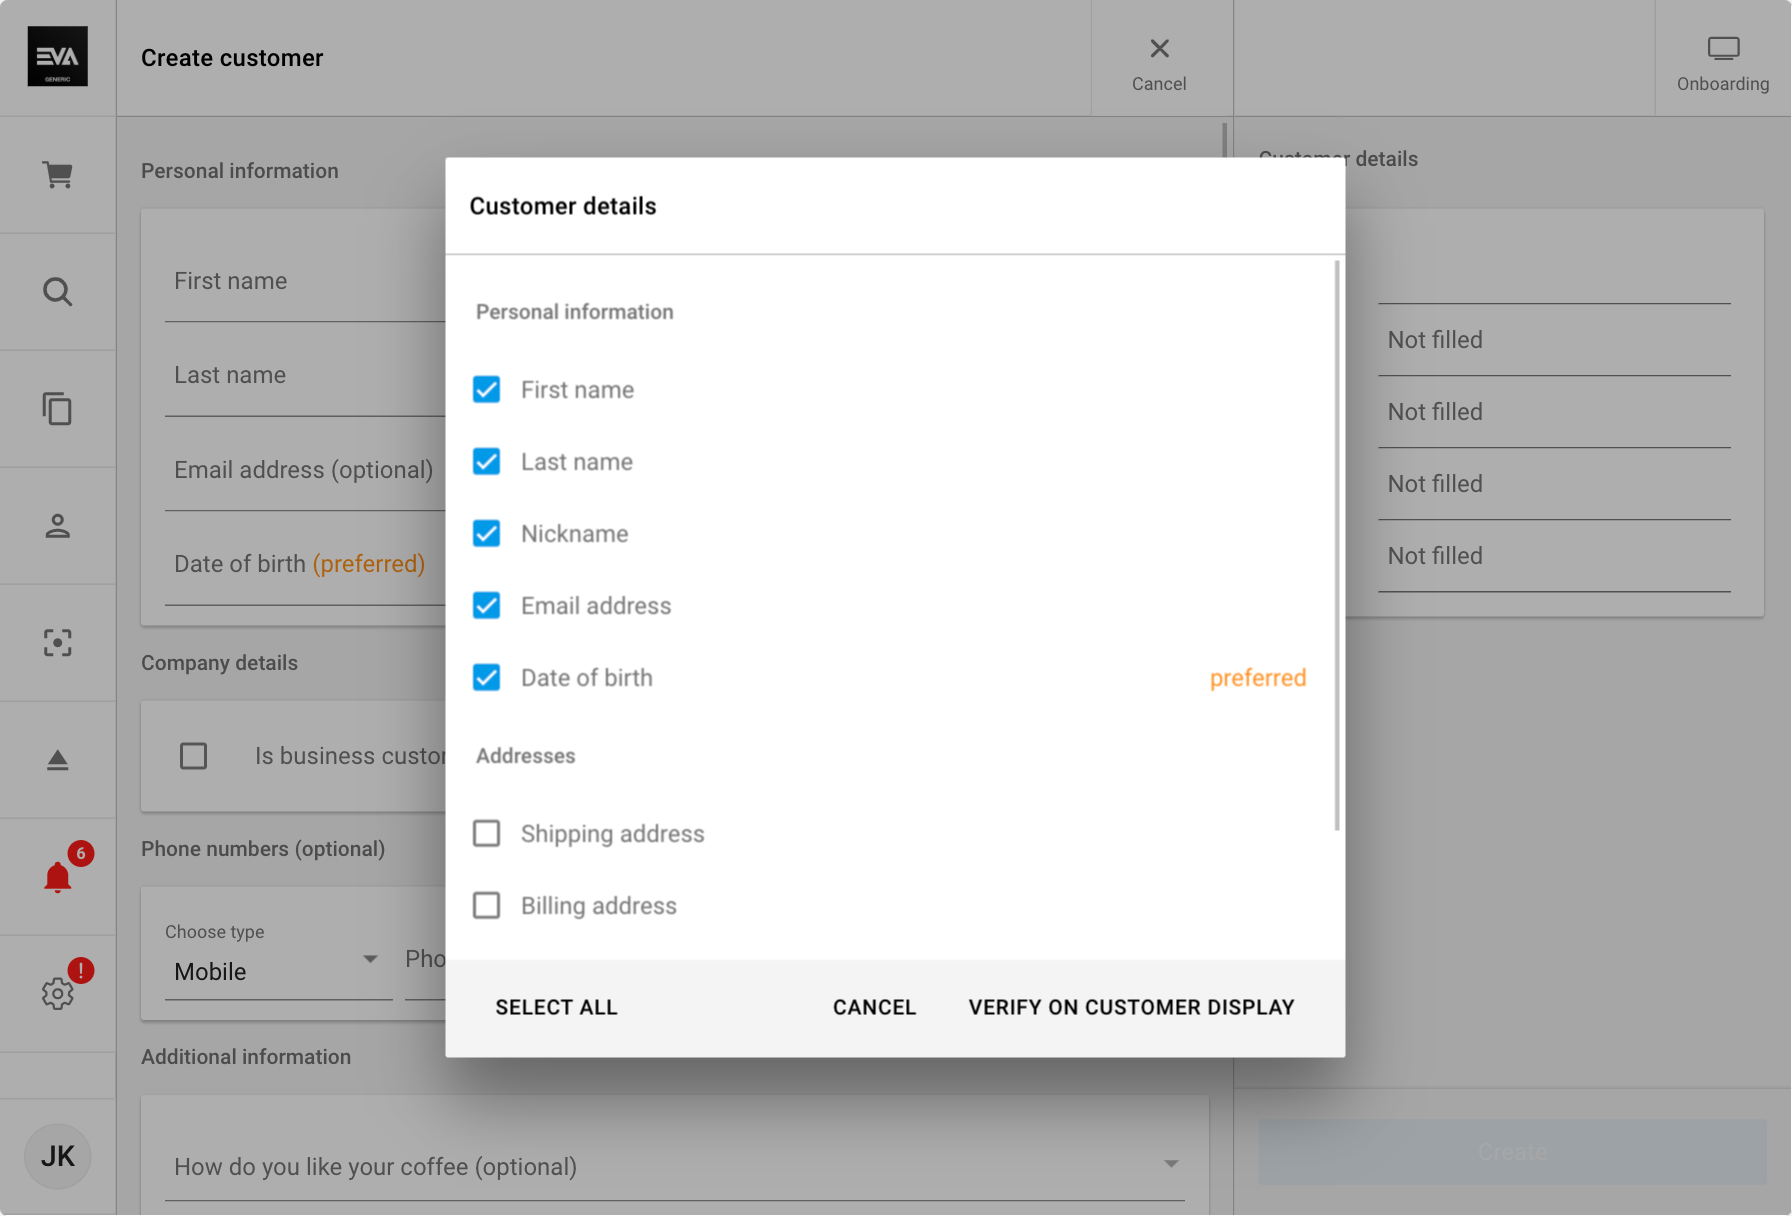
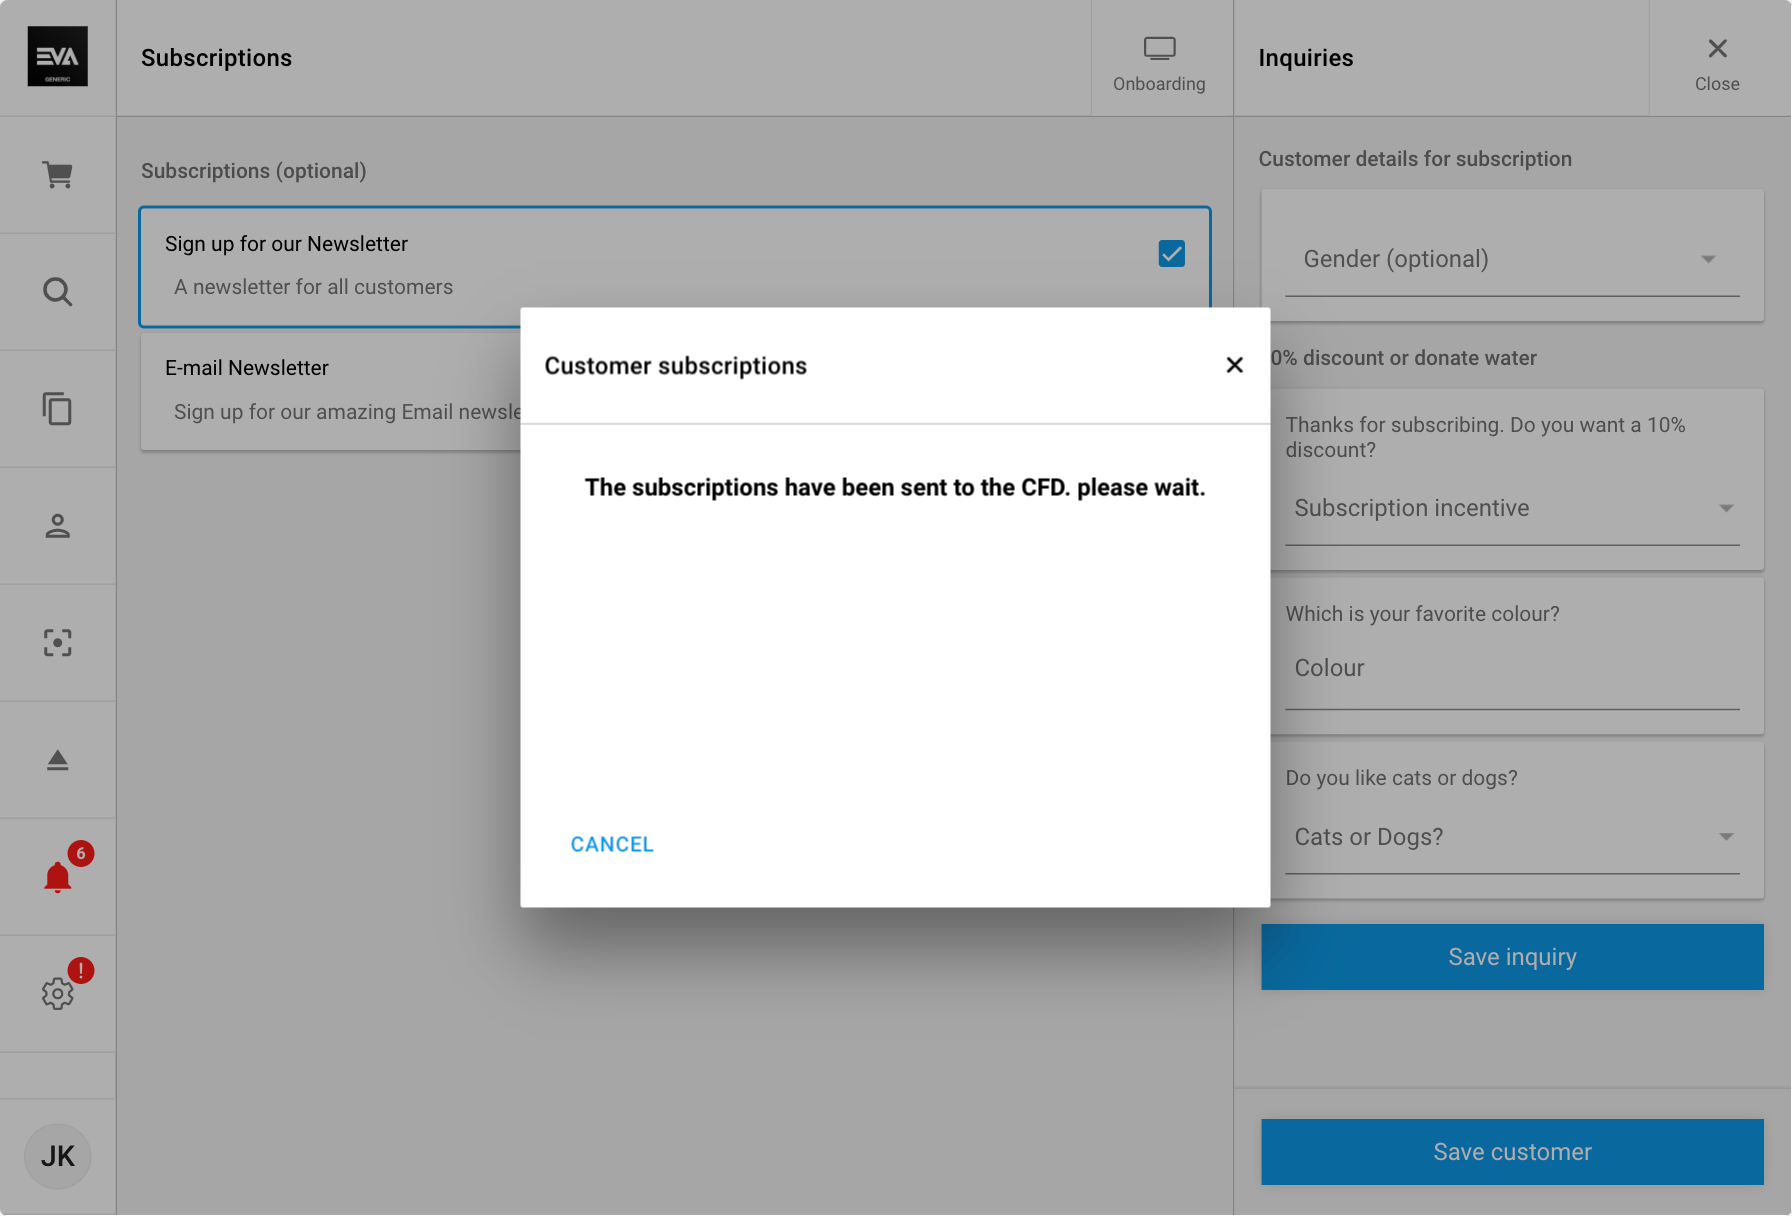
The Onboarding button can also be used with Subscriptions and Inquiries in order to prompt respective questions on CFD for customers to fill in or answer.
Here is how the Onboarding button will show in such a scenario.
Once tapped, a notification will be displayed for POS users, and will disappear once the customer is done with filling in/answering the requested details on the CFD.
- CFD Configuration.
- Set up customer facing display on POS.
Loyalty points
A customer's subscriptions and loyalty program balance are displayed through the Customer Display Panel on the sidebar.
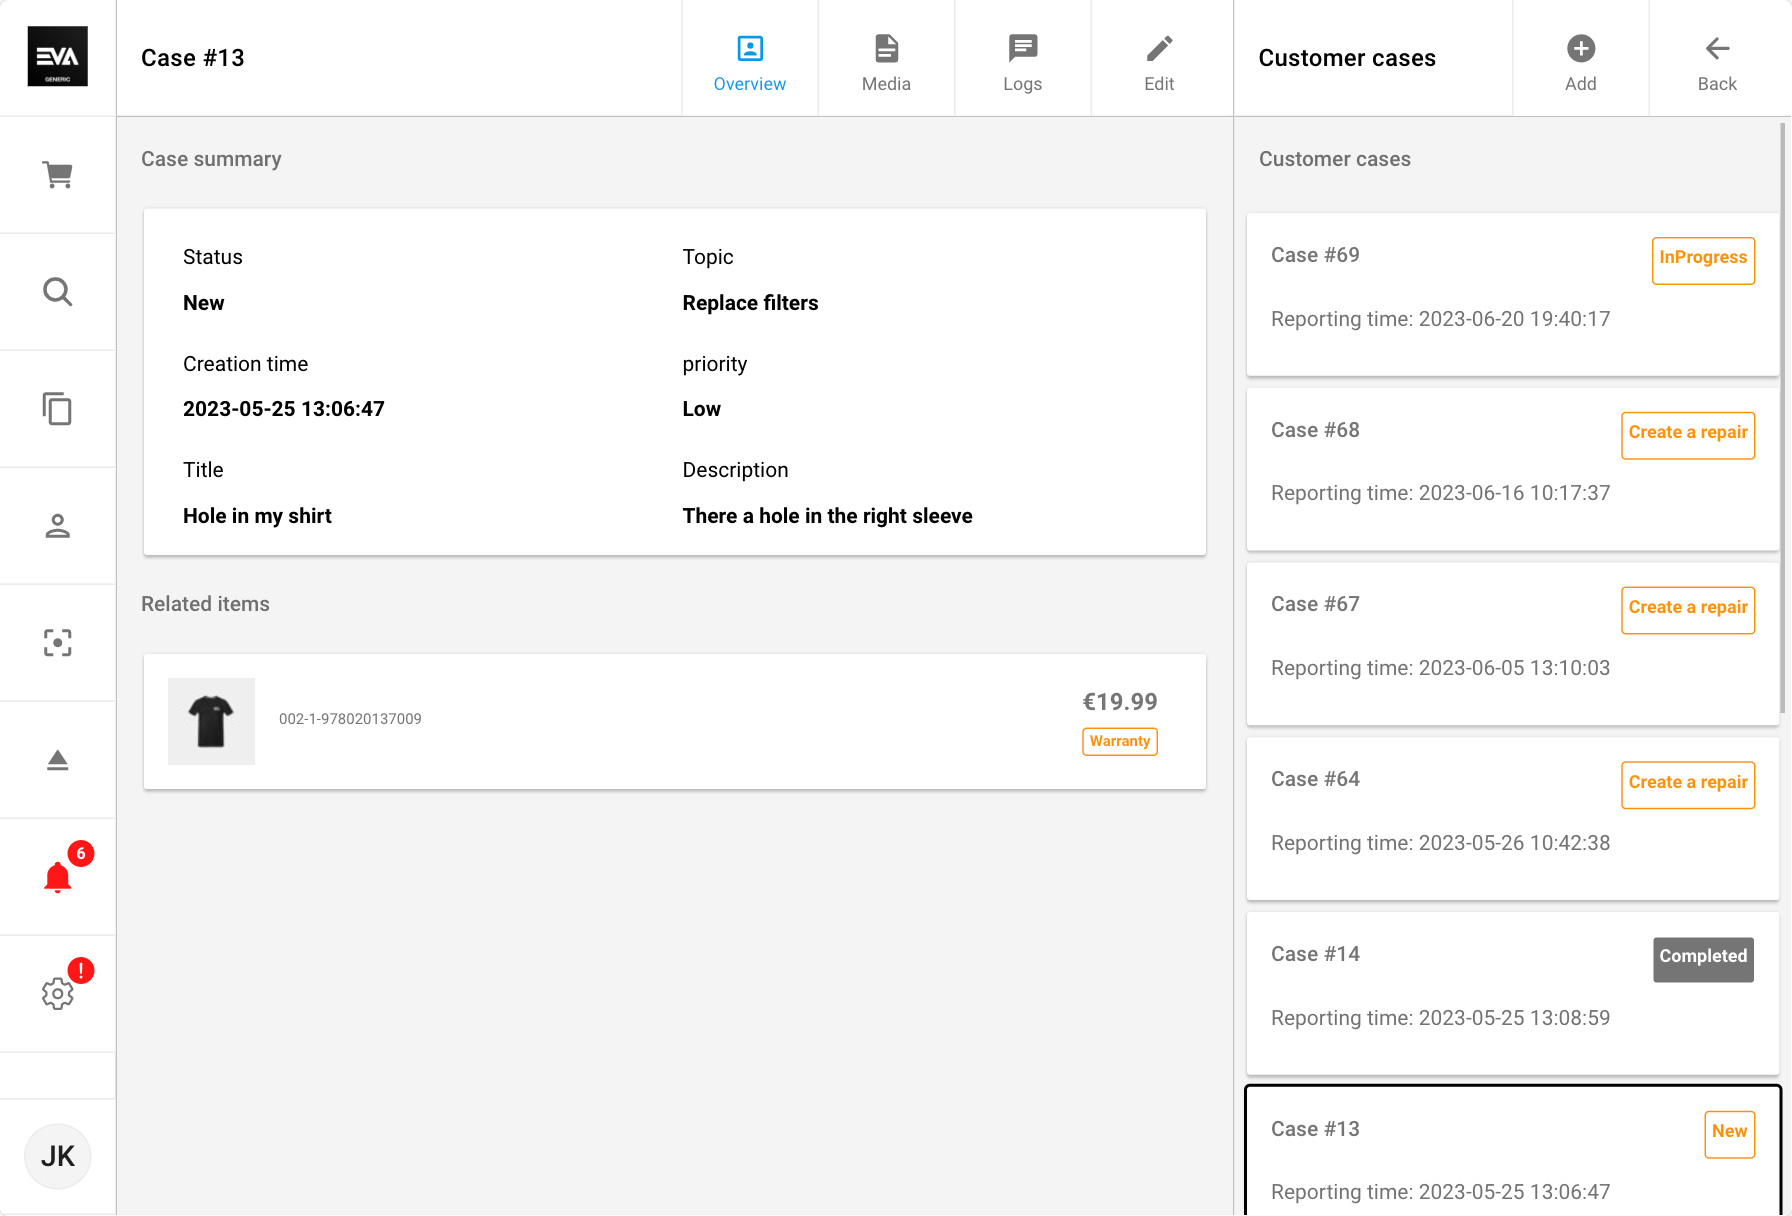
Customer cases
The app setting App:Customer:ShowCases determines whether customer cases are displayed or not. When set to true, customer cases are shown, and when set to false, they are not (defualt value is false).
For customers with Cases user can view and manage customer cases by tapping the Cases tile.
Upon clicking the tile, a list of cases (if any) associated with the customer will appear, showing the case numbers, last updated dates, and statuses.
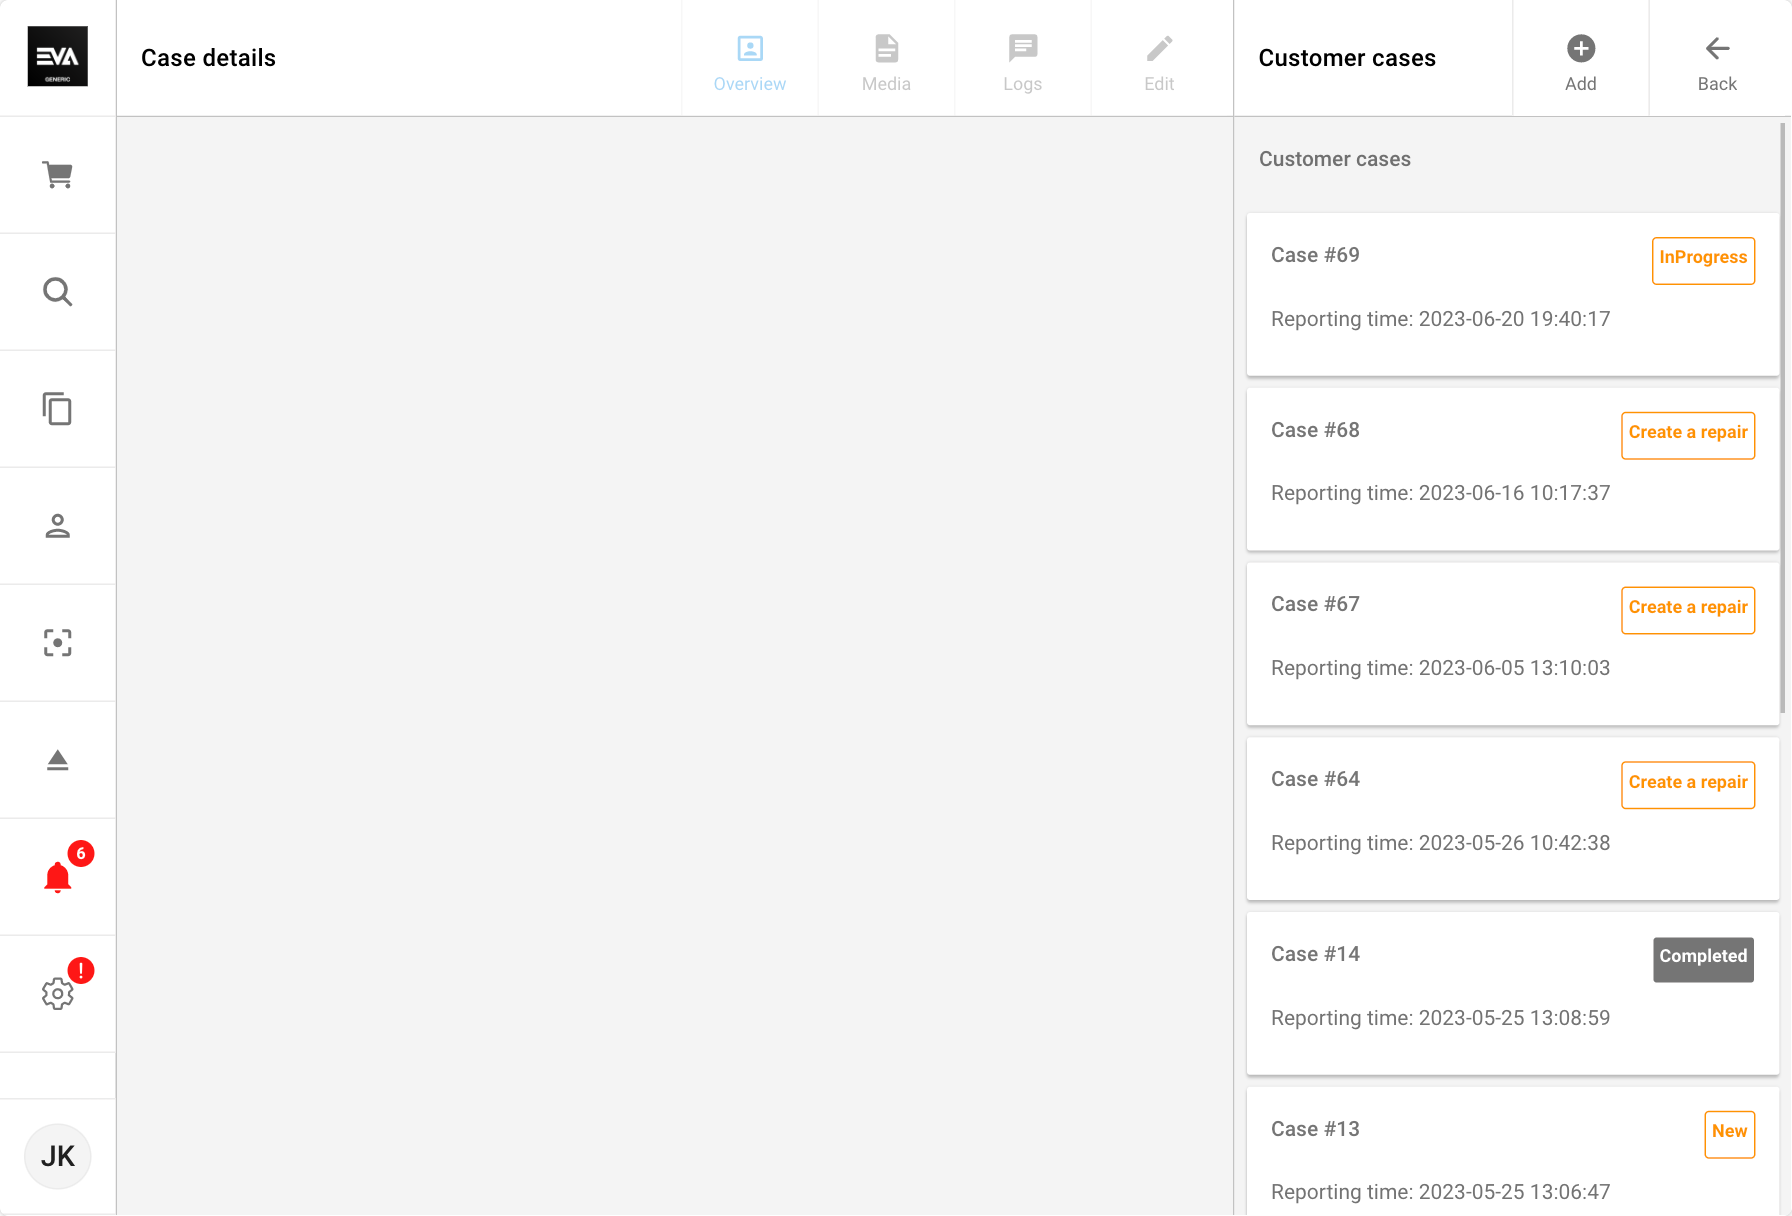
Tabs and buttons are available for you to view active cases associated with the customer, add new cases, add logs, or navigate back to customer search.
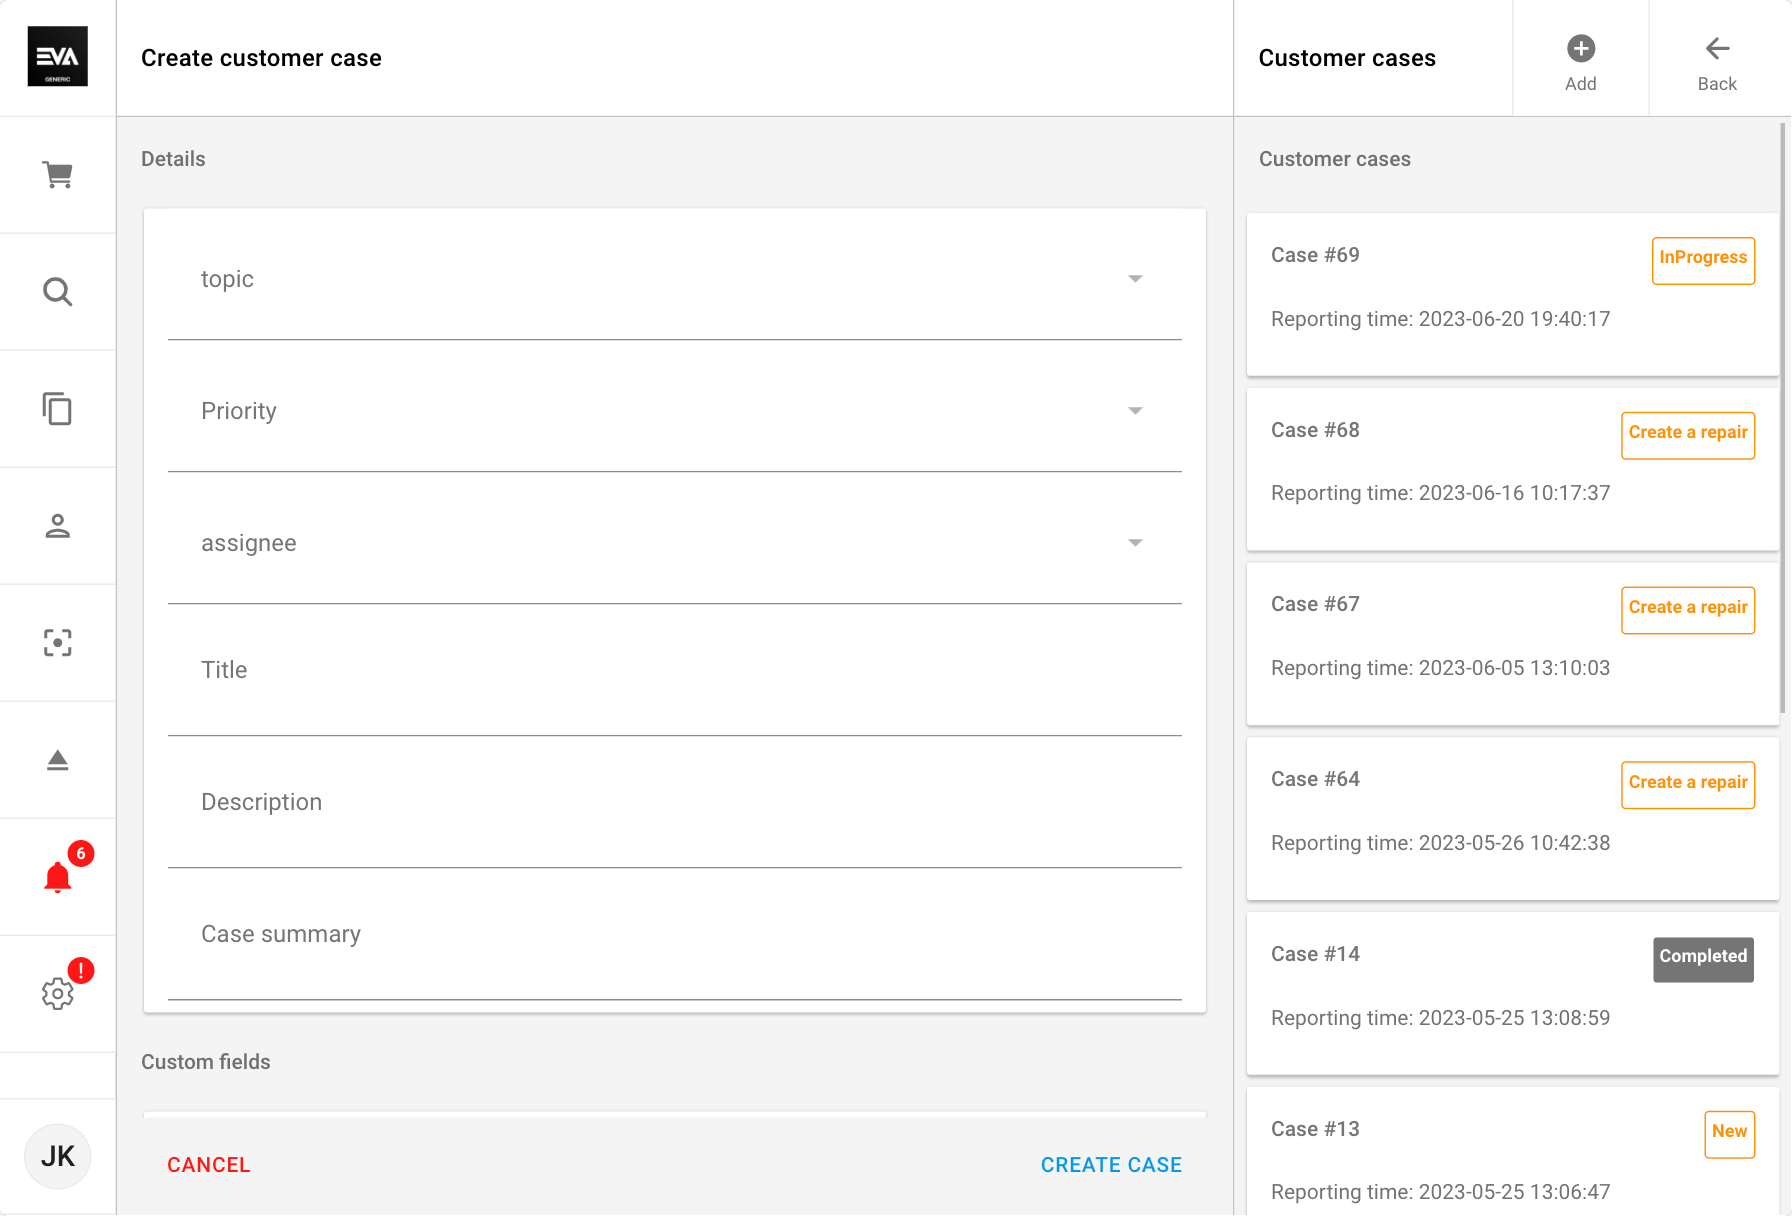
Additionally, employees can view the case's details, create new interaction logs and edit (most of) the information. If there are Custom fields, these may be prefilled by POS based on the availability of a Default value. If there are no custom fields, the dedicated section will be hidden.
The title and description of a case are editable only so long as no employee is assigned to the case.
Check out Cases on Admin Suite for more.
Owned products
The app setting App:Customer:ShowBoughtProducts determines whether customer bought products are displayed or not. When set to true, bought profucts are shown, and when set to false, they are not (defualt value is false).
Customer owned products can be viewed by tapping a customers Owned Products button.
Tapping will present a list of owned products (if multiple) and the possibility to archive.
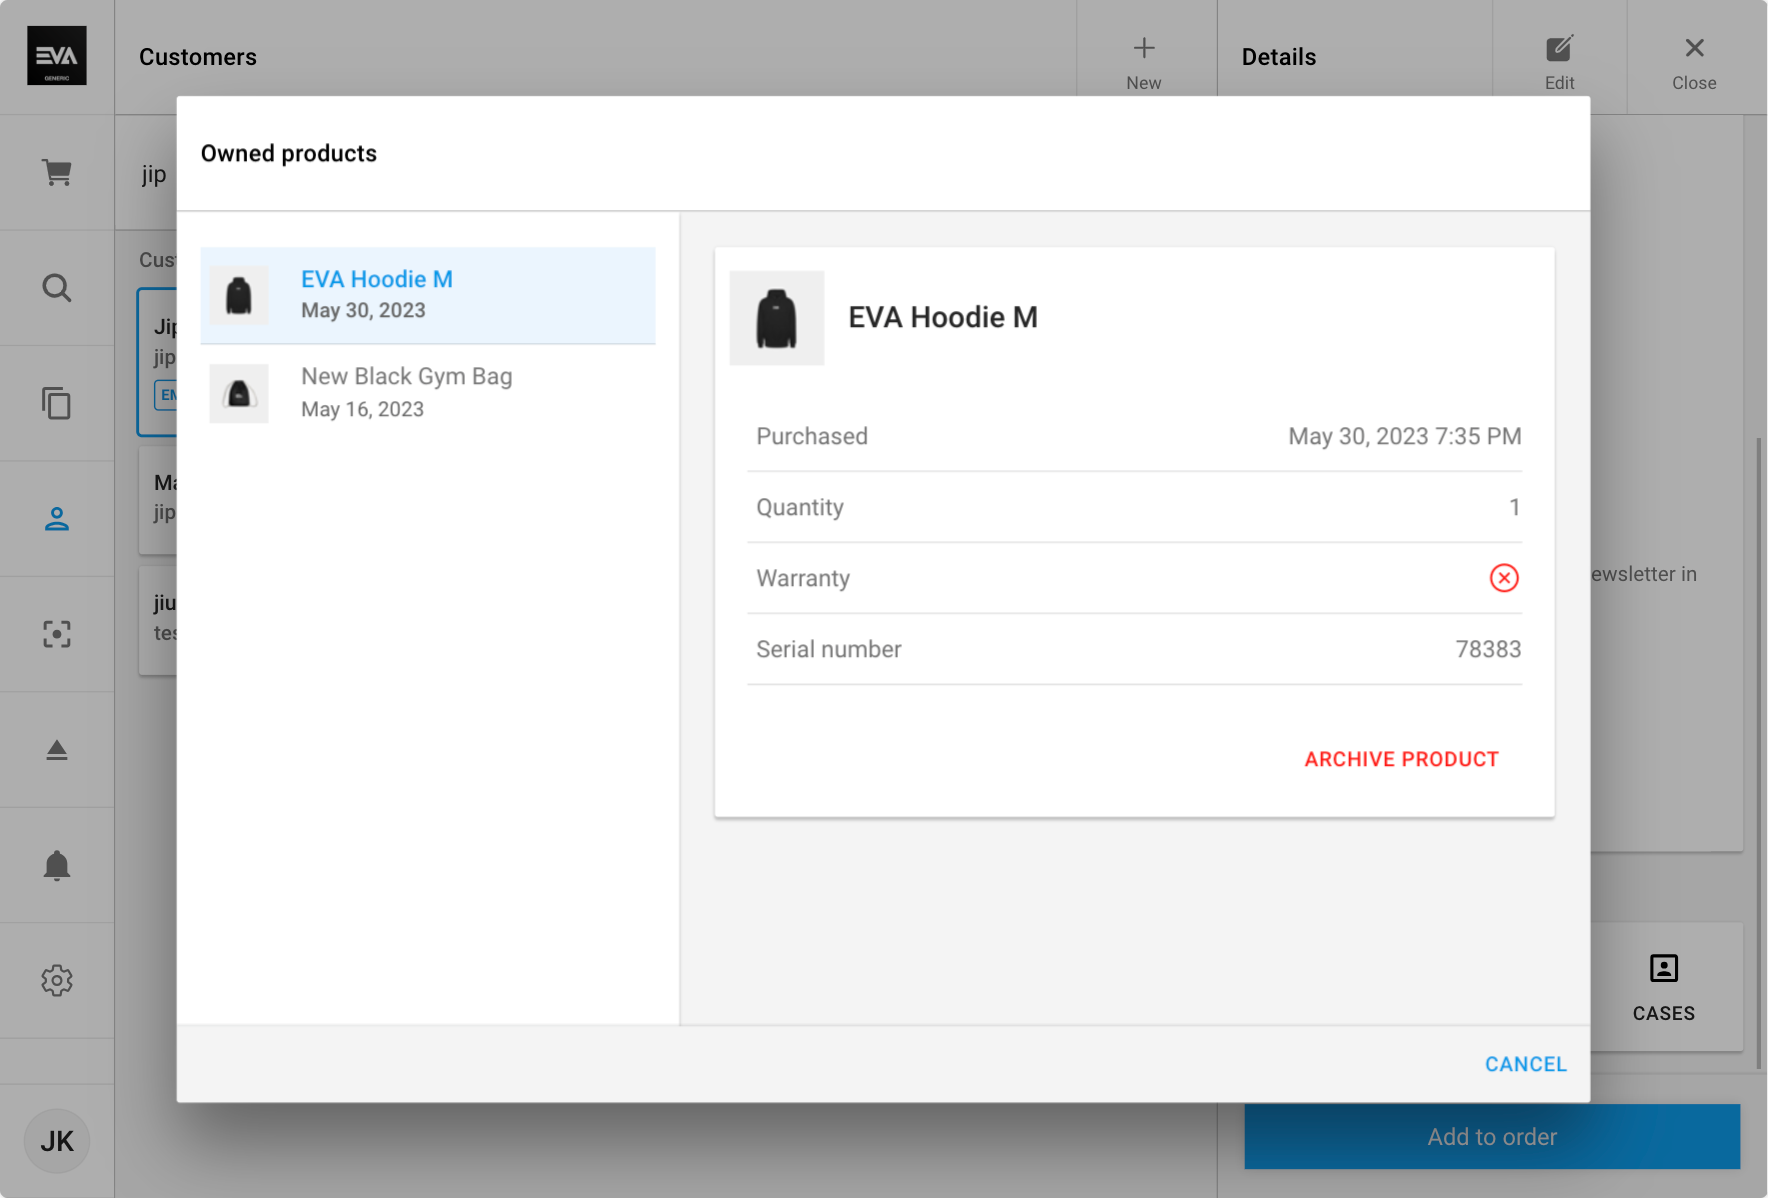
More on this can be found under the Bought products tab in the Consumers chapter of Admin Suite.