Case settings
Case settings
Configure case statuses and topicsThe Case settings chapter is where you can add, view, or edit Case Statuses, Case topics, and Case custom fields. Those are then used when creating or editing cases (Cases management) in Admin Suite or via the Apps.
Check the Cases introduction page for a general overview of Cases and its uses.
The app setting App:Customer:ShowCases determines whether customer cases are displayed or not. When set to true, customer cases are shown, and when set to false, they are not (defualt value is false).
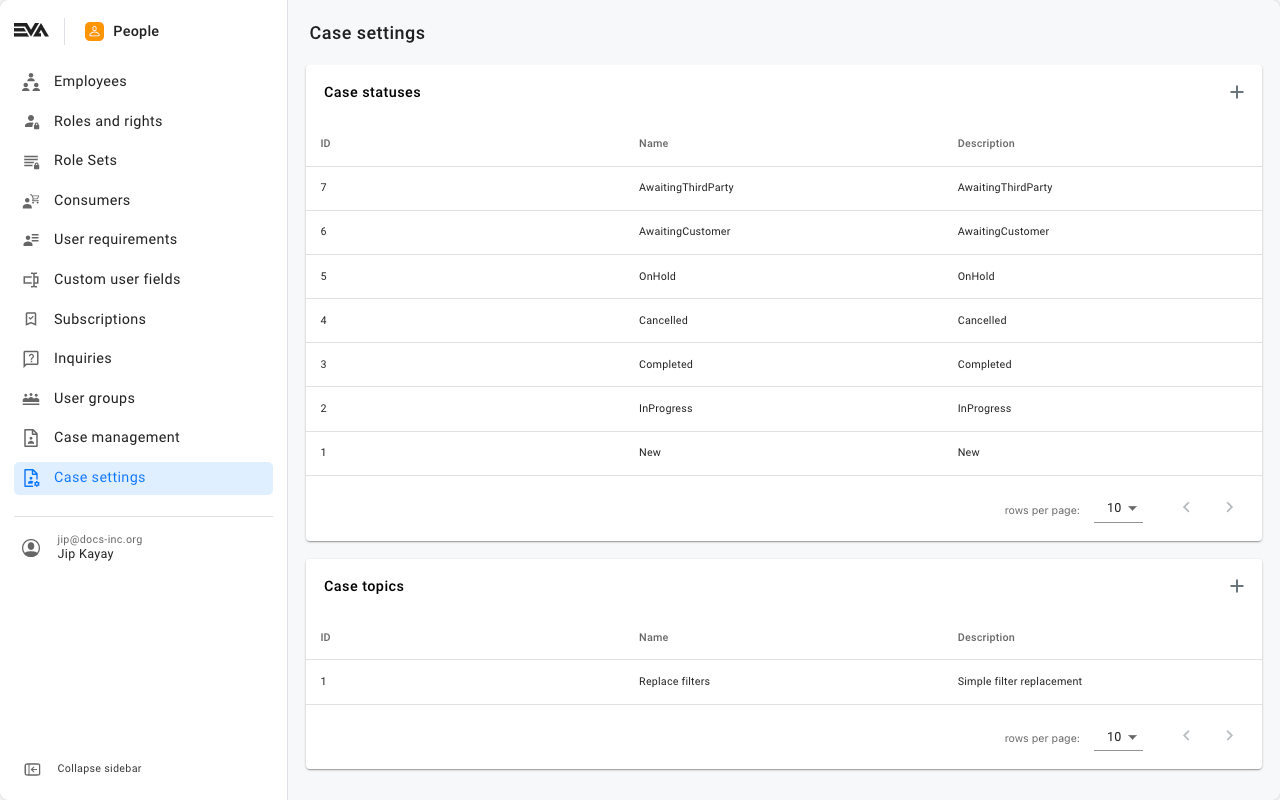
Case statuses
In order to be able to access this card, you need the CaseStatuses permission. Permissions are managed from the Roles and rights chapter namely, from the functionalities card of a users role.
The Case statuses card is where you can add or edit the various statuses in which a case could stand.
The statuses New, InProgress, Completed, and Cancelled are by default provided and in turn cannot be deleted.
For example, you've received a request for maintenance of a sold item. The initial stage of receiving an item is New, then moves to In-Progress when on route to/from the workshop and during actual maintenance work, and to Completed once it's ready for pickup. In such scenario, you'll need to create 3 case statuses (new, in-progress and completed).
A newly created case will always get status New (this is default behavior).
To Add, simply click the '+' icon that corresponds to the Case statuses card. Give it a name (mandatory field), a description, an action, specify whether the status is considered the closing one or not. In other words, if this is the last stage of how your cases would flow, and only which after a case would be considered as closed. Then, Save.
To edit or view, simply click the desired case status. Notice that you'll also have the option to use name translations. This influences the name displayed on front end(s) for users based on their preferred or specified organization unit language.
The corresponding input for the Name field is what users would see on the front end(s) when creating or editing cases as an option when specifying or editing the Status field.
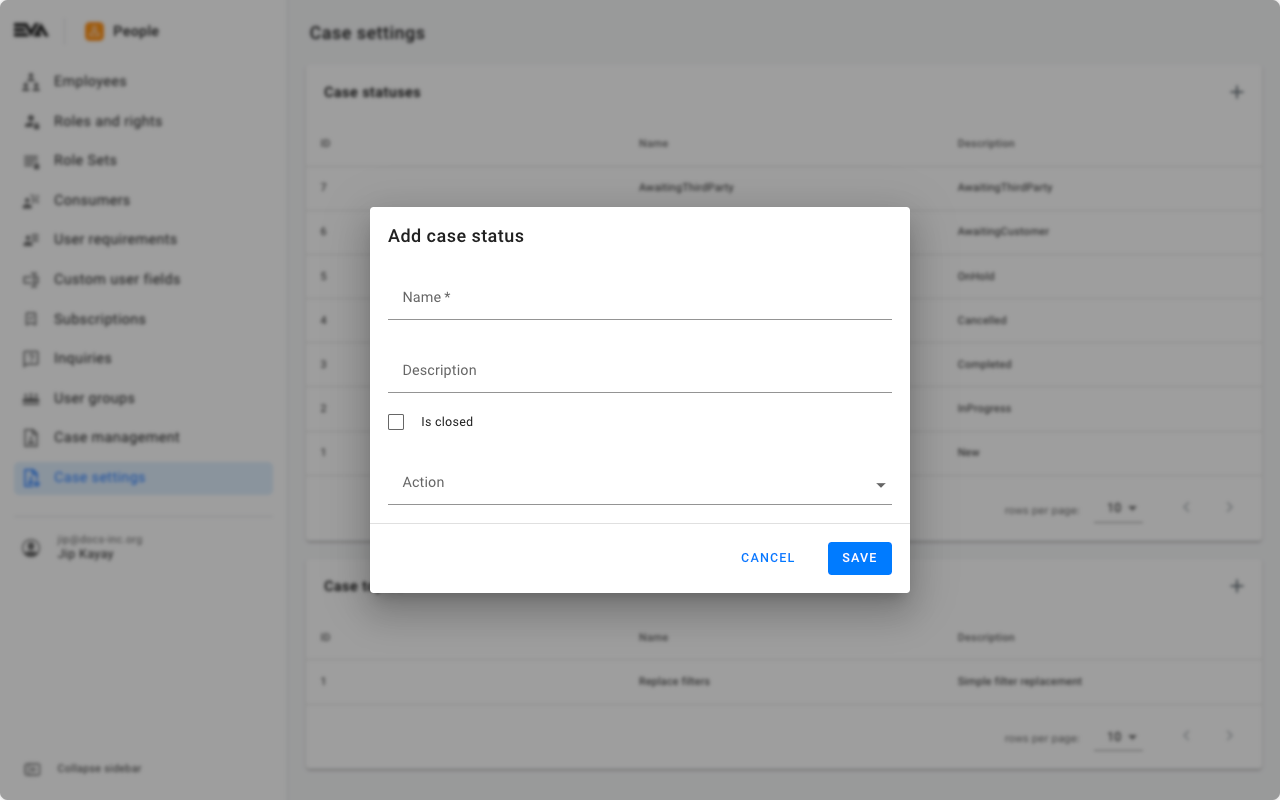
Action
An action can be tagged to a case status, which in other words if that case status is selected, a corresponding action would be auto triggered.
The following are available actions that could be triggered along with a case status:
- None: No action.
- Create repair: A new repair case will be created in the Repairs chapter. The case information will already be prefilled.
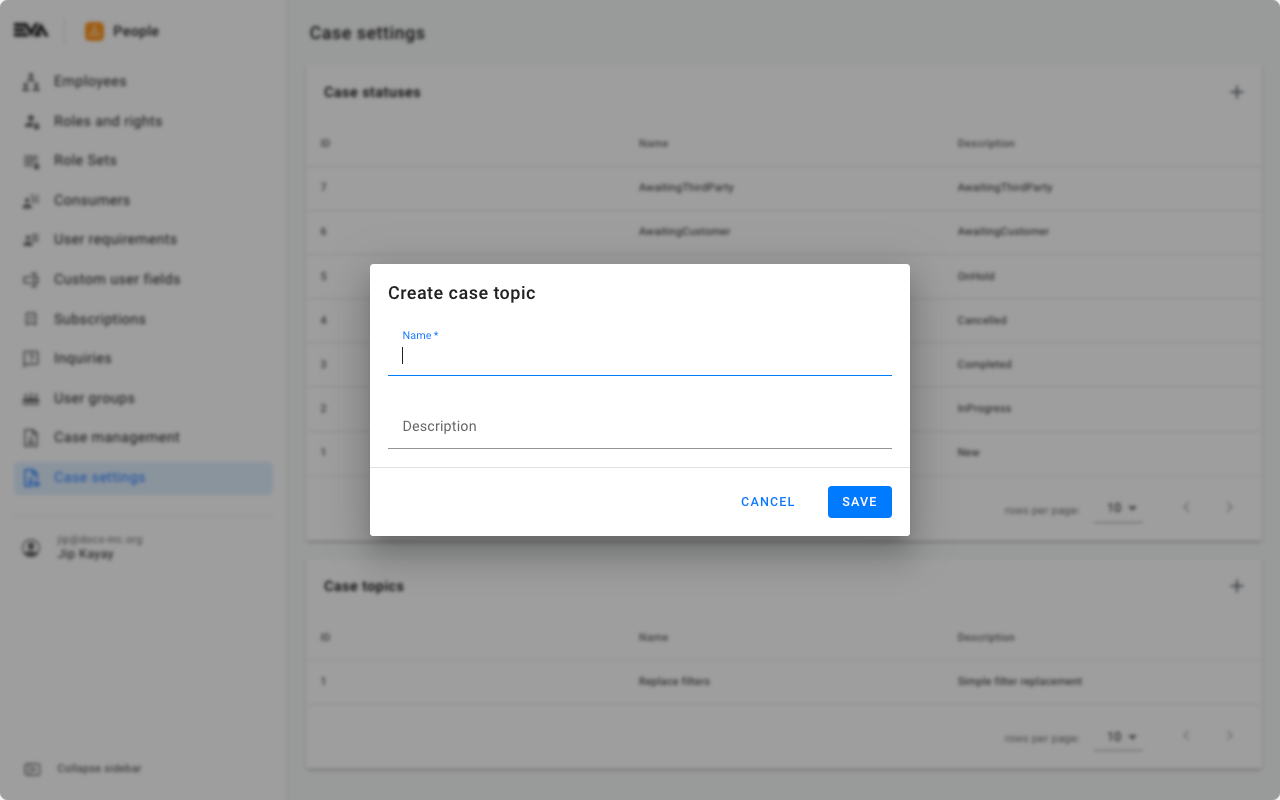
Case topics
In order to be able to access this card, you need the CaseTopics permission.
The Case topics card is where you can add or edit the various topics in which a case could be classified as.
For example, the type of cases you'd receive could either be Maintenance or Replacement. In such scenario, you'll need to create 2 case topics (maintenance and replacement).
To Add, simply click the '+' icon that corresponds to the Case topics card. Give it a name (mandatory field), a description, and then Save.
To edit or view, simply click the desired case topic. Notice that you'll also have the option to use name translations. This influences the name displayed on front end(s) for users based on their preferred or specified organization unit language.
The corresponding input for the Name field is what users would see on the front end(s) when creating or editing cases as an option when specifying or editing the Topic field.
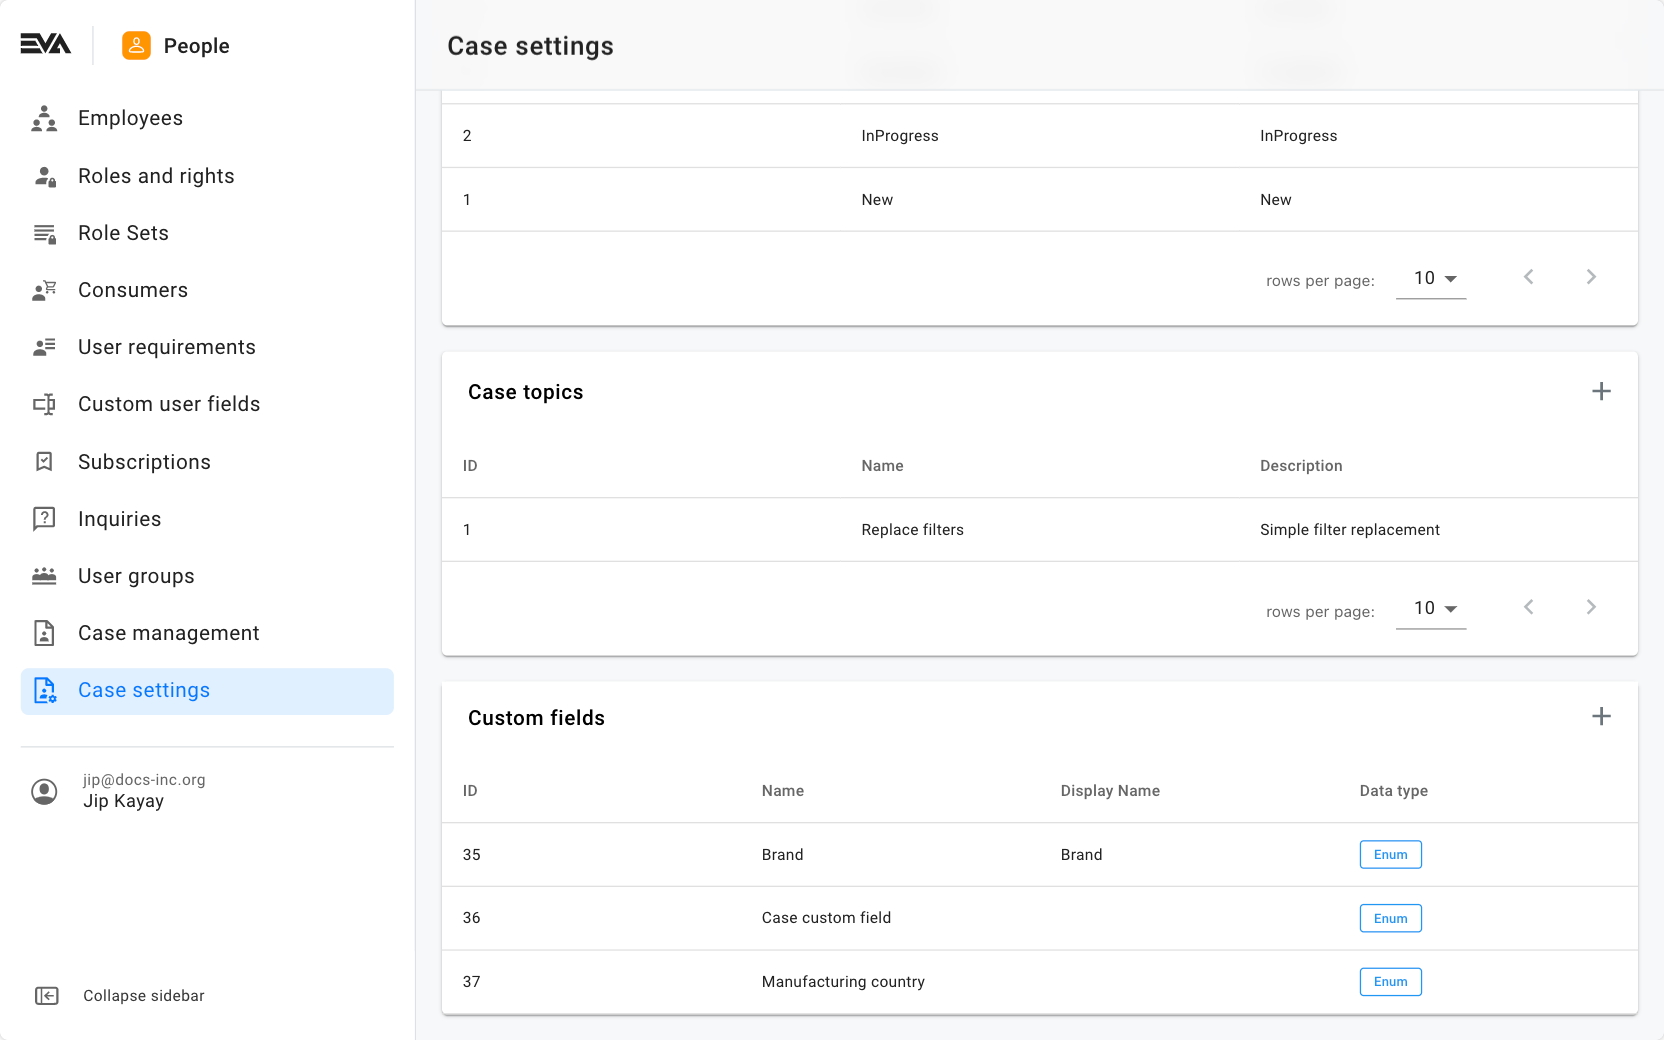
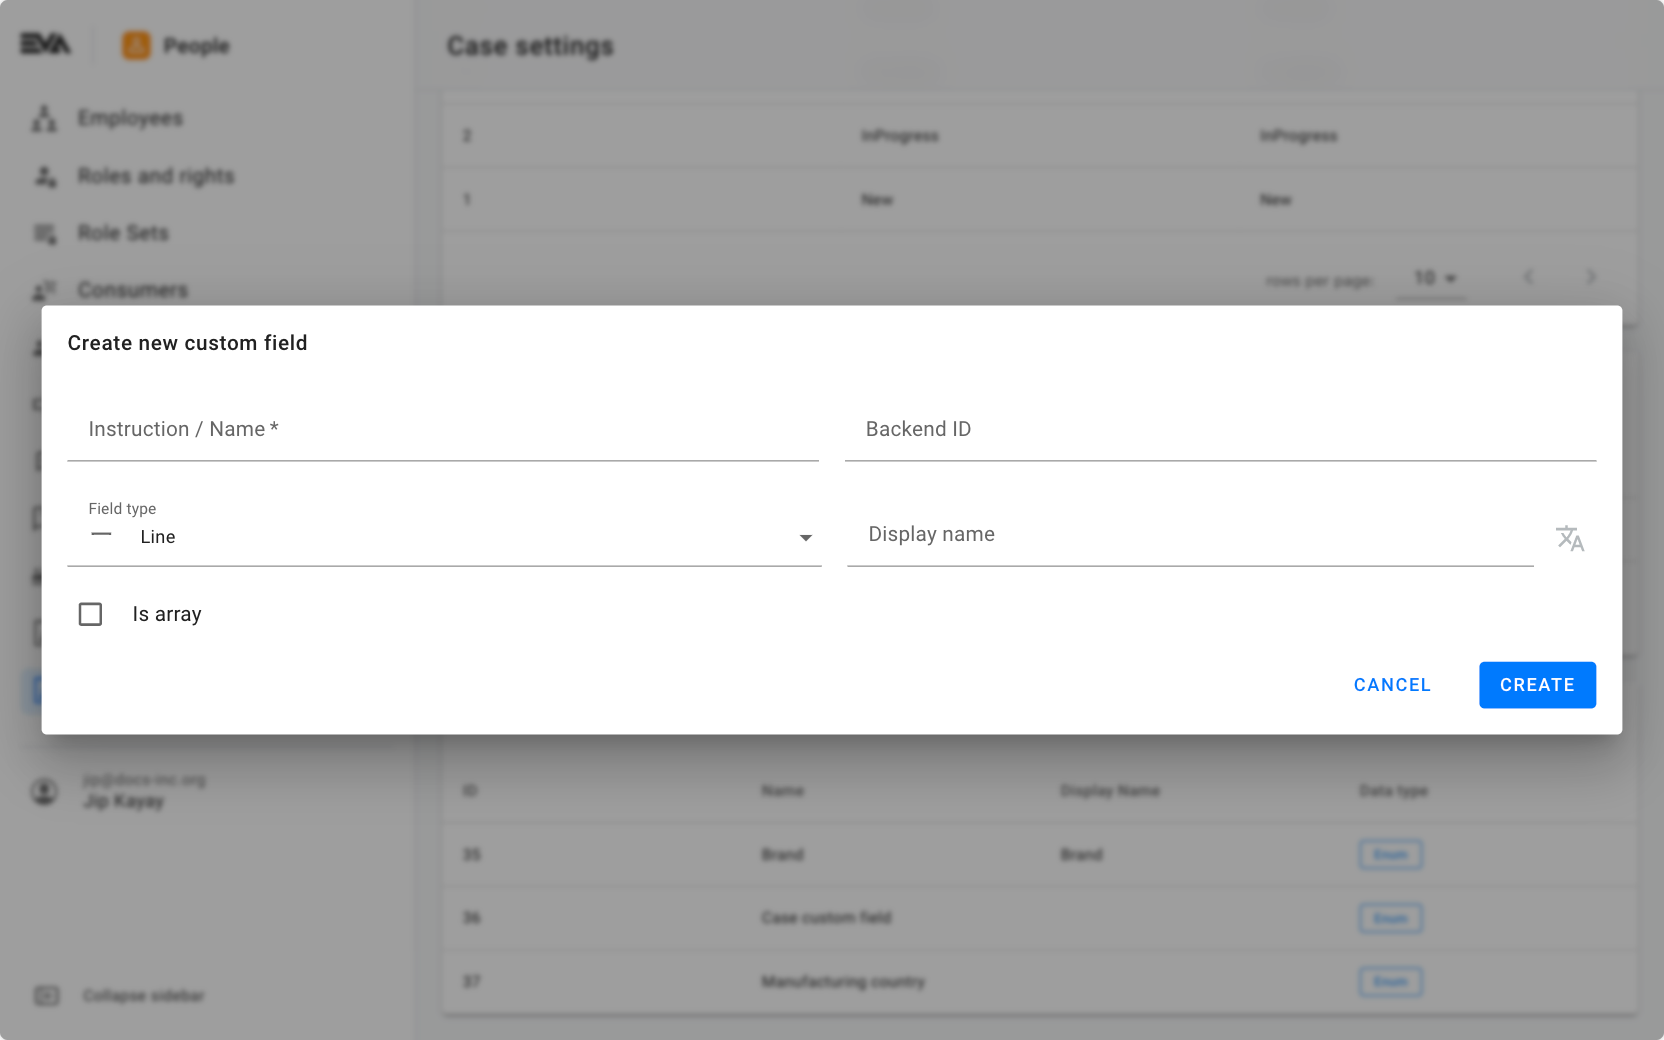
Custom fields
In order to be able to access this card, you need the CustomFields and CustomFieldTypes permissions.
Custom fields can be created for use with cases. Managing those can be done using the Custom fields card.
To add a custom field, click the cards corresponding '+' icon.
Creating custom fields works the same as described here. Editing is also similar.
For more information on the - potential - next step, see Repairs in Admin Suite.