Creating replenishments in Admin Suite
Creating replenishments in Admin Suite
Managing purchase ordersThe Replenishment overview shows all products for which replenishment has been set up. It also directly shows the minimum and maximum amounts configured for the product's replenishment.
In the right sidebar you can filter on products. You can check your replenishments per OU by switching OUs via the OU selector in the bottom left.

By inserting comma-separated PIM properties to the Replenishment:ProductProperties setting, they become available when reorganizing columns in the Replenishments overview. Keep in mind that the setting can differ per OU and the overview is influenced by the selected workspace.
In order to be able to access this chapter, you need the Replenishments permission.
Creating a Replenishment
Via Excel
Replenishments can be configured per product by uploading an Excel file, or by using the replenishment modal.
When using the Excel upload, you can either download the current replenishment file and make your updates, or you can add the following properties in a blank Excel sheet and upload them with your values.
- ID
- SourceOrganizationUnitID
- OrganizationUnitBackendID
- ProductID
- ProductBackendID
- StockLabelID
- MinimumQuantity
- MaximumQuantity
- StartDate (YYYY/MM/DD)
- EndDate (YYYY/MM/DD)
Via Admin Suite product matrix
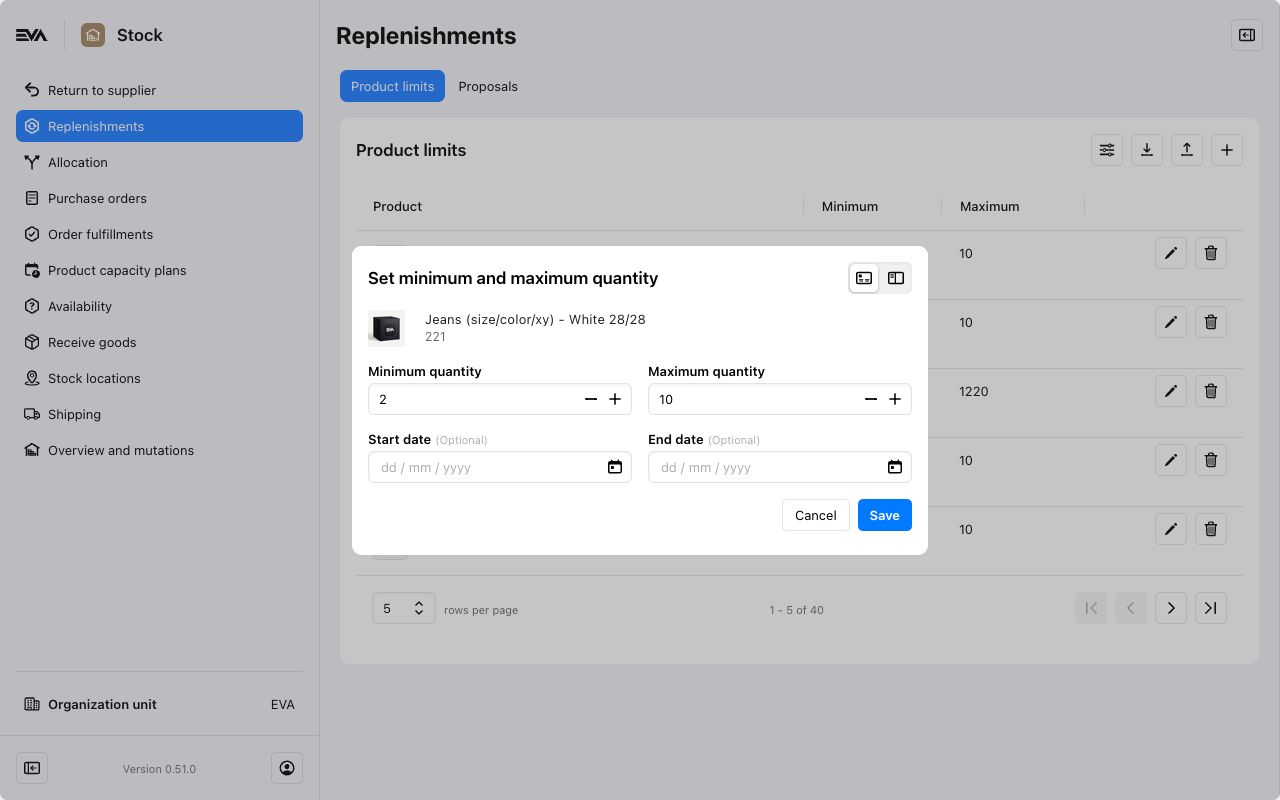
Alternatively, by clicking the '+' icon in the Replenishment overview, you can configure a new Replenishment. You can edit an existing one by clicking it. When creating a new one, start off by searching the right product.
Once you've found the product you need, several options become available to configure its replenishment.
These are its:
- Minimum quantity;
- Maximum quantity;
- Start and End date.
If you've picked a configurable product, an additional option becomes available in the Set min max overview. By clicking the 'matrix' icon in the top right, you can get an overview of all this product's variants and configure the replenishment quantities for all of them individually. The same functionality is available when opening an existing replenishment.
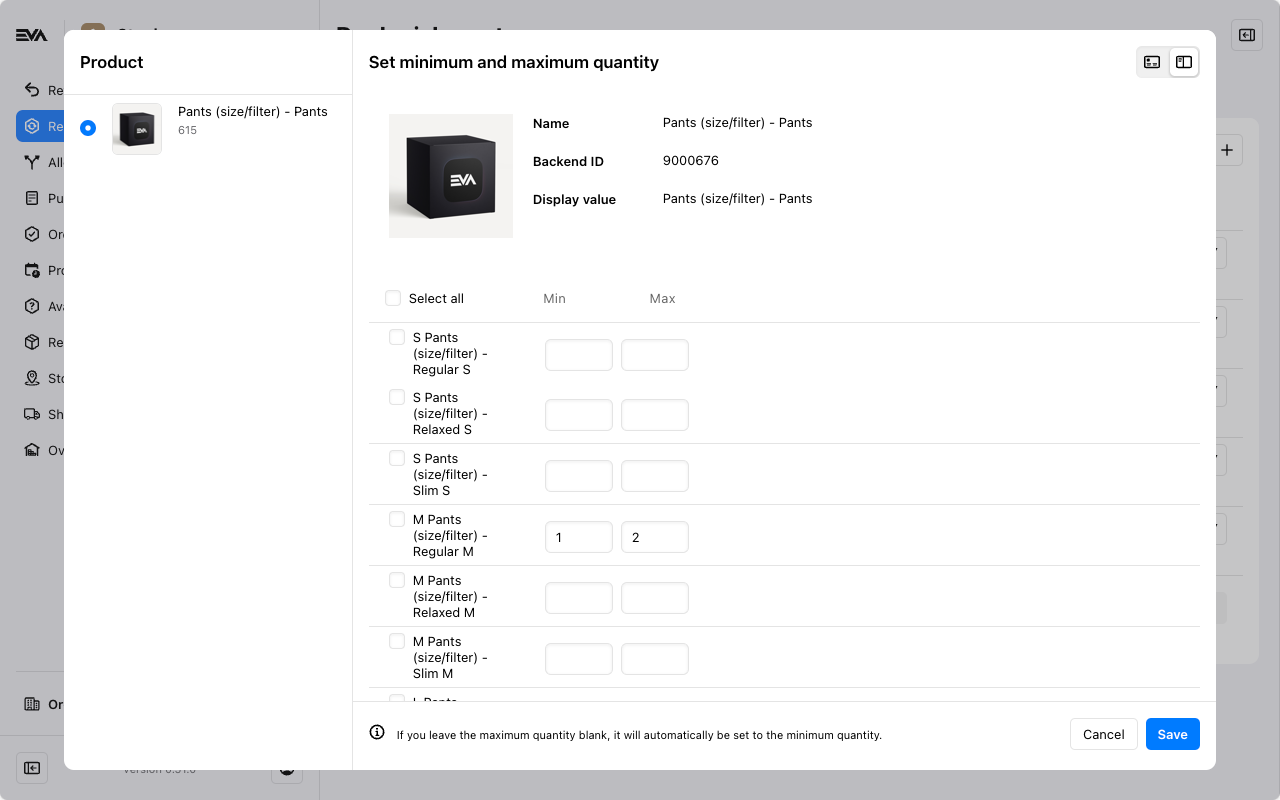
The modal above allows you to choose a product variation, like color or fit, from the left sidebar. You can then set minimum and maximum values for each size. By selecting multiple variations or using the Select all option, you can apply these values to all selected variations at once from the bottom panel.
The filter property used in the Set min and max modal is determined by the same settings which determine your filter in your product display panel. For configuring these settings, please see Adding filters to your PDP.
Downloading your replenishment overview
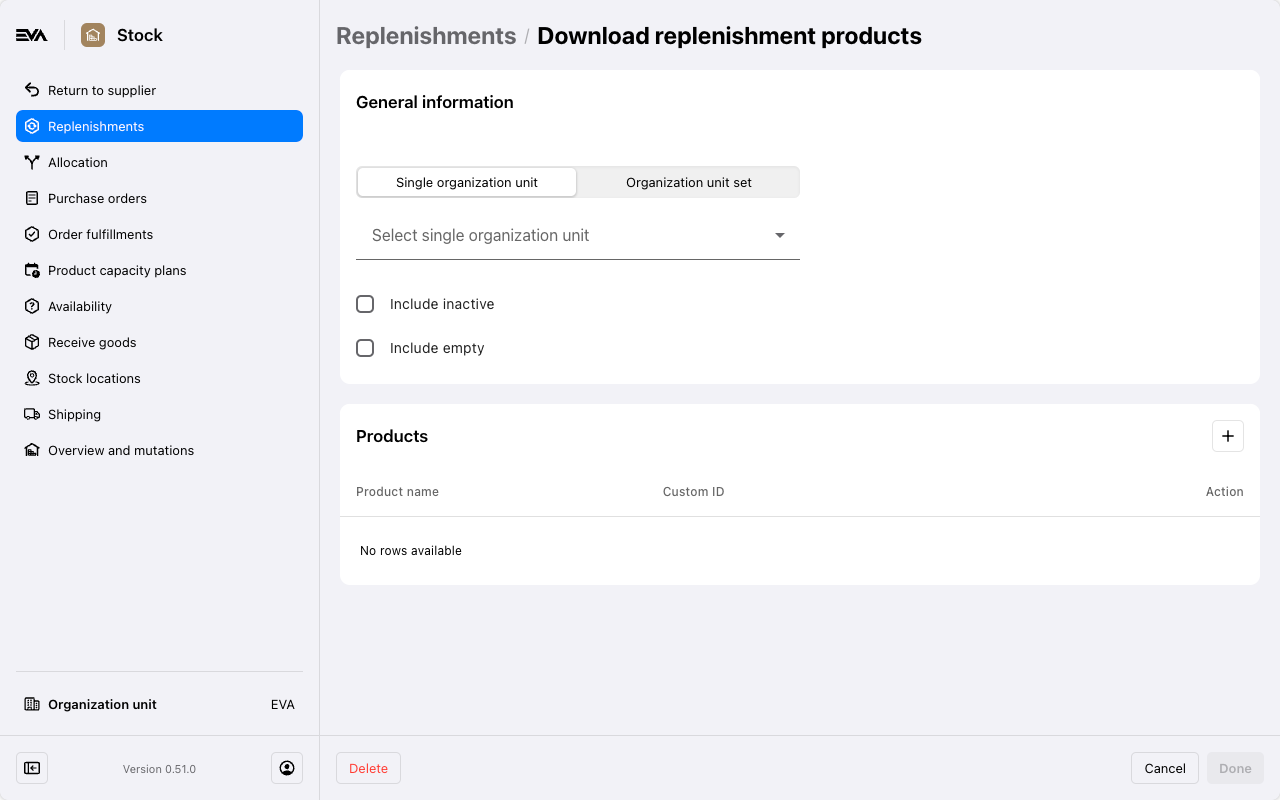
You can download an overview of replenishment for specific products on specific OUs by clicking the 'download' button in the chapter overview.
The screen that follows lets you select an OU (set) and the products you want to include in the download. You can optionally include the following:
- Include inactive: EVA will include inactive entries in the download, including those with a start date for an EAN in the future and an end date for an EAN in the past.
- Include empty: EVA will display empty rows for non-configured product combinations, making it easier to fill in.
This will trigger an async process where your file is prepared for you in the background. Once it's done you'll receive an email on the email address attached to your user which contains a download link.
The resulting Excel file shows all relevant information about the products you mentioned. You can even make the file display relevant product properties. You can specify which properties are relevant by adding them in the Replenishment:ProductProperties setting - these properties are ignored during an upload.
Properties included in Excel
Include inactive
- OrganizationUnitID
- OrganizationUnitBackendID
- ProductID
- ProductBackendID
- StockLabelID
- MinimumQuantity
- MaximumQuantity
- StartDate
- EndDate
Include empty
- OrganizationUnitID
- OrganizationUnitBackendID
- ProductID
- ProductBackendID
- StockLabelID
The mail which informs you of the file is based on the AsyncRequestCompleted stencil and can be customized. This same stencil is used for any other "async request completed" emails.
The download cannot include information of more than 100 OUs, this includes sub-OUs.