Menu
The menu screen can be found to the left of the screen, simply swipe left-to-right or hit the hamburger button in the top left corner. This page will show you what each chapter in the menu amounts to, in the same order as displayed in the menu. To access the menu, hit the hamburger button in the top-left corner or swipe across the screen from left to right.
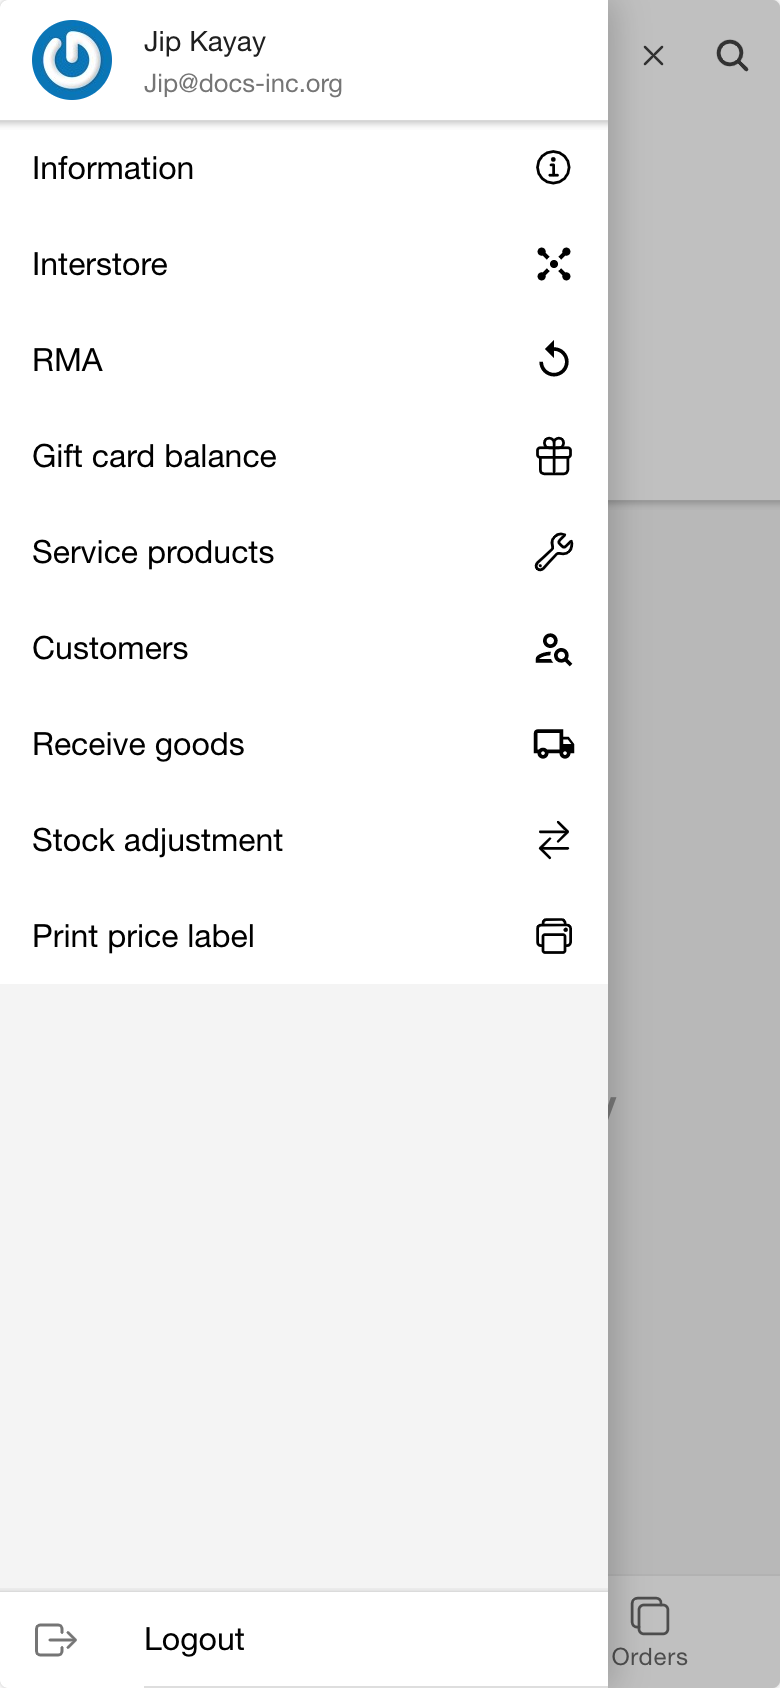
Information
The very first chapter in the menu is the Information tab, which containis one of the best features of the Companion: Dark mode. Click the 'moon' symbol to activate it.
Here you can log out or, if hours are tracked, clock out. You can also see which user is logged in, the current app version and whether you are connected to the test or production environment.
There are several actions you can take on this screen, indicated by the '>' symbol. You can see this symbol behind your EVA Endpoint URL for example, which allows you to override the endpoint of your specific instance of the Companion, or in the compliancy card of this chapter; the latter allows you to generate several compliancy related documents.
Interstore
The Interstore tab allows you to create a shipment of products between two stores within the same country. The interstore shipments are mostly used for larger shipments (e.g. pallets).
You can start off an interstore order by adding the necessary products to the basket. This can be done either by using the scanner, or by searching a product as you would for a normal basket. When the list of products is completed, you can continue by tapping 'Next'. On the final page you can also add an order remark, but this is not mandatory. You will however have to add a destination (store) and, depending on the settings, provide a shipment ID.
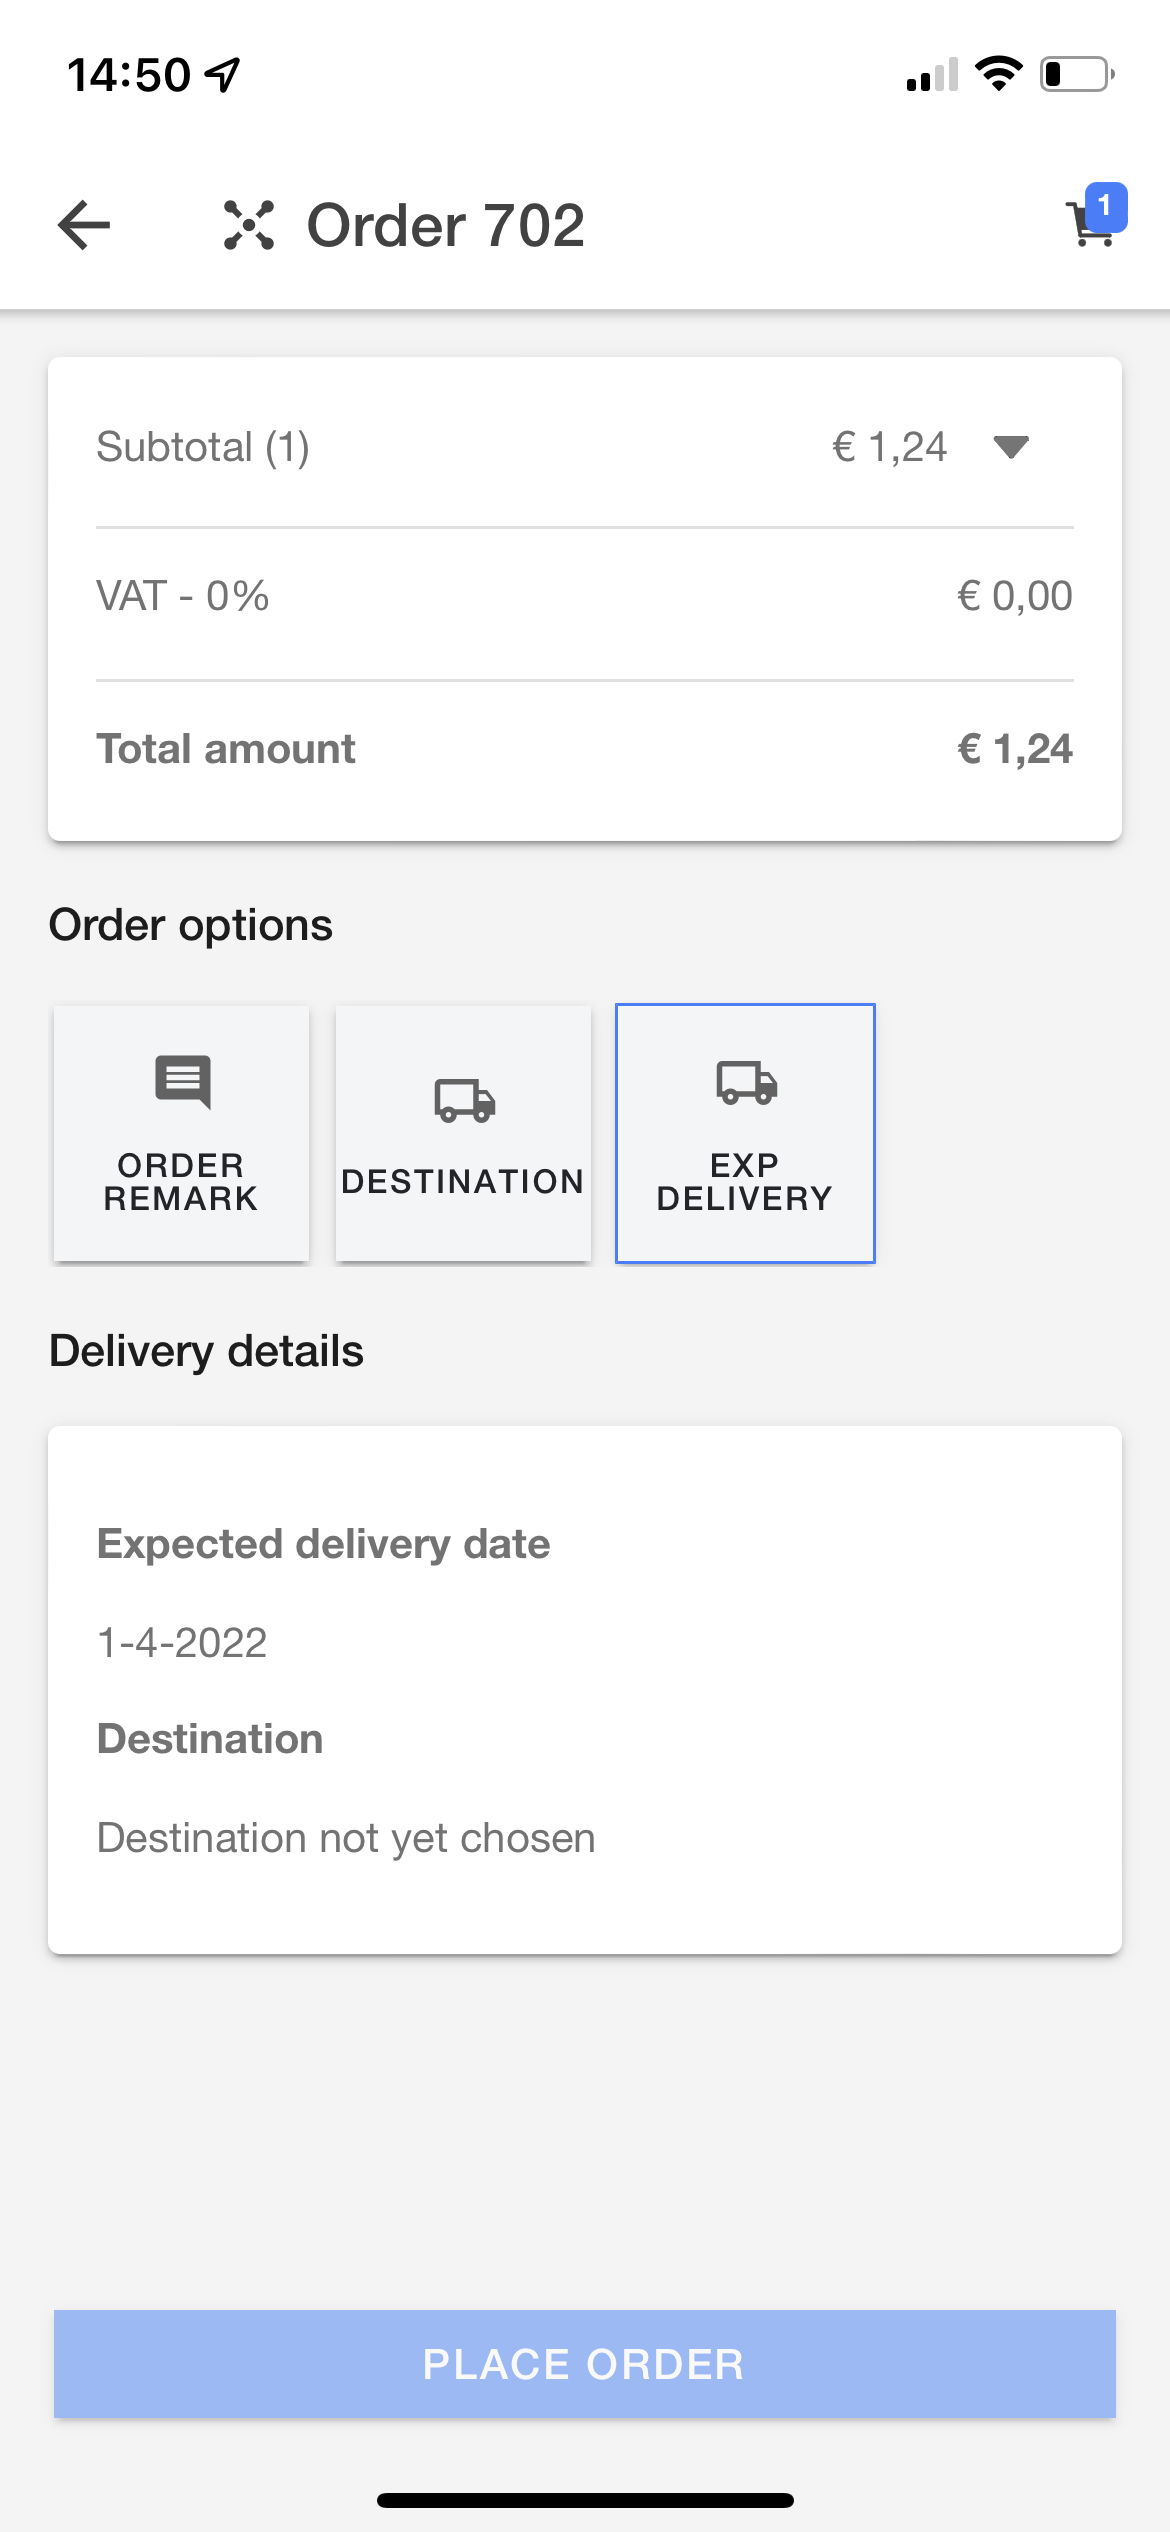
Once all mandatory fields are inserted, the action button 'Place order' will be activated. The interstore order will from now on be visible in the designated store's Receive goods tab.
RMA (Return to supplier)
Returning products to the warehouse can be done through this menu item in the Companion. After navigating to the page, you'll be greeted with a toaster message stating your order type has been updated to RMA. Other than that you'll see an empty page where you can use either the scanner or the search functionality to add items to be returned to the supplier. When you have added all necessary products, you can continue by tapping 'Next'.
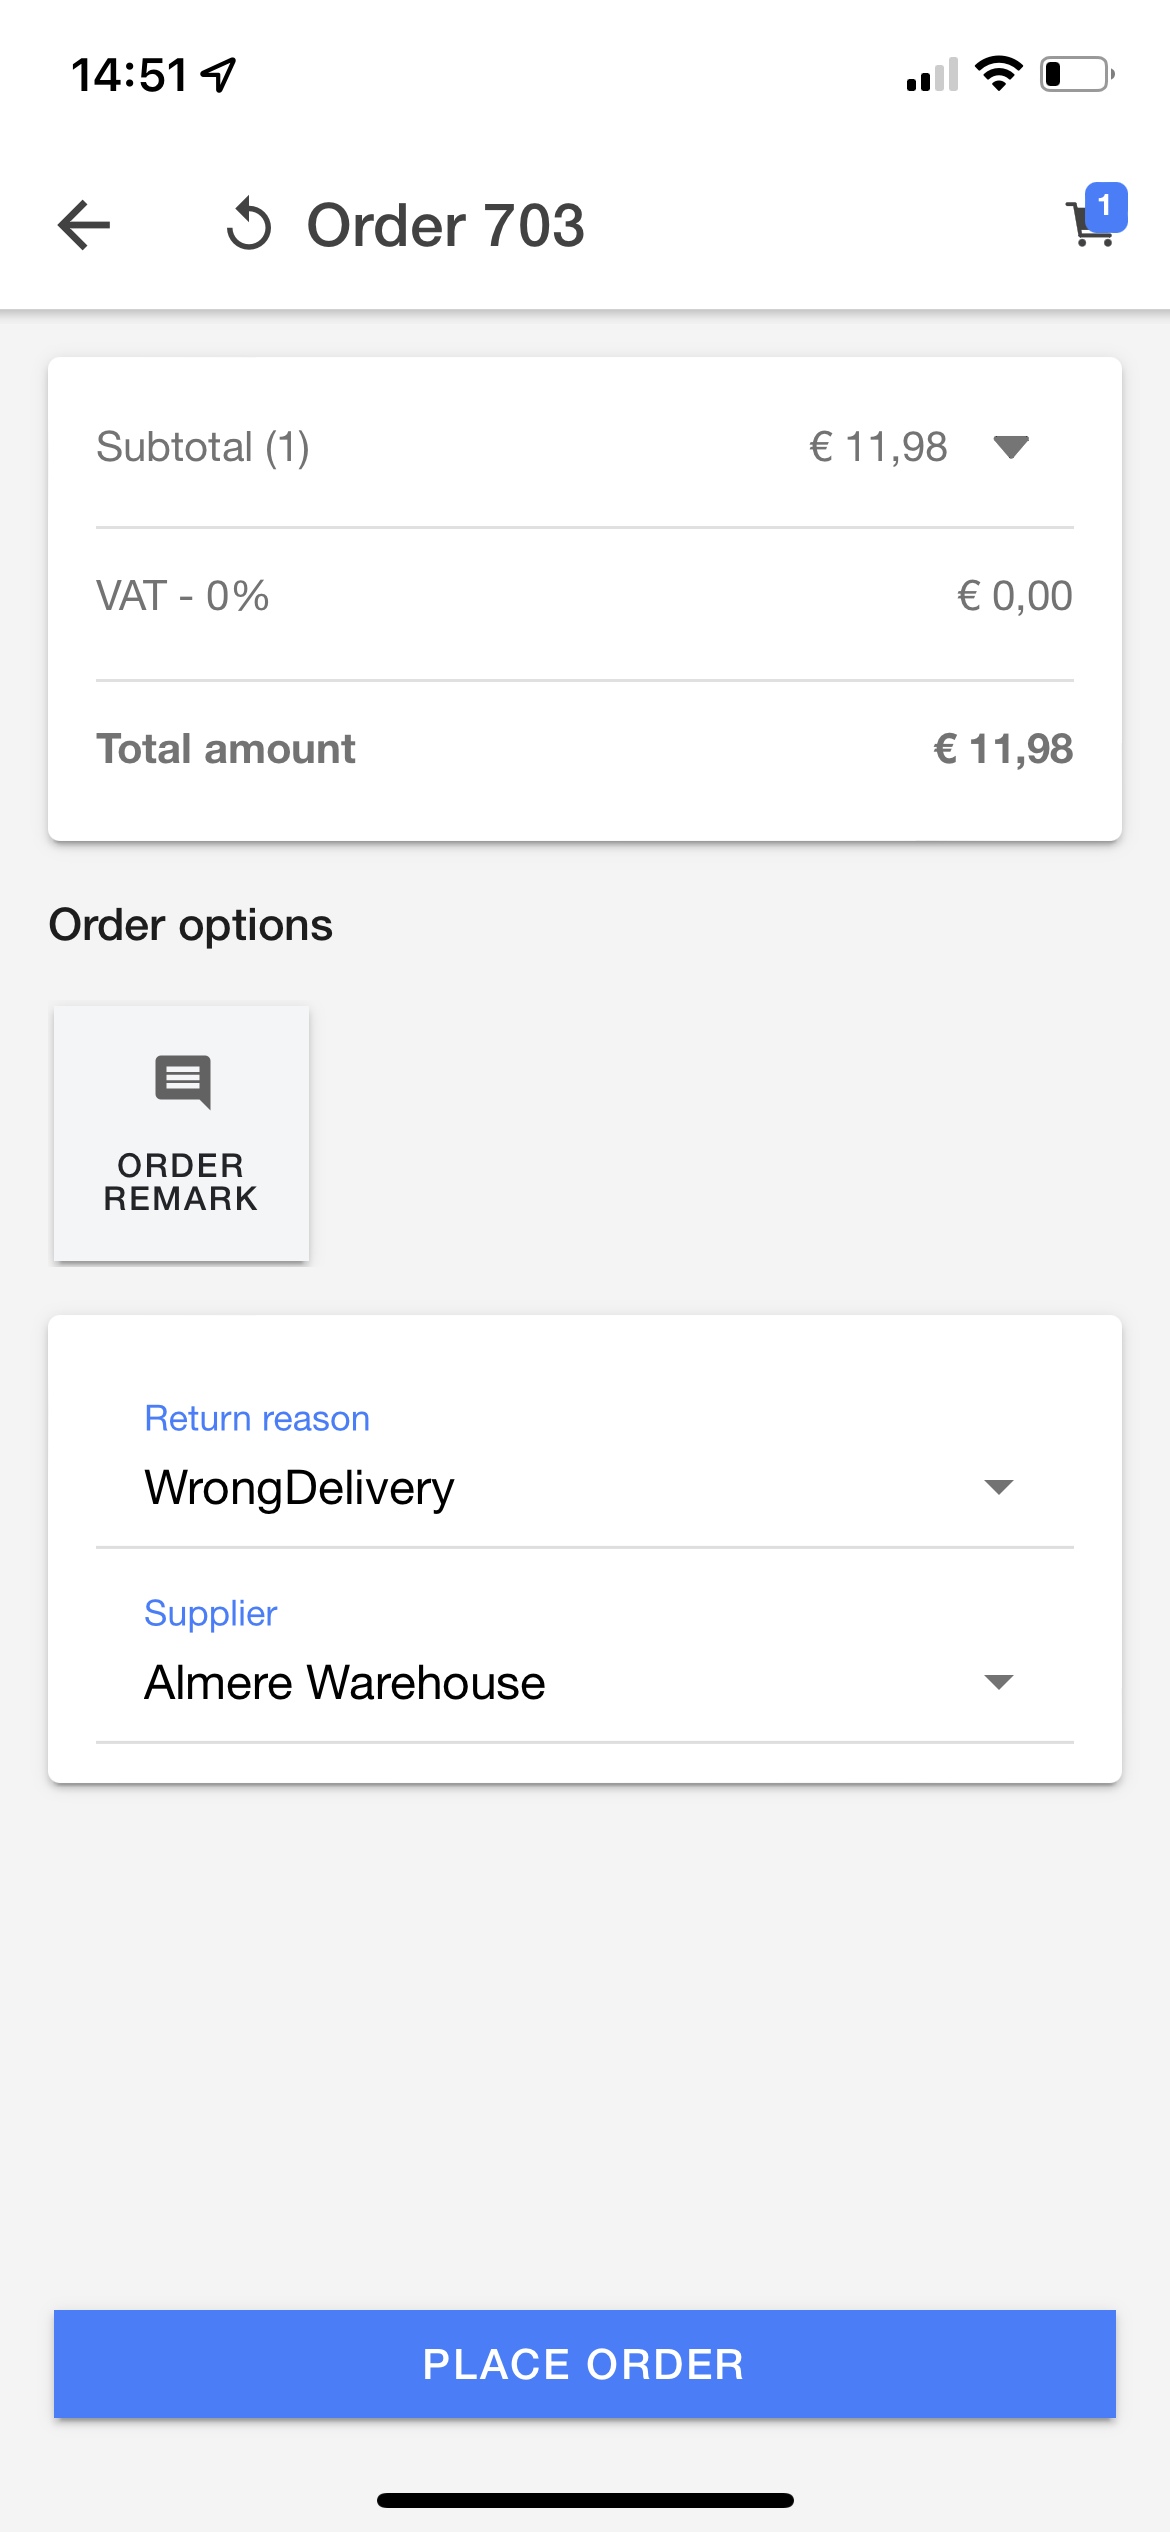
This next page shows you an overview of the products contained in the order. You are free to add an order remark, but the 'Return reason' and 'Supplier' fields are mandatory. It's worth mentioning that customized return reasons can be added via Admin Suite, in the [Orders module(#manuals/suite/orders.mdx#return-reasons). Once those fields are specified, 'Place order' will be activated. Note that the returns reasons already available in the field are currently not possible to change.
After the RMA order is placed, the order will most likely be created right away. A Return to supply user task will then be waiting for you and your colleagues in the Tasks section of your Companion App.
- Your organization is using an older RMA flow. In this older flow your RMA order is not created until it has been approved by the Finance Department of your organization.
- OrderValidation has been enabled in your (new) RMA order flow. If this is the case, a user with the appropriate role will have to find the RMA order and confirm the order before it can actually be RMA'd. You can find more information about these settings and roles at [RMA-RTS Settings and Roles(/configuration/rma-rts-settings-and-roles.mdx).
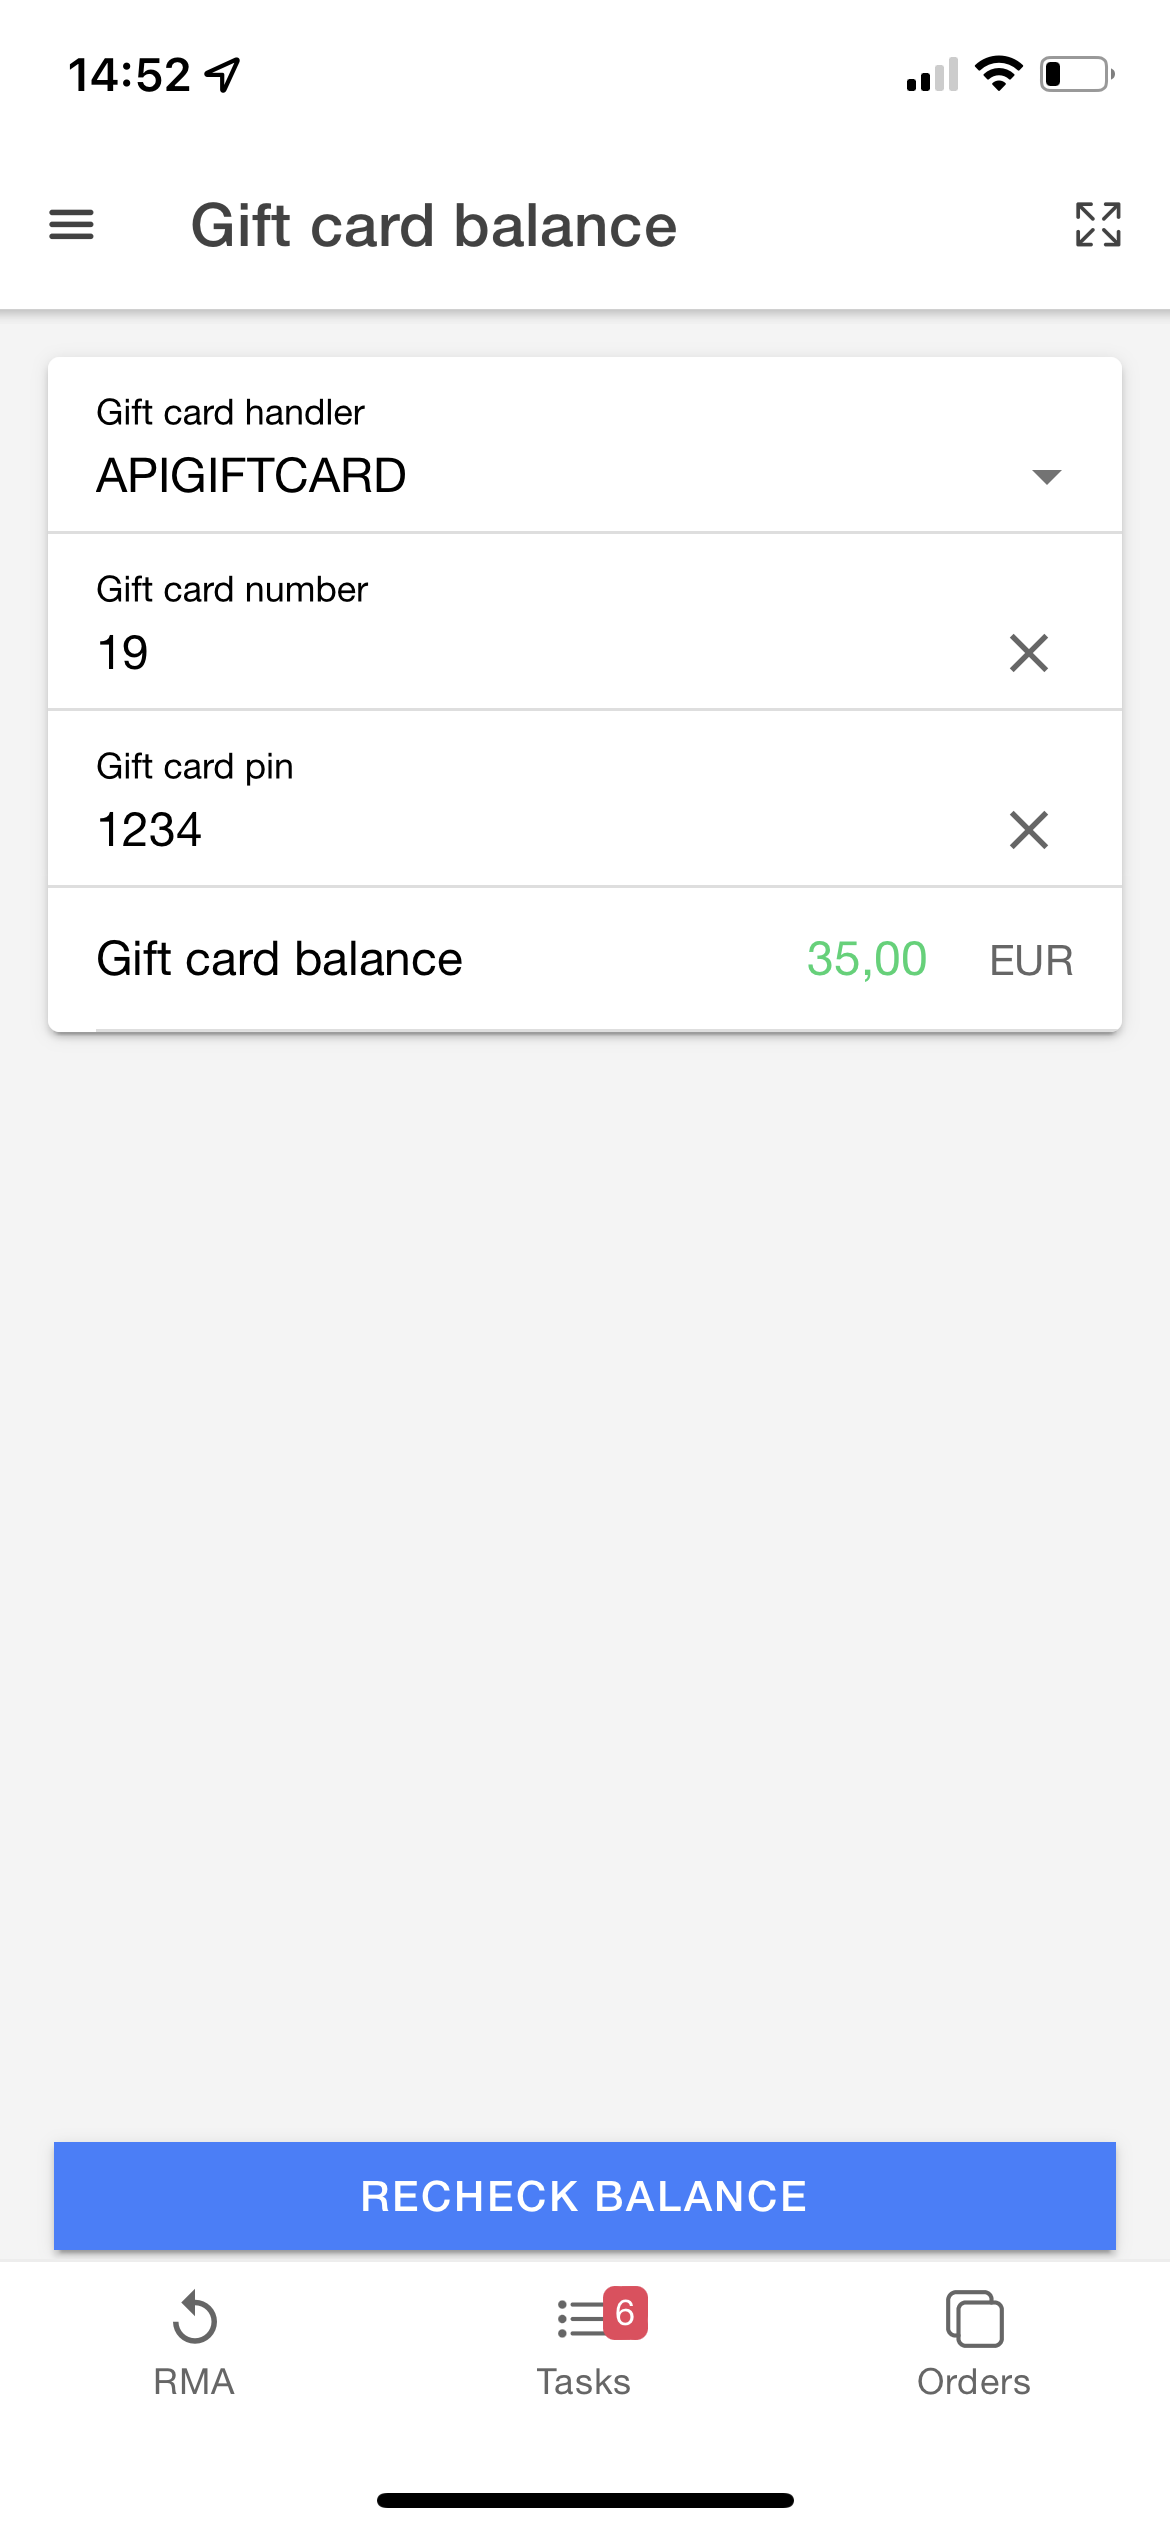
Giftcard balance
This can be used to check the current balance of a giftcard. You can either scan the card number or enter it manually, though we highly recommend scanning the number if available, to avoid errors.
When manually typing, make sure to select the applicable giftcard handler first.
Most giftcard implementations don't require a PIN for checking the balance. If empty/no balance is returned, after having manually typed the card number, make sure you did not make a typo.
Service products
Here you can add service products to an order (e.g. shipping costs).
Customers
Here you can search, create and edit customer data. Take into account that creating a new customer will not automatically attach the newly created customer to the current session. It's also possible to search for customers by scanning any QR code containing their SSN, e.g. a driver's license. In case of customer creation, fields can be autofilled by scanning. This does however require use of a third-party service.
When adding the customer's email address, EVA will check right away whether the address already exists or not. If it does, the 'Create' button will automatically switch to 'Edit', allowing you to the edit the current customer's details.
The Address book shows you a list of all addresses used by this customer. You can alter any address, delete it or change the default delivery ('Home' symbol)/billing ('Cash' symbol) address. If you delete an address which is currently used as a default one, then the default address will automatically change to the address that will remain. Note that if more than 1 address would remain, the default address cannot be deleted right away, since it would be unclear what address would have to become the new default. Either switch the default yourself, or delete addresses until only one remains (excluding the current default address).
Receive goods
The Companion App lets you receive incoming shipments and add them to the sellable stock. You can do so from the submenu Receive goods. Here you will see a list with incoming shipments. Shipments which are past their expected delivery date are marked with a ! symbol.
To receive a shipment, you can scan the barcode on the shipment or packing slip. That barcode originates in the shipment that was created in the EVA Admin. If there is no barcode on the physical shipment, you can also find this barcode in the EVA Admin → Stock → Receive goods → View. Once you scan the barcode, you can accept the shipment in the Companion App.
There are two ways by which you can receive shipments: detailed inspection and automatic. Which one(s) you’ll see in your task is dependent on the receive method of the shipment, which itself is dependent on the setting PurchaseOrder:ReceiveMethod.
This setting accepts Manual (0), which translates to the (time-consuming) inspection; Automatic (1) which is the automatic confirmation of all products in the shipment; UserDefined (2) which lets the user pick one of both for the shipment. By default the setting picks Automatic (1).
If the detailed inspection shows a deviation in the quantity of scanned items in comparison to the expected quantity of items, you will have to manually toggle the checkbox to confirm this deviation before you can receive the shipment. When the scans do show the expected quantity of items in the shipment, users can simply confirm the shipment.
When you confirm a shipment while there are still other shipments to be received, a notification will show.
Stock adjustment
We facilitate quick access to stock adjustments by making it available from the tab in the hamburger menu. This makes it easy to scan a product barcode and adjust the current stock. Alternatively you can enter the stock adjustment page through the cart or by searching a product and navigating to the product's detail page.
To adjust the level of Sellable stock, follow these steps:
- Tap the hamburger icon and tap Stock Adjustment.
- Search for the product or scan its barcode.
- Tap on the stock level (in blue) to the left.
- Now tap the label for which you would like to adjust stock, to open its adjustment window.
- Skip to the Adjustment reason field and select the appropriate reason in the dropdown menu.
- Choose the second label "Correction".
- Specify the quantity. Take into account that the Quantity field is a relative stock mutation, not a target quantity. (E.g.: adding two items to sellable stock = value 2, while subtracting an item = value -1).
- Type a remark to proceed with the stock adjustment. (Only corrections require this.)
- Finish the correction by tapping Confirm.
- You can check your adjustment by selecting the item and ensuring the quantity on hand is now accurate.
You can also "move" products from one stock label to another. For instance, if a product is damaged, follow these steps to remove it from "Sellable" inventory and set it to "Damaged" inventory.
- Tap the hamburger icon and then tap Stock Adjustment.
- Search for the product or scan its barcode.
- Tap on the stock level (in blue) to the left.
- Now tap the label from which you would like to move stock.
- In the Stock adjustment window, tap the checkbox to enable the stock movement field.
- Select the stock label ''Damaged'' in this field. (No remark is required for this option.)
- Now tap Confirm.
- A confirmation of the stock move will be shown at the top of the screen.
- Afterwards, you can tap on the product again to check the levels for each Stock Location.
Remember: when moving stock, always select the stock label you want to move the stock from first, before selecting the stock label you want to move the item to.
Print price label
This menu allows for scanning of products, and then printing price labels for them based on the PriceLabel stencil template.
This is especially useful when receiving a shipment containing discounted products needing new labels. By using the print price label mode you can scan any item you find and create its corresponding labels right away, taking into account the number of labels required.
Click Quick mode to start printing price labels on the selected station without the need for additional steps. A four-second delay is built in to allow you to add more labels before printing starts.

More on Price label configurations can be found here.
Logout
If you want to switch to a different account, or want to prevent others from accessing an unattended device, you should log out.
Open cash drawer
To open the cash drawer, go to 'Menu' → 'Information', now shake the device. You will be prompted which station to open.