Scanning in the POS
POS offers several ways to scan barcodes. You can link a manual scanner such as an EVA App or a dedicated device, or use one or both of the device's own front and back camera for scanning.
We recommend always using a dedicated scanner, but you can also enable the POS' own cameras additionally. Whatever you choose, this page will show you how to configure it.
Pairing a manual scanner
There's two ways to start the configuration flow for pairing a device:
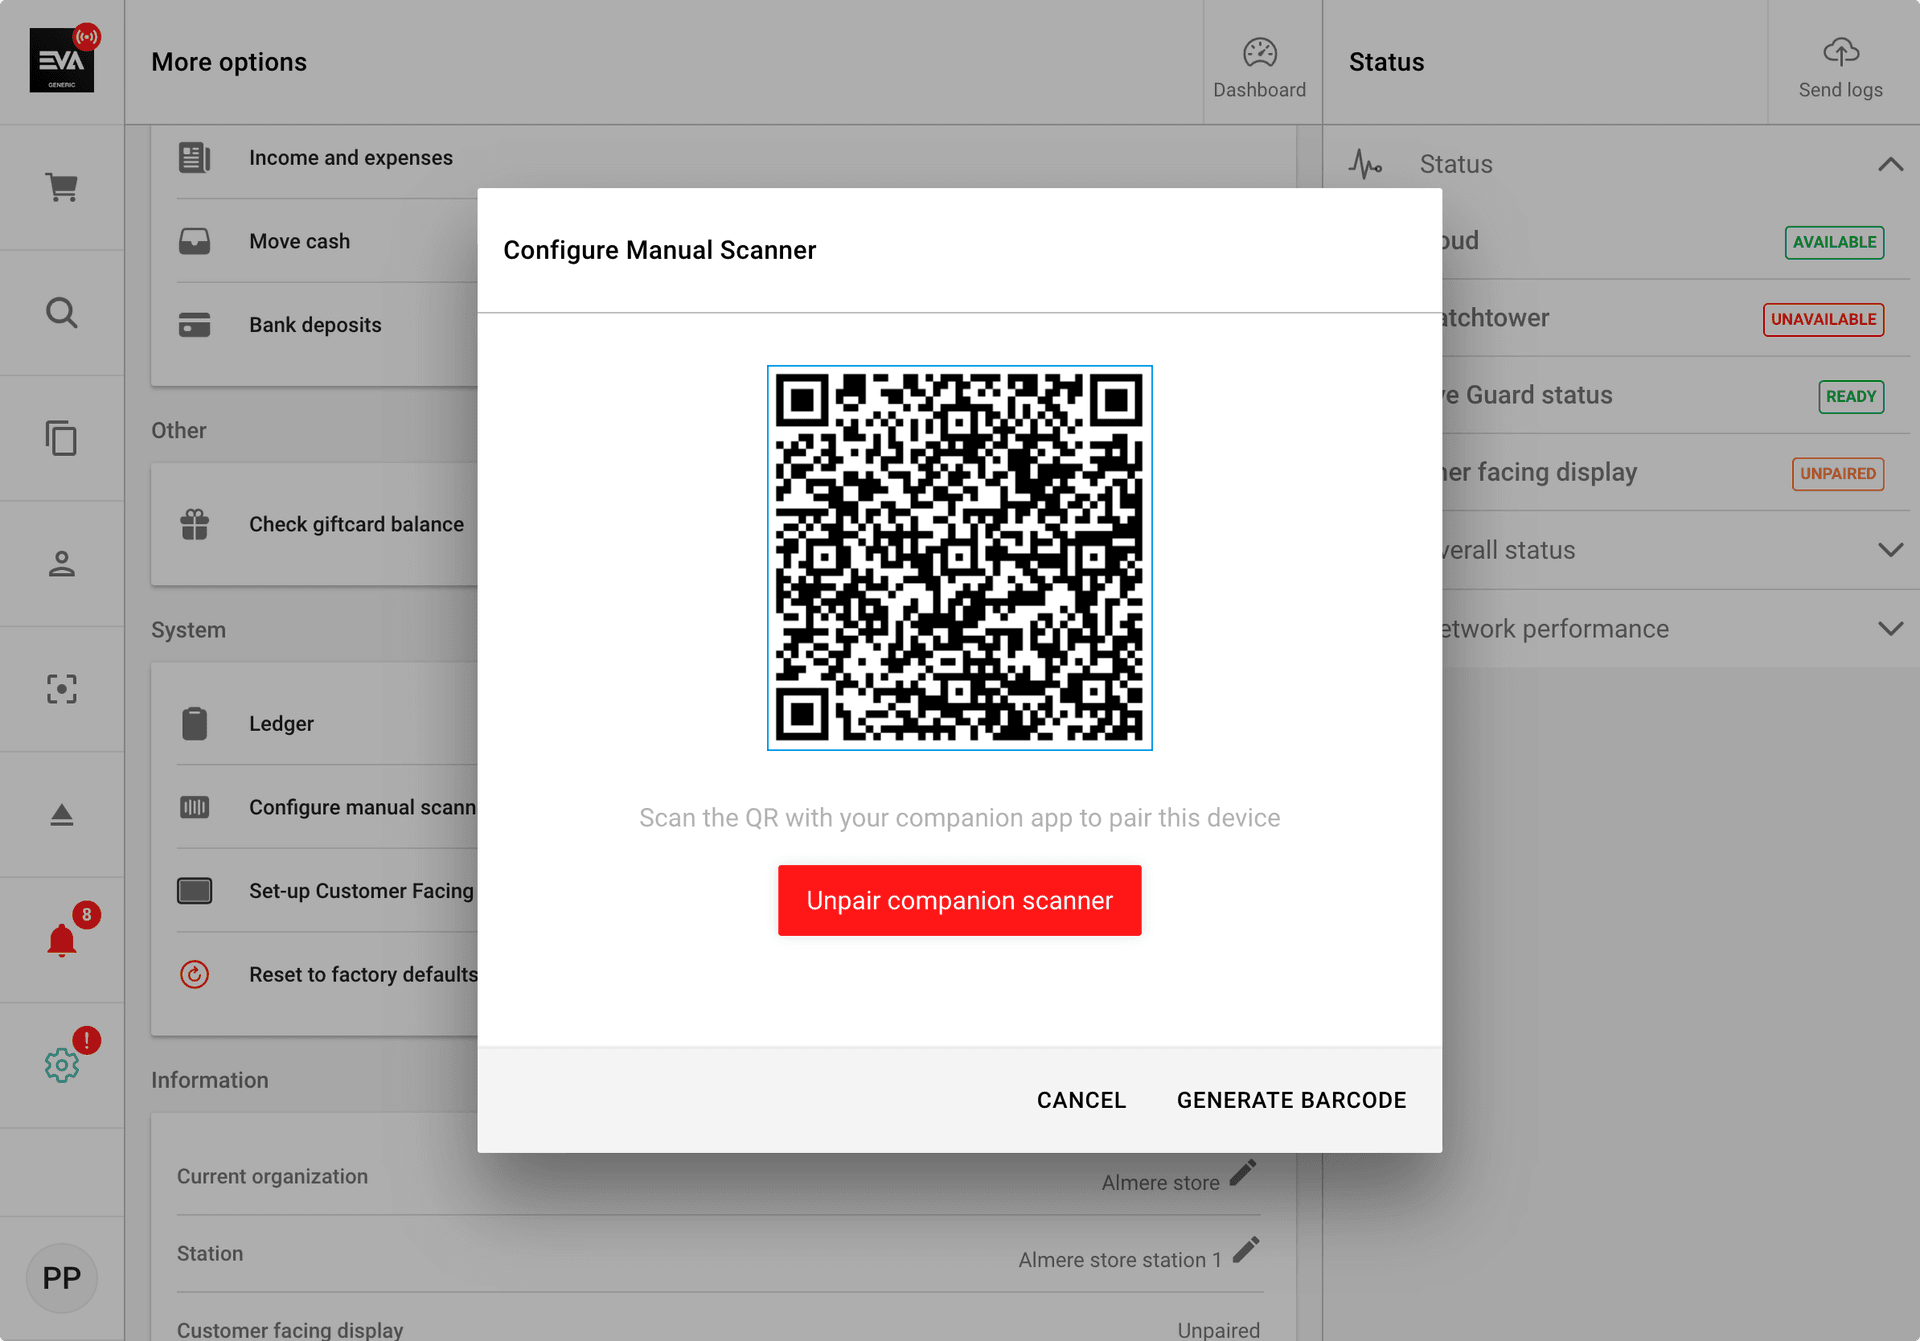
- By tapping Configure manual scanner in the More options section (listed under System)
- By tapping the 'EVA' icon in the top-left
Via Configure manual scanner (1)
This flow is the most extensive of the two, allowing you to pair either an EVA device or a dedicated scanner.
Pairing an EVA device
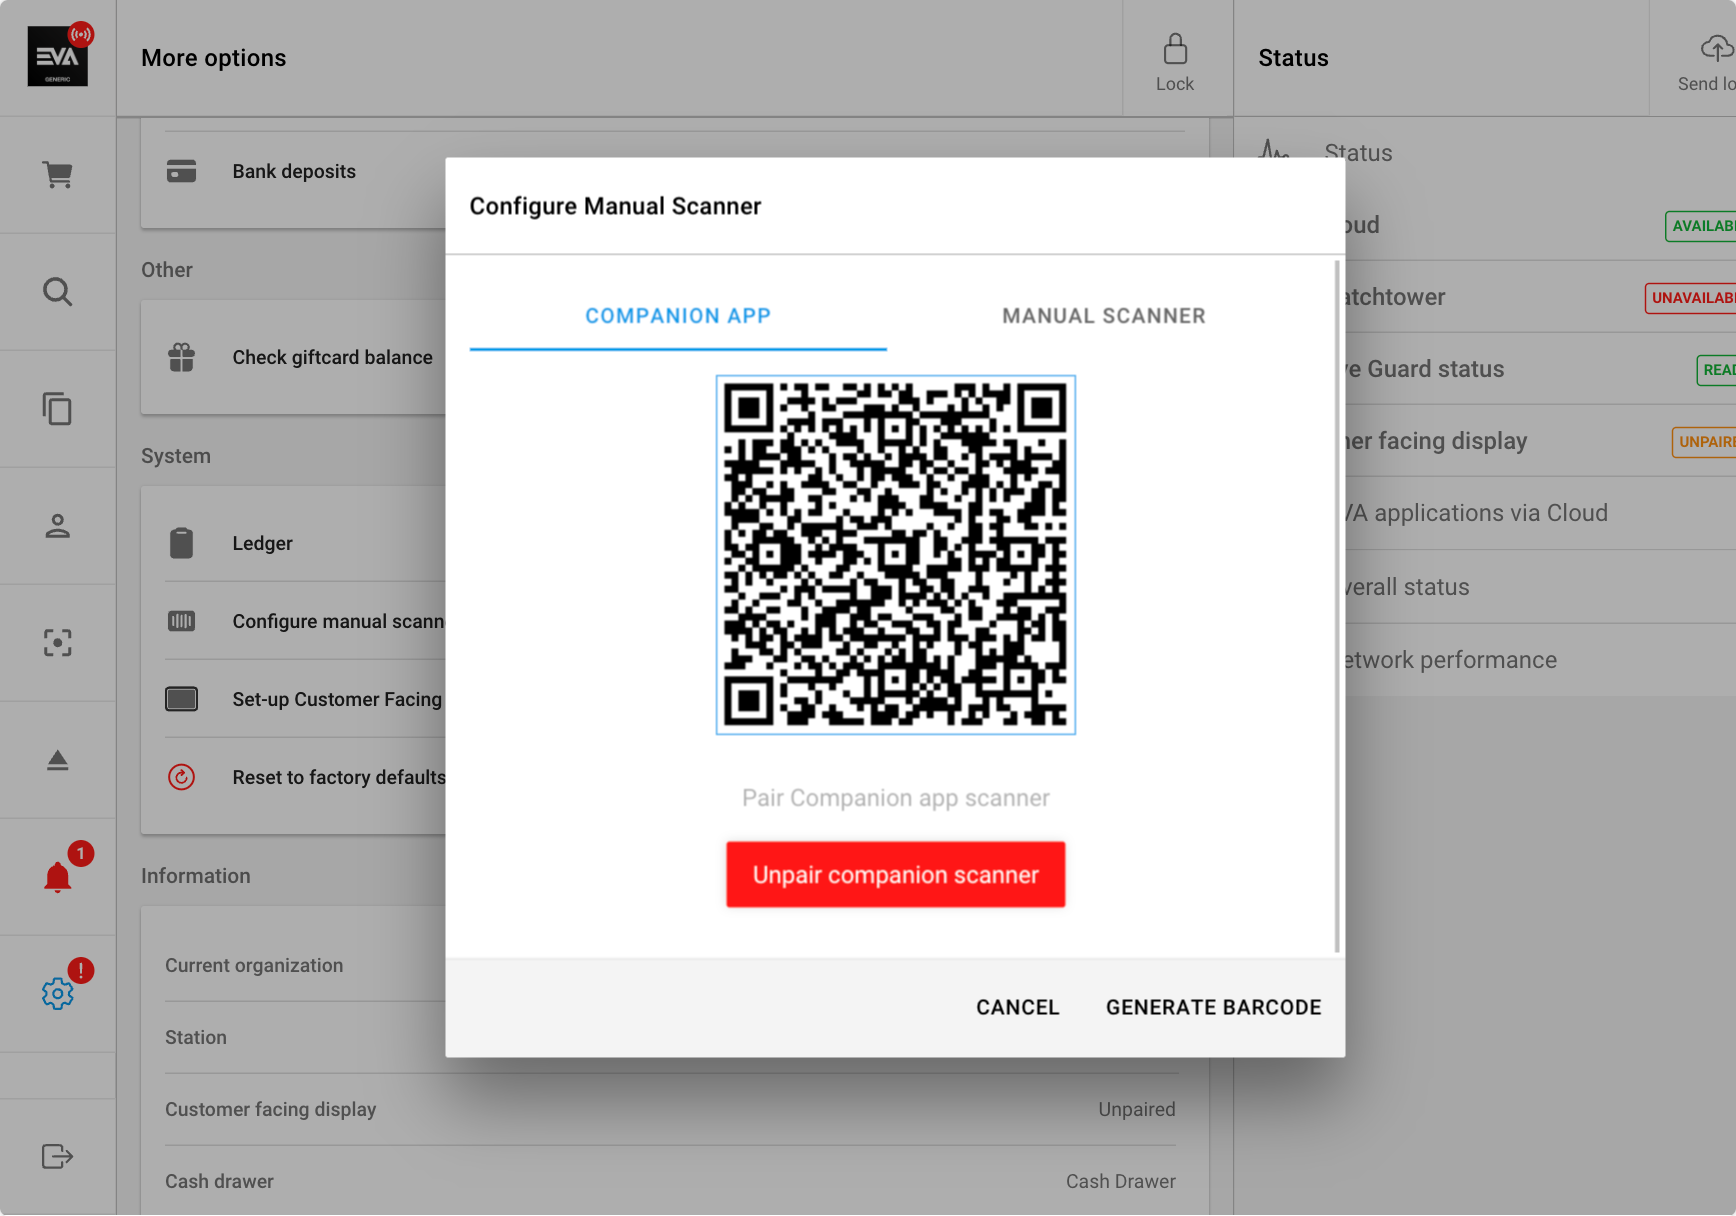
The first tab in this modal is Companion App. Despite its naming, this tab can be used to pair not just the Companion but the Checkout App as well.
Pairing is easy, simply scan the displayed QR code with either of the Apps and the device will accordingly enter Scanning mode.
You will see a checkmark in the top left at the EVA icon after pairing - regardless of what scanning device you're using - which will show you the pairing was successful and active.
You must be logged in to the same organization unit on the POS and the Companion App or Checkout App in order for the pairing to work.
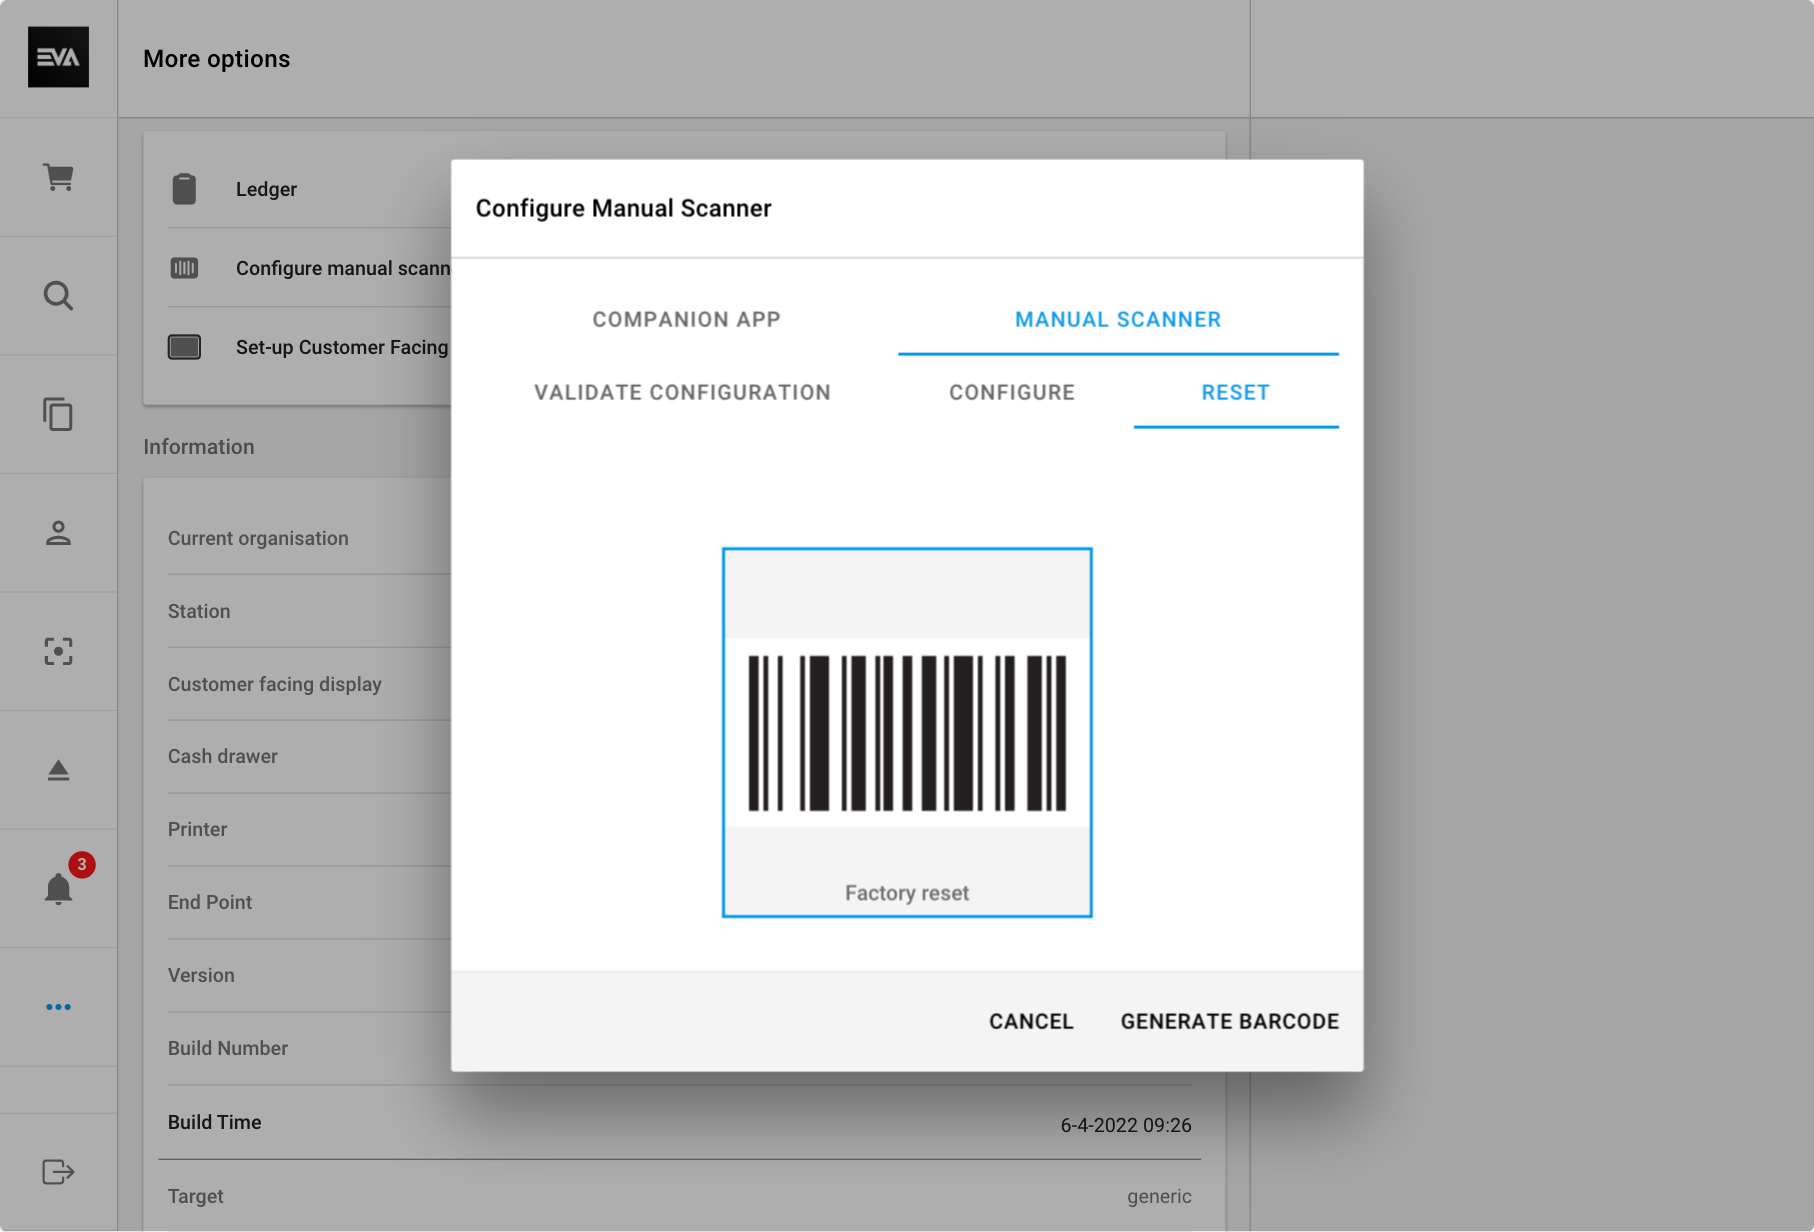
Pairing a dedicated scanner
Any scanning device other than the Companion or Checkout App falls under this category.
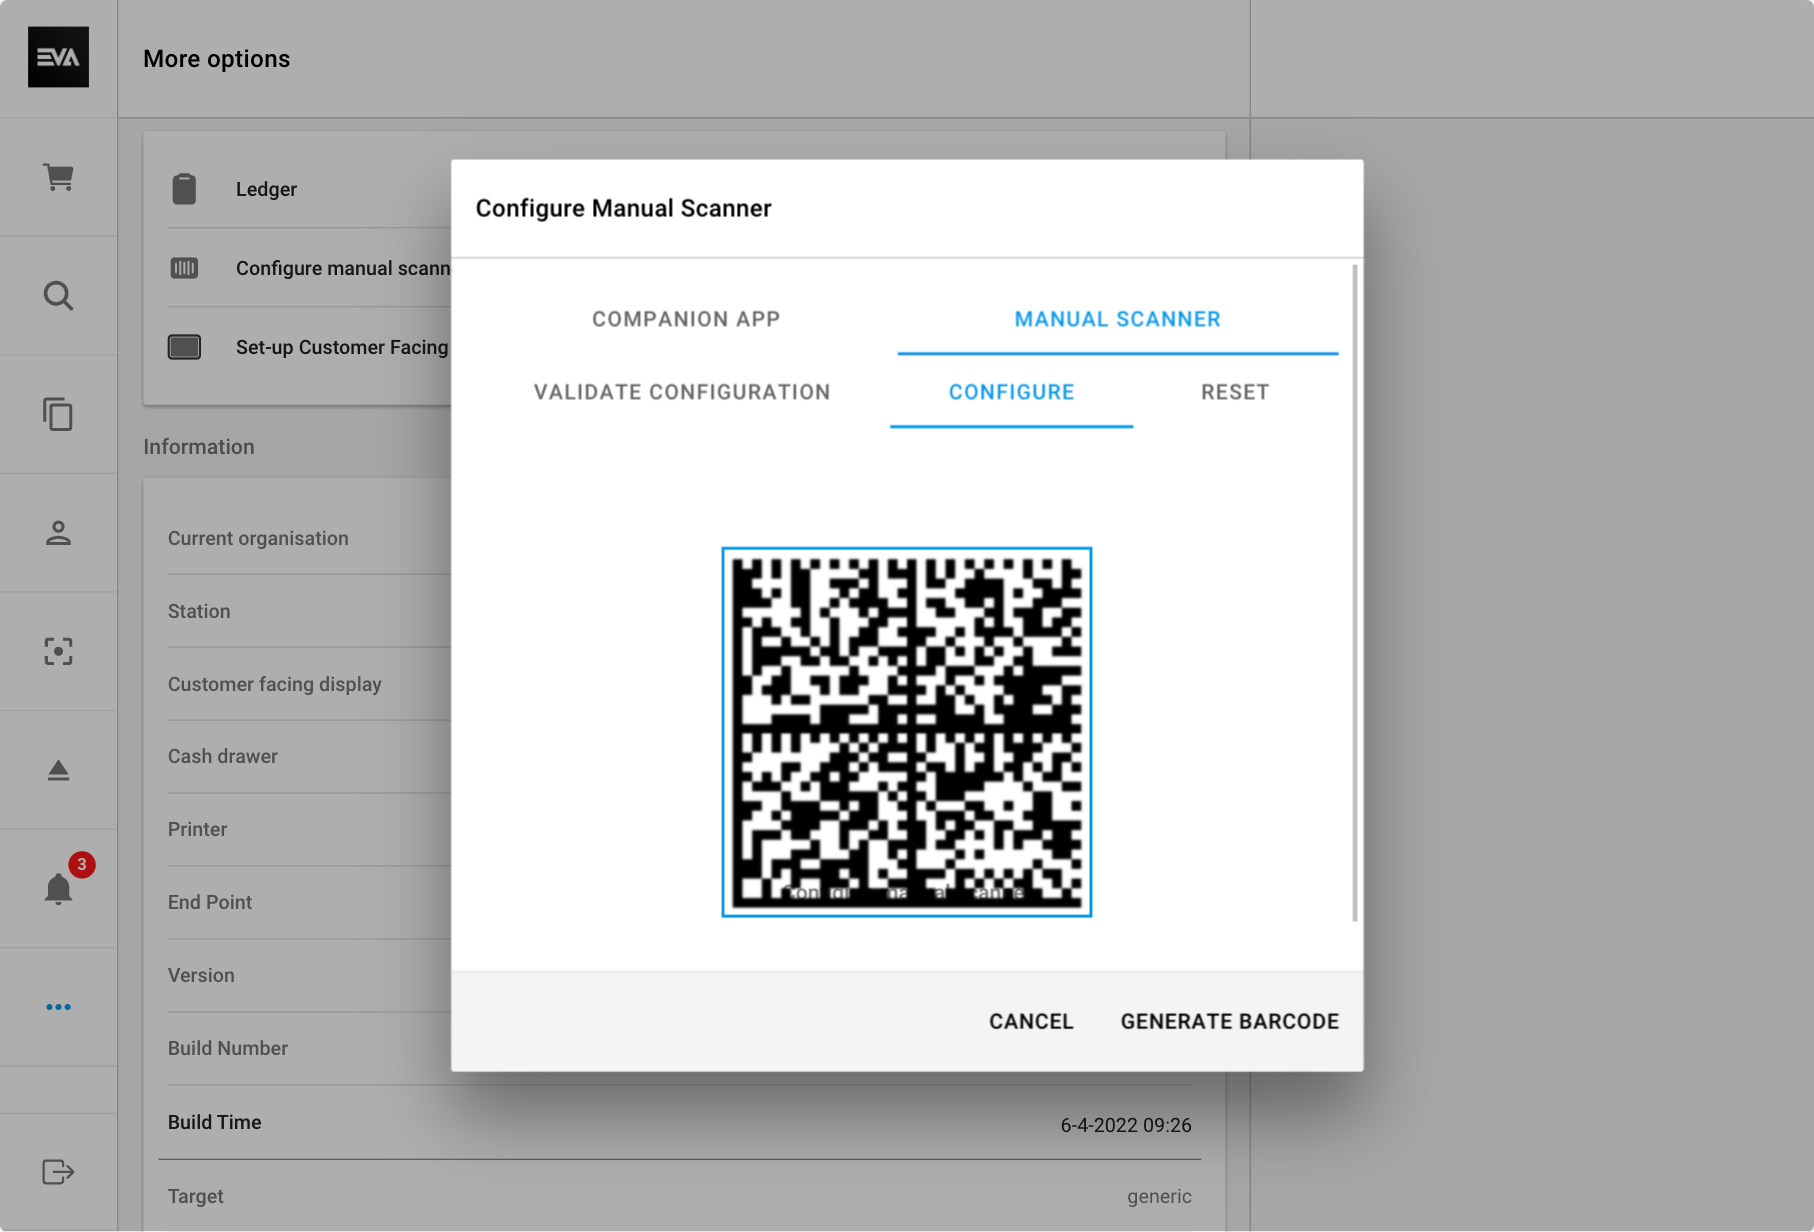
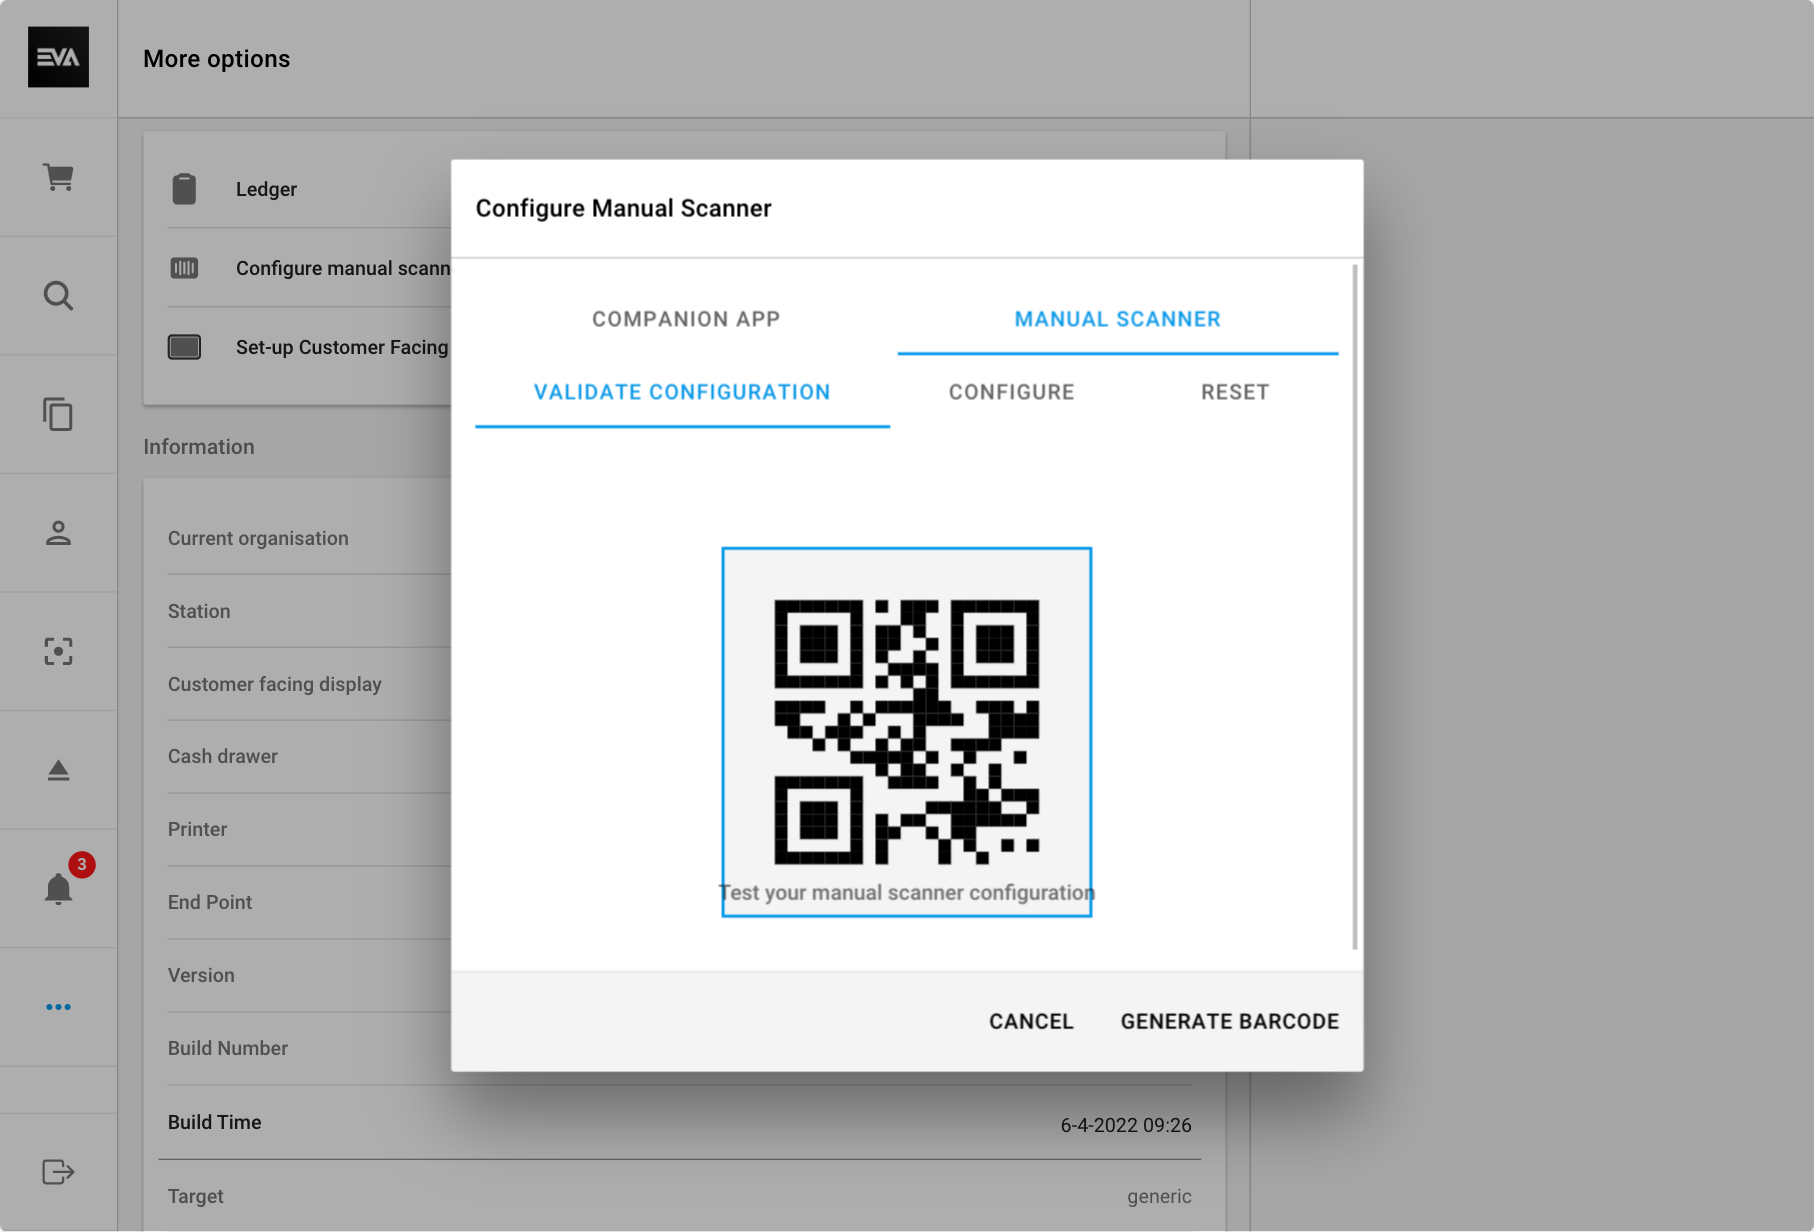
To configure a manual scanner, you need to follow these three simple steps:
Step 1 - Reset: Use your scanner to scan the displayed barcode. This will reset all existing configurations on the device (if any). That way, we make sure we are starting clean.
Step 2 - Configure: Use your scanner to scan the displayed QR code generated on your POS. This configures your scanner and couples it with the POS.
Step 3 - Validate configuration: This validates designs. Your scanner is now ready for use.
With manual scanner configuration, various keyboard languages and different scanner brands may require additional support from our side.
Via EVA icon (2)
By tapping the the 'EVA' icon in the top left, you will enter a modal similar to the one in the previous flow. The main difference is that this modal only offers quick access to pairing (and unpairing) an EVA device.
Using POS' own cameras for scanning
There's basically two ways you can make use of scanning with the POS device itself: either with the Apple scanner or with Scandit's, the latter of which requires a license. What happens exactly upon a successful scan, depends on what section of POS you're scanning in.

POS will wait two seconds between each scan to prevent accidental scans.
Essential settings
There are two relevant settings when it comes to enabling your scanner:
App:Scanner:Providerwhich can be set to either appleScanner or scanditApp:Scandit:LicenseKeylets you specify your Scandit license key
The way these two work together benefits from some explanation as well:
| Setting combination | Applied scanner |
|---|---|
App:Scanner:Provider is not set App:Scandit:LicenseKey is not set | Apple |
App:Scanner:Provider is set as scandit App:Scandit:LicenseKey is set with no value | Apple |
App:Scanner:Provider is set as scandit App:Scandit:LicenseKey is set with a valid key | Scandit |
App:Scanner:Provider is set as appleScanner App:Scandit:LicenseKey is set with a valid key | Apple |
App:Scanner:Provider is set as appleScanner App:Scandit:LicenseKey is not set | Apple |
App:Scanner:Provider is not set App:Scandit:LicenseKey is set with a valid key | Apple |
Is our advised Smart Data Capture scanner for your smart device.
Enabling the scanner with the above settings will not immediately make it ready for use. You have to instruct POS to display the button for barcode capture as well, which you can do with the following setting:
App:Pos:ShowBarcodeCapture- Defaults to not showing barcode capture buttons
- Explicitly set it to true to enable them
Preferred camera
POS supports the use of both the front and back-facing cameras for scanning. By using Scandit as your scanner, you can seamlessly switch between these two cameras.
You can use the following setting to specify which camera POS would use to capture a barcode (scan), choosing between front or back as its value: App:Pos:Scandit:BarcodeCaptureCameraPosition.
This setting applies to Scandit scanners only. The Apple scanner will always default to the back camera, as it is the only option available.
Feel free to drag and drop the camera and scanner windows on your POS to place it somewhere that's more convenient for you.
Action upon scanning
What happens when you (successfully) scan a product barcode, depends on where you're using the camera:
- Basket: by scanning a product from within the basket, the product will added to the basket
- Product search: when scanning a barcode while in the product search, the product will be displayed
If you'd scan a product in user search, you can expect angry beeping sounds because people are not products.
If an employee scans an unknown barcode in the basket, product search, or user search, POS will attempt a search and display the code in the search bar.
Aside from scanning products, you can also scan:
- customers in the customer search
- orders in the basket or orders search
- identification QR codes to login or unlock
- serial number barcodes to register serial numbers or configure gift cards