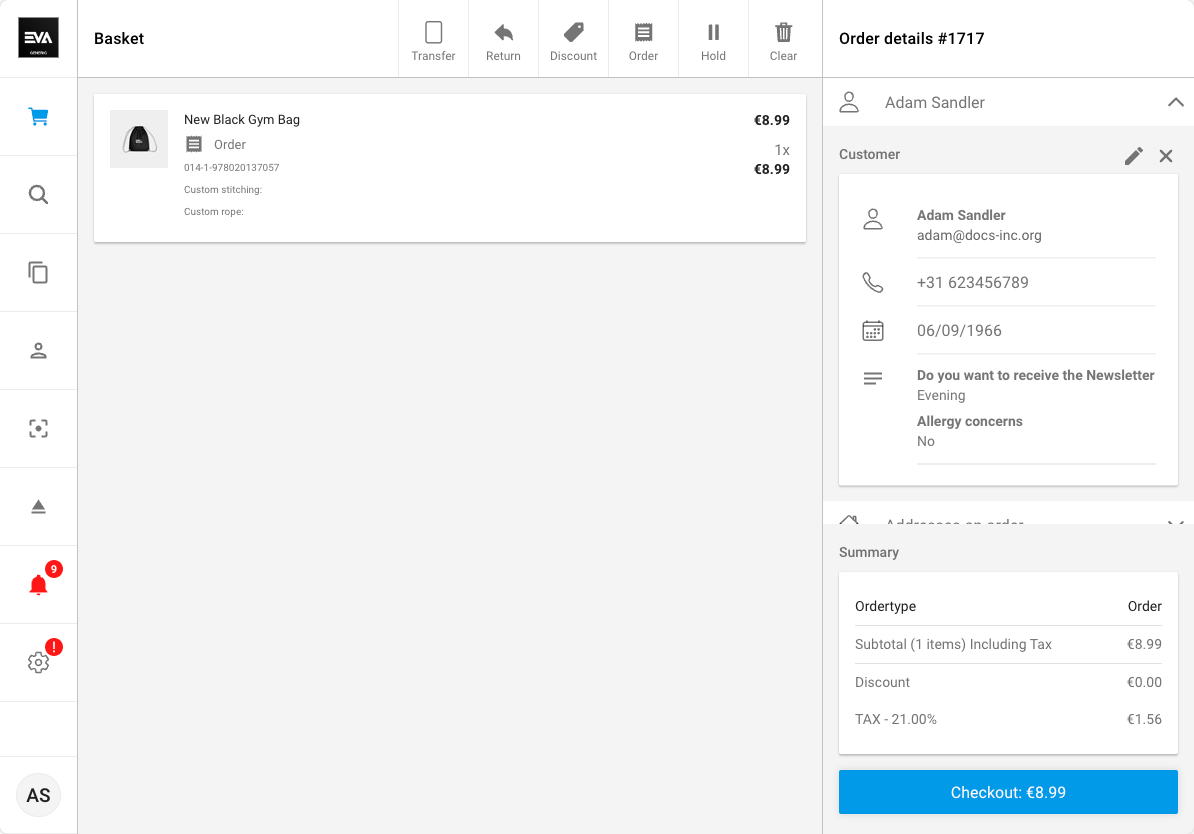
Checkout
The Checkout sidepane shows your available order options and payment methods.
Pressing the checkout button moves you to checkout. This preserves everything in your basket while replacing the right sidepane with the refined checkout sidepane.
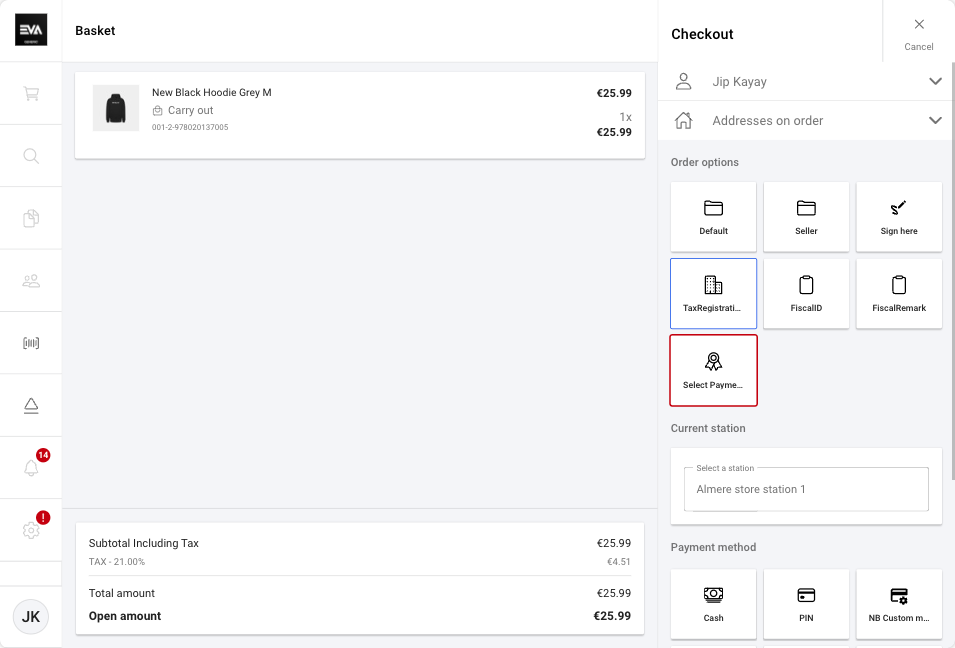
Order options
Checkout order options consist of additional tiles that can be added to your checkout screen. While preset tiles are available, you have the flexibility to create custom tiles to meet your specific needs.
You can read more about the creation of custom tiles in the Checkout options docs. Additionally, you can find more information about each handler in the Checkout option handlers docs.
The Select payment tile pertians to Loyalty program payment types. For details on setting up this payment type within a Loyalty Program, please refer to the Loyalty Program Payment types documentation.
When attempting to save custom fields with empty values, default values are displayed for dates, and "0" is displayed for numbers (both integers and decimals).
Payment methods
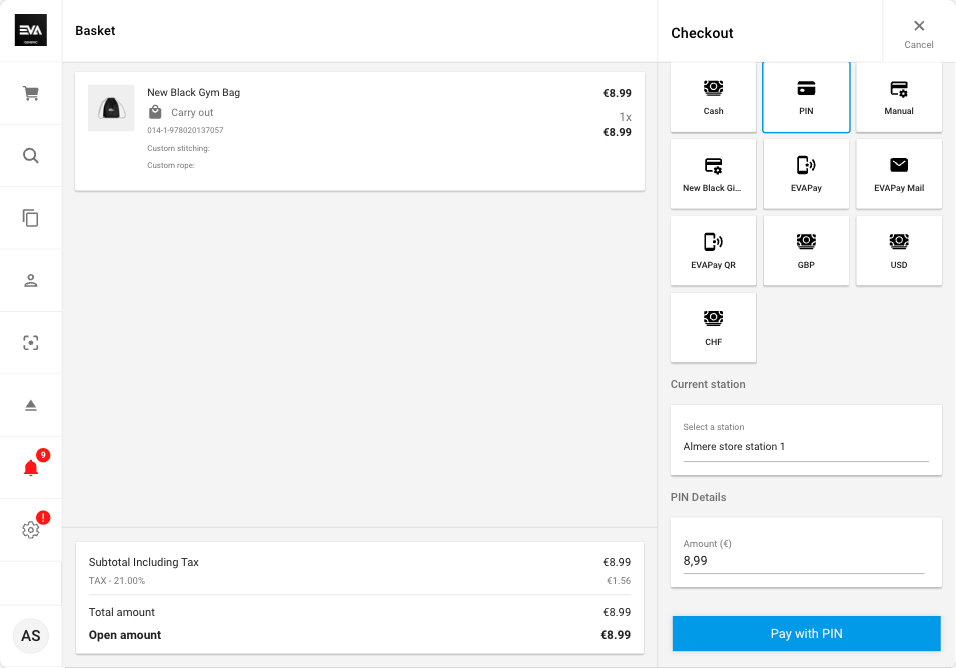
When checking out, we first need to select our preferred payment method. Once a payment method is selected, you can choose what station to use; the default station is preselected. Additionally, you can specify the payment amount. By default, this is set to the full open amount.
In local mode, an additional button on the right side pane, top corner called EVA Pay Code will be displayed. This button can be used to manually input a Time-based One-Time Password (TOTP) Token to confirm payments made (if scanner to scan the QR-code is also not available). A useful feature in instances of internet outages where the customer performs the payment from their own device and provides the code received.
When a payment, whether partial or full, is canceled or fails, POS will display the message "The payment failed" and emit an error sound. Likewise, if the process times out, POS will also show a toaster message and emit an error sound to alert the employee.
For card payments, a Cancel transaction button will appear after 5 seconds to provide the latest payment and refund status.
For cash payments, you can decide whether it's possible to refund a higher amount in cash than what is currently available in the cash drawer. When App:Checkout:ValidateCashDrawerAmount is set to true, you won't be able to refund an amount higher than what is inside the cash drawer.
Cash denominations
By default, the total order amount is pre-filled to match the open balance on the order. However, this can be adjusted to match any amount received from the customer or to make use of partial cash payments.
When entering an amount which is higher than the order amount, a modal will appear displaying recommended change to be returned to the customer. This will display potential denominations if App:Checkout:DisplayReturnDenominations is true
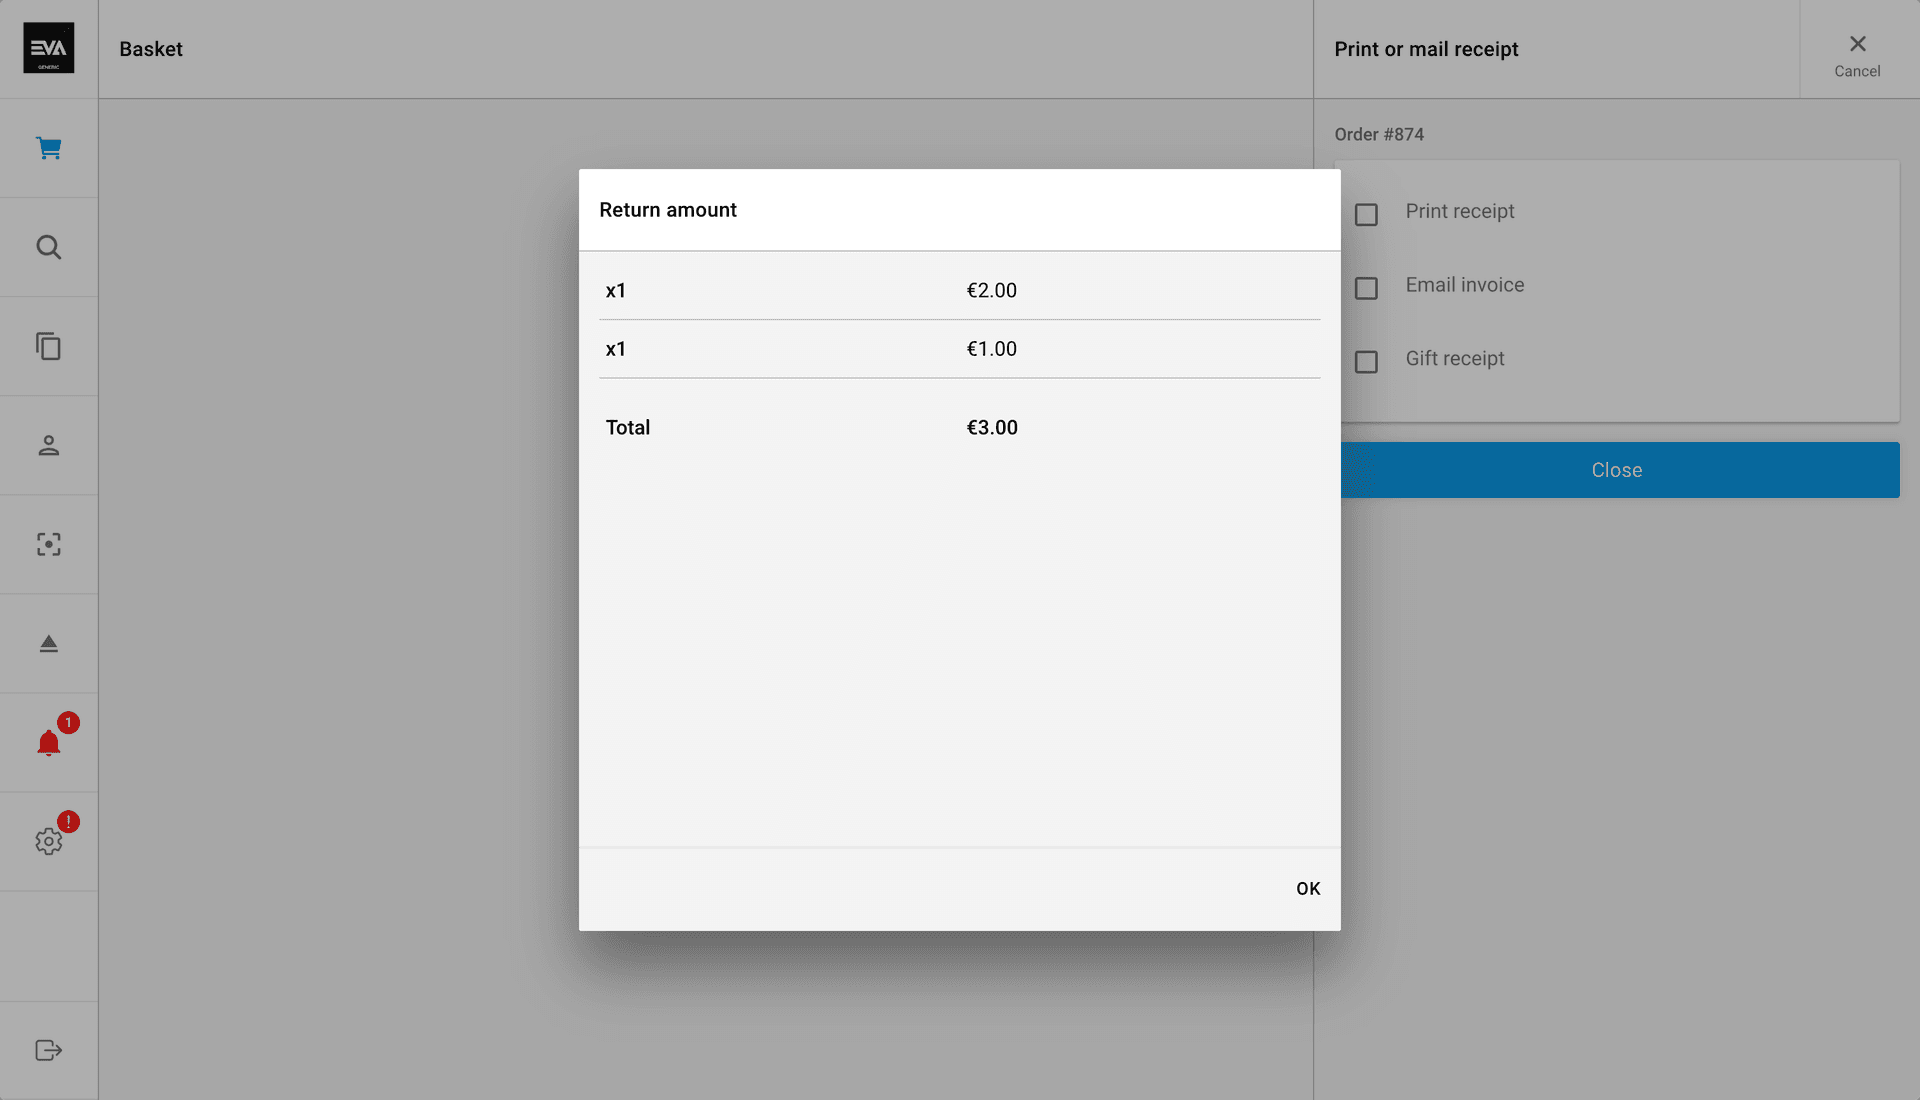
Print or mail receipt
After making a payment, we are prompted with a menu where we can choose what documents we want to print or mail to the customer, such as receipts and invoices.
If they have been printed or mailed previously, the button will reflect this with the words "Reprint" or "Resend" as options. In case of a printing failure, you will be notified via a toaster.
You can also print invoices via AirPrint sharing the PDF through the native iOS share modal.
While making your selections in the menu, the sidebar buttons are disabled. If there are no partial payments or refunds, both the Cash Drawer and Cancel buttons will remain enabled.
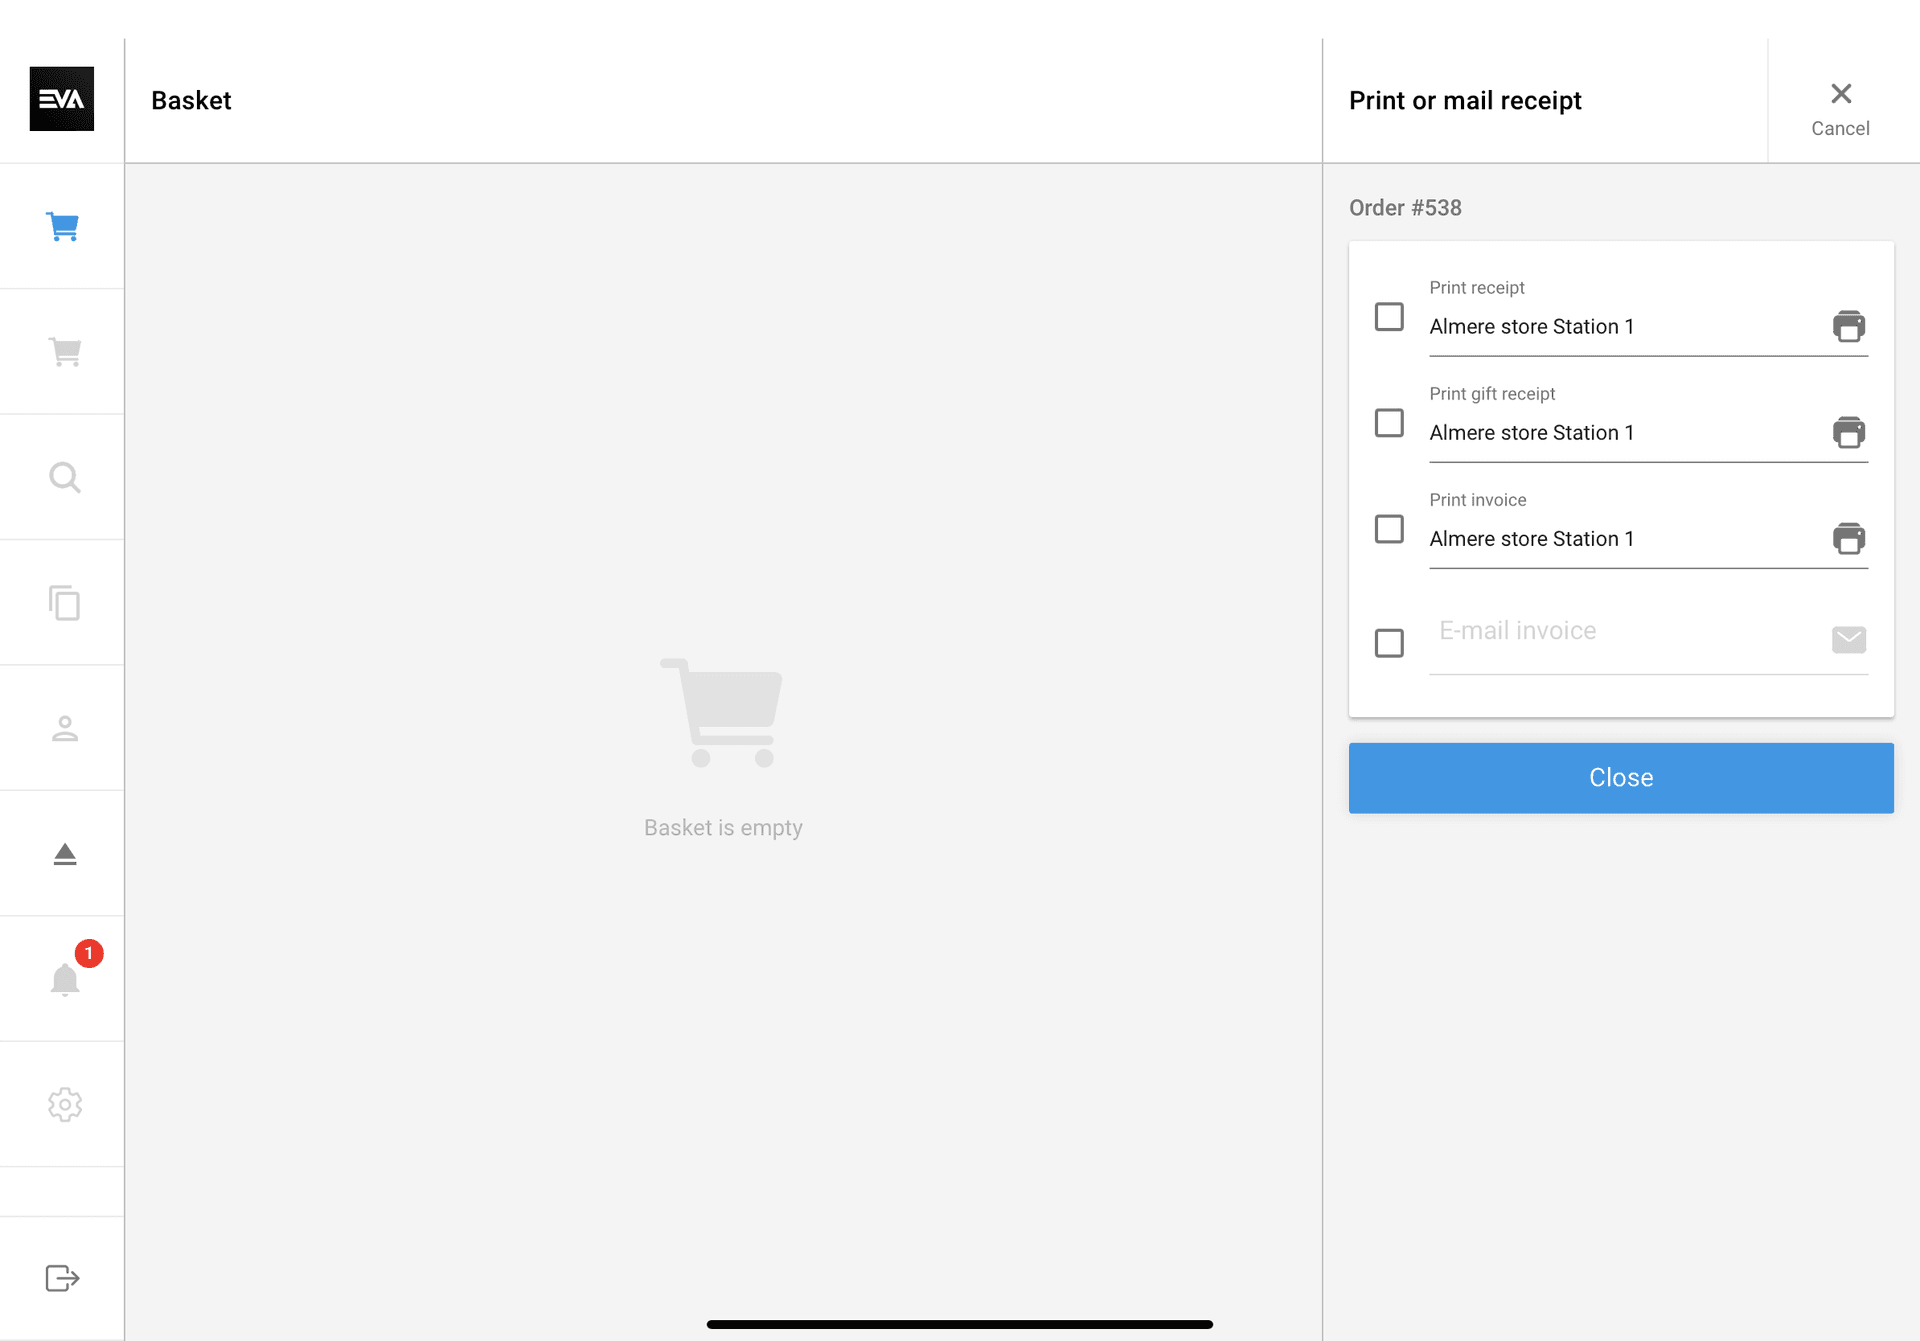
The Confirm button is be disabled when the email address is invalid and either the Email invoice or Email receipt box is checked. The Confirm button is enabled for unchecked checkboxes.
Print receipt output type
There are two settings here which you can use to influence the default/preferred output type if Print receipt is the chosen option:
Auditing:PreferReceiptPrinting: Setting its value to true (default value is false) would mean a print output of type receipt.Auditing:PreferPaperPrinting: Setting its value to true (default value is false) would mean a print output of type paper.