Loyalty Programs
Loyalty Programs
Offering benefits to loyal customersLoyalty programs enable you to offer special pricing and exclusive payment methods to frequent customers. Additionally, these programs allow for the accumulation of points under specific conditions. Customers can use these points as a form of payment or to trigger special promotions. This guide explains how to set up a loyalty program and describes the available options.
Loyalty programs are managed in Admin Suite, under Promotions -> Loyalty Programs.
In order to be able to access this chapter, you need the LoyaltyPrograms permission. Check the loyalty related functionalities for more details.
The initial overview
The chapter's initial UI consists of two tabs displays an overview of all existing Loyalty programs or Loyalty program groups (if any). It offers options to create new ones using the '+' icon, or edit existing ones by clicking one. Make use of the filter to fine-tune your overview.

Create loyalty program
To begin a creation flow, click the '+' icon in the initial overview page.
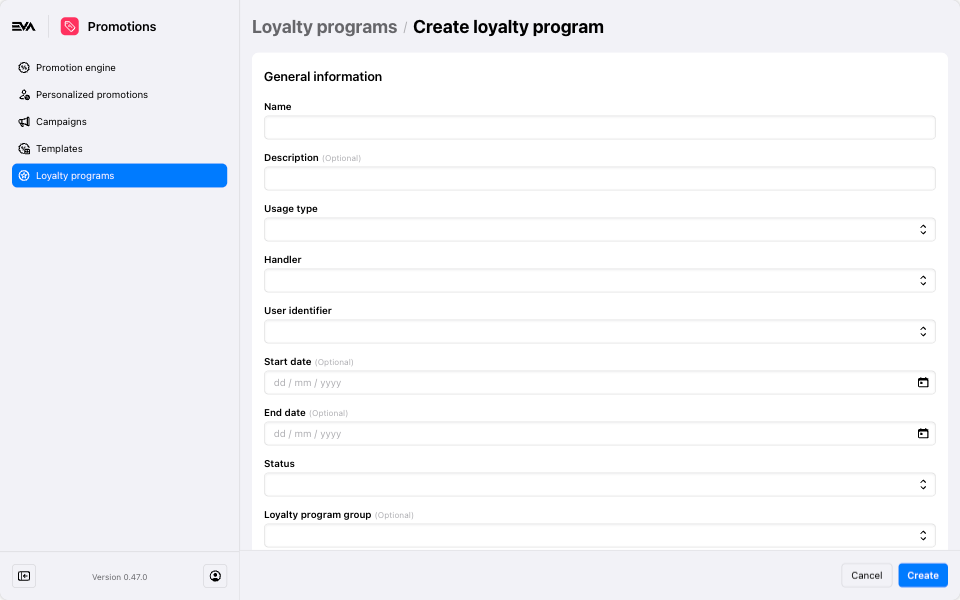
The Create modal will consist of the following fields:
Expand to view field descriptions
- Name: Enter a name of your choice.
- Description: Provide a description of your choice.
- Usage Type: Choose from three options:
View Usage Options
- Allow Awarding: Specifies whether the program permits awarding points. This works in conjunction with the Points saving rules tab. Enabling this option allows points to be awarded, so specifying how those points would be saved and managed is necessary.
- Usable as Payment Method: Specifies whether points can be used as a payment method. For example, 1000 points can be used as a discount of €1.00.
- Usable for Withdrawal: Specifies whether withdrawing points is permitted. For example, 1000 points can be withdrawn to obtain a free product.
- Handler: We currently have two loyalty program handlers:
Expand to see options
LOYALTYAPI
This handler gives you the most flexibility, but is also the hardest to set up, as it requires you to have a third-party to store loyalty points, and a custom integration. Read more here.
EVALOYALTY
This handler stores your points in EVA. We support withdrawals, payments (using points), and points awarding in EVA LOYALTY, we also support this on production environment. We don't want to be a bank, so we can't store actual monetary value. This is why EVA LOYALTY does not support payments on production environments.
- User identifier: Using this field you can determine how the user identifier would look like. There are 2 options:
Expand to see options
- Request from frontend: Implies that a user identifier will be fully provided by the frontend user during application. The user will need to manually input/scan an identifier; otherwise, an error will occur.
- Custom: Implies that the user identifier will be based on the inputs of the following 3 fields:
- Prefix: A fixed user identifier prefix (Example:
PRE-) - Start: A starting user identifier number (Example:
1000) - Suffix: A fixed user identifier suffix (Example:
-SUF- Combining the inputs, your user identifier would look like thisPRE-1000-SUF, and the next subscriber asPRE-1000-SUFand so forth).
- Prefix: A fixed user identifier prefix (Example:
- Start Date: Choose your preferred start date.
- End Date: Choose your preferred end date.
- Status: Select from three options:
Expand to see options
- Inactive: This status deactivates the loyalty program but allows point withdrawals if points are still available and the program is active between the chosen start and end dates.
- Suspend: This status suspends the loyalty program and prevents any point withdrawals to any remaining outstanding points.
- Active: This status keeps the loyalty program fully operational within the specified start and end dates.
- Checkboxes: Select from the following options:
Expand to see options
- Requires customer: Determines whether enrolling into a loyalty program requires a customer to be attached or not. Not, as in an order only with no check on whether a customer is attached or not.
- Apply manually only: The loyalty program must be manually added by a user to an order/customer via frontend apps.
- Requires subscribed customer: Customers must manually opt into the loyalty program. This first requires setting up a subscription linked to the loyalty program.
- Auto subscribe: Automatically enrolls customers into the loyalty program without manual opt-in. This first requires setting up a subscription linked to the loyalty program.
- Requires subscription validation: Specifies whether validation of the user identifier for the linked subscription is required or optional from the frontend. A tile labeled "User subscription identifier" will appear during the checkout flow for input of the user identifier.
- Loyalty program group: Is used to organize loyalty programs under a broader collection of programs. More on loyalty program grouping can be found here.
Edit loyalty program
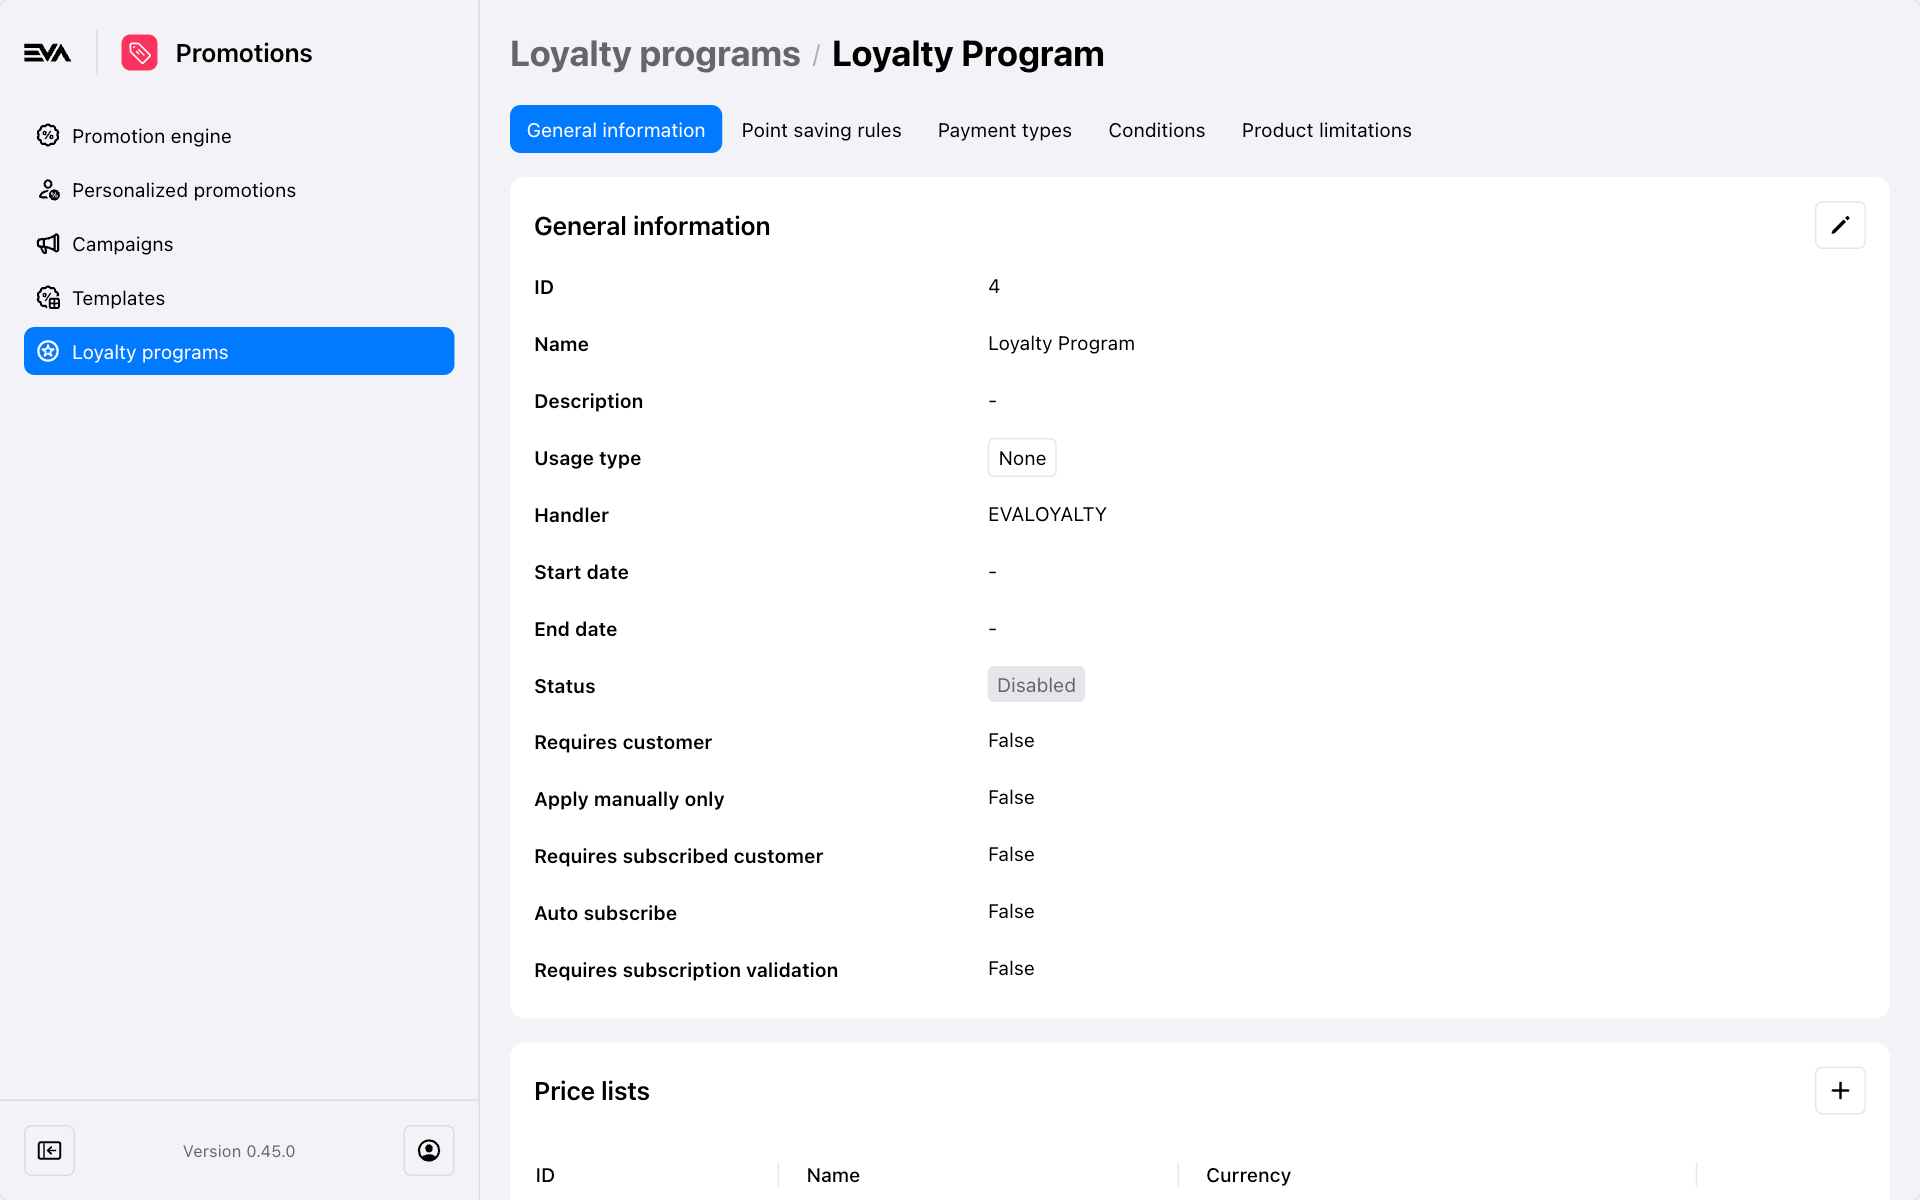
To start the edit flow, click an existing loyalty program from the initial chapter overview. The UI will consist of five tabs:
General information
First tab: Here you can modify all fields initially set up during the creation of the loyalty program.
In addition, you will be presented with another card namely, price lists. The dropdown will include all currently available price lists. The chosen price list will apply to orders when the loyalty program is active.
It is not possible to have multiple pricelists consuming the same currency.
Further, the Organization Unit Set card allows you to specify which organization units the loyalty program applies to. This card will only be visible if the loyalty program is linked to a subscription.
Point saving rules
Second tab: In addition to self-explanatory fields, the following require further explanation:
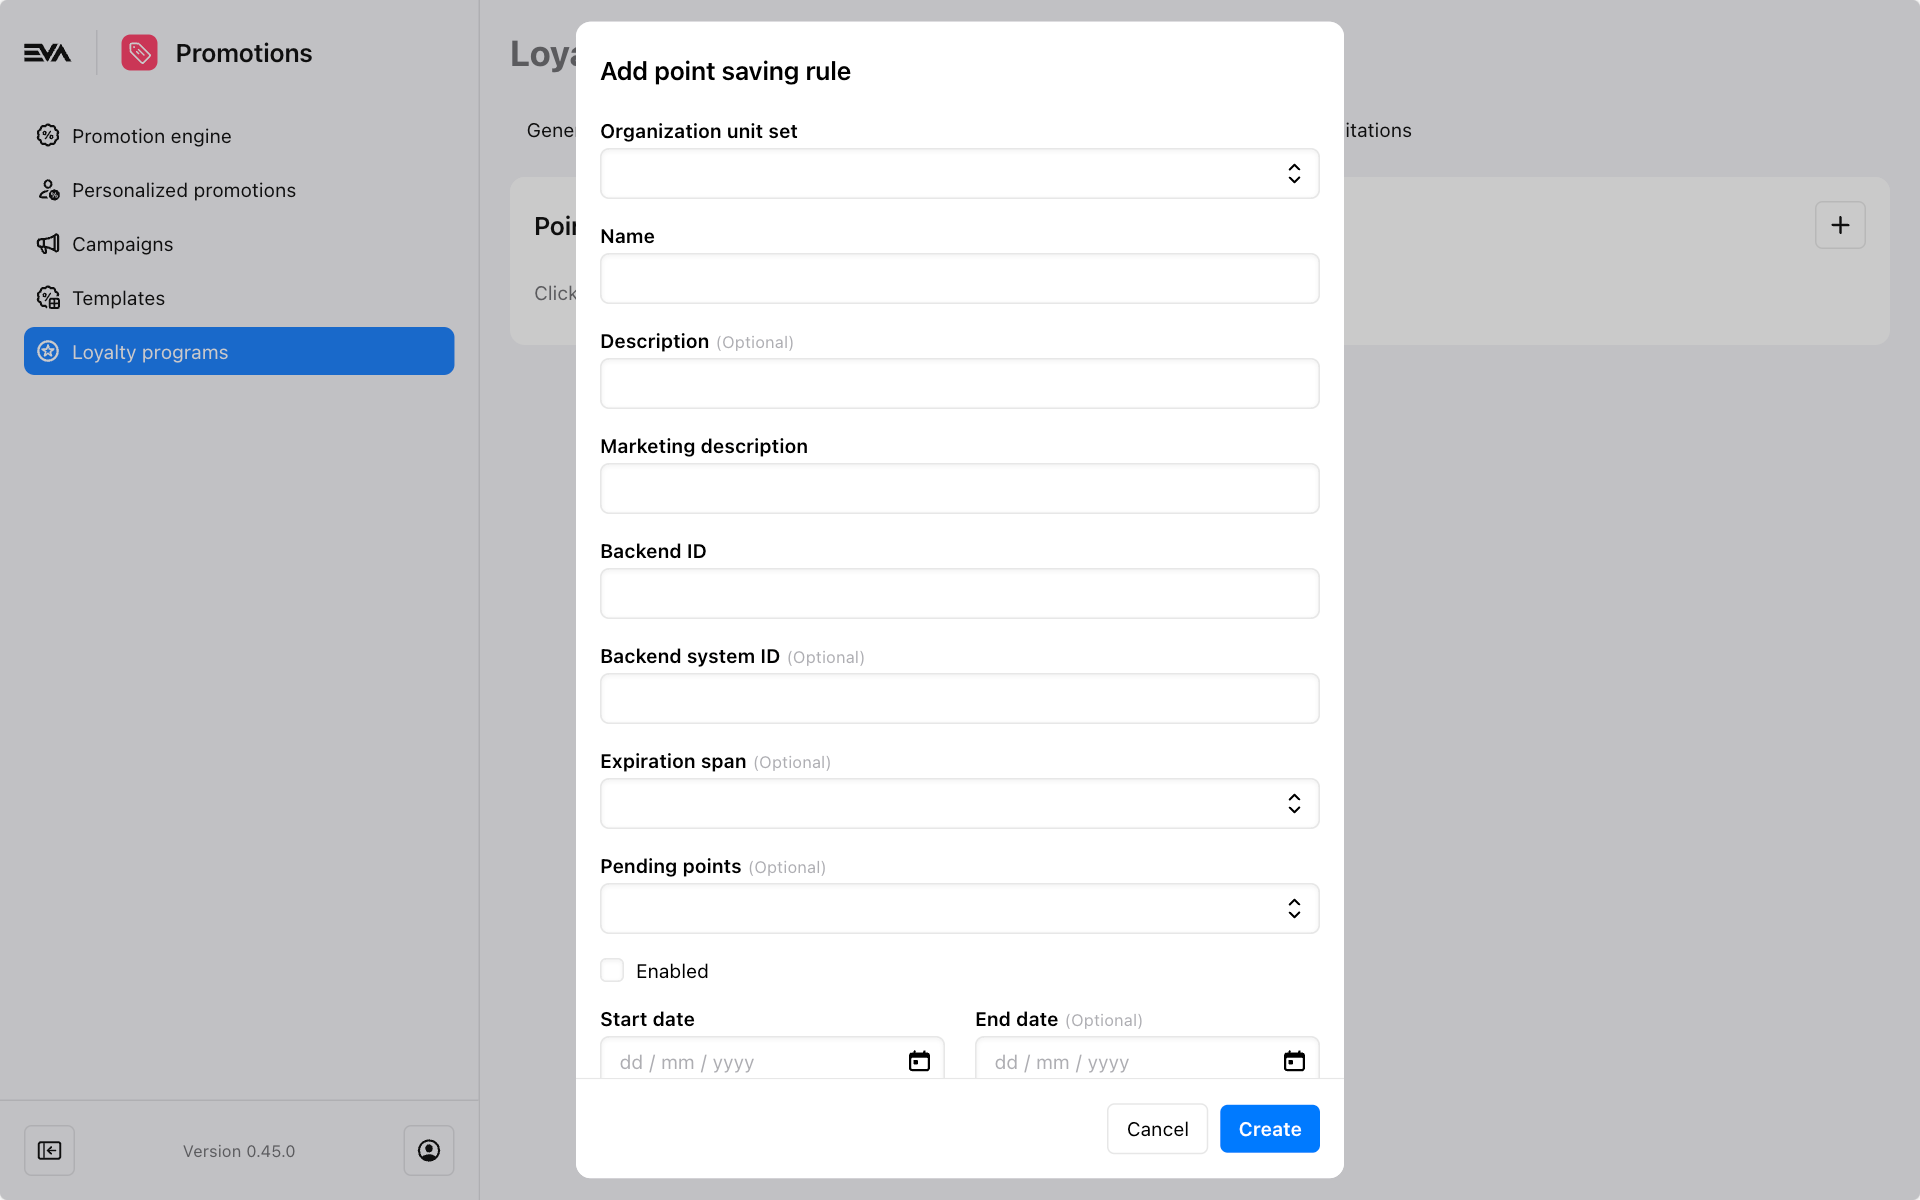
Expand to view field descriptions
Points to award
Check Awarding loyalty points docs for more on creating or editing rules.
Expiration span
The expiration span dictates how long loyalty points will be usable before expiring. There are 5 options;
| Option | Description |
|---|---|
| Default | No expiration date. |
| Custom | Expire along a custom interval. Selecting week and entering 10 will result in expiration after 10 weeks. |
| Expire end of year | Points will expire at the end of the year. |
| Expire end of month | Points will expire at the end of the month. |
| Expire set date | Points will expire on the given month and day in the year when the points were issued. If the given date falls BEFORE the issued date, they will expire the following year. |
Expire set date comes with an additional field; Leniency days. This dictates the minimum amount of days required between when the points are issued to when they expire.
Expiration span only kicks in after the pending period has concluded.
Pending points
Some retailers want to have a certain pending period before points are issued.
| Option | Description |
|---|---|
| Default | No pending period. |
| Custom | Custom pending period. Selecting week and entering 10 will result a pending period of 10 weeks. |
| Pending Return Period | Points will remain pending until after the return period expires. Same value as setting Returnable:InvoicedDays which is one of the settings available that influence returns for more. |
Conditions
This card allows you to specify the necessary conditions that should apply in order to activate the specified Point saving rules. Defining conditions here is optional. The following are the available options:
- Order amount: Specify the order amount threshold whereas if the order amount is greater than the point saving rules would trigger.
- Product set: Specify the product set and quantity that if applicable would trigger the point saving rules. The dropdown will list existing configured Product sets.
- Consumer: Select the desired user custom fields from a dropdown menu that lists all available ones.
Payment types
Third tab: Loyalty programs allow you to expose additional payment types by configuring one here. When adding a payment type, you'll need to provide the following details (note how some are labelled optional on the frontend):
Expand to view field descriptions
- Payment type: The dropdown menu will only display configured payment types that utilize the LoyaltyProgram system payment method.
- Sequence: Accepts only integer values. It determines the order of calculation among payment types, which is crucial for accurate tax computation and budgeting.
- Tax Handling: Offers two options:
- In Tax: The budget includes tax (e.g., a budget of $100 means you can spend $100 including tax).
- Up to Tax: The budget excludes tax (e.g., a budget of $100 allows spending up to $120 with a 20% tax rate).
- User Budget Deduction: Provides three options:
- Program: Deducts the paid amount from the program's budget.
- Payment Method: Deducts from the specific payment method's budget.
- None: No deduction from any budget.
- Budget: This field accepts numerical values with decimals. Represents the total amount available for transactions using this payment type.
- User budget: This field accepts numerical values with decimals. Indicates the total amount a user can spend using this payment type for the specified program.
- User maximum usage: This field accepts integer values only. Limits the number of times a user can utilize this payment type.
- Maximum amount per order: This field accepts numerical values with decimals. Sets the ceiling on spending per order using this payment type.
- Maximum percentage of user budget per order: Only integer values are accepted. Restricts the spending per order to a percentage of the user's total budget (example, a 10% limit means spending cannot exceed 100 on a 1000 budget per order).
- Excluded from program budget (Checkbox): Indicates whether usage of this payment type affects the program's budget. When checked, usage does not impact the program's specified budget.
- Required (Checkbox): Mandates the use of this payment type in an order if it is still applicable to the user.

For POS, a tile named Select Payment will be displayed at checkout under Order options. This tile corresponds to the payment type specified in the Payment Type field. If multiple payment types are available, the user will be prompted to choose one.
Conditions
Fourth Tab: Loyalty programs allow you to establish specific conditions that dictate when the benefits apply. For example, benefits will only apply if the value of user custom field who is tagged to an order contains a specific value.
Available conditions with descriptions:
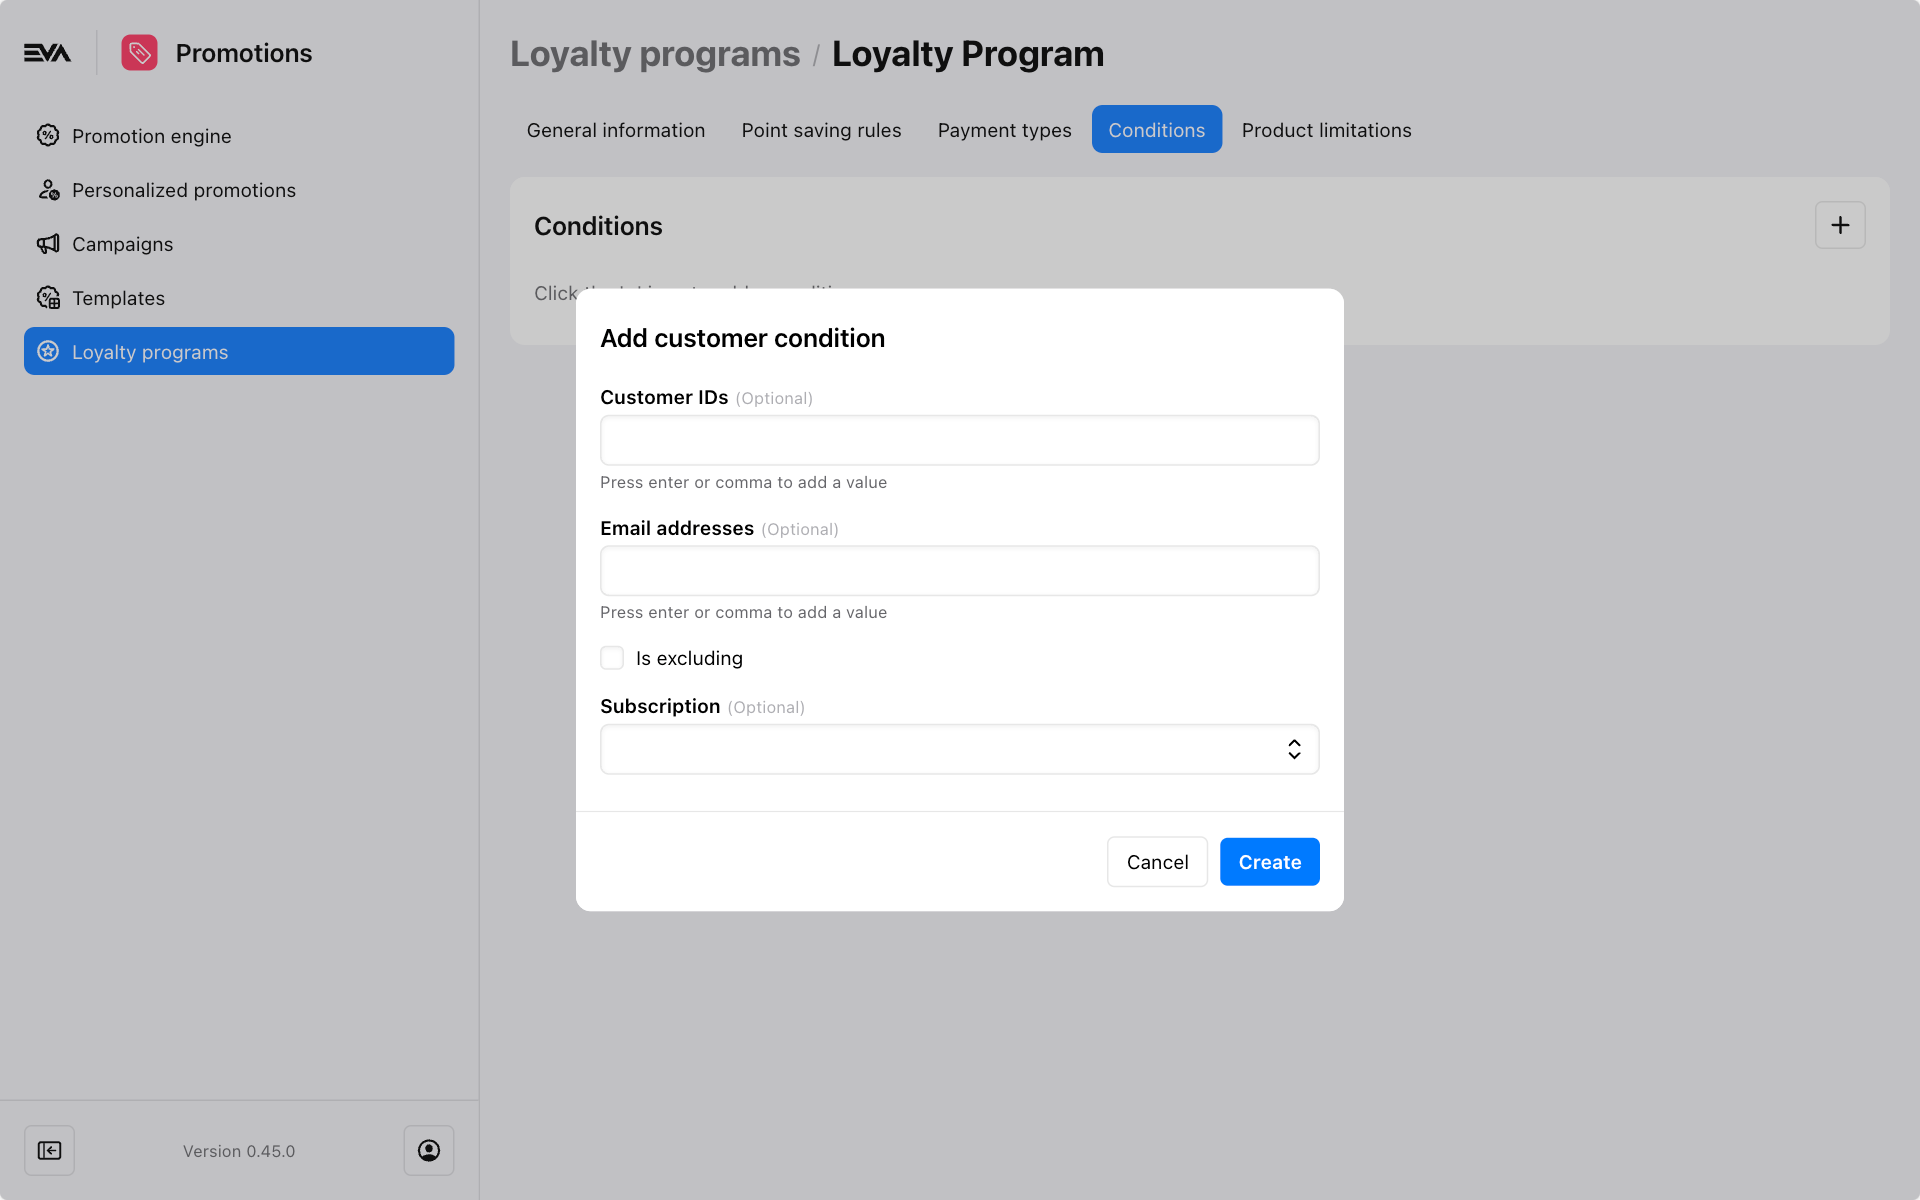
Customer
Customer
This condition restricts the program to specific customers, identified by their customer ID, email address, or those subscribed to a certain subscription.
- Exclude: Check this box to prevent the specified customers from availing the loyalty programs benefits, enabling participation for others only.
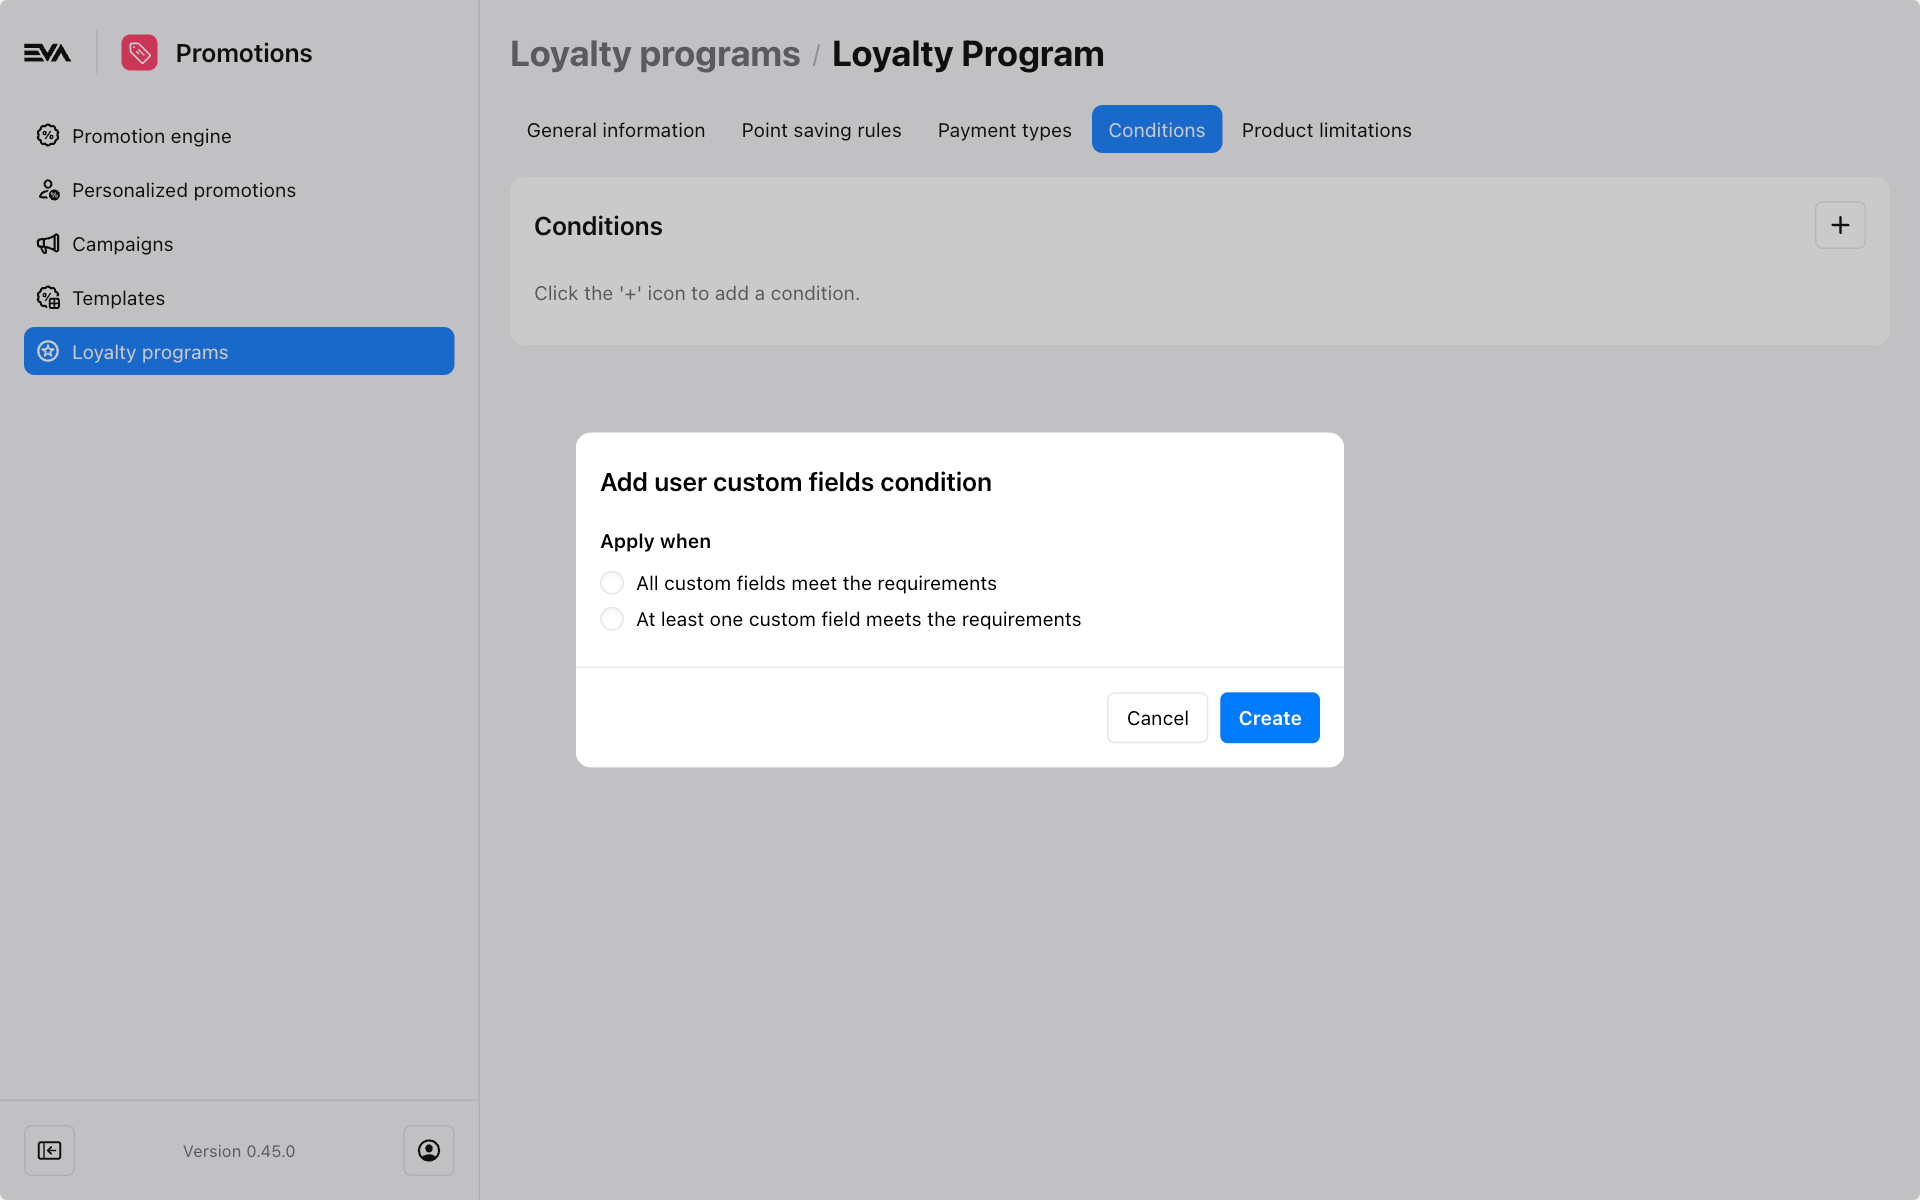
User custom fields
User Custom Fields
This condition limits the program benefits to certain users based on the value of certain user custom fields. When adding a user custom field condition, you need to provide the following details:
- All or at least one: Specify whether the program applies if all or at least one of the user custom fields meet the requirements.
- Custom Field: Select the desired user custom fields from a dropdown menu that lists all available ones.
- Operator: The criteria in which the specified Value will be checked. For instance, Equals requires the user's input to exactly match the specified value of the following field "Value".
- Value: Specify the custom field value that would be checked against the Operator criteria.
Order custom fields
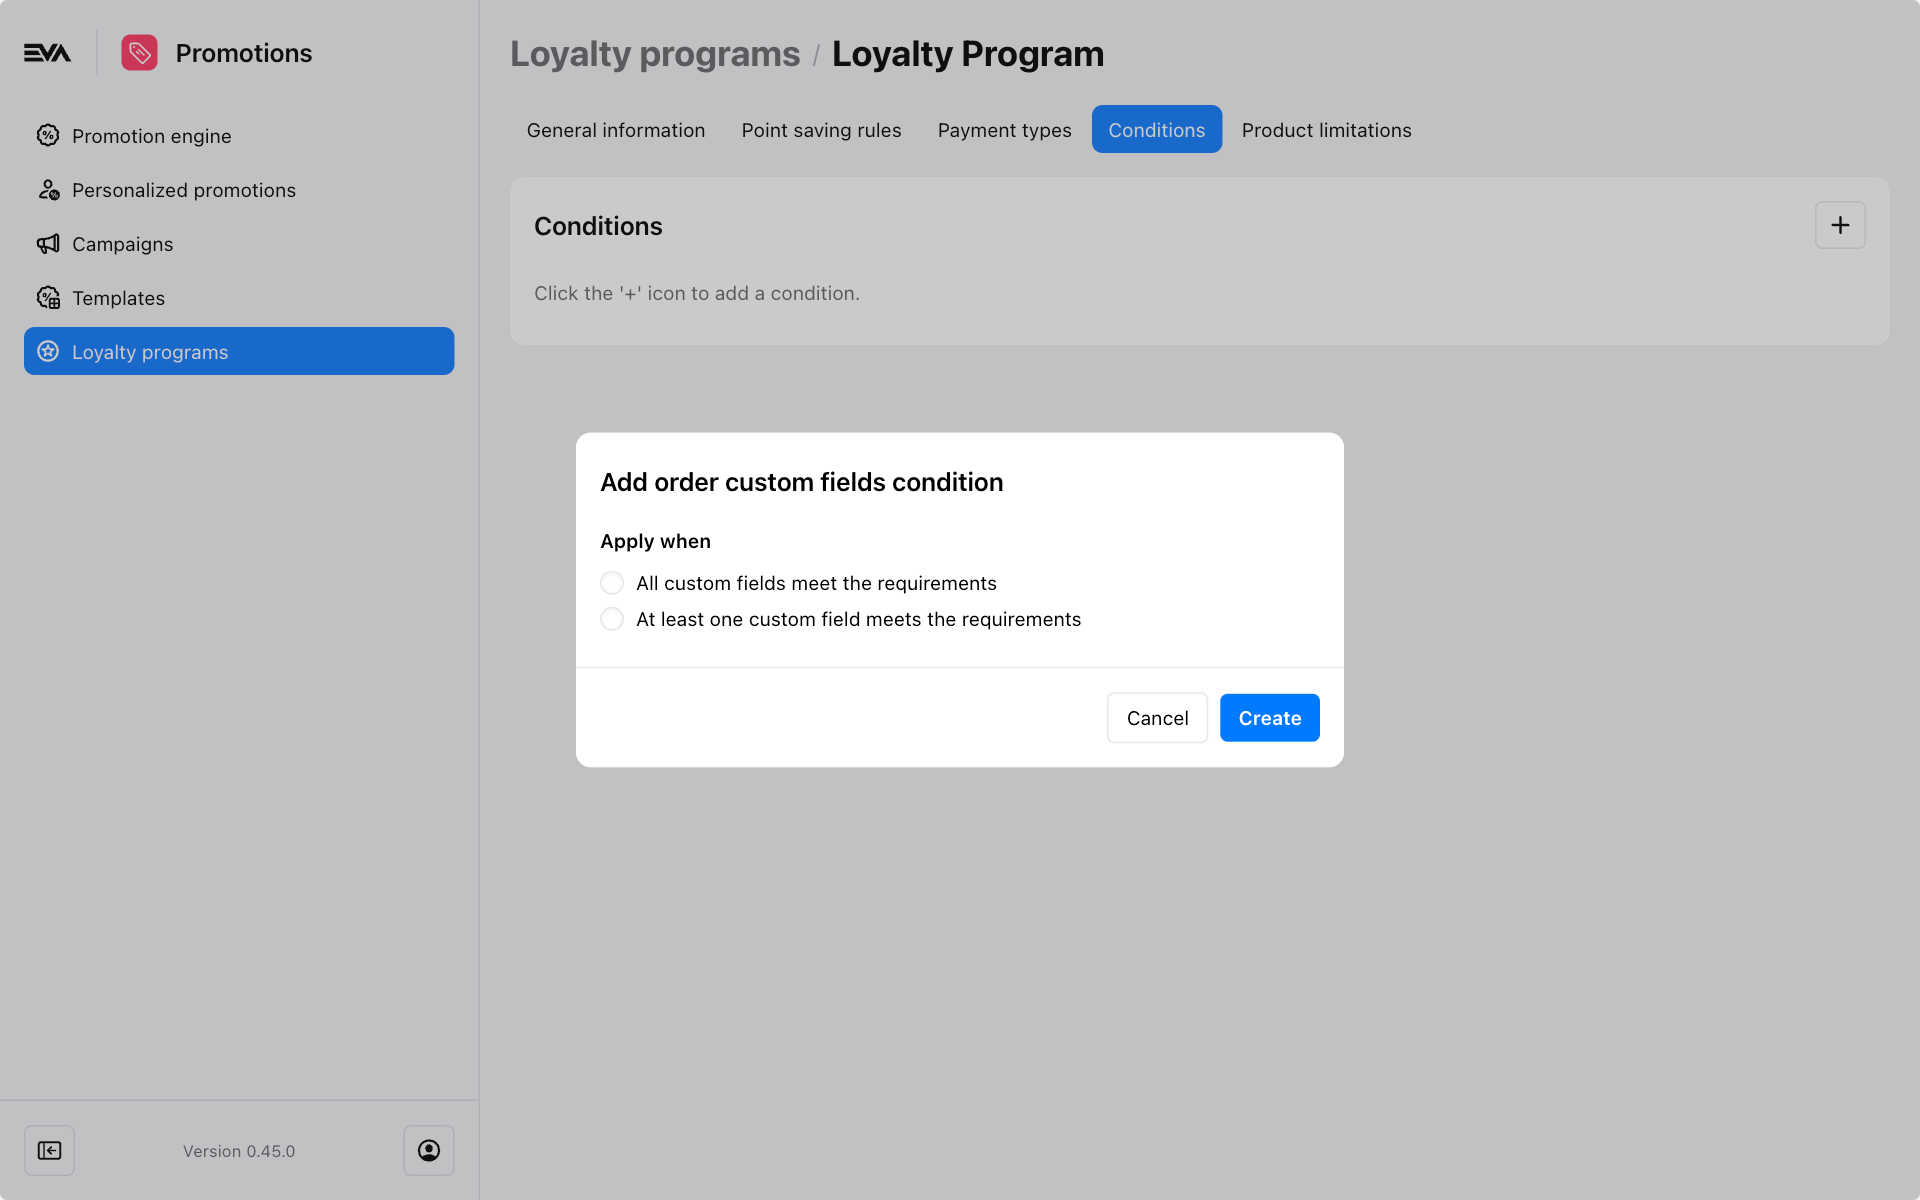
Order custom fields
This condition limits the program benefits to certain orders based on the value of certain order custom fields. When adding an order custom field condition, you need to provide the following details:
- All or at least one: Specify whether the program applies if all or at least one of the order custom fields meet the requirements.
- Custom Field: Select the desired order custom fields from a dropdown menu that lists all available ones.
- Operator: The criteria in which the specified Value will be checked. For instance, Equals requires the order custom field value input to exactly match the specified value of the following field "Value".
- Value: Specify the custom field value that would be checked against the Operator criteria.
Order type
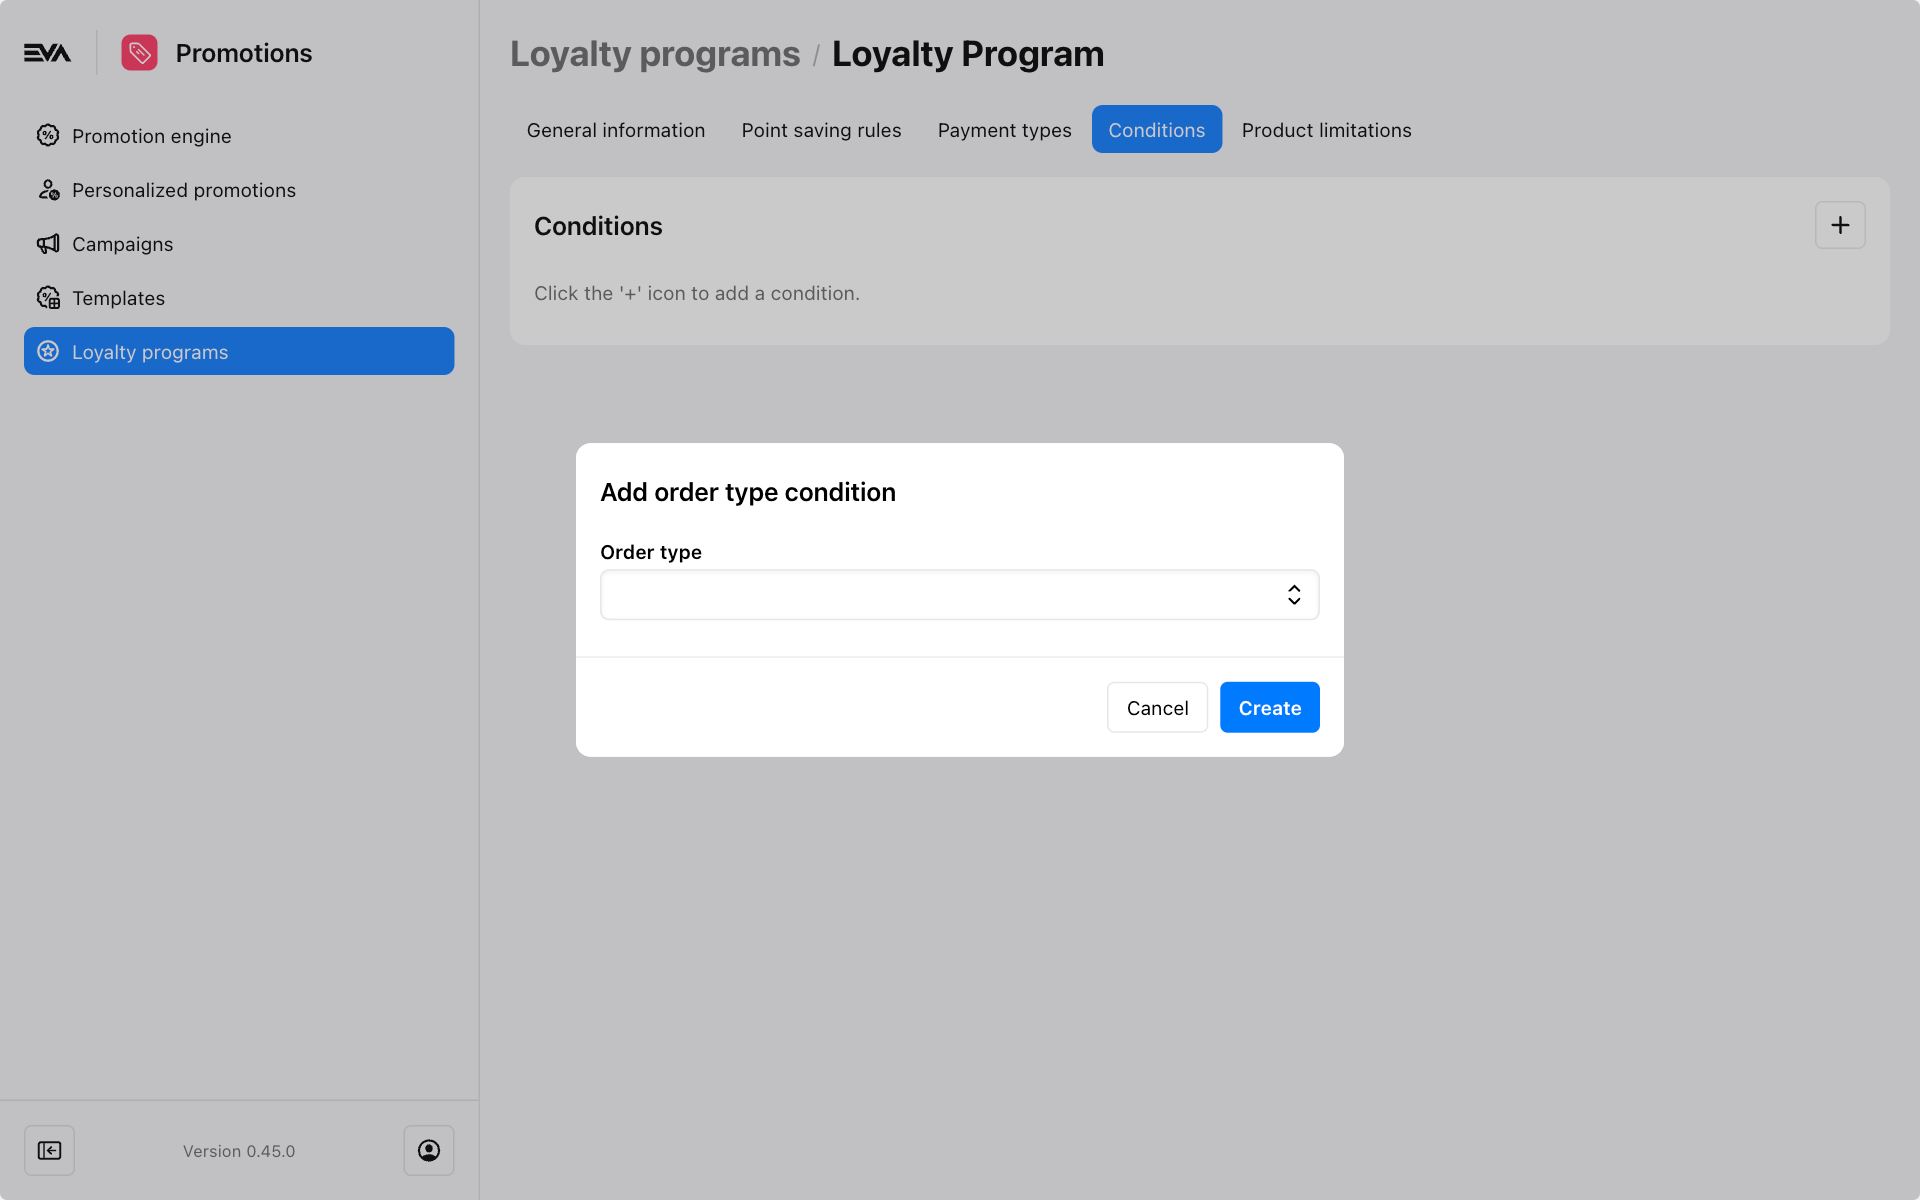
Order type
This condition limits the program benefits to certain order types. The dropdown will by default list all available order types.
Order properties
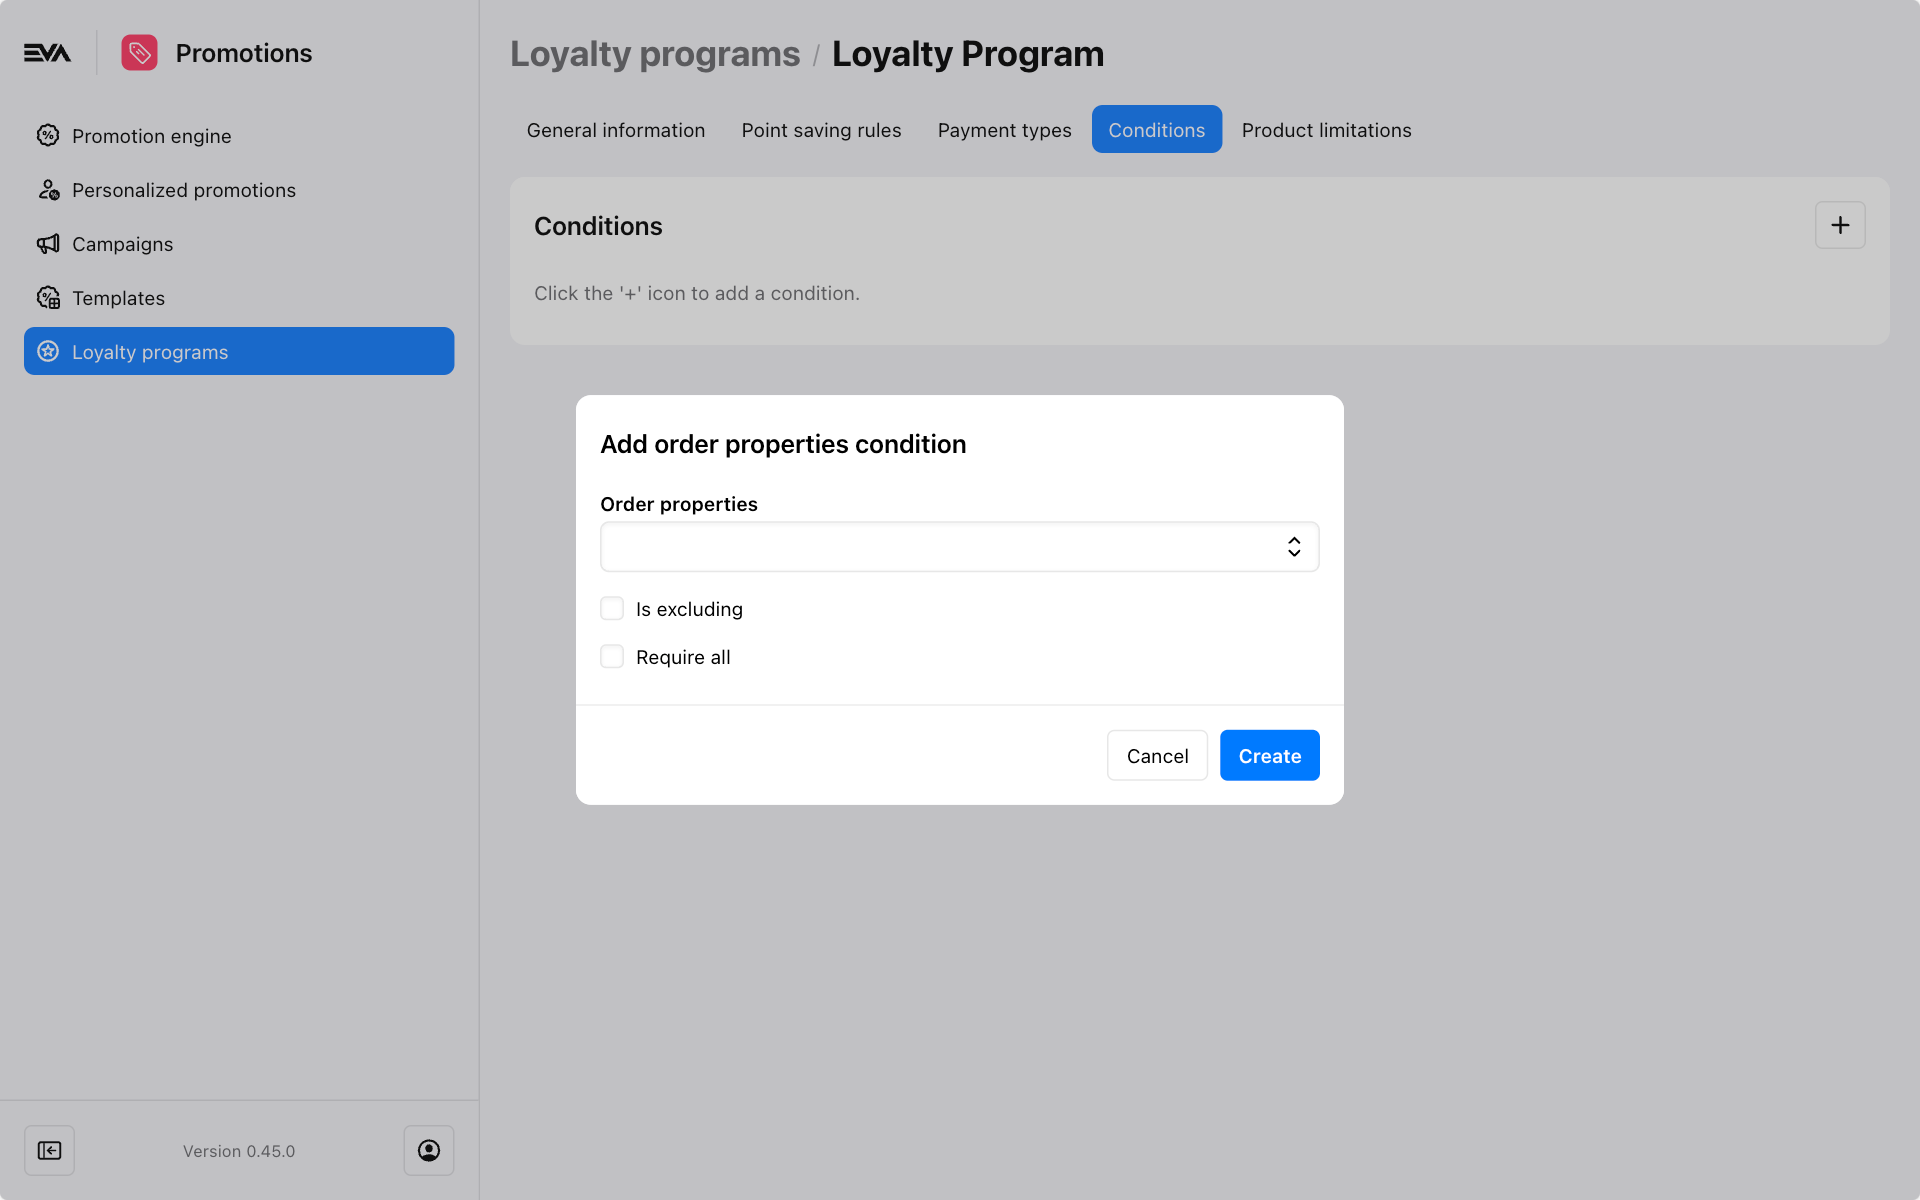
Order properties
This condition limits the program benefits to certain order properties. The dropdown will by default list all available order properties as listed below.
- Is excluding: Check this box to exclude certain order properties from loyalty program benefits. Only orders with different properties will be eligible.
See list of all available order properties
Product limitations
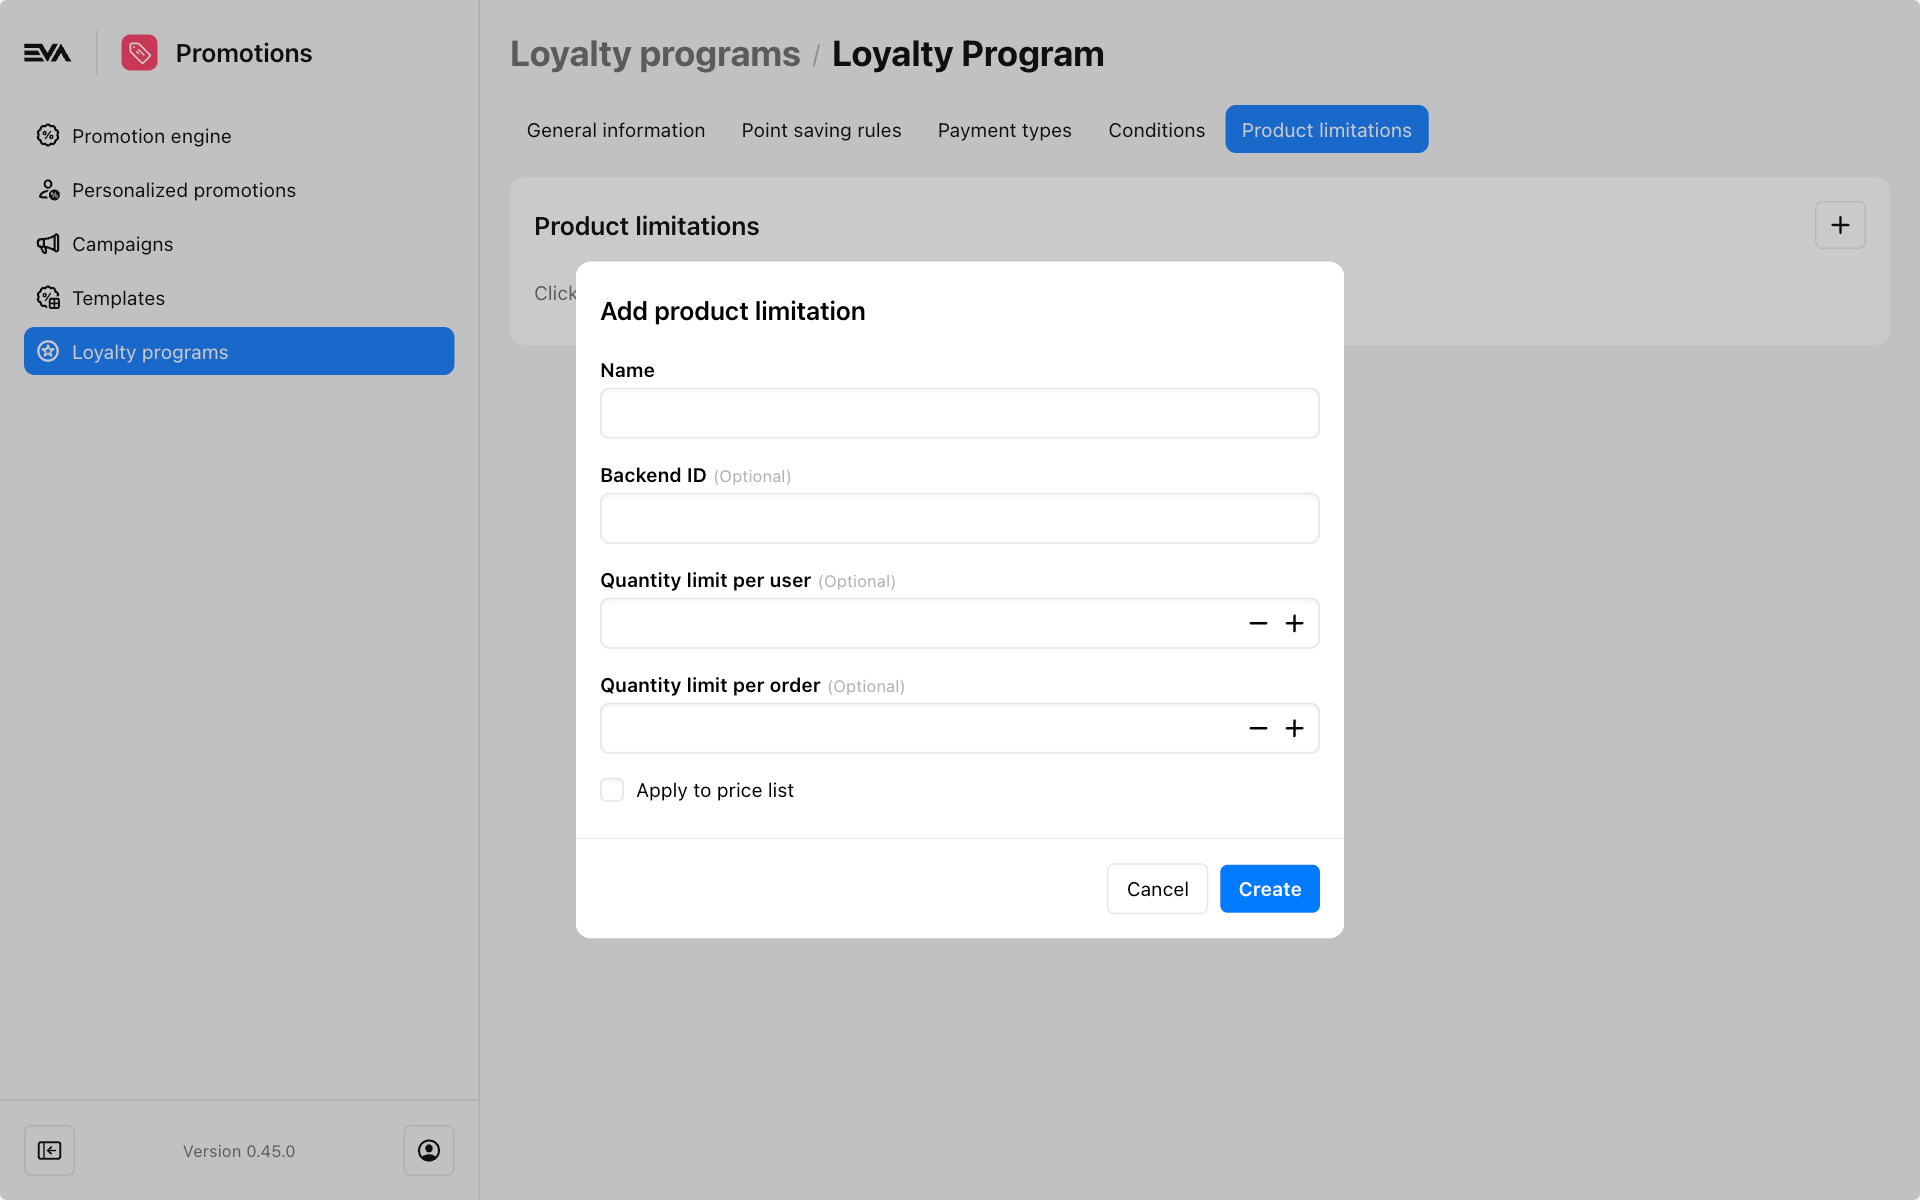
Fifth tab: A loyalty program may include product limitations. These limitations can restrict the number of products purchased at one time. Specifically, you can specify a set of products, apply a filter, or use the Apply to price list checkbox to indicate that the limitation applies to the products specified in the used pricelist for this loyalty program.
You can find the loyalty program's applied price list under the General Information tab.
Create Loyalty program group
Loyalty program grouping is used to link multiple loyalty programs together. This method simplifies the management of umbrella budgets across various programs.

Loyalty related functionalities
Based on role permissions, each user may have different rights on what can be done within the loyalty module and frontend behavior. Permissions are managed from the Roles and rights chapter namely, from the functionalities card of a users role.
The following table provides a list of those permissions and the impact each one has on the users rights:
Show loyalty related functionalites
| Functionality name | Scope when functionality is not ticked |
|---|---|
| LoyaltyPrograms | The scope on what a user can do using the loyalty programs tab. |
| BlockUserSubscription | The ability to block a subscriber from accumulating or using loyalty points from a specified loyalty program. |
| BlockUserSubscription | The ability to unblock/reverse a blocked subscriber from accumulating or using loyalty points from a specified loyalty program. |
| DepositLoyaltyPoints | The ability to deposit loyalty points to any users balance. |
| WithdrawLoyaltyPoints | The ability to withdraw loyalty points from a users balance. |
| RebalanceLoyaltyPoints | The ability to use rebalance feature on a users balance. |
| ApplyLoyaltyDiscount | The ability to apply a discount that is grounded upon loyalty benefits. |
| LoyaltyProgramGroups | The scope on what a user can do using the loyalty program groups tab. |
| LoyaltyProgramBudgetManagement | The ability to manage a loyalty program budget. |
| LoyaltyProgramGroupBudgetManagement | The ability to manage a loyalty program group budget. |