Custom fields
Custom fields
Create your own fieldsBy default, EVA has a lot of fields and properties that can be configured. No matter how many fields we'd add however, there would always be some that you feel are missing. To get ahead of this, EVA allows you to create your own, custom fields.
In order to be able to access the various custom fields chapters, you need the CustomFields and CustomFieldTypes permissions.
There are many, many places in Admin Suite and the Apps where you can use custom fields. There are too many to list here, but they are generally described in each relevant chapter.
They can be created within the Custom fields chapter, as described on this page, or via APIs if that's your cup of tea.
Custom fields have specific types which allows them to be used in areas where you'd expect them.
Examples
Custom fields for organizations: Radio buttons Indoors or outdoors can be created as custom fields in an organization units basic information whereas, more details about the location type of the organization unit become required fields.
Custom user fields: The User type custom fields can be prompted when, for example, you're using Inquiries or when creating new customers (either on the frontend Apps or via the consumers chapter).
Custom fields for order: Custom fields of type Order are used to accompany a Checkout option.
Custom fields for order lines: Custom fields of type Order line are configured as a Checkout option via the Custom fields chapter in the Orderline custom fields card.
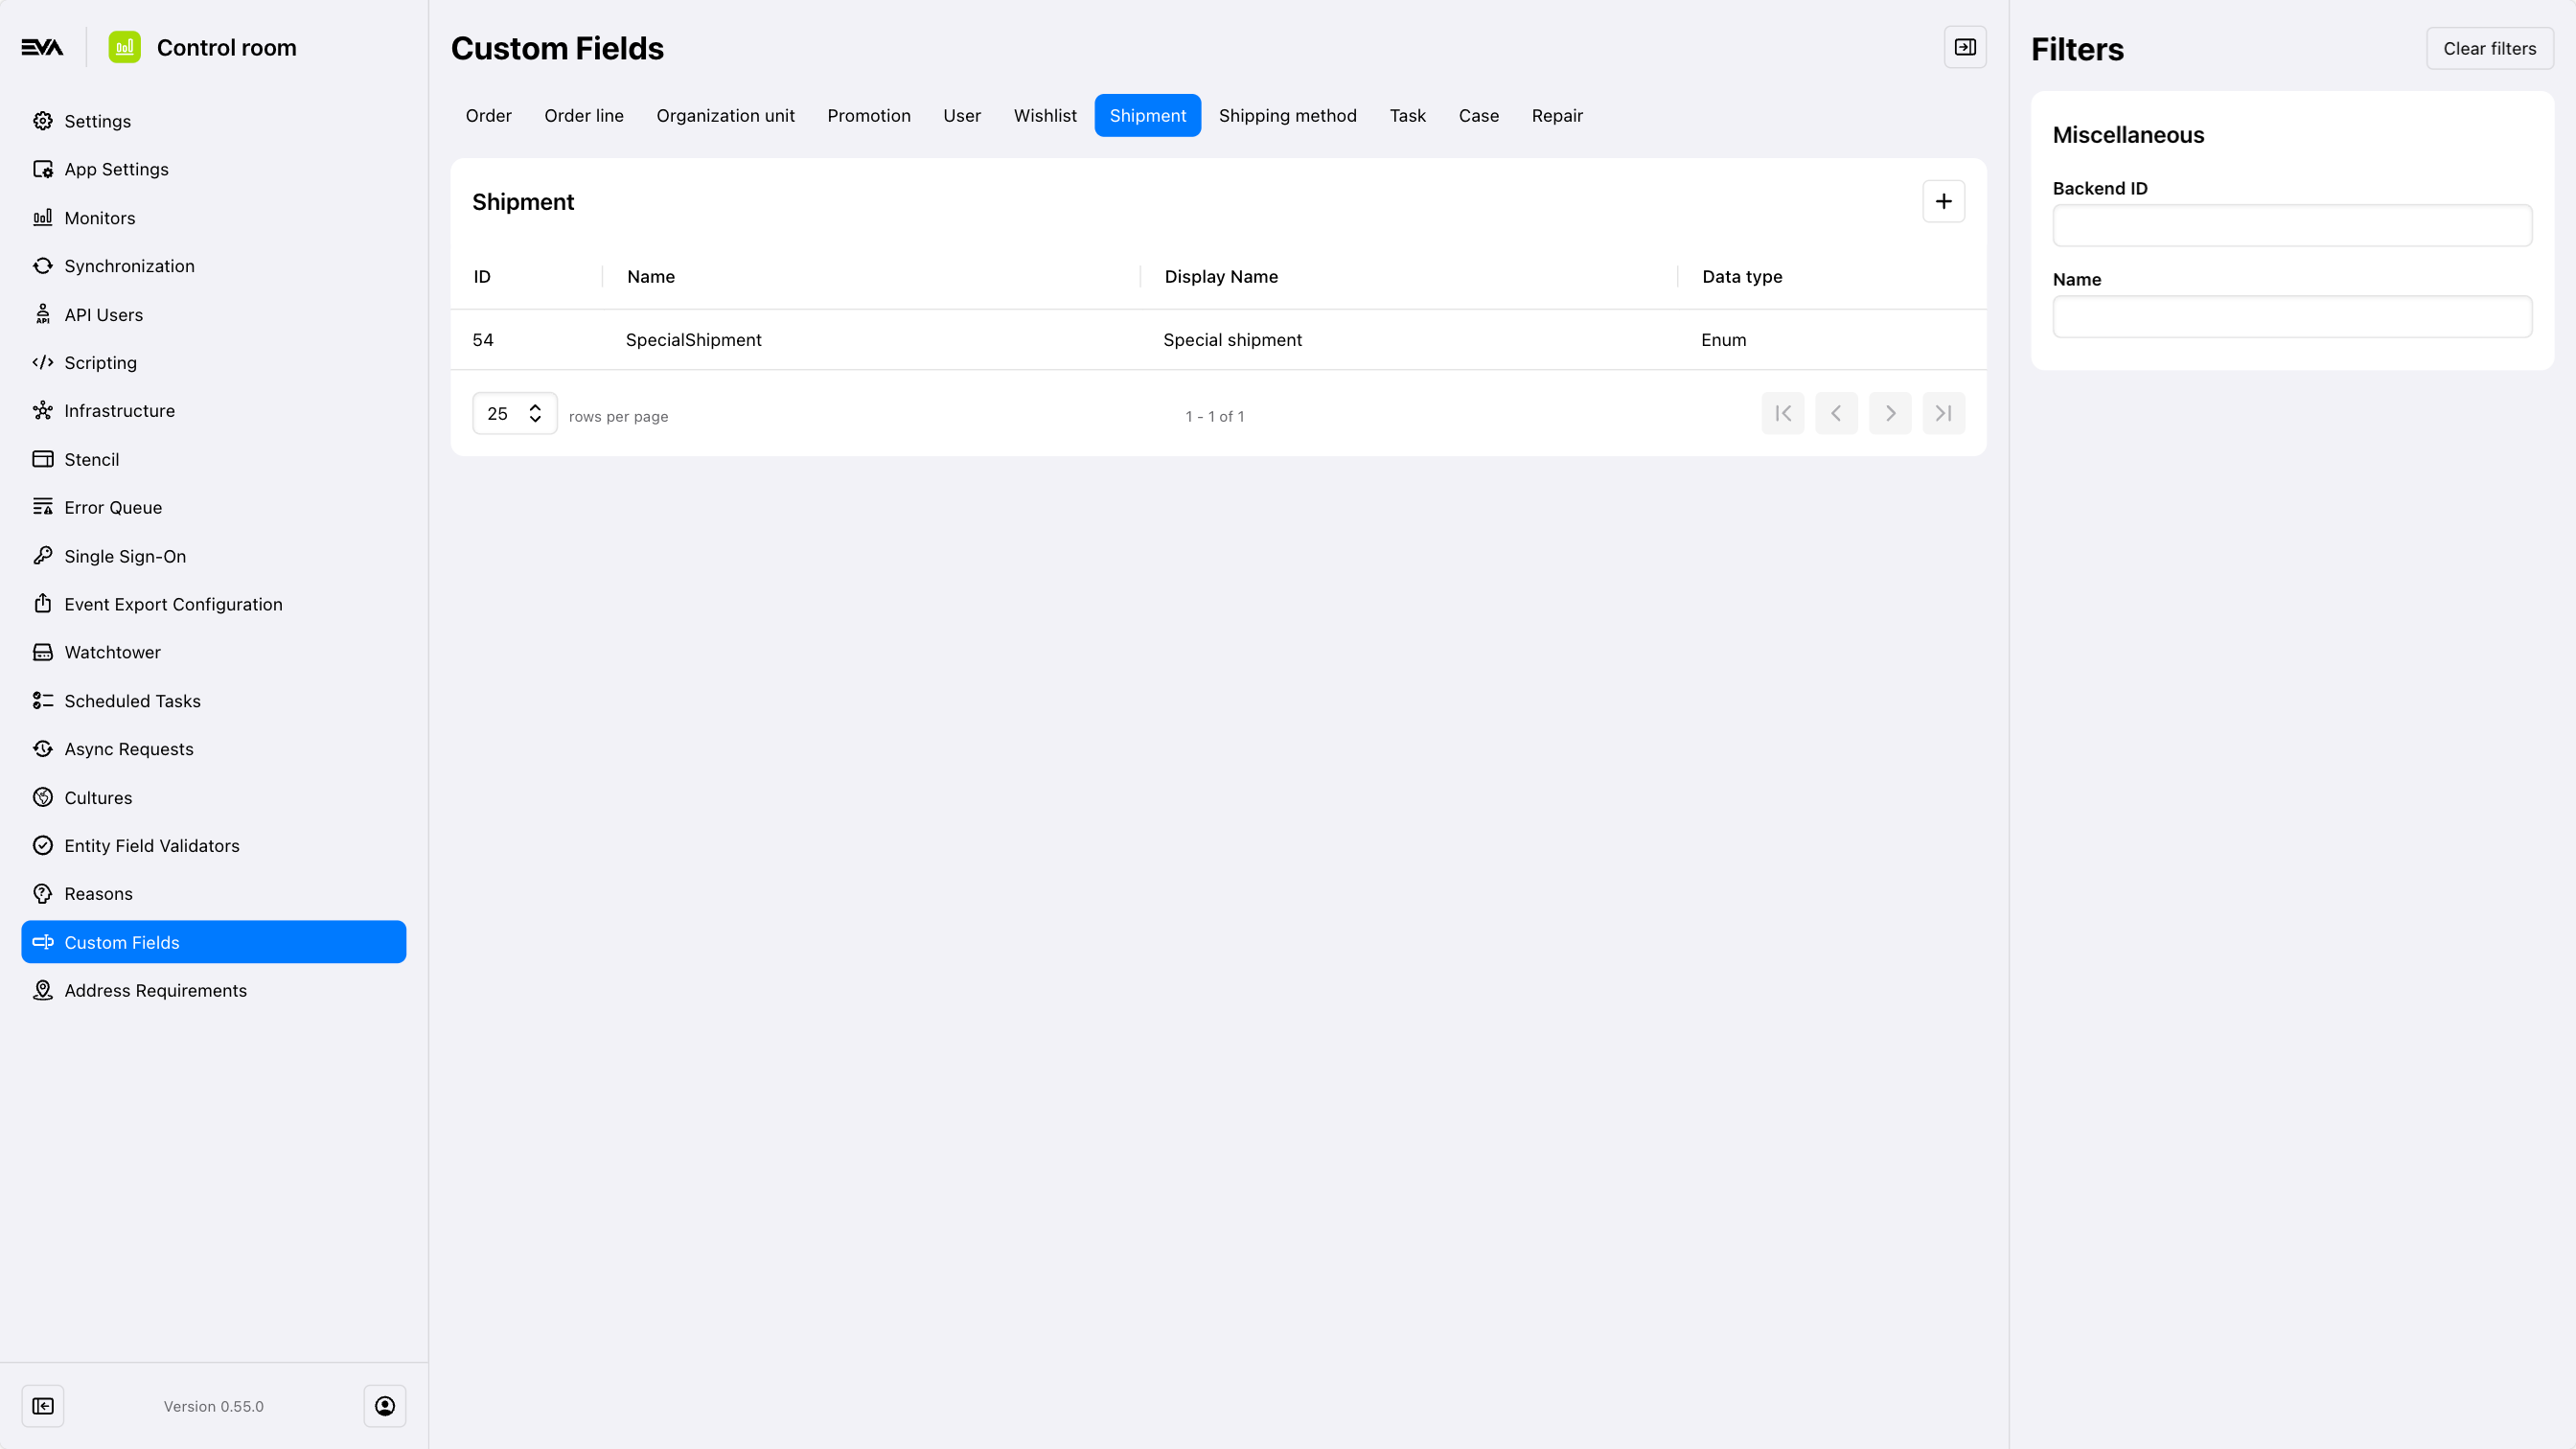
Custom fields for stock: Custom fields of type Shipment are used to add custom fields to shipments.
Orders custom fields are not to be confused with Custom order statuses and Custom order types, each serve different purposes. Docs for those can be found here.
Overview
The Custom Fields chapter in the Admin Suite begins with an overview of the existing custom fields for the selected type, accessible via the chosen tab. It also provides options to add new fields or edit and delete existing ones.
Creation
To add a new custom field, click the '+' in the top right corner.
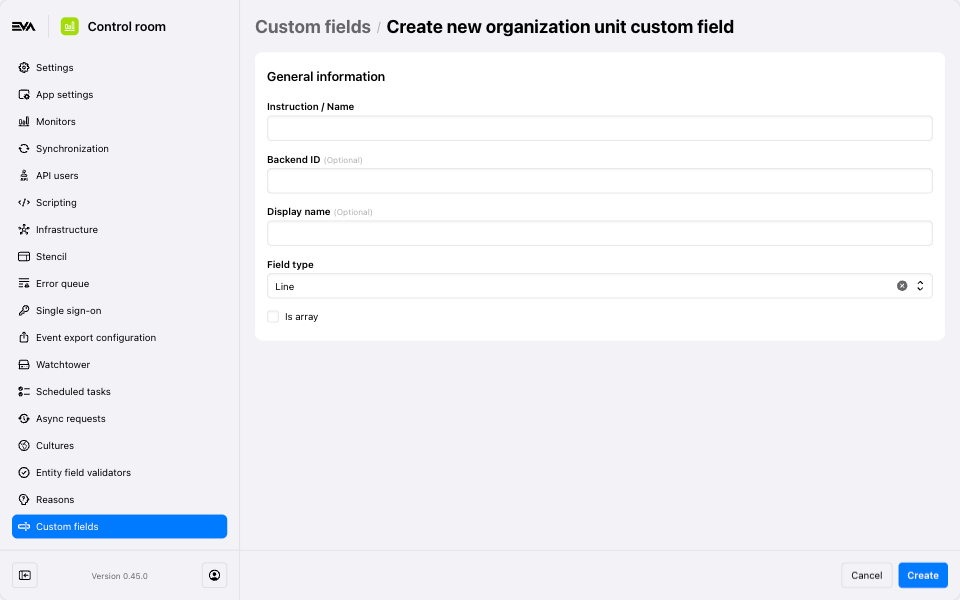
A custom field requires a Name, a BackendID, a Field Type, a Display name, and sometimes values if, for example, Radio buttons was your choice of Field type.
The Is array checkbox is displayed only if your Field type selection is Line, Number, or Decimal. If you're editing an existing custom field, the checkbox will always be "Read only".
By using the 'Translations' icon you can then translate the Display name and Values to various languages (see note).
Once created, translations and all other fields can be edited from the custom fields General info card.
Display Name and Values is what eventually becomes prompted -and thus visible- on frontends to the user(s) as specified in the custom fields settings card.
When creating a custom field with predefined 'values', like in the example screenshot, make sure to set the BackendID for your values; otherwise, they will not be saved.
Field type
Field types allow you to shape the custom field to the format you need. Your choice here determines the way the info is displayed. A Line will allow for all kinds of different inputs in the custom field and is helpful to ask for customized data that cannot be classified in a dropdown list for example. Checkboxes or Radio buttons on the other hand, limit the options and are better suited for fields that could be answered via a standardized list of choices. And with Toggle, you can ask yes/no or opt-in/out type questions.
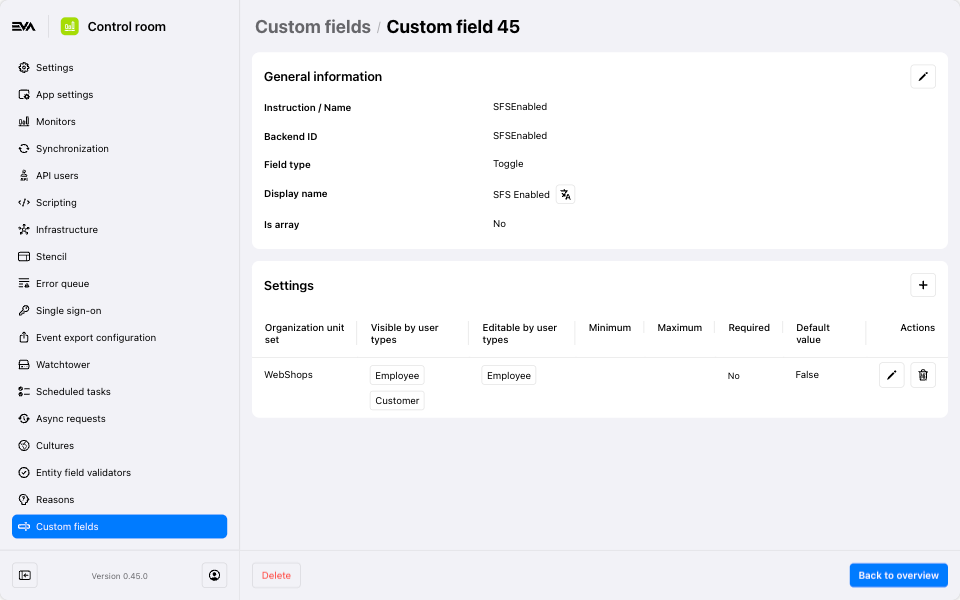
Settings
After creating a custom field, a new card will appear called Settings where additional stuff such as; if the field is Required or not, the Default value, and for which OU or OU set it would be applicable to can be configured.
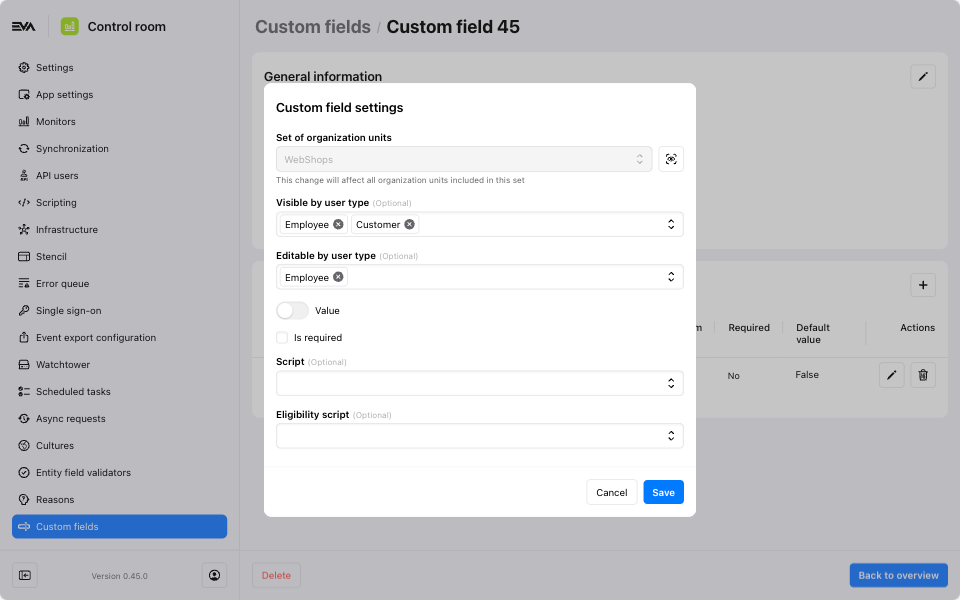
This is also the place to script the custom field context and/or specify who'll be able to see that custom field: Visible by user type, and by whom would it be editable via Editable by user type.
For example: Assume you have an order custom field called "Go green" that requires a mandatory "yes" or "no" answer from customers, and your input for Visible by user type was Customers & Employees, and for Editable by user type it was only Customers. This would then imply that both employees and customers would be able to see the custom field, but only a customer would be able to answer/change the value.
A list of user types can be found here.
Default value
The Default value feature comes in handy when you need to pre-fill a value for a custom field on your frontend.
In the Custom Field Settings modal, you'll notice the default value field provides a dropdown list when you've chosen the Field type as Radio Buttons, Checkboxes, or Toggle. This is because value choices are already known for these types. The value(s) you select from this dropdown will automatically populate the custom field on the frontend.
For other field types, you'll need to manually input the default value. The value you enter in this case will serve as the pre-filled value for that custom field on the frontend.
Keep in mind that users can still change the default value manually on the frontend to select from other available values or enter a different value, depending on the field type of the custom field.
Scripting
With scripting you can impact a custom fields context in terms of what is shown and what is hidden. This can be done using the following fields:
- Script: The dropdown list is based on existing script(s) that have the extension point source called CustomFieldSecurity.
- Eligibility script: The dropdown list is based on existing script(s) that have the extension point source called CustomFieldEligibility.
Custom fields on the frontends will accordingly adjust if input is provided in those fields.
Delete
If you want to delete an existing custom field, just open that custom field and click that red Delete button in the bottom left. Confirm that you really want to do this, the custom field will be gone.