Inquiries
Inquiries
Enriching customer recordsInquiries can be created to gather any information you like from your customer; this can be all kind of things from the age of your customer to his or her favorite color. The inquiries can be used in a subscription (for a newsletter for example) or during the editing/adding process of your customer so you can store the information you want on the user.
To create your own inquiry, go to the People module and navigate to the Inquiries chapter.
To access this chapter, you need the Inquiries permission.
Add inquiries
To add an inquiry, click the chapter's '+' icon. In the following menu, you can name and describe your inquiry.

- Name (required): give the inquiry a name that clarifies what kind of questions the inquiry holds - this will be displayed in the front end.
- Description (optional): a clarification of the inquiry - this is for your own identifying of the purpose of this inquiry.
- Prompt user: this checkbox allows you to either prompt this specific inquiry to the user if checked or to not prompt it if it remains unchecked.
- One time use only: this checkbox allows you to make use of the inquiry multiple times if unchecked, or to allow a onetime use only if checked.
- Script (optional): display a dropdown single select menu where the user can select a script. Only the scripts of type UserInquiry are displayed in the dropdown.
After all fields are populated, click the Create button to add it to the list of inquiries.
You can add custom fields to your inquiries of type Line, Integer and Decimal.
Adding questions
After creating the inquiry, questions can be added to it by clicking the '+' icon in the right corner below the general information card.
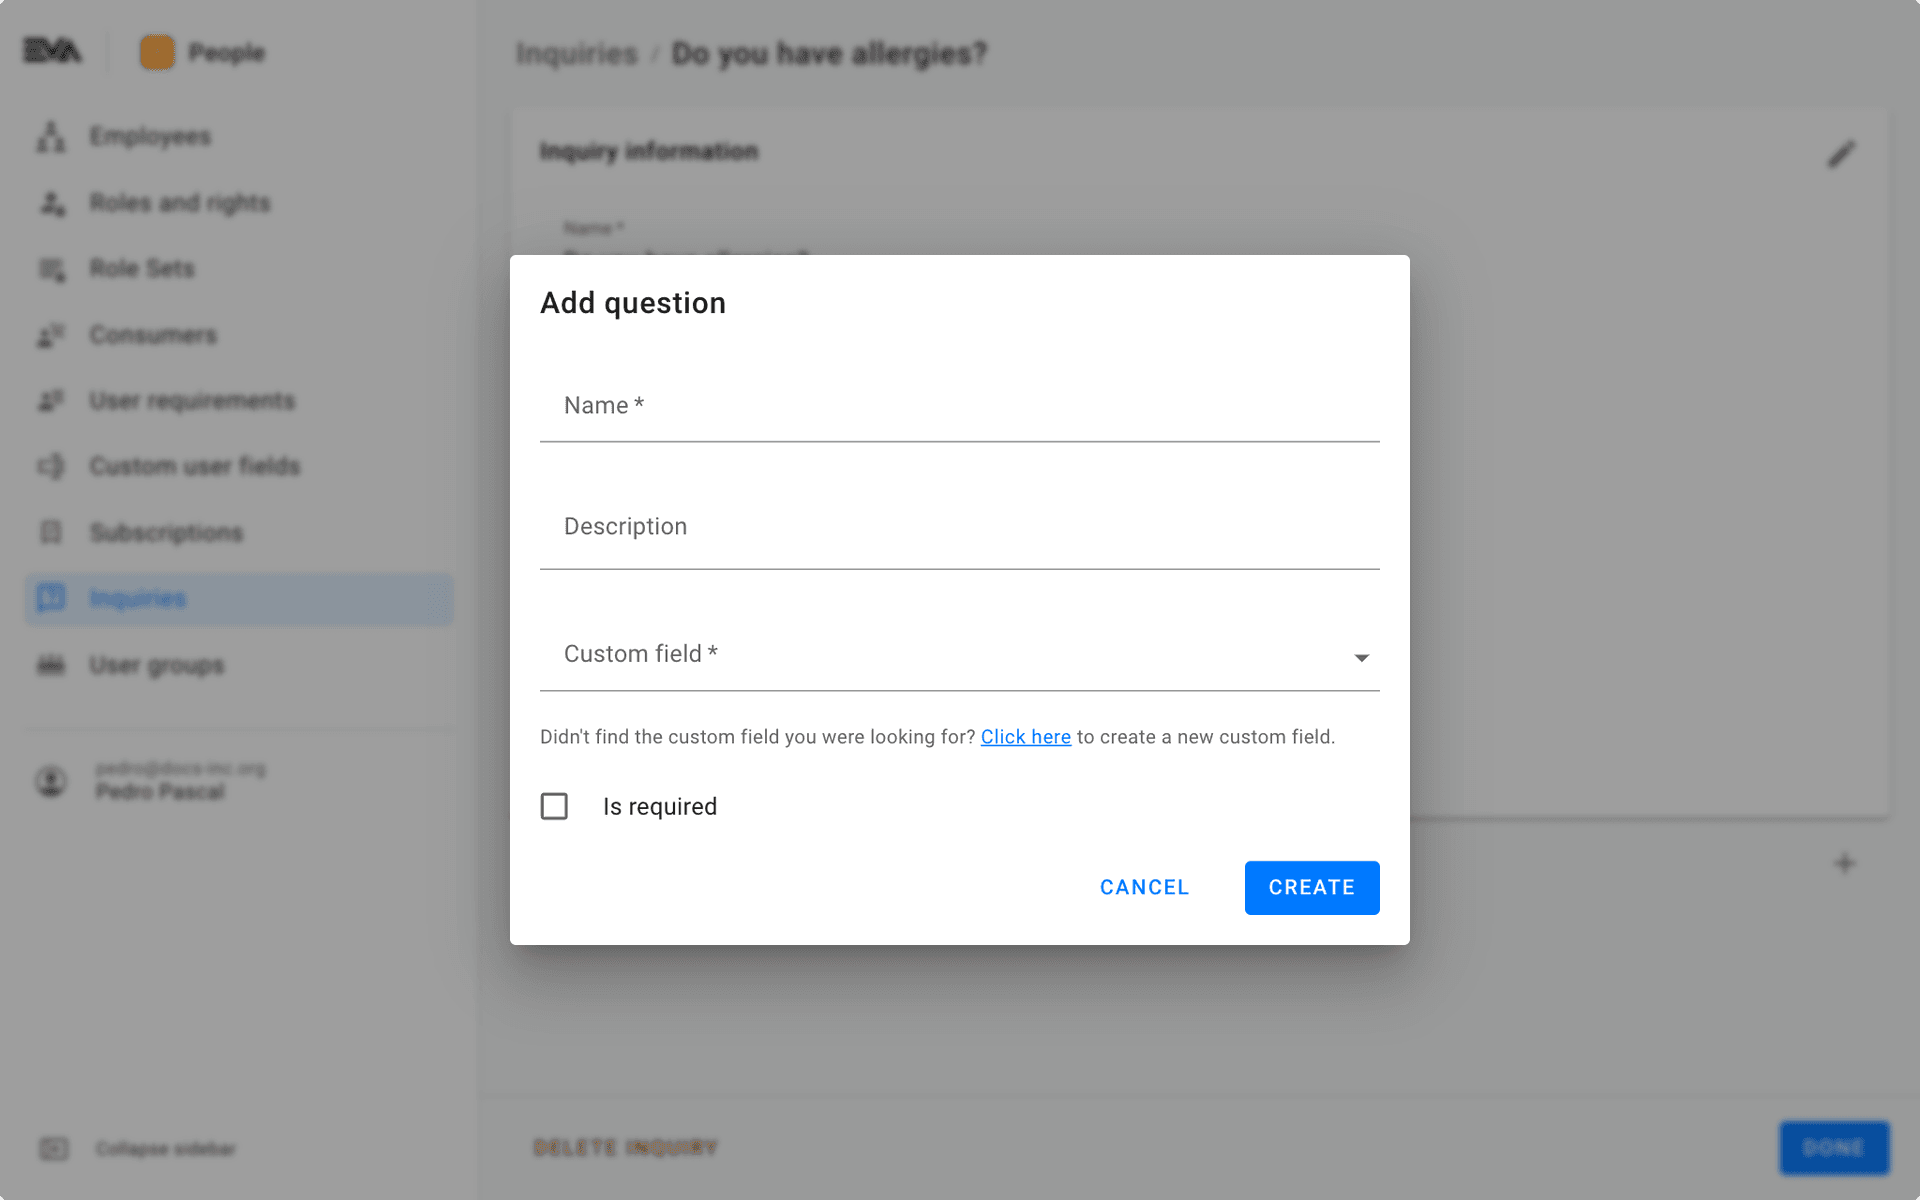
Clicking the '+' icon will prompt the Add question modal where you can add a question and also connect a custom field to it.
- Name (required): name your question - this will be displayed in your front end in the inquiry's list of questions.
- Description (optional): by adding a description, it will be displayed in your front end beneath ther Name, so beneath the question.
- Custom field (required): add the custom field that holds the input field for the question.
- Is required (optional): specify if the question is mandatory to answer or not by using this checkbox.
Sort questions
When more than one question is added in the inquiry, there’s a possibility to rearrange the order of the questions.
This can be done by clicking the 'drag and drop' icon (next to the '+' icon). The question at the top has the highest priority and will be displayed first in the front ends. This works all the way down to the lowest priority.
This is a helpful feature when you have follow-up questions. For example:
Favorite meal of the day + at what time do you eat that meal + what is your favorite dish.
The order of time and dish can be rearranged to whatever you think makes the most sense.
Edit inquiries
Clicking an existing inquiry from the list view will prompt the edit modal. All fields in the Inquiry information card are editable by clicking the 'Pencil' icon and translatable by clicking the 'Language' icon.
Further, questions can be added/rearranged and deleted however, keep in mind that it’s not possible to edit the custom field attached to an existing question. To edit a question click the 'Pencil' icon, and to translaea click the 'Language' icon.
Deleting
- Deleting questions: Deleting a question can be done by clicking the corresponding questions 'bin' icon.
- Deleting inquiries: Deleting an inquiry as a whole can be done by clicking the Delete inquiry button found on the left bottom corner of the footer bar in red font.