Payment configuration
For more information on payments in general, as well as an explanation of integrated and non-integrated (custom) payment parties, see Payments under Concepts.
The Payment methods chapter gives you a clear overview of all different payment methods, such as Adyen, AdyenCheckoutAPI, EVAPay or Mollie, followed by the payment types available for that method. For example, the AdyenCheckoutAPI payment method includes the payment types, iDeal, Apple Pay, Credit Card, etc.
Now, several payment methods will come preconfigured in your environment. Those are non-editable, and are found under the System card. Custom payment methods on the other hand, those are found and/or created/edited via the second card in this overview, called Custom.
In order to be able to access this chapter, you need the PaymentMethods and PaymentTypes permissions.
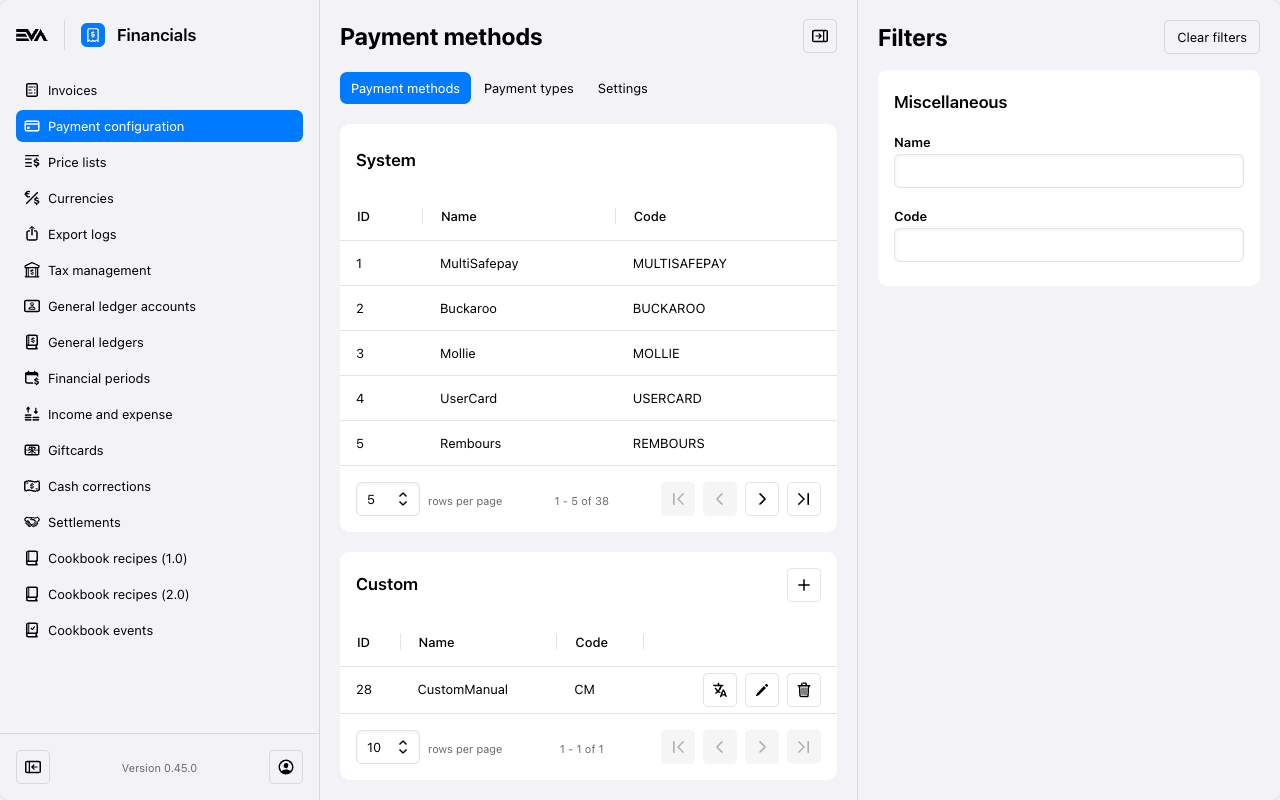
Make use of the right pane filters to narrow down your overview results. The filter fields will differ along with the chosen tab (Payment methods, Payment types and Setting). The filters offer options relevant to its kind.
Creating/editing a custom payment method
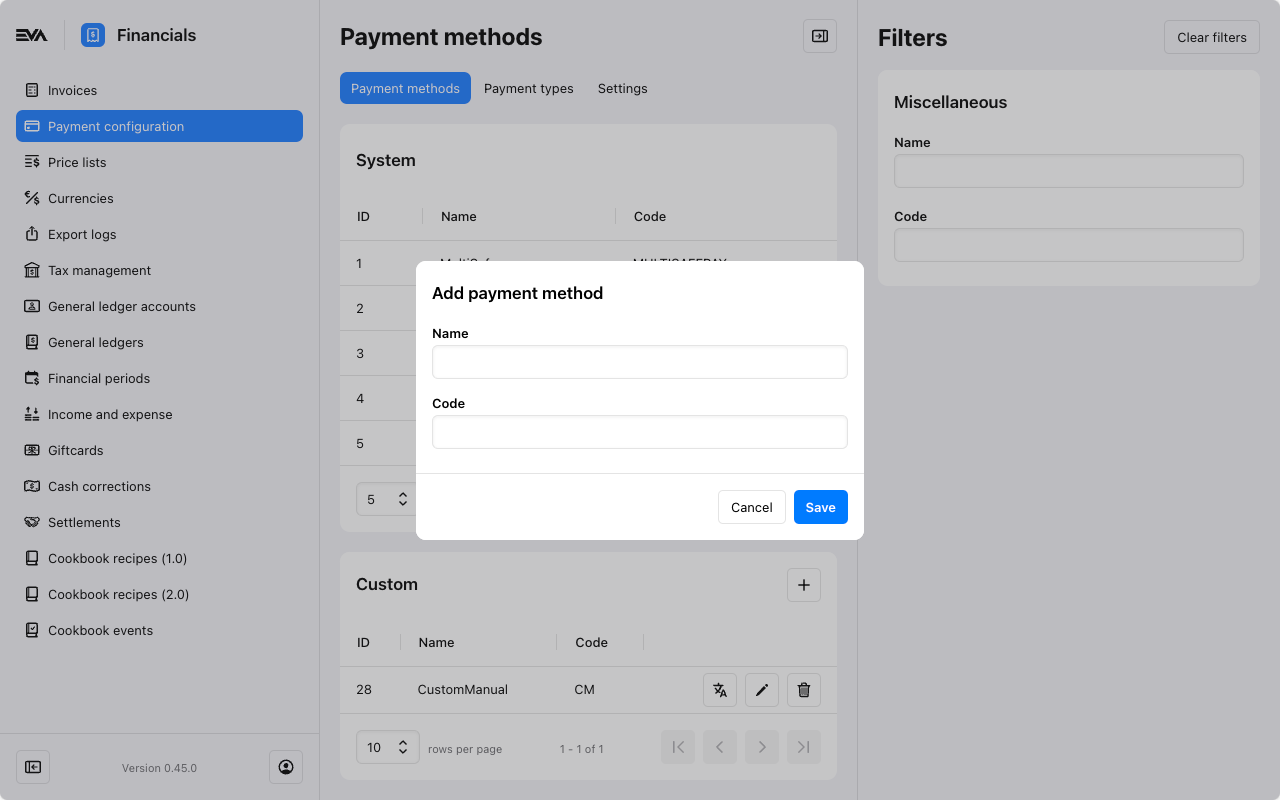
You can add a custom payment method by clicking the '+' icon in the top right of the Custom card. The required fields are Name and Code. The code, when creating a new payment method, is not used in its configuration and serves more as an indicative field than anything else.
On the other hand, editing is as simple as clicking the 'pencil' icon.
Creating a System payment method or editing an existing one is not possible. We'll take care of that when and if required.
Adding/editing a payment type
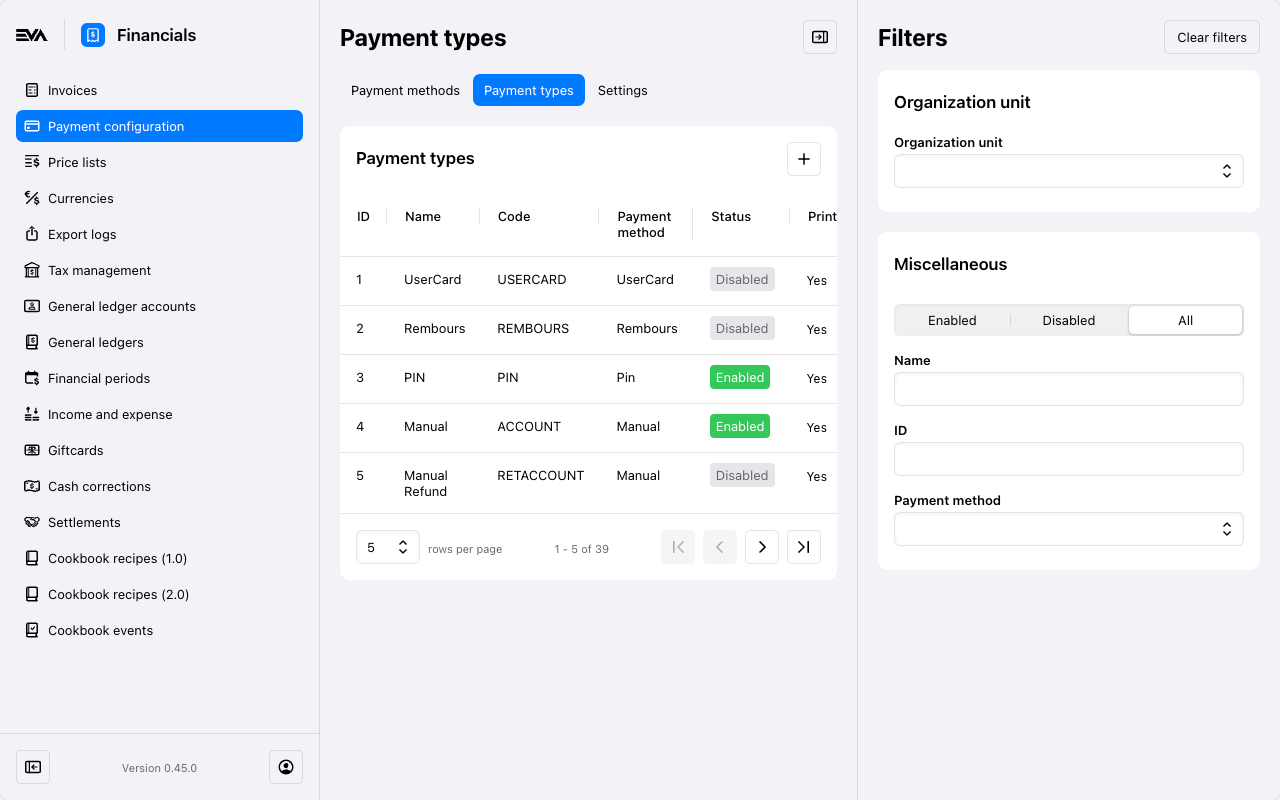
You can add a new payment type from the Payment types tab by clicking the '+' icon in the top right of the card.
The fields used in creation of a payment type and their descriptions are as follows:
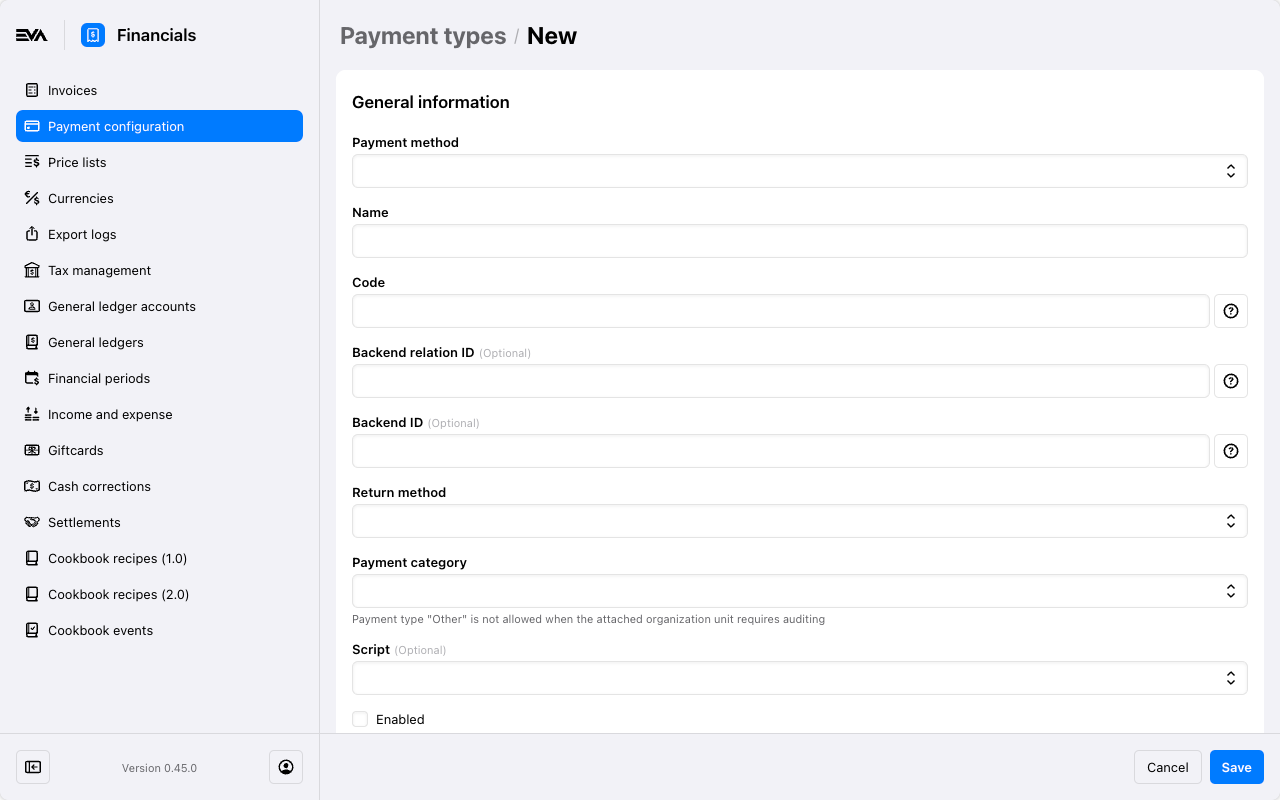
- Payment method: A dropdown list based on the available System and configured Custom Payment methods.
- Name: The name of the payment method, specifically how it will be displayed.
- Code: The internal reference code for system to system communication.
When specifying the Code, be sure to specify it exactly as required by the PSP. You can read more about the format of these codes below, or go to Adyen payments for more background information.
- Backend ID: BackendID of the payment type.
- Return method: Define what action should be taken when an order is returned with payments on it.
- Default -> a return order that is triggered by a user
- Blocked -> the order can't be returned
- Forced -> automatically create refunds for these payments.
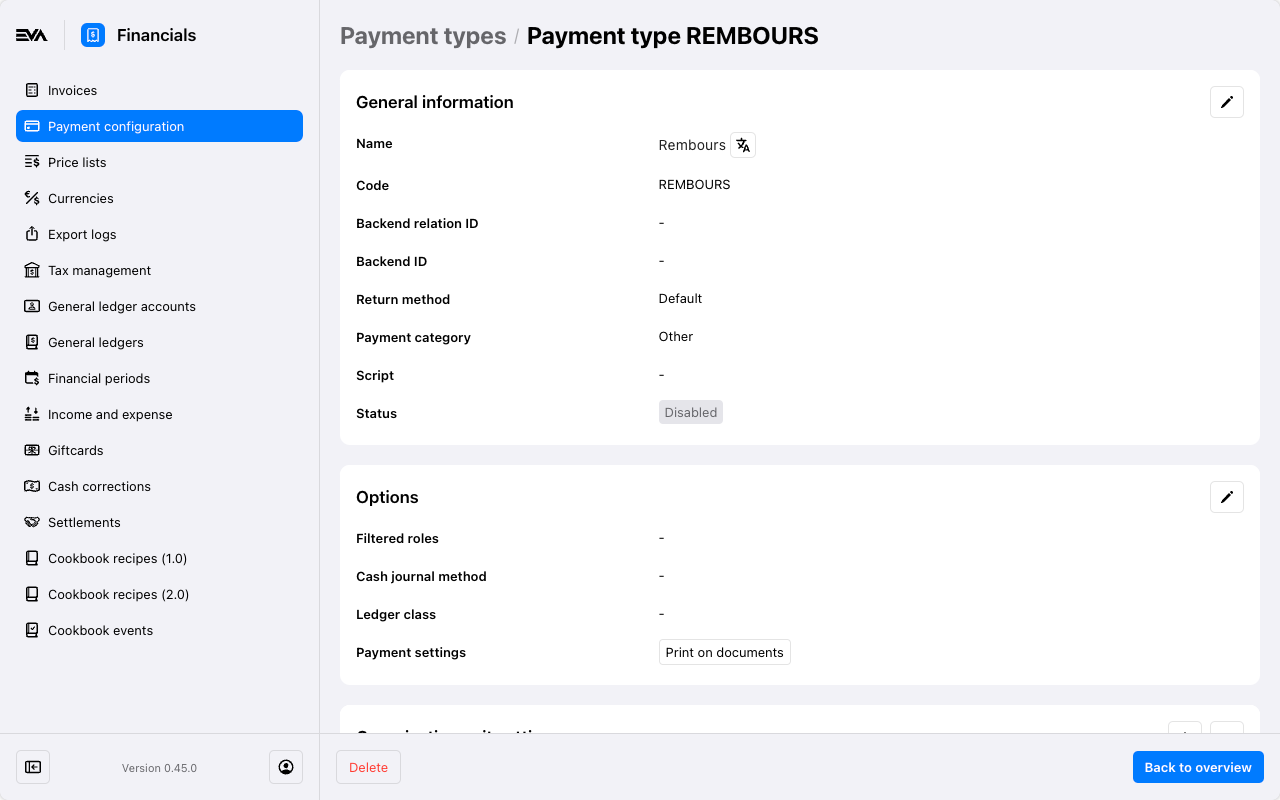
- Payment category: Payment categories are set for compliancy reasons: aside from the Other category, these don't affect your payment directly, but instead allow you to designate the payments as one of the generic categories as used by the fiscal printers and in the from the Audit files.
- Other = 0 (using this makes it an invalid payment type)
- Debit = 1
- Credit = 2
- Cash = 3
- Voucher = 4
- Online = 5
- Rounding = 6.
- Active: Enable/disable the payment type.
- Script: Select an active PaymentTypeAvailability script, to fine-tune this payment method's availability based on order properties.
On the other hand, editing an existing payment method is as simple as clicking an existing one. This will navigate you to the settings tab.
Payment type Codes
The payment method dictates what should be entered in the Code field, since the code has to match the PSPs internal reference. If we'd use the ADYEN_CHECKOUT_API payment method for example, we need the following the code format as set by Adyen, which comes down to: ADYEN_CHECKOUT_API_BRANDNAME.
The 'BRANDNAME' here is the code used by Adyen for their own integration with another payment provider, such as iDeal. In case of iDEAL it would likely be ADYEN_CHECKOUT_API_IDEAL. But you can read more about the Adyen payments specifically in the Payments using Adyen docs.
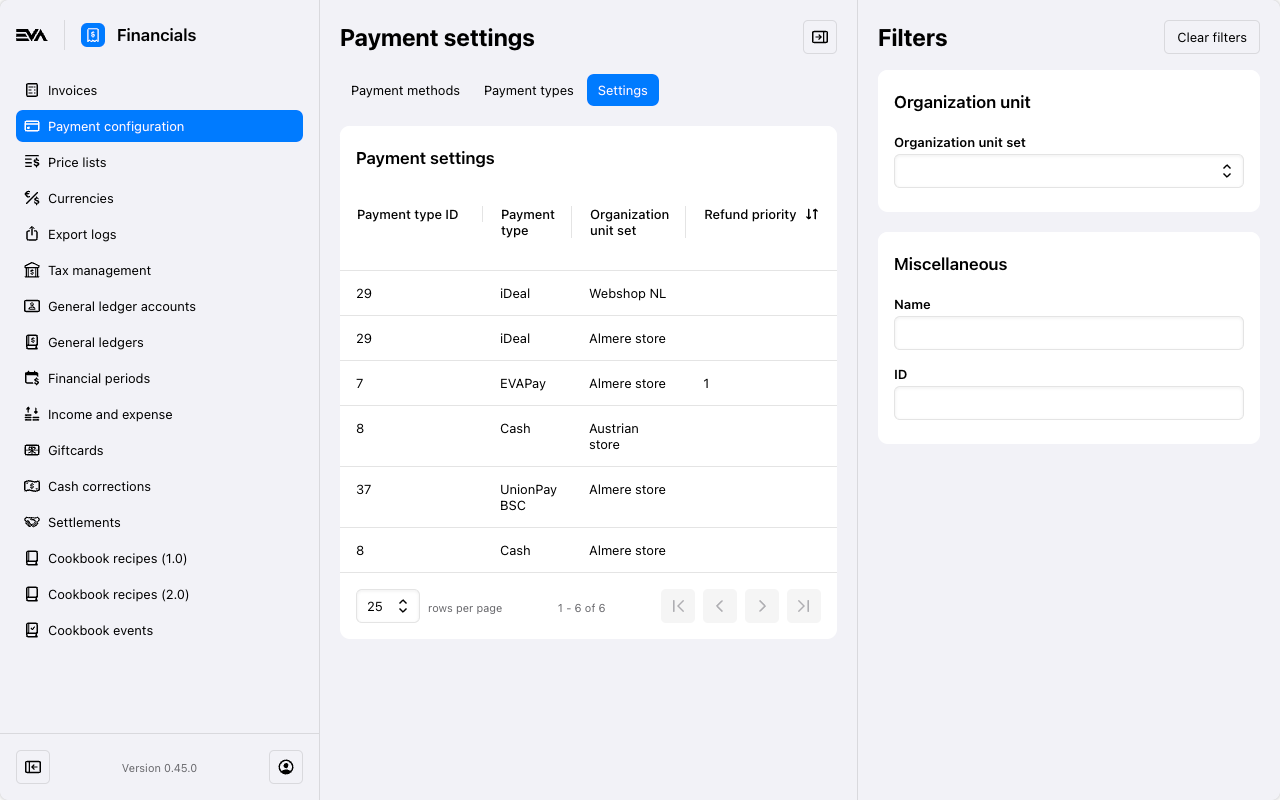
Settings
The Settings card allows you to edit or further fine-tune the use of a payment method even further. It consists of three cards: General details, Options, and Organization unit settings.
General details
Those are the details initially filled in. A description of each field can be found here.
Options
This card may differ based on whether the payment method is System or Custom. A custom one will show more fields. Nonetheless, all fields will contain a dropdown with options to choose from, most are quite straight forward.
However, one field namely the Cash journal method, could benefit from a little more explanation. This field is used for payment types that have some physical representation, mostly that's just cash. This field will determine when the cash journal for such payment type should be counted in your store (organization unit), with the following possible variations available:
- None: no cash journal
- Close: only when closing the journal
- OpenAndClose: when opening or closing the journal
- Ignore: the employee never counts it, but there is a journal that is automatically set with the right amounts
Options for regular payment methods
Options for loyalty payment methods
This payment method card named Loyalty is specifically meant for your loyalty payment types. It is mostly similar to the regular payment types, aside from that it features a Loyalty program ID field in its Options card.
For example, users can link their LINE accounts to their customer accounts, enabling full, partial or mixed payments using loyalty points.
Options for custom payment methods
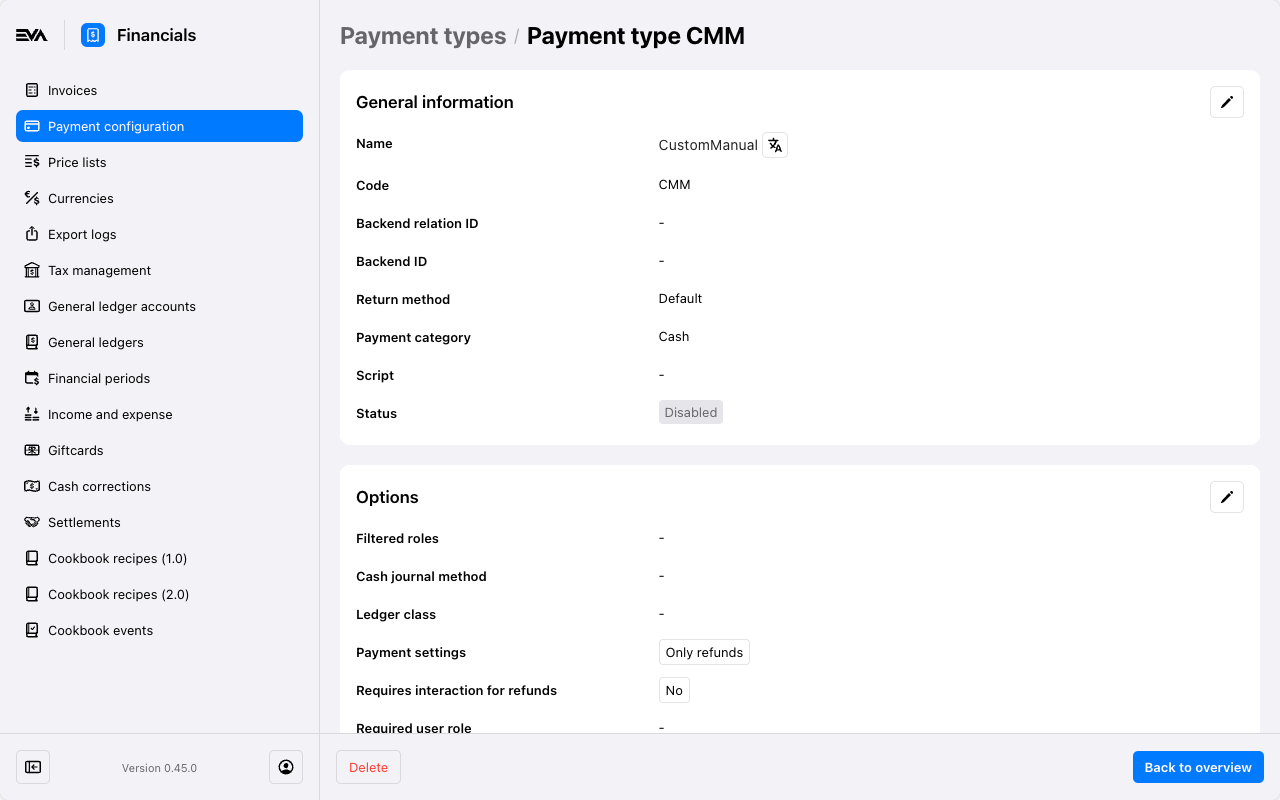
As you can see, the options for custom payment methods also include setting a Required user role and a Required functionality, the latter of which is an entire list of functionalities - type what you're looking for.
Even though the first four fields are the same as for a regular payment method, the possible values of the fields differ: custom payment methods once again offer more values. This includes how to handle refunds, cancellations, confirmations, etc; a host of configuration options are available to custom payment methods.
Keep in mind that some options work in tandem. Take for example Only refunds, which will not be effective if Refunds allowed and Refund without original order are not set.
Organization unit settings
You can add more configuration options to OU sets. These options include for example a specific Capture moment or disabling for certain line action types.
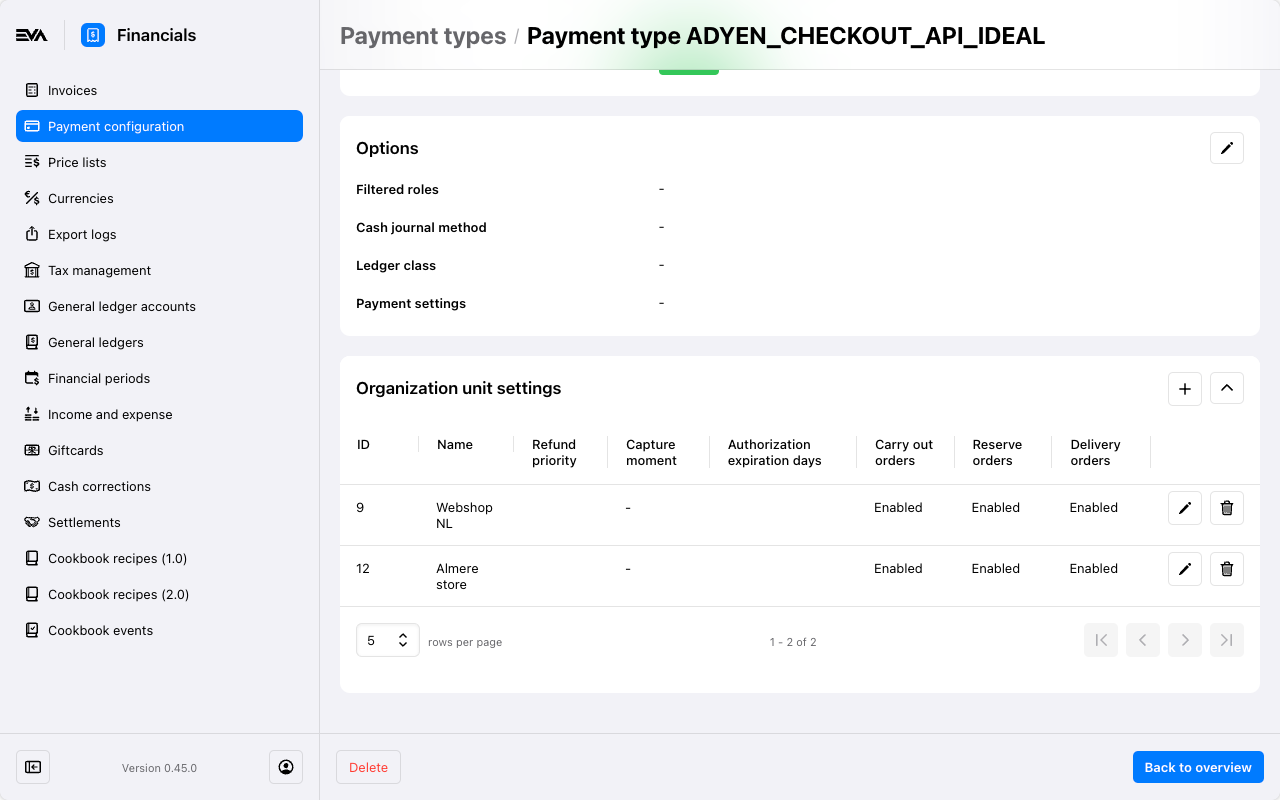
For backwards compatibility reasons, all types are available across organization units regardless of specified sets by default.
The recommended configuration however, is to make use of the PaymentMethods:PaymentTypeAvailabilityByOuSetType setting. By setting this to true on root level, availability is strictly limited to the specified OU sets.
This allows for much more fine-grained structures, such as having CASH available for a store set only (so it's not available on ecom).
- Refund priority: The Refund priority is set by entering any number - the higher the number, the higher the priority.
- Capture moment: The Capture moment determines if and when EVA would send a capture request towards the PSP, make sure the systems have a matching moment. When not specified it will default to None. The dropdown offers the following options:
- None: direct capture moment (such as when using PIN in store)
- Manual: manual action required
- Ship: when the order is shipped
- Confirmation: as soon as the order is confirmed
- Authorization expiration days: This can only be filled if the Capture moment was set to any value other than None. This specifies the number of days after which any uncaptured payment amounts will be automatically cancelled. Just like with the capture moment, make sure the duration specified matches with that of your PSP.
- Order type: Specify per order type whether this payment method should be active for it or not.
These OU settings are irrelevant when stores are operating in Local mode, and therefore ignored when Local mode is activated.
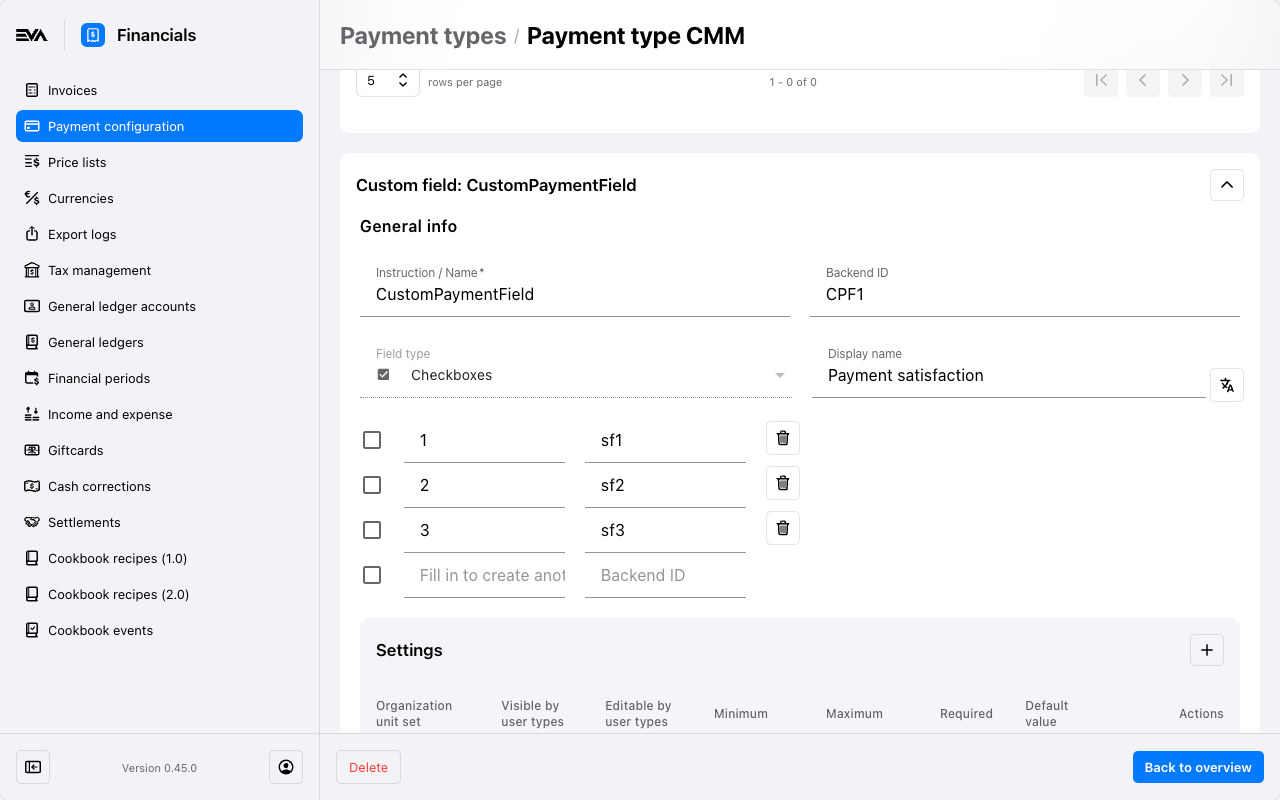
Custom Fields
You can add custom field(s) to custom payment type(s). The user interface to configure ones is similar to the one found in the Custom Fields chapter. However, the ones pertaining to payment types can only be added or edited via this card here, and not from the Custom Fields chapter.
Payment types visibility
See Custom payment methods in integrations for services to fine-tune for whom a payment type should (not) be visible in the POS and Companion.
Flexible Type Mapping
In order to map various external gift cards under the card payment type and distinguish between, for instance, a MasterCard and an external gift card, make that Pin:UseFlexibleTypeMapping is set to true.
Create a payment type for each card circuit provided by your PIN provider for which you want to assign a specific payment type (Ensure the code matches the card circuit). The payment method for these types should be your chosen payment provider (For example, Adyen). This configuration will alter the payment type when a transaction is completed.