Shipping
Shipping
Managing carriers, shipping methods, costs and restrictionsThere are many aspects to shipping, some required for your flows and some optional. Whatever it is you need, can be found in this Admin Suite chapter.
The Shipping chapter, and this namesake docs page, is subdivided by three tabs:
- Carriers
- Shipping method & costs
- Shipping restrictions
Carriers
The chapter opens up with the Carriers on display. These represent the various companies you are partnered with to physically bring your packages from A to Z.
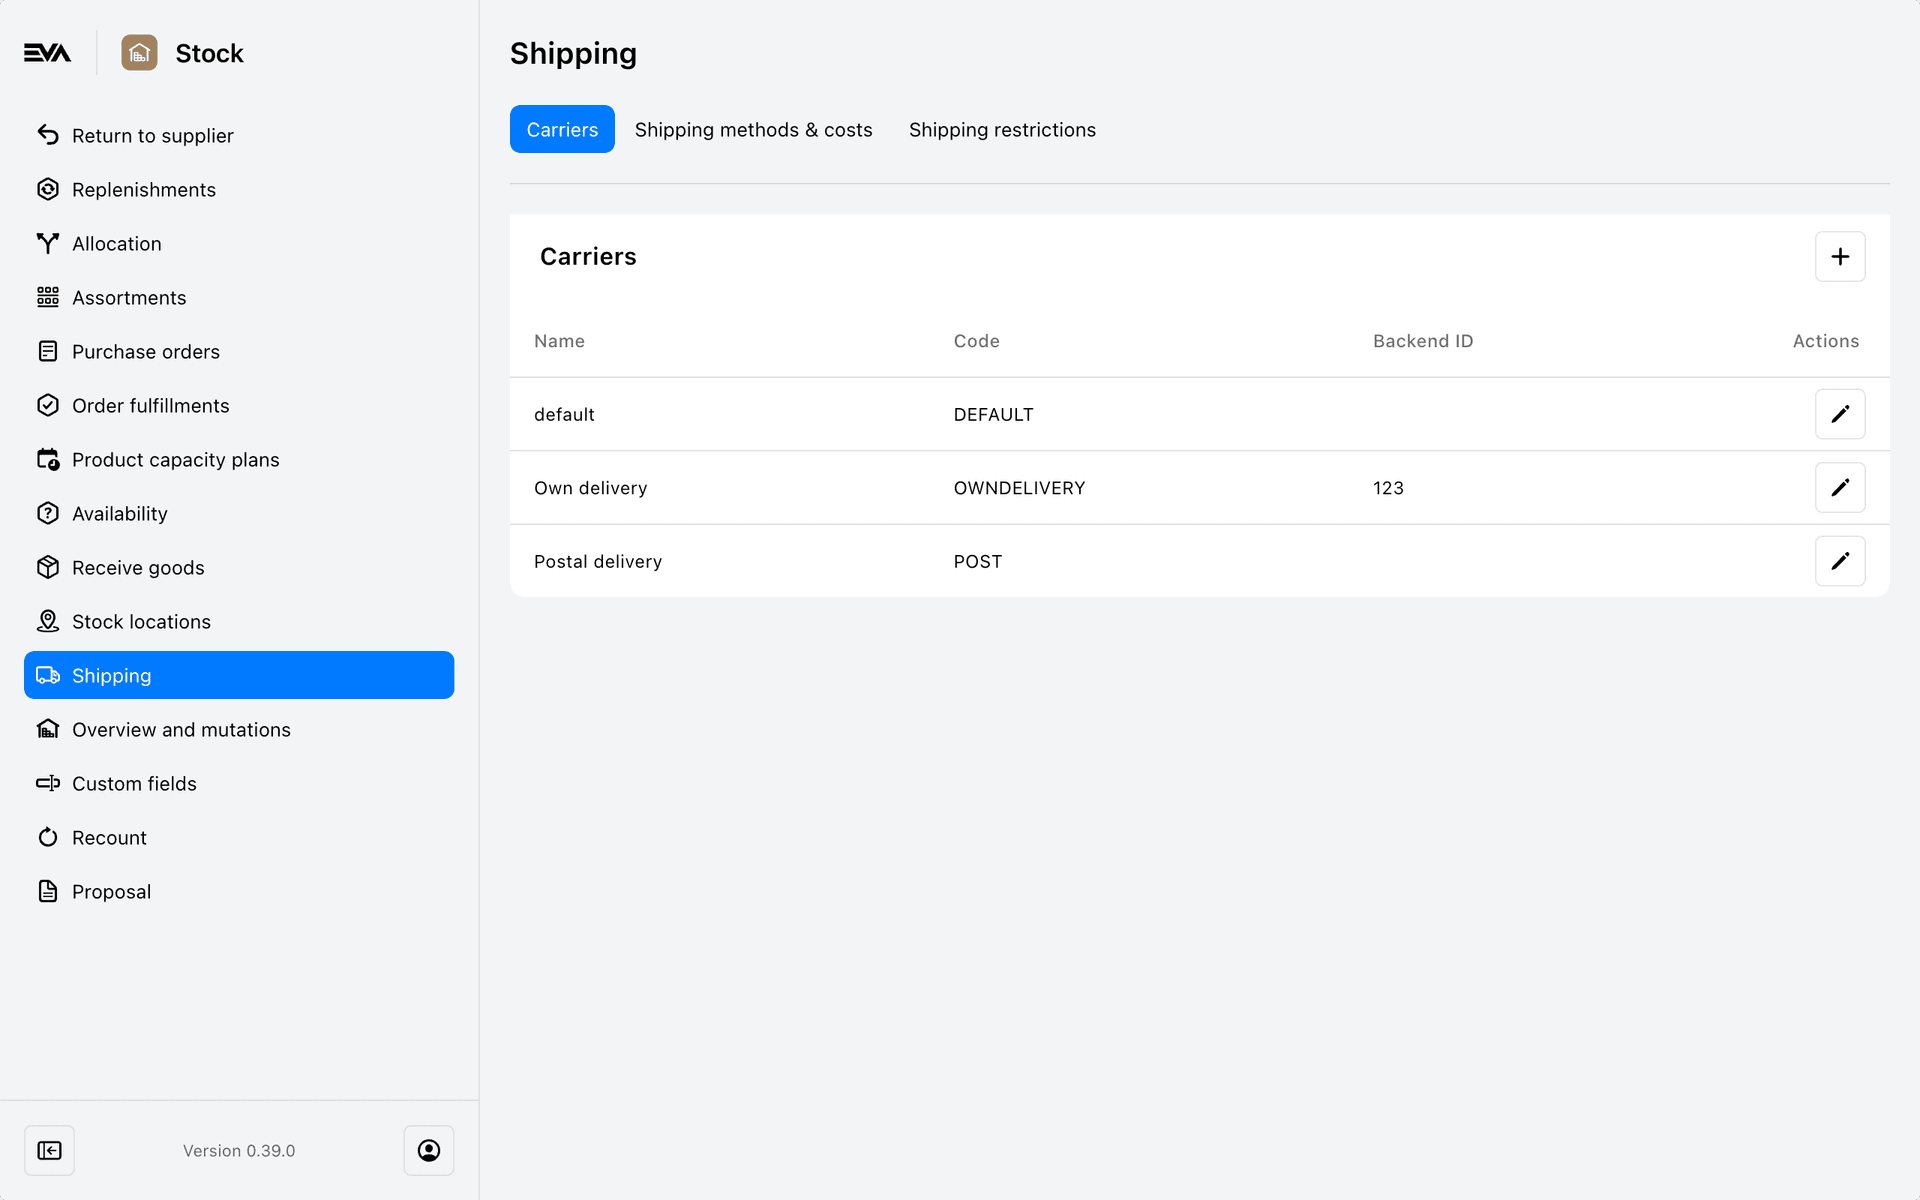
The creation modal only has three fields, which are all displayed in the overview as well.
| Property | Description |
|---|---|
| Name | Name of the carrier (e.g. FedEx, UPS, PostNL). This is the name that is displayed in front-ends (e.g. POS, App Suite). |
| Code | (Optional) Add a Code to the carrier. This is a reference code (e.g. FED_EX) for use in your interfaces, and can be mapped to internal codes used in your WMS. |
| BackendID | This is an extra field to be used to match the carrier to an ID used in your external (backend) systems. |
Shipping methods & costs
This overview shows all currently active shipping methods and the attached carrier.
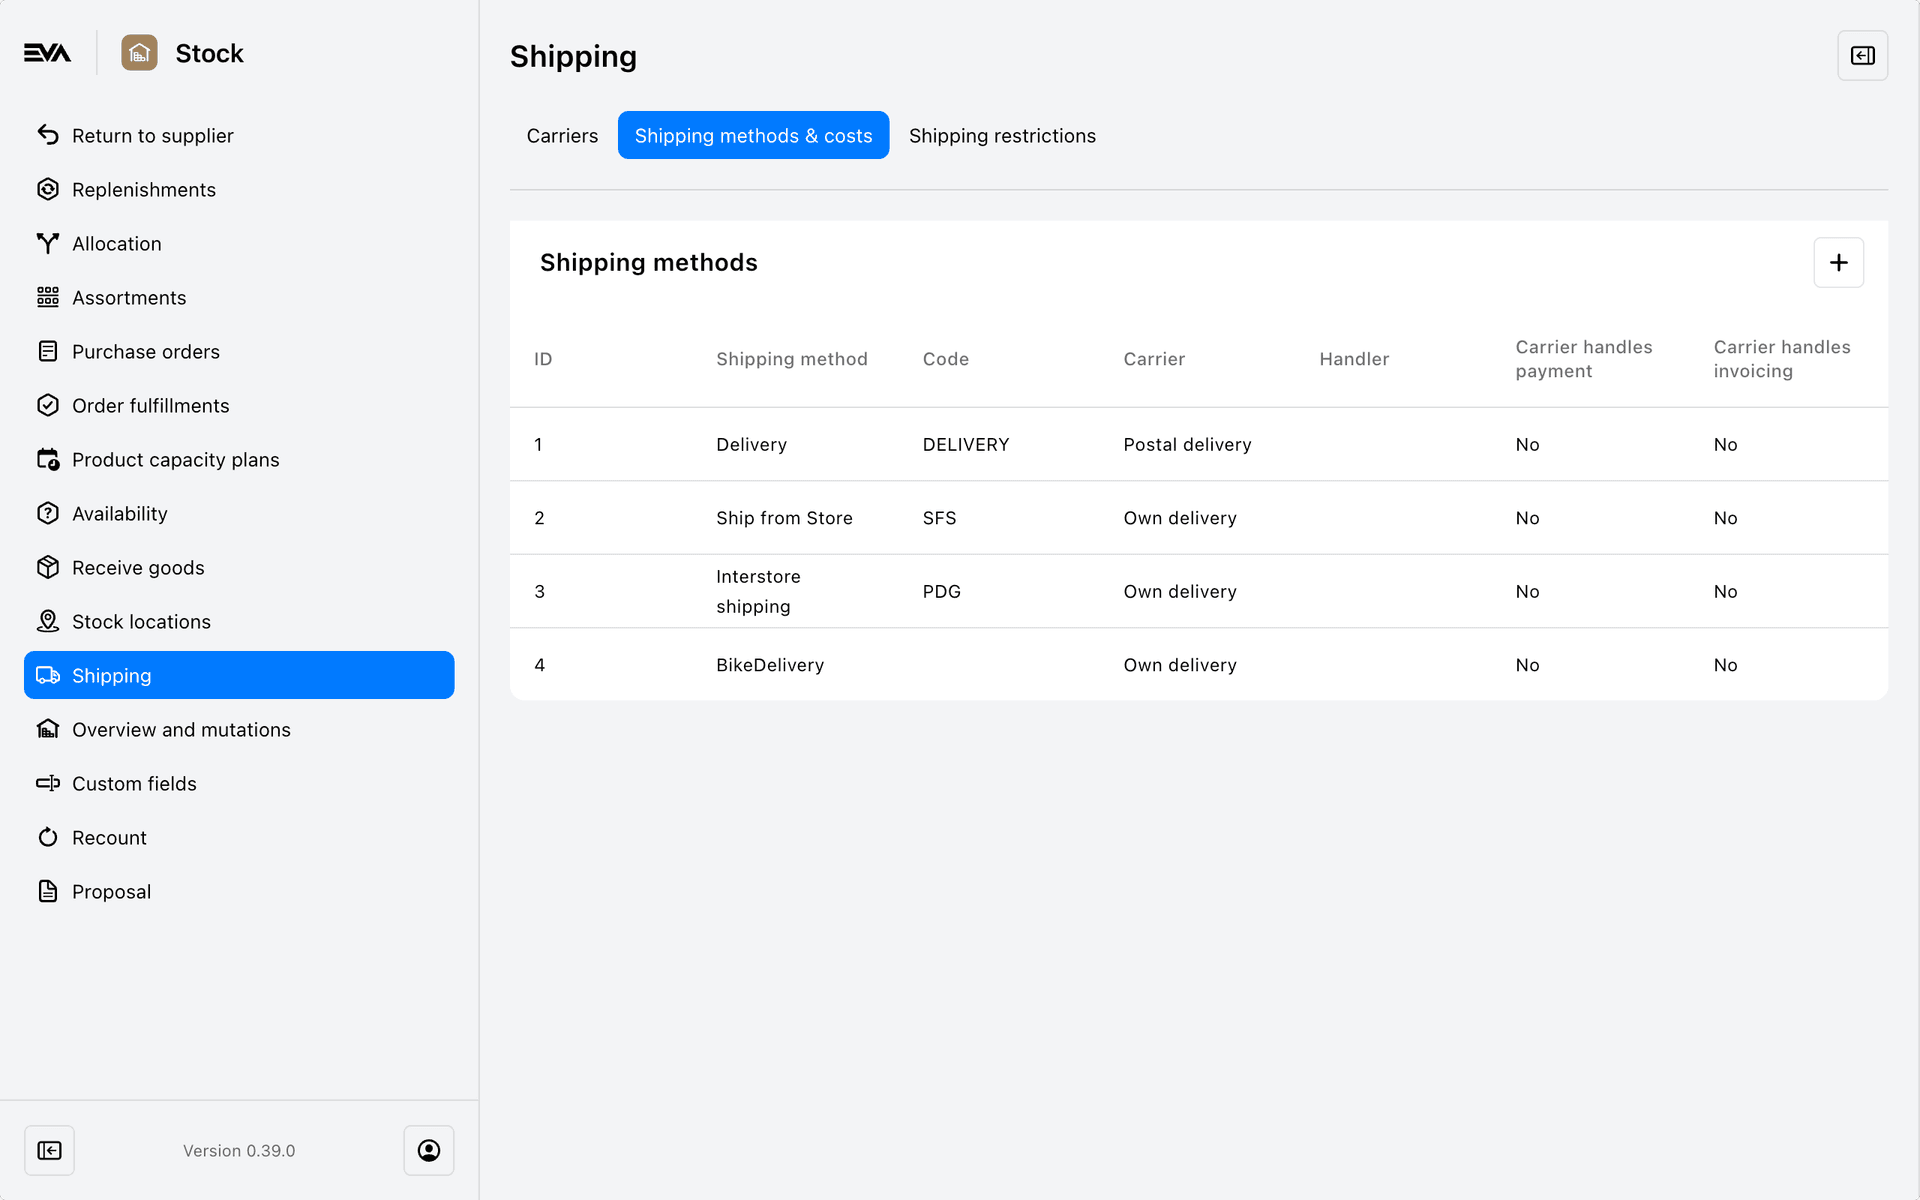
When you click the '+' icon to add a new one, you start off by creating the method. The following table shows you all available fields and options.
| Property | Description |
|---|---|
| Carrier | One of the previously created carriers. |
| Name | Name of the shipping method (e.g. Standard Delivery, Express Delivery). This is the name that is displayed in front-ends (e.g. POS, Companion App). |
| Code | (Optional) Add a Code to the shipping method. This is a reference code (e.g. STAND_DEL, EXPRESS_DEL) for use in your interfaces, and can be mapped to internal codes used in your WMS. Note that this can be used to bypass the carrier. |
| Delivery type | Specify the appropriate delivery type. Shipping methods can have one of the following delivery types attached: - None - Default - ShipFromStore - Interbranch |
| Handler | Select a handler from the list of available ones. |
| Carrier handles shipping | Mark this if the shipments created with this method need to be kept pending instead of being shipped automatically. EVA expects the carrier to ship the shipment. |
| Carrier handles payment | (Optional) Mark if this is a shipping method in which the customer pays to the carrier upon delivery. |
| Carrier handles invoicing | (Optional) Mark this if the carrier creates the invoice for the customer. |
If you let your carrier handle payment and invoicing, your order state will not go to Completed, but remain Shipped until the carrier informs EVA the package has been paid and delivered. If your carrier handles shipping only, payment will be required up-front.
Additional information
Regarding delivery types
By default, all delivery types are set to None, meaning the type will show up for each shipping method. By selecting a specific type however, it will only show up when it's relevant based on the order type and OU. By selecting Default it will be specifically excluded from Interbranch and SFS.
If you want to enable Interbranch shipping, you need to perform a few additional steps aside from choosing it as the relevant Delivery type:
- Set
Interbranch:ShippingOptionto one of the following values:- 1 (Manual) - This default value means shipping will happen right away (if all requirements are met).
- 2 (ManualWithShipmentIDs) - You'll have to manually scan a ShipmentID after which all lines are shipped.
- 3 (ManualWithDetailInspection) - You'll have to manually scan a ShipmentID plus all product barcodes.
- Create the relevant supplier relations for interbranch orders.
Regarding shipping methods in POS
POS specifically requires you to set OrderLineCreator:SetDefaultShippingMethod to true before any shipping methods will become available at all.
Regarding shipping methods in PushSalesOrder
When passing the shipment information on the PushSalesOrder service it looks like this:
        "ShippingInformation": {
        "Method": "STAND_DEL",
        "UnitPriceInTax": 1,
        "TaxRate": 1.21
},
The Method entry corresponds with the Code configured on the shipping method.
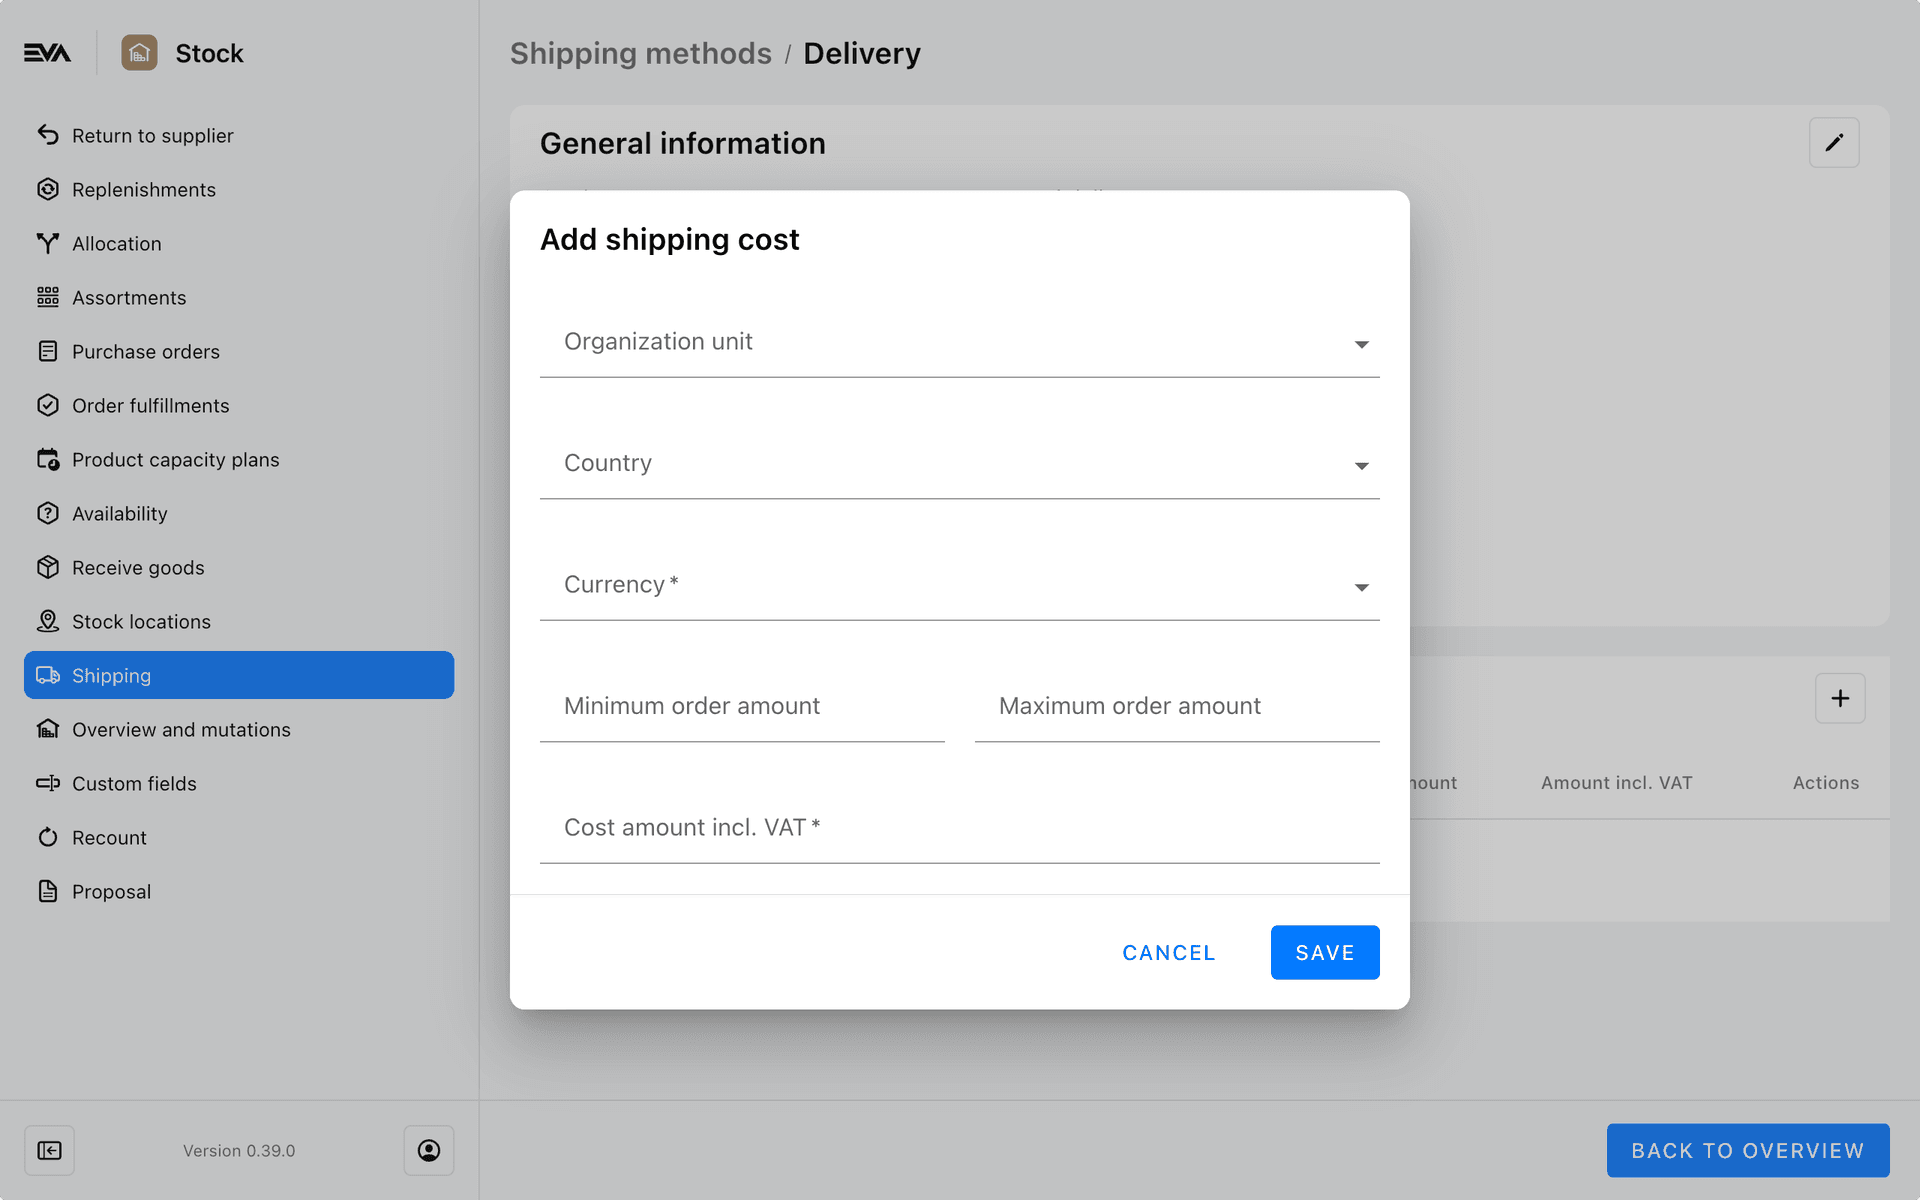
Costs
Once you've created your basic shipping method, you can attach costs to it. This way you might set a different shipping cost based on the order amount for example.
Any created shipping costs will be shown on the Logistics tab of the OU in question automatically.
Cost-related settings
Show shipping costs without attached shipping address
It is possible for your front ends to display a range of shipping costs, even when no shipping address has been attached yet.
- Set
ShippingCosts:CalculateWithoutShippingAddressto true - Create a shipping method with shipping costs without a country attached. You can do this per OU
Prevent rising shipping costs in out-of-stock situations
When order lines are cancelled after they have been exported, due to an out-of-stock situation for example, customers wouldn't expect to have to pay (increased) shipping costs.
- Set
ShippingCosts:ExportedLinesCanIncreaseShippingCoststo false
This will prevent rising shipping costs after lines have been exported. Mind that the reverse is still possible: cancelled lines which warranted high shipping costs will lead to reduced shipping costs.
Context-based shipping costs
There are some cases where you do not want your shipping costs to include tax. This is mostly applicable when working with external tax providers such as Avatax and Vertex. In that case, it is recommended to enable this feature to prevent situations with open orders based on rounding issues during re-calculation of an in-tax configuration and an ex-tax order context.
- Set
CalculateShippingCostsBasedOnExTaxto true
Once set to true, configured shipping costs will be considered EX TAX when inside a CalculateAmountsBasedOnExTax context.
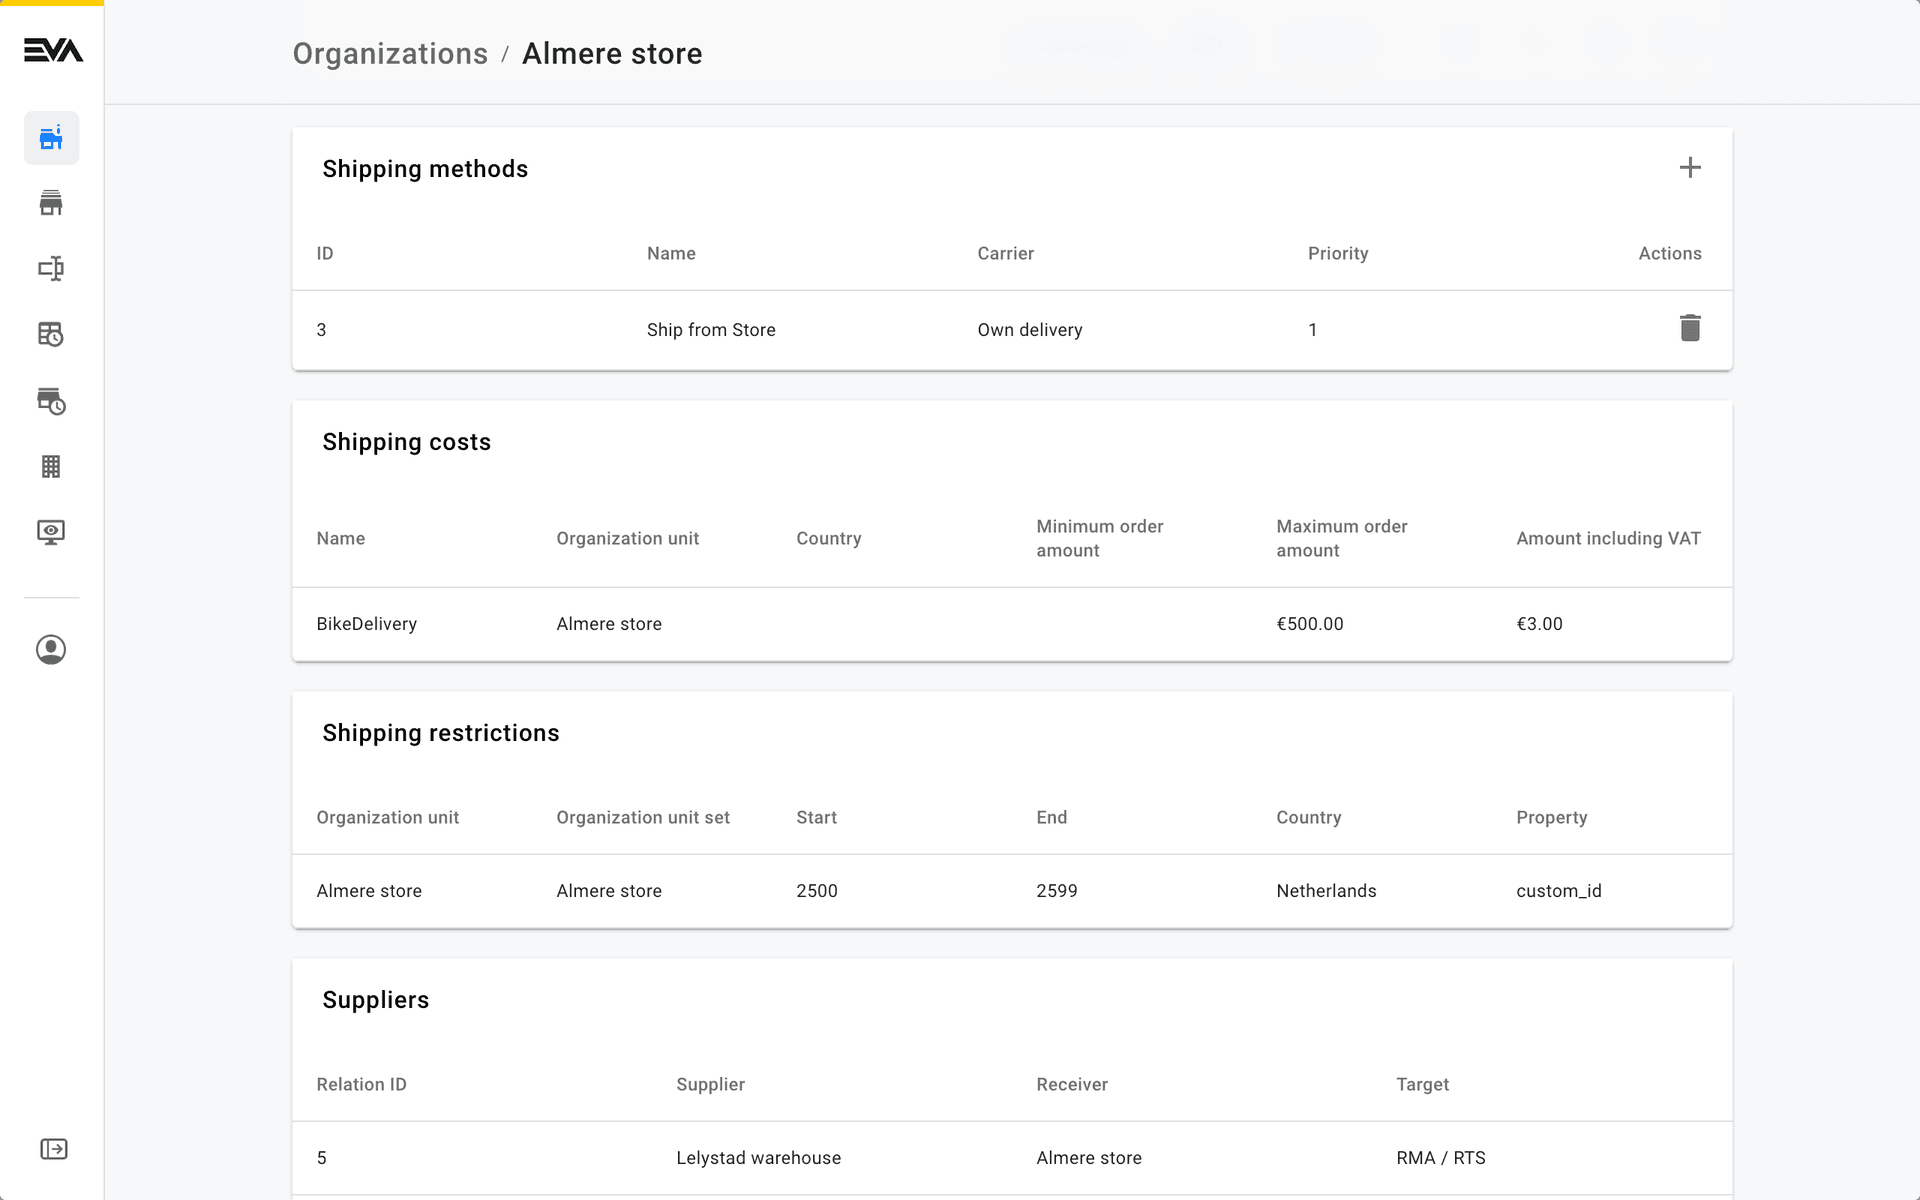
Attaching your shipping method to your store
You have to attach your new shipping method to your store manually. To do so, go to Organizations, pick your store and head over to its Logistics tab. Amongst all these cards, you can find Shipping methods. Click the '+' icon to select one of your available shipping methods and to set a priority.
In there you can select your store, enable the appropriate shipping method and set its priority. Mind that a higher number equals a higher priority.
If you want to be able to change your shipping method in an order in your Checkout App or POS' checkout, you will additionally need to create the corresponding Checkout option.
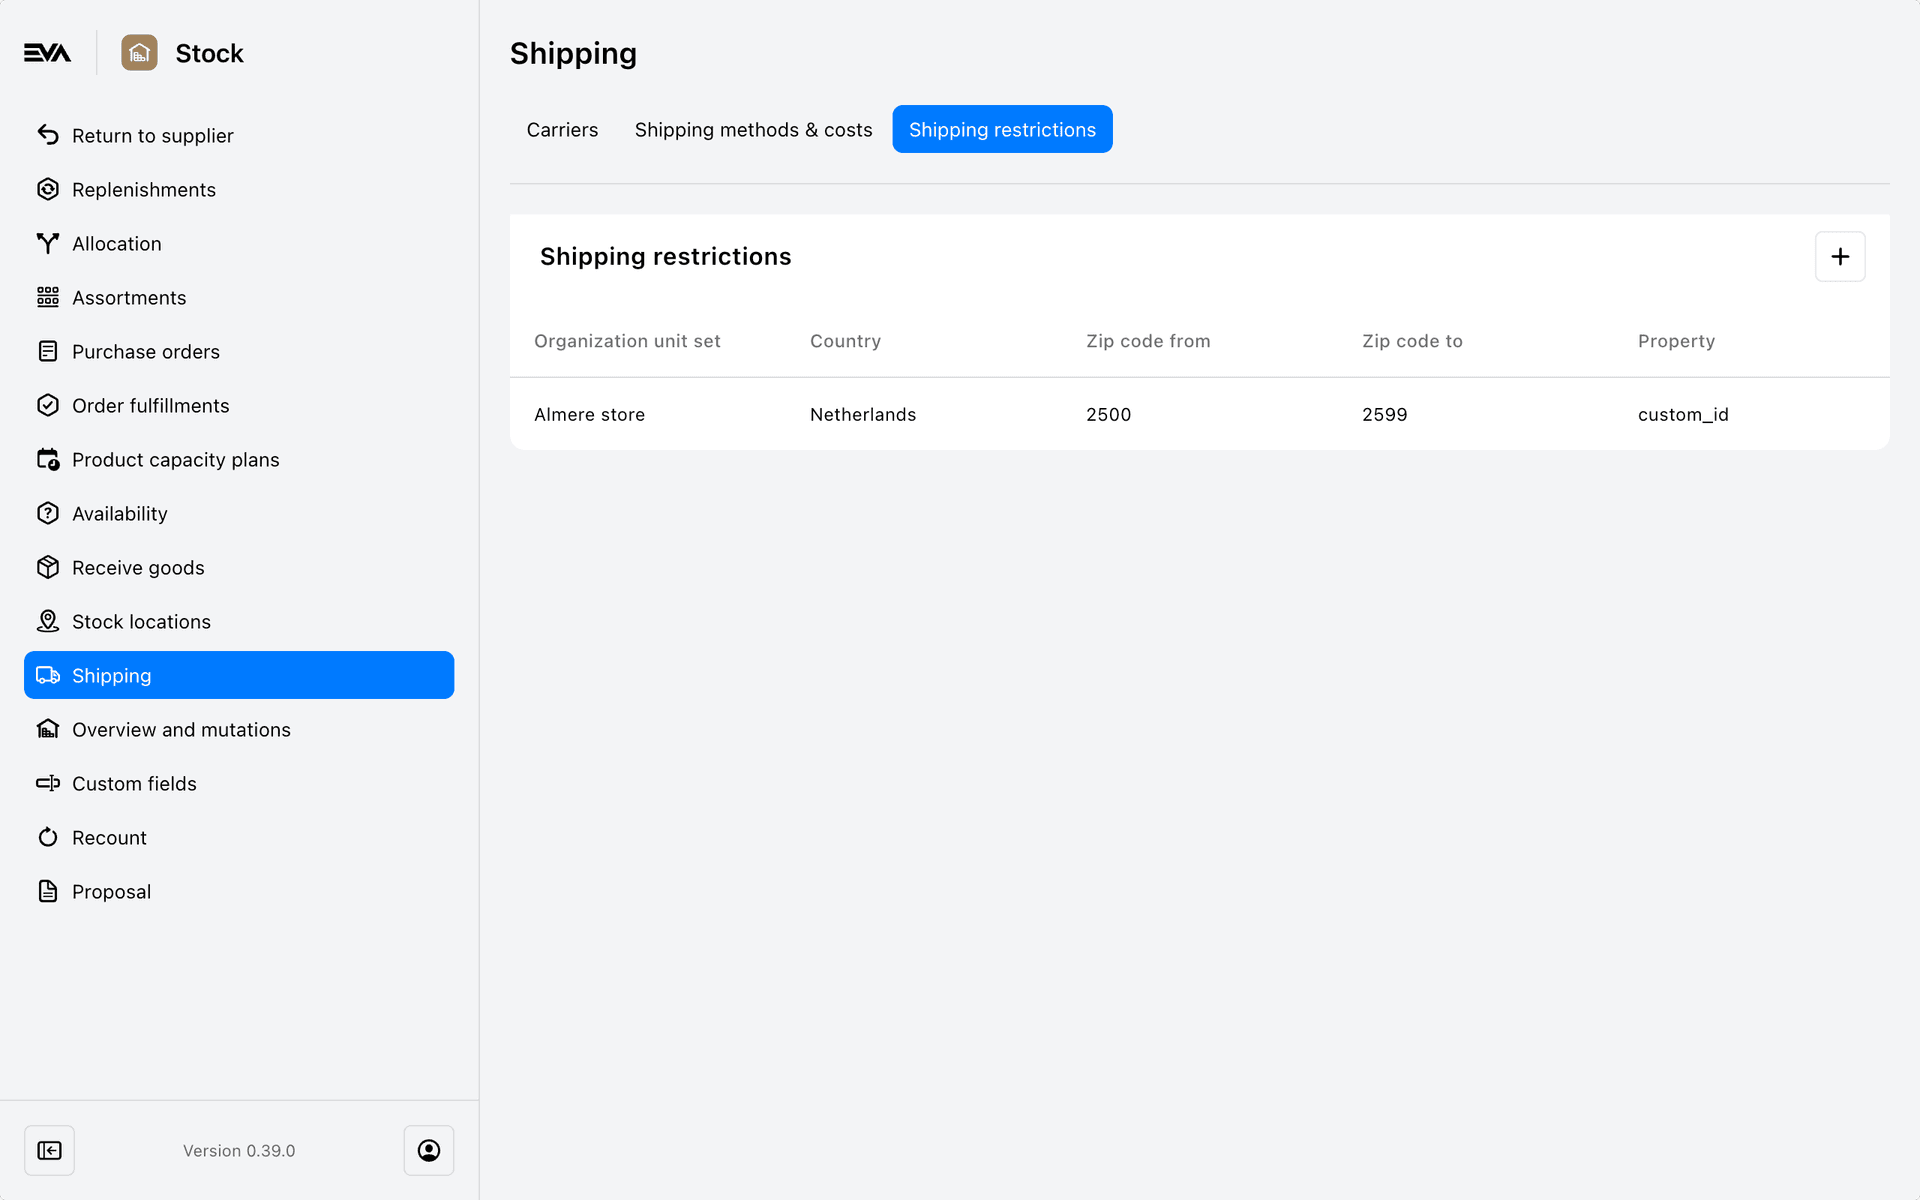
Shipping restrictions
EVA supports the use of restrictions on shipments to customers.
To use this feature, you need the ShippingRestriction functionality along with the desired scope.
Permissions are managed from the Roles and Rights chapter, specifically from the functionalities card of a user's role.
This can be used to block certain addresses, such as specific zip codes, from receiving a delivery. It can also prevent specified products from being shipped to certain addresses using zip codes. Importantly, carry-out orders are not affected by such address shipping restrictions.
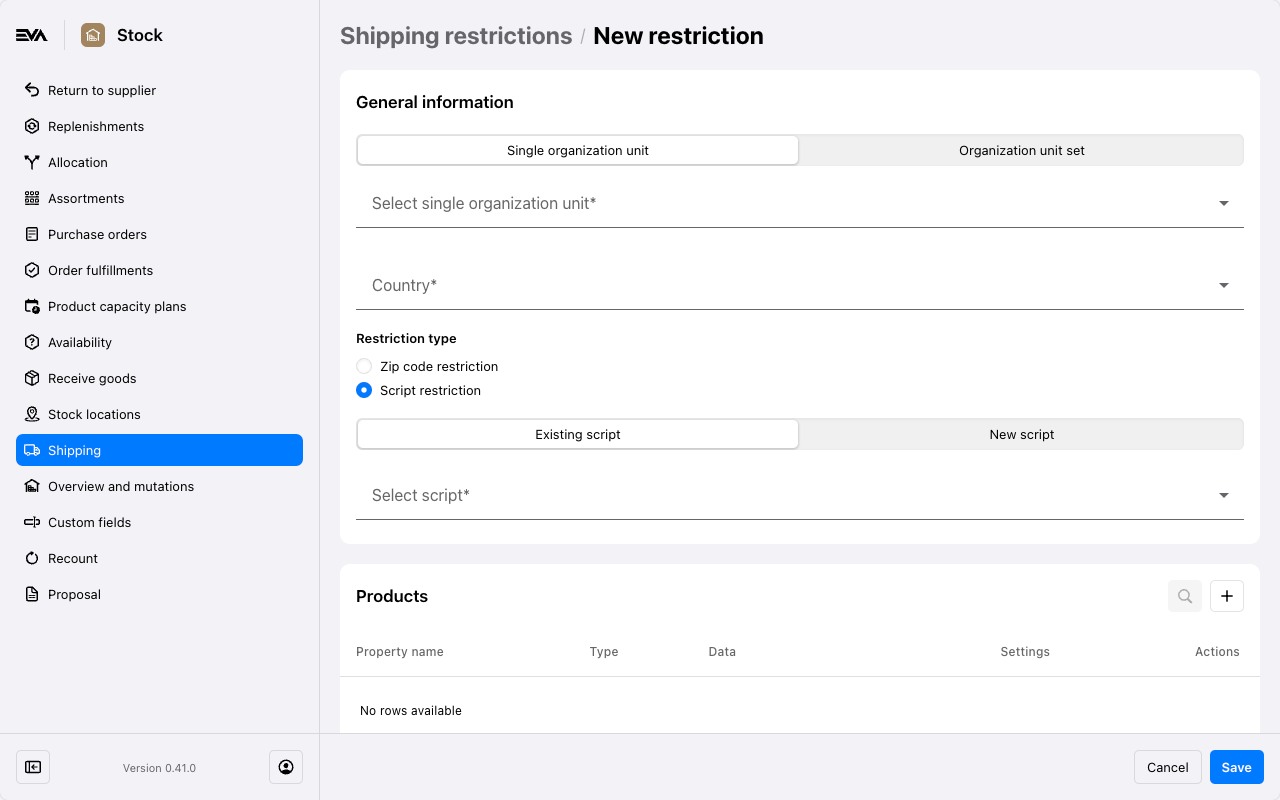
Shipping restrictions are configurable at the organization unit(set) level. This means you could create a situation where restrictions apply only to Online orders, for example, by selecting your webshop organization unit or set.
- Zip code resstriction: This is an address restriction that also adopts use of a range value for zip codes. For example, 1234AA till 1234ZZ would be a valid range in the Netherlands. For single zip codes you can set the start and end with the same zip code.
- Script restriction: This can be used to apply a customizable shipping restriction using the
ShippingRestrictionextension point. If any existingShippingRestrictionscripts are available, you can select one from the drop-down list of Existing Script. Alternatively, you can create a new one using the New Script button. More information and a sample can be found here.
Every restriction needs an effective country to block the addresses, so if you want the same restriction in Germany as you have in the Netherlands, you need to add it twice.
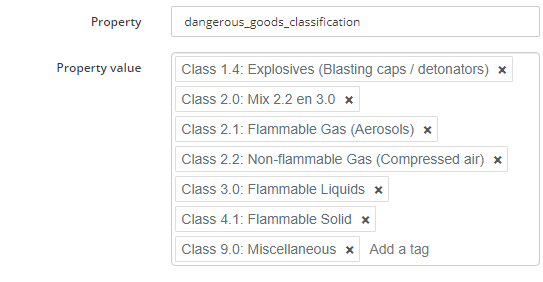
The product restrictions themselves are done based on PIM properties, which are specified either in bulk (pasting multiple values of a specific product property) or by means of the product filter.
The following example shows you a useful example of properties you could restrict (though this example's UI is based on Admin Suite's predecessor).
Once a restriction has been created for a specific OU, it will automatically be added in the Logistics tab of the OU in question.
Changing restrictions can take up to 30 minutes to take effect, due to caching them for speedy checkouts.
Limiting deliveries to same country
Shipping restrictions tie into the available countries for deliveries.
The countries which are allowed for deliveries are configured in the OU's Logistics tab, specifically the Available countries card.
You can however override this, allowing OUs to only deliver to addresses in the same country.
You can do so by setting RequiredData:ValidateAvailableCountries to true.
To make it even more clear: when set to true, you allow only domestic shipping such as NL to NL and DE to DE but not NL to DE.