Configuring Live Guard
Preparation
Our Watchtowers are custom-built by OnLogic. The product number is NEWBLACK-CL210G-11. They cannot be publicly ordered, you need to contact our dedicated account manager at OnLogic, your Strategic Lead can provide you with their contact information.
These devices can be sent to your stores or HQ directly, as they ship with the right firmware pre-installed.
Configuration
First off, we set up our physical device, then we add it as a device in Admin Suite's Watchtower chapter. Finally, we configure EVA to make use of Live Guard.
Set up device
To set up your device, check out all items in the box. You should find the following items:
- Your Watchtower device
- A power cable
- Power cable adapters
Setting up your service is as easy as plugging two cables into Watchtower and turning it on.
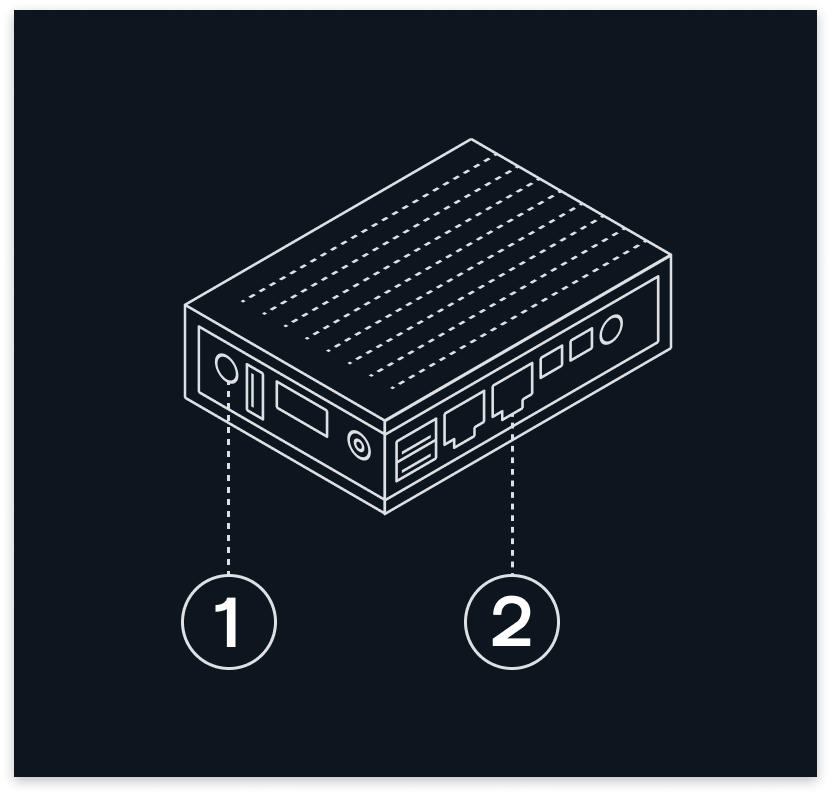
- Use the power cable and your desired adapter to plug the Watchtower device into a power outlet.
- Connect the Watchtower device to your local network using an ethernet cable (use the correct ethernet port as pictured).
- Use the power button to turn on Watchtower. When turned on, a white light will show.
Configure your device
To onboard your device, head to your Watchtower chapter.
The Watchtower overview shows you all configured Watchtowers; whether they are online and if they are connected to Live Guard.
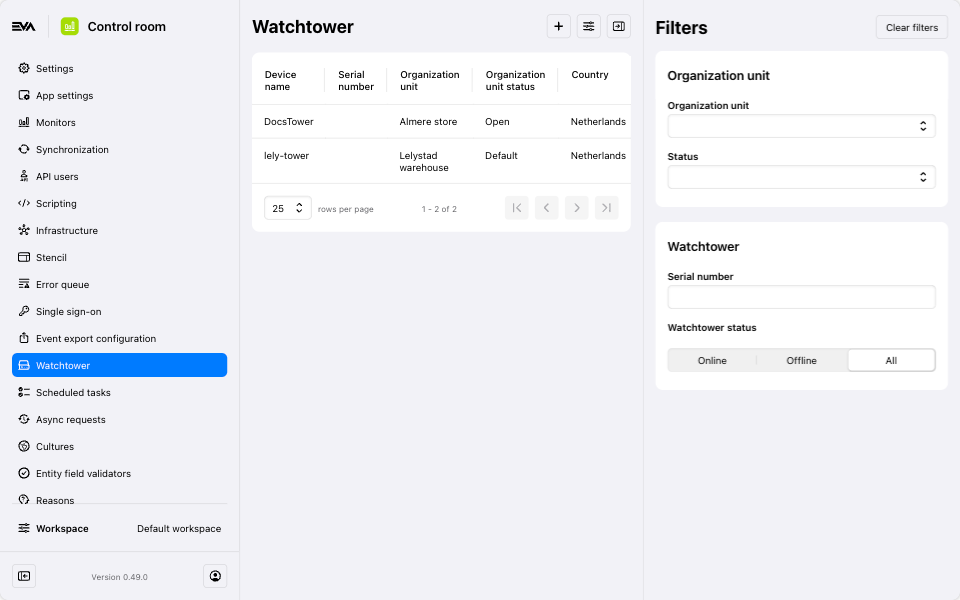
Our Docs team's Watchtower is not fully functional, and therefore missing certain data and action options which are available to you (such as the Terminal)
Adding a new device is simple:
- Device name
- Organization unit
- Serial number (optional)
Special mention for the option Device is virtual, which you can use for testing purposes. Although using this in a live environment is possible as well, we do not recommend it. If necessary however, please contact New Black about the additional steps.
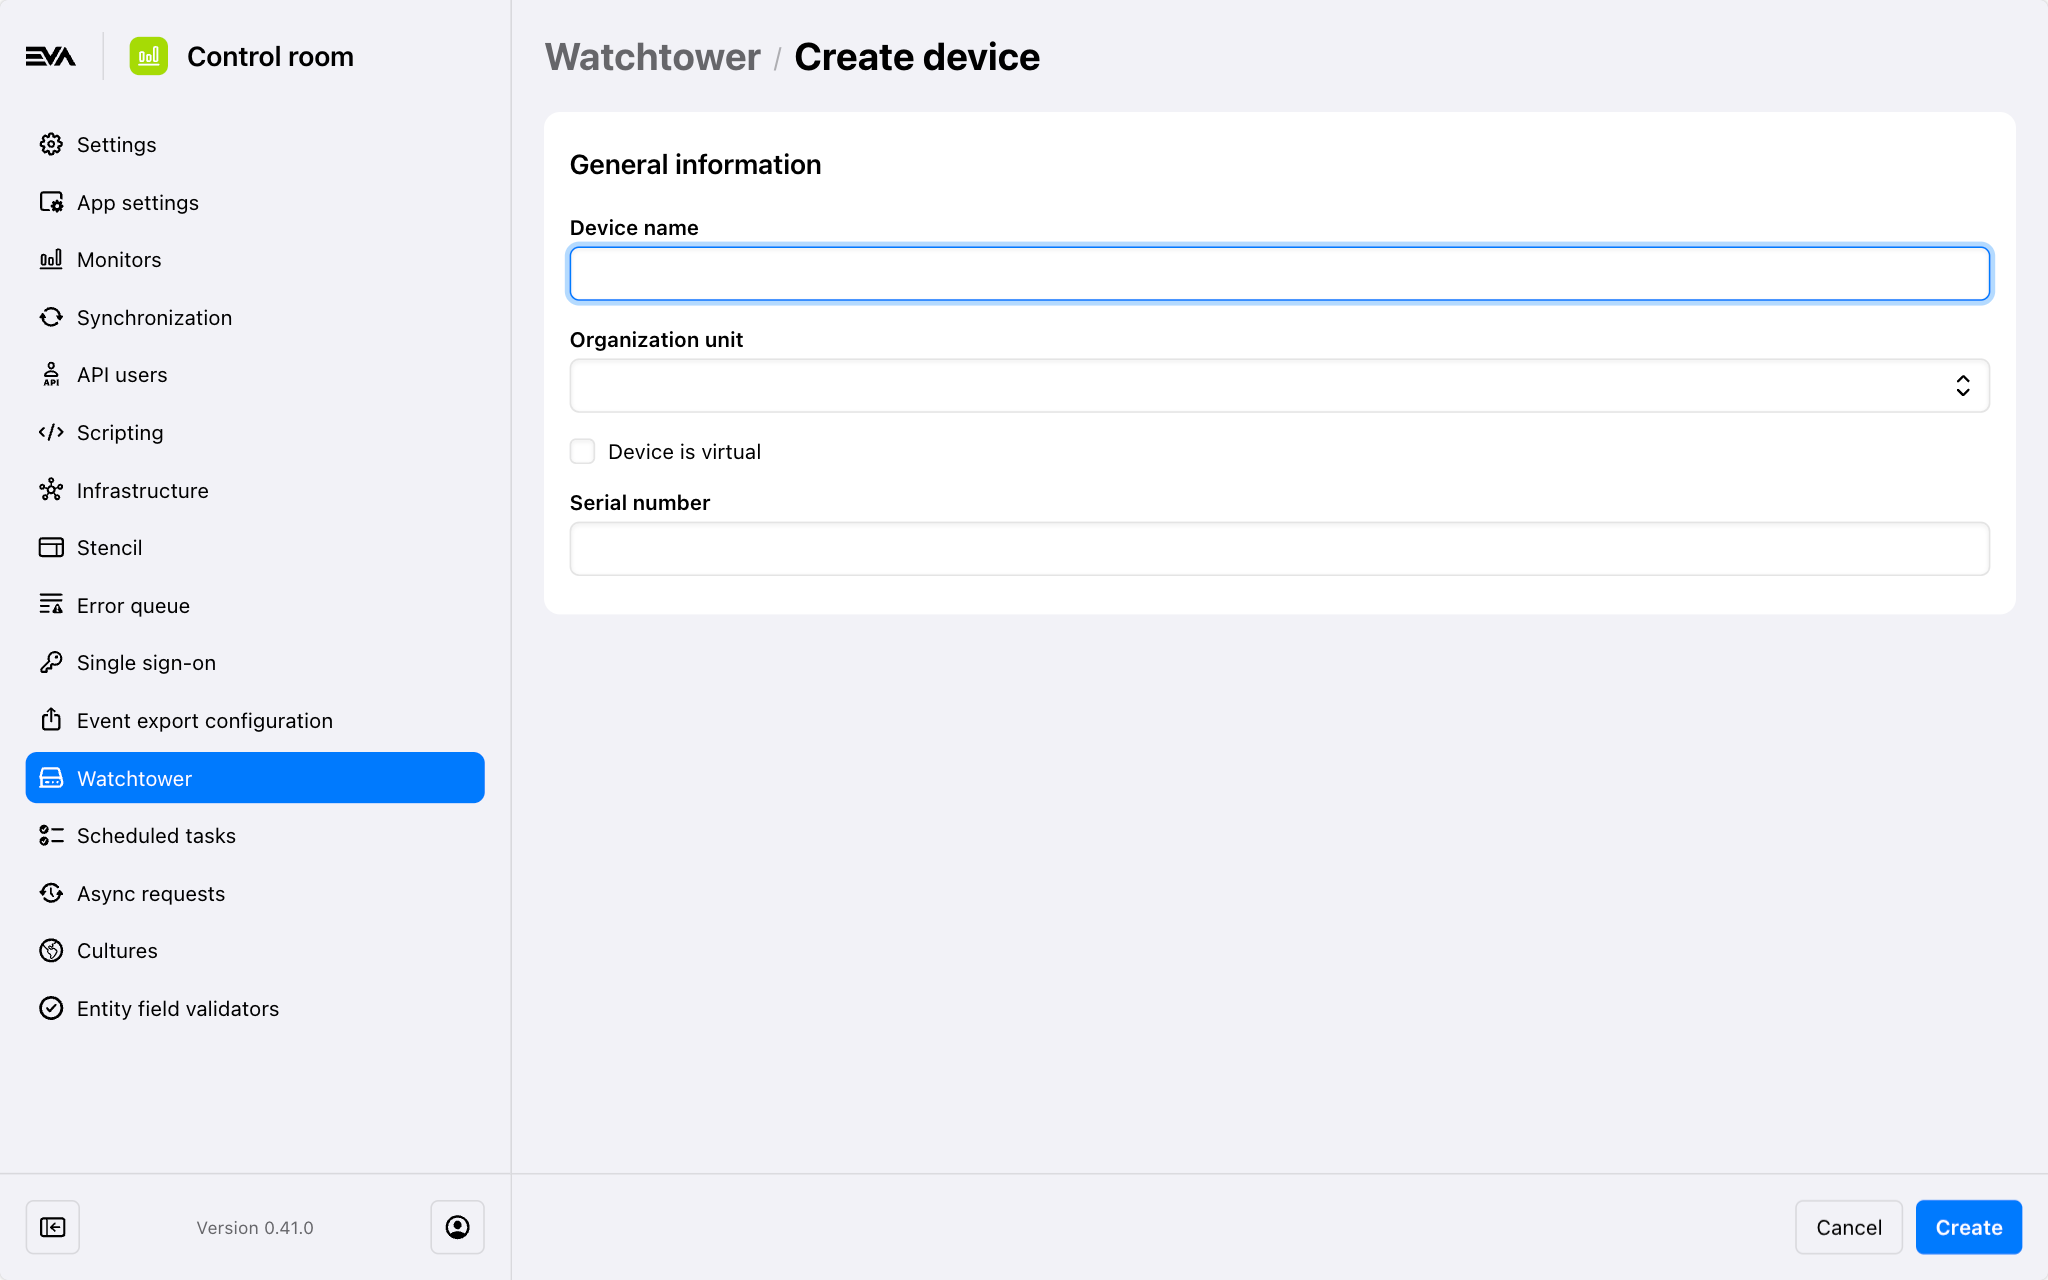
Mind that there are two serial number stickers on the device, both titled OnLogic. Use one on the big sticker with a serial number starting with E (ignoring the one starting with P).
Once created, you'll be prompted with an API key if your chosen option was Device is virtual, allowing connection to the watchtower. Make sure to secure the API key as this will only be shown once and cannot be retrieved once again for security purposes.
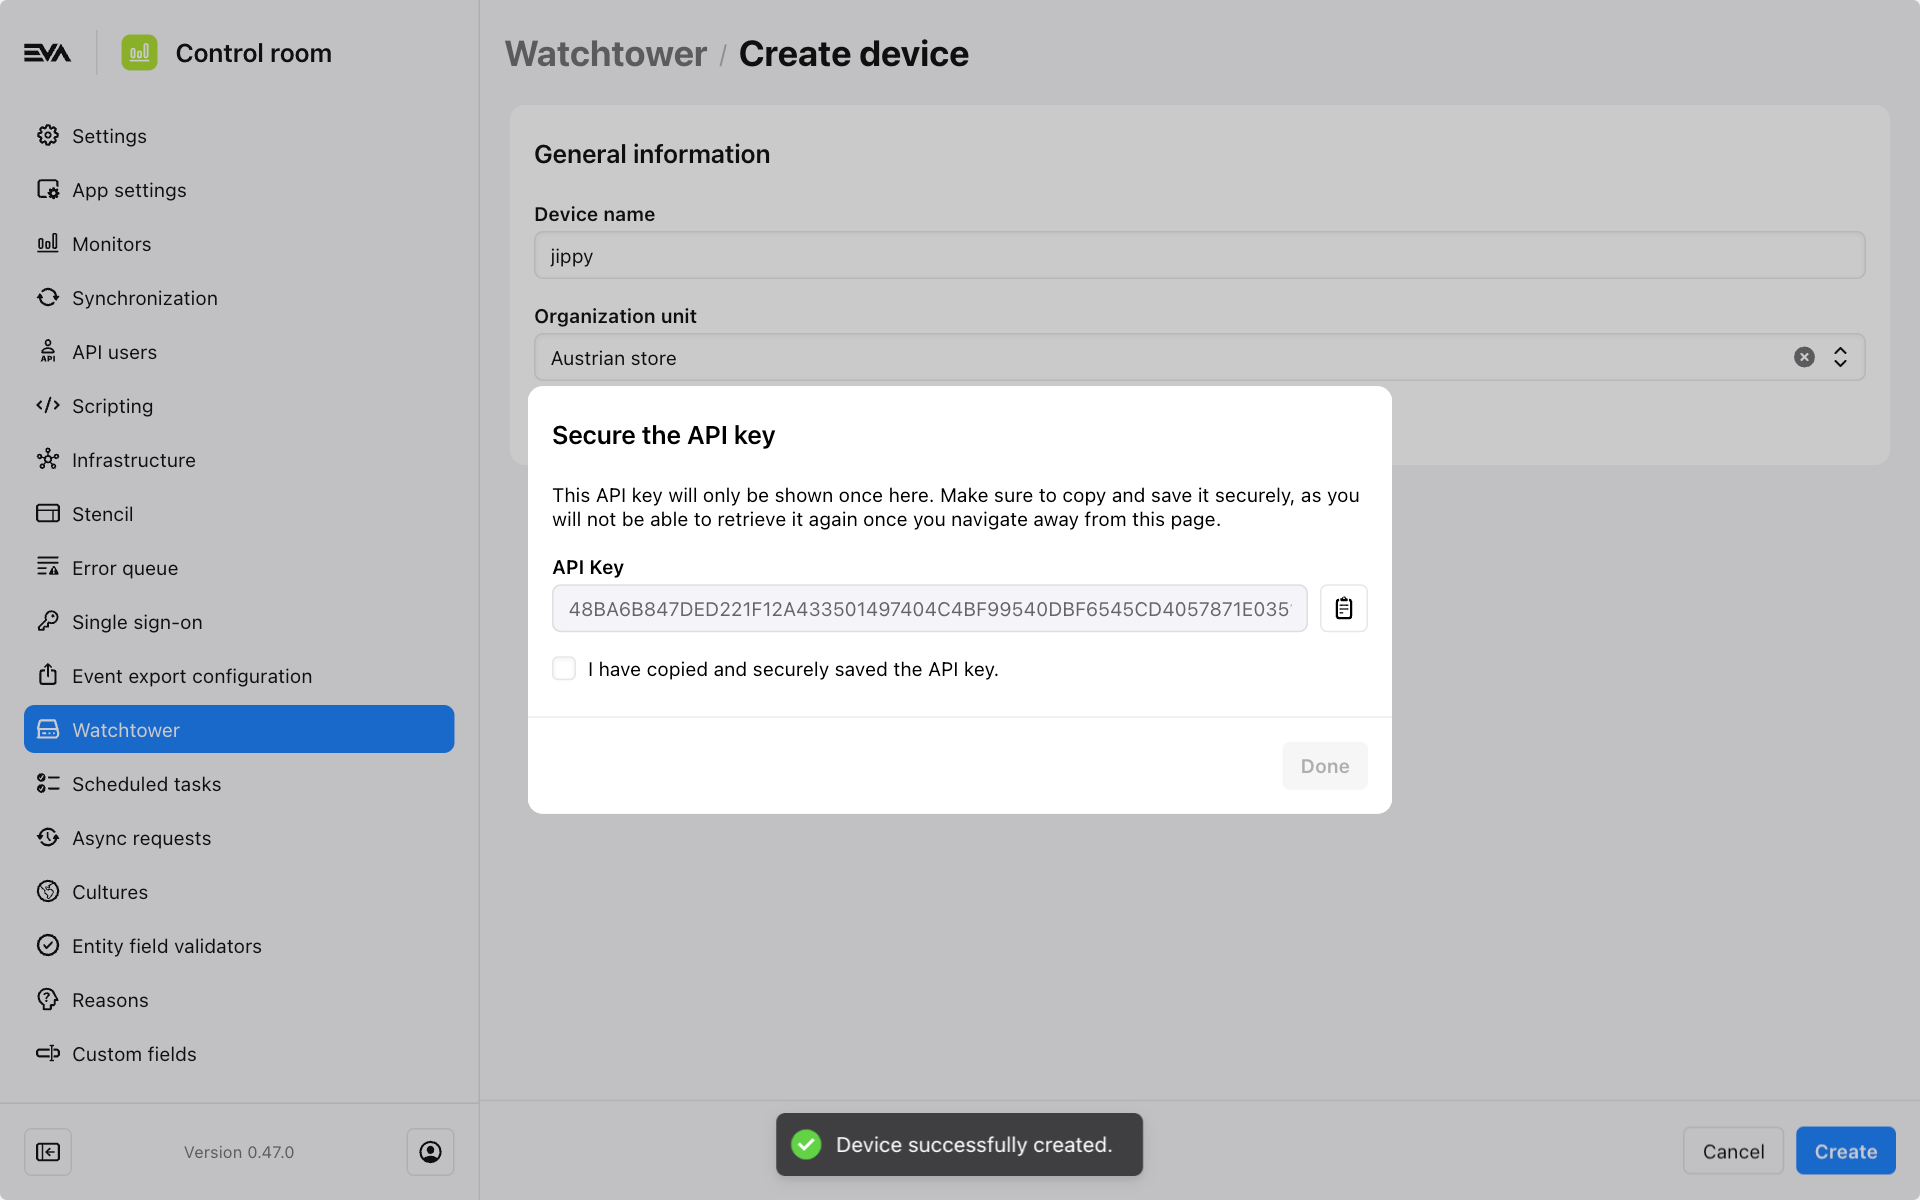
You can not get access or view the API key once again after you click Done. Therefore, make sure to save it somewhere safe. Furthermore, API Keys should be treated like passwords i.e. do not share API keys for any other purposes than what it is intended for.
Details
Once a Watchtower has been added, you can check its status and if everything on the Watchtower is running as it should.
After having configured the Watchtower in its entirety, you'll have to exercise a little patience while it downloads the latest updates.
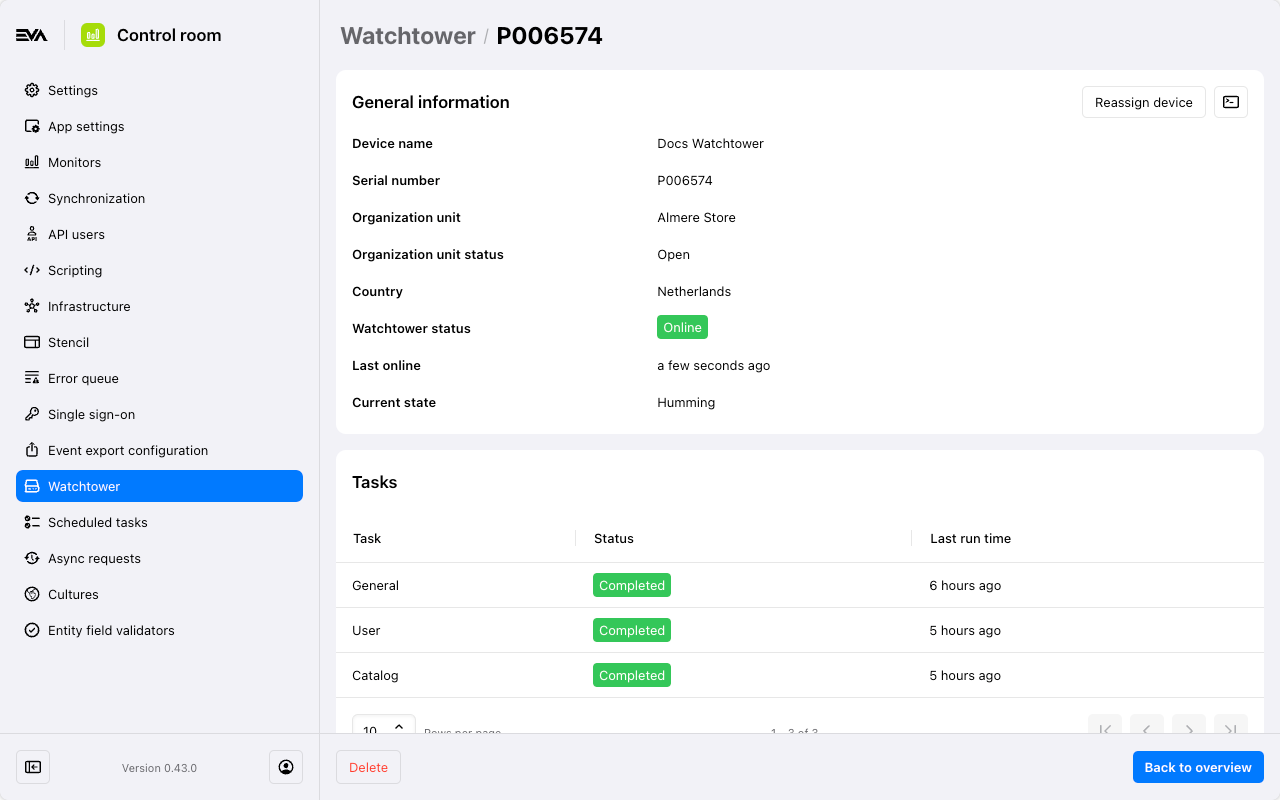
The following states are possible:
- Humming - the Watchtower is working as intended
- If it's in Local mode, it will remain Humming, though status will be Offline
- A bit sad - some part of the Watchtower is not fully functional
- Start service - needs a moment to start up
- Updating services - needs a moment to update
- Downloading software - needs a moment to download new software
The Tasks card shows the three separate categories which the Watchtower syncs every few hours. Mind that you can manually sync a category if necessary.
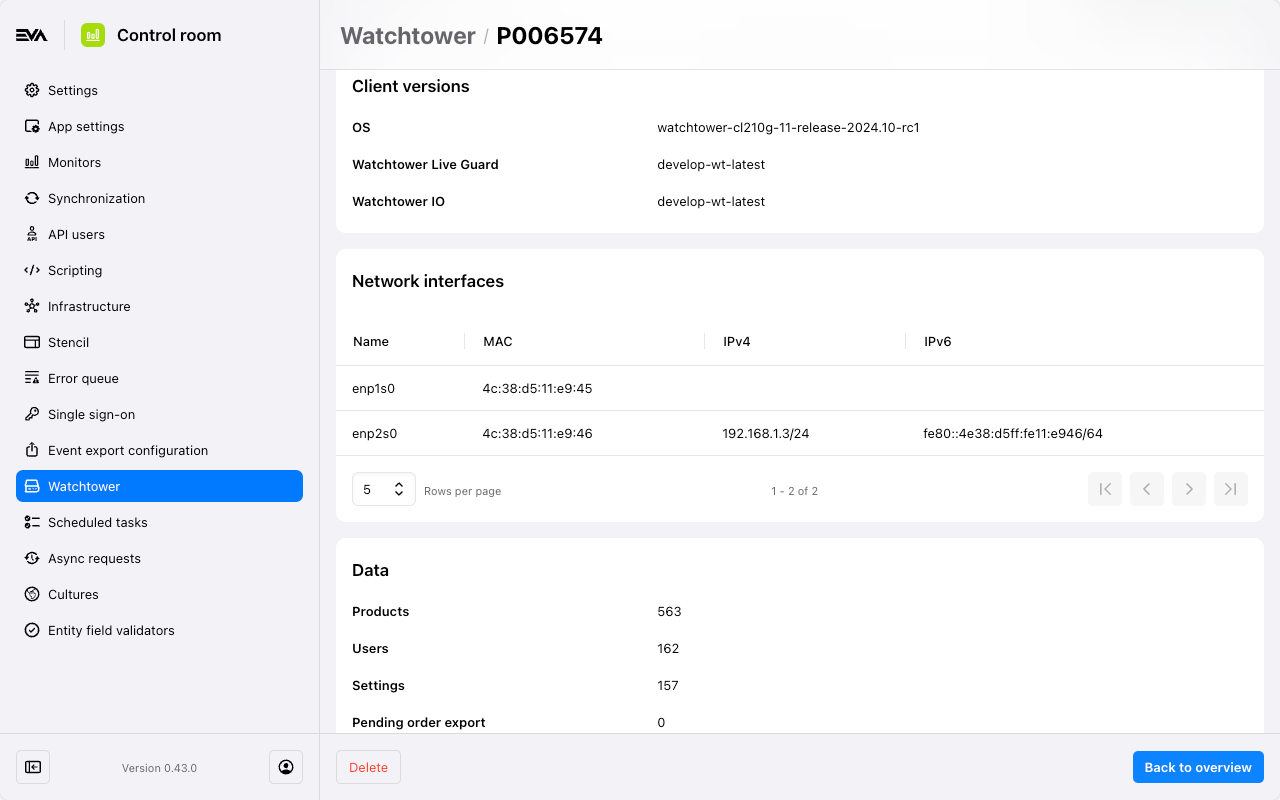
Pay attention to the Name in the Network interfaces: if it ends with 0, it means you put the cable in the correct Ethernet port. A device may seem operational, but if it is not in the correct port, it will not work as intended.
The Watchtower supports both IPv4 and IPv6.
The Pending order export field in the Data card should be 0. If it's not, it means an order is stuck on the Watchtower and unable to sync with EVA Cloud.
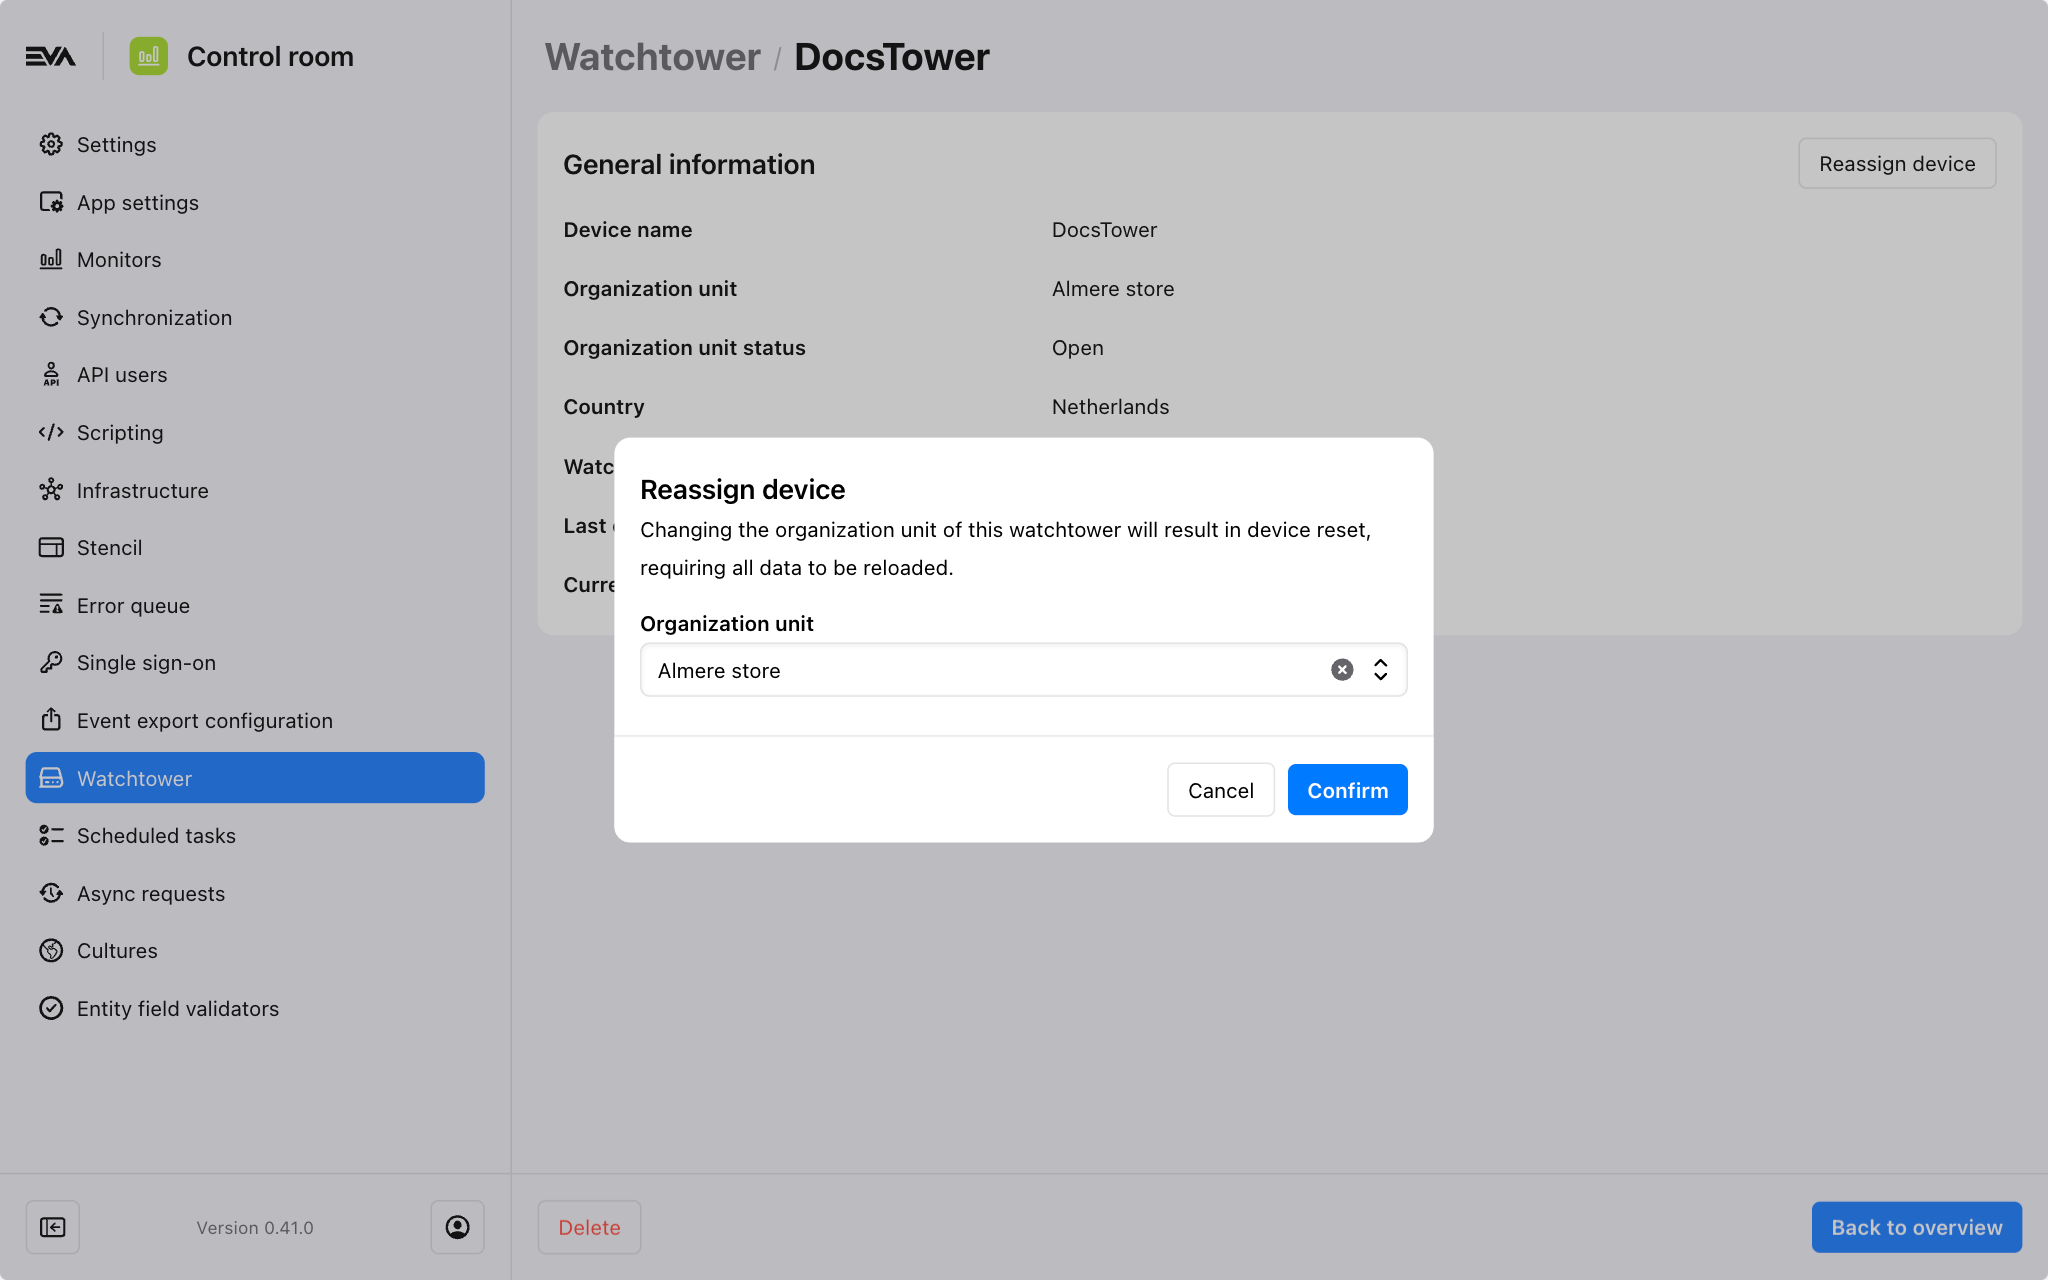
Reassign
To reassign a device, click the Reassign device button in the General information card, then select the new organization unit to which you want to reassign the watchtower.
Terminal
To add an additional level of access to your Watchtower device, you can enter into direct communication with the Watchtower via the 'Terminal' icon. This is available in the Actions column as well as in its details screen.
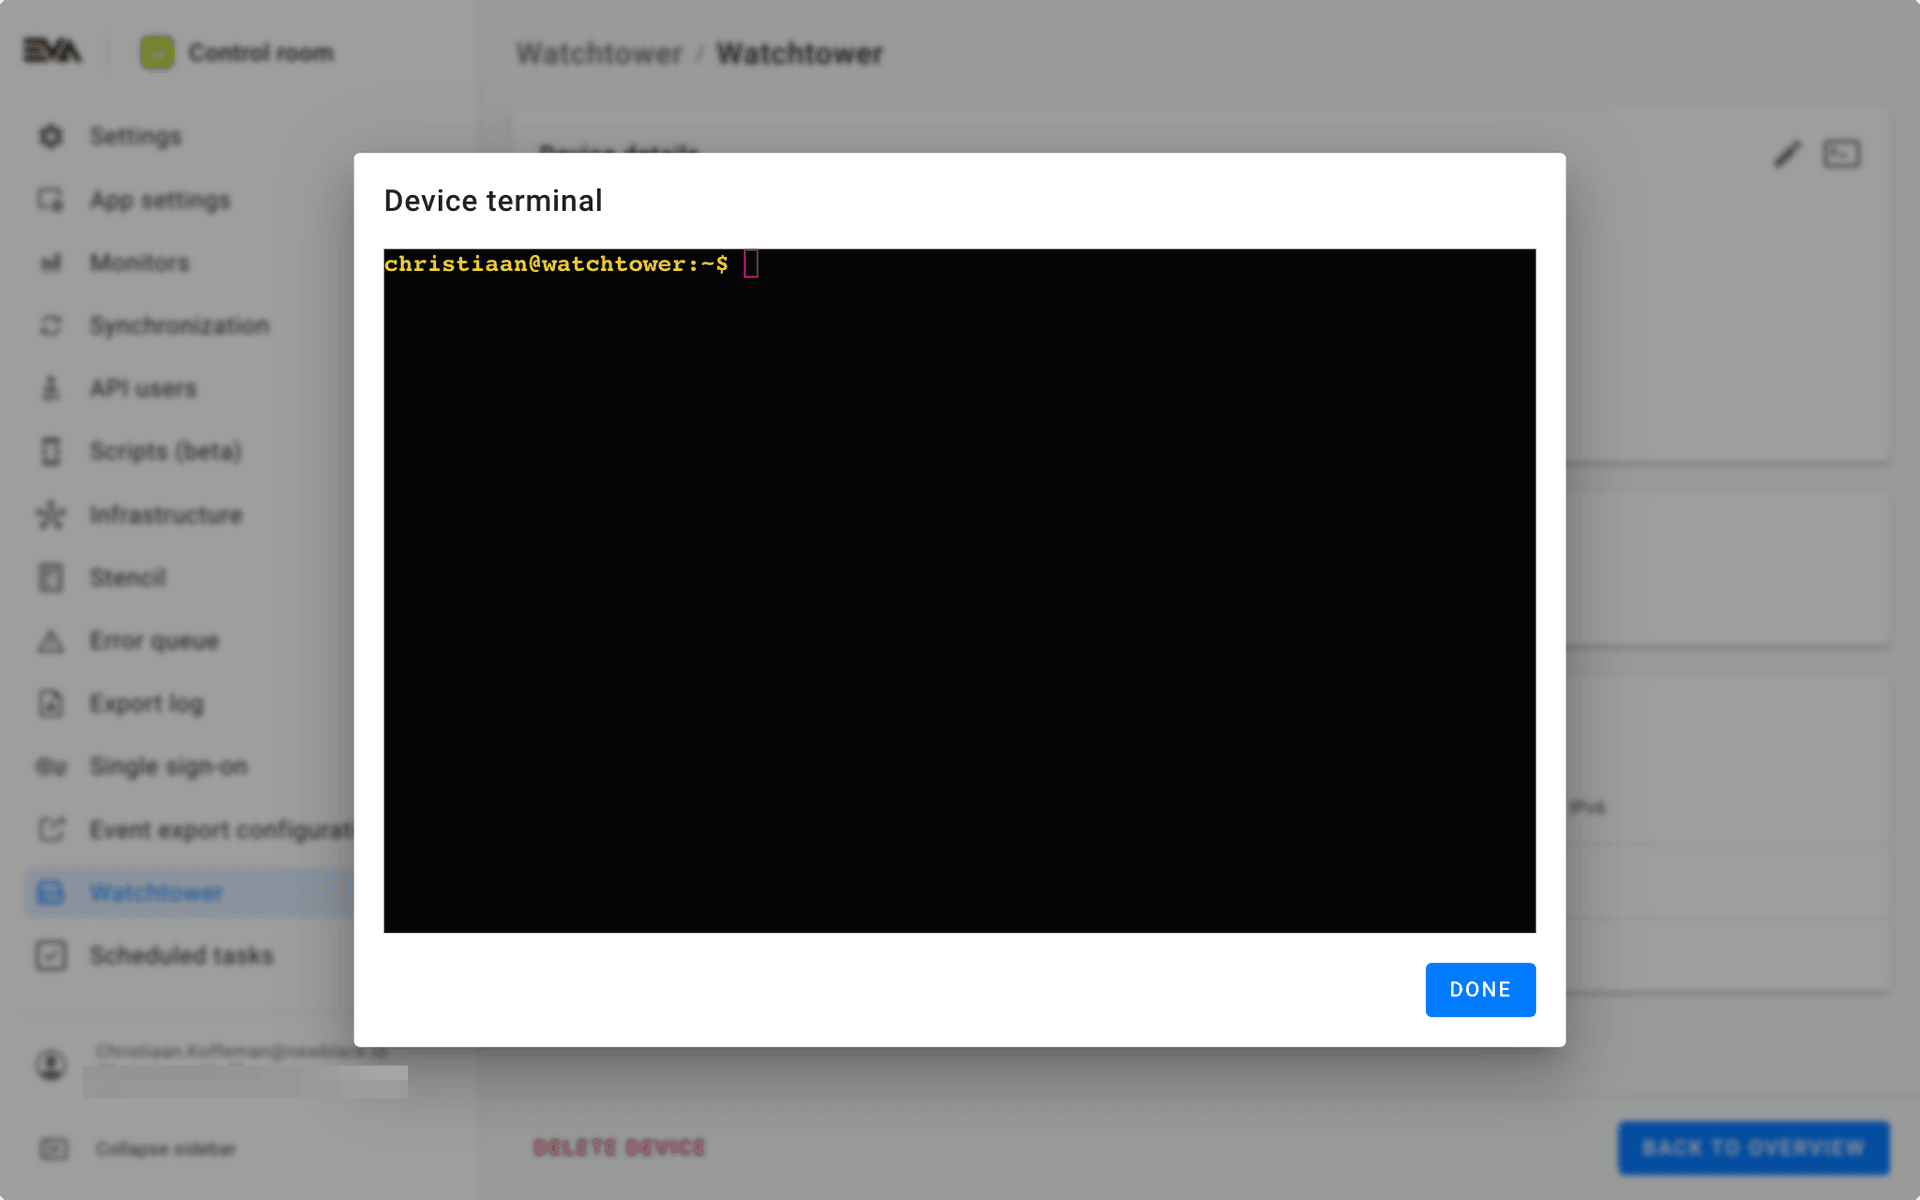
Enter Help for an additional set of commands.
Activating offline functionality
After having configured everything, your Watchtower will be ready for use with printing jobs. If you also want it to provide its offline functionality, all you have to do is switch the following LiveGuard:Available to true.
Please note that the PrintR settings might affect the above when you're working on a test environment.
Monitor your Watchtower
By means of the Monitors and Scripting functionality, it's possible to keep track of how your Watchtower performs.