User requirement sets
User requirement sets
Managing frontend required fieldsUser requirements allow you to specify which fields appear on your frontend during actions like creating a new user (customer or employee) or placing an order. You can also specify the designation of those fields as required, preferred, or regular (optional).
To access this chapter, you need the UserRequirements permission. Permissions are managed from the Roles and rights chapter namely, from the functionalities card of a users role.
Overview and example
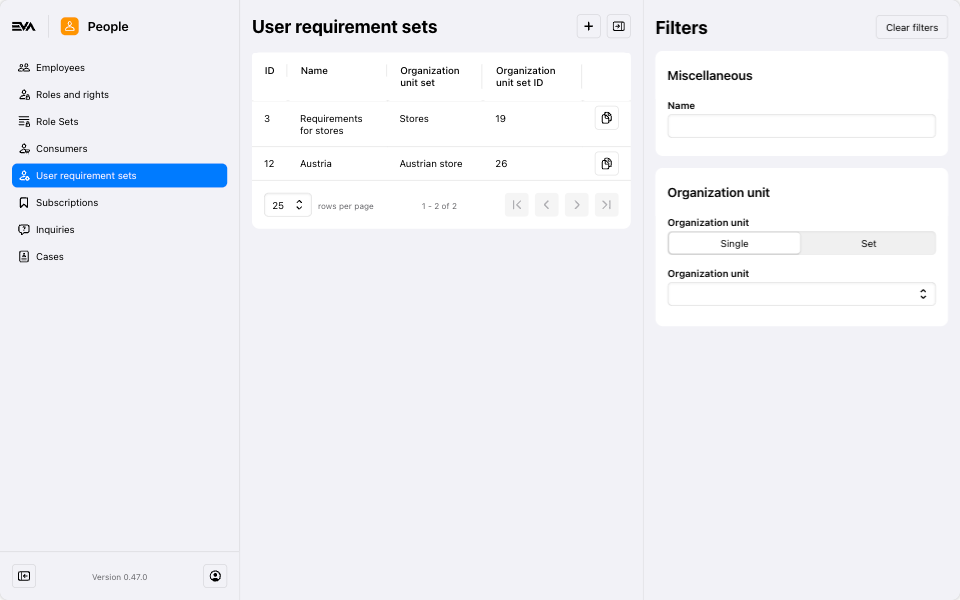
The chapter starts with an overview of all existing User requirement sets. Here, you can:
- Filter sets by Name or Organization unit(s).
- Edit an existing set by selecting it.
- Add a new set by clicking the '+' icon.
- Duplicate a set by clicking the 'Duplicate' icon under the Actions column.
Your overview will always return no results in new environments where you're just getting started with using EVA, requiring you to start configuring one from scratch.
Example Configuration
For additional clarity, the following example illustrates a configured user requirement set.
Expand and view the example
The below screenshot depicts the choices made for a user requirement set
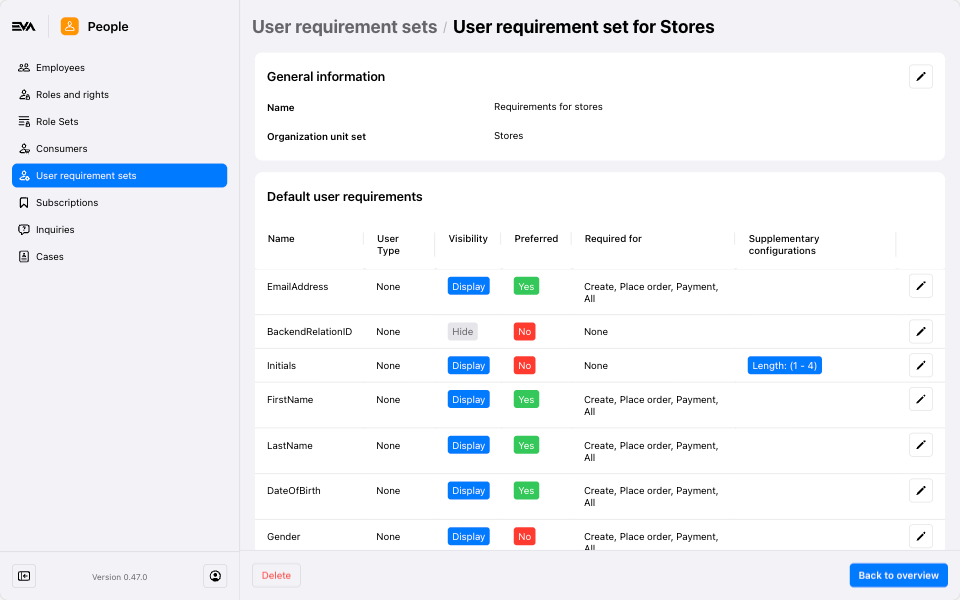
From this example, we can derive that:
- The fields that will be displayed to the users on the frontend: EmailAddress, Initials, FirstName, LastName, DateOfBirth, and Gender.
- The fields that will be hidden from the user on the frontend: BackendRelationID.
- The fields that will be clearly marked with a Preferred label on the frontend (but not mandatory): EmailAddress, FirstName, LastName, and DateOfBirth.
- The fields that will be not have a "Preferred" label on the frontend: Initials and Gender (also not mandatory).
- The fields that will be clearly marked with a Required label on the frontend and hence block the flow until provided: None; all fields are optional and some are preferred.
- Supplementary configurations: The Initials field has a supplementary configuration where the inputted value is limited to 1 to 4 characters.
See section Additional user requirements on how to override base configuration of a user requirement and additional options.
Creating or editing a set
Click the '+' in the top right corner to add a new set. Creating a new set works the same as editing an existing one.
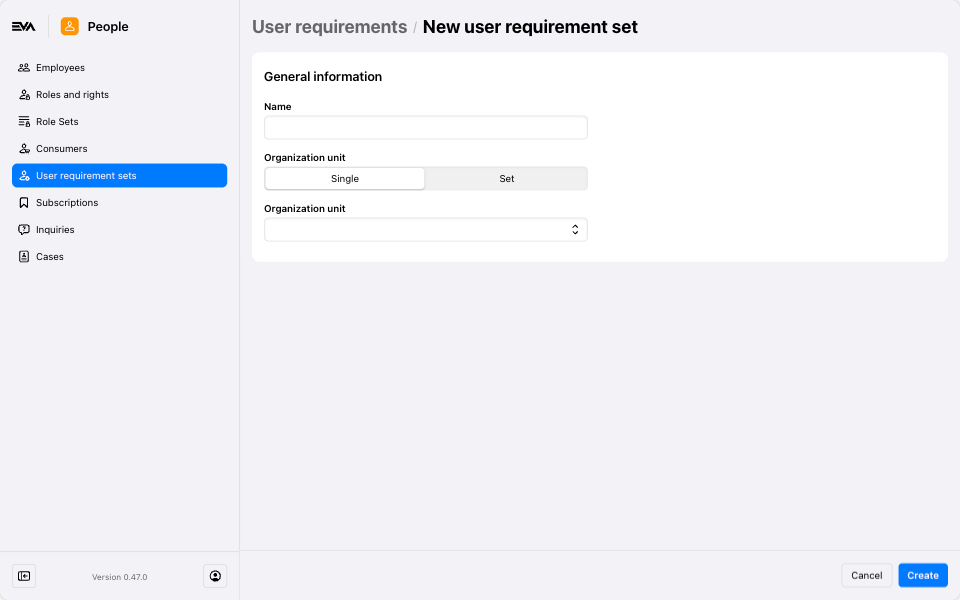
First, we give our set a name and specify to which organization unit(s) it would apply.
If Organization unit set was your chosen option, make use of the 'Framed magnifying glass' icon called Subsets for an overview of all the organization units included in that set.
After you click Add, your overview will display two additional cards, including Default User Requirements. This card contains a set of pre-configured requirements that are initially hidden, not preferred, and not required.
If the out-of-the-box are insufficient, you can create user custom fields. See the Custom fields documentation for configuration instructions.
Each user requirement consists of a few options. Some can be edited by clicking the 'Pencil' icon under the Actions column.
Each covered in more details below:
- Name
- User type
- Visibility
- Preferred
- Required for
- Supplementary configurations
Name
This field displays the default name of the user requirement and cannot be edited.
User type
Specify which user type(s) the user requirement would apply to, Employee, Customer, or both.
The User Type is only editable when using the Additional User Requirements card.
Visibility
Visibility specifies whether the requirement is displayed on the front end or not. The Hide requirement checkbox, will hide the requirement in the front end.
Preferred
There are two display types here:
- Preferred: Choosing preferred will make the corresponding user requirement bear a preferred labelling on the frontend. However, this does not make the user requirement a mandatory one and will allow users to proceed without filling it in. If this is the chosen option, the overview will display a Yes token for the corresponding user requirement.
- Regular: Choosing regular will make the corresponding user requirement not bear any labels on the frontend, and thus optional to fill out. If this is the chosen option, the overview will display a No token for the corresponding user requirement.
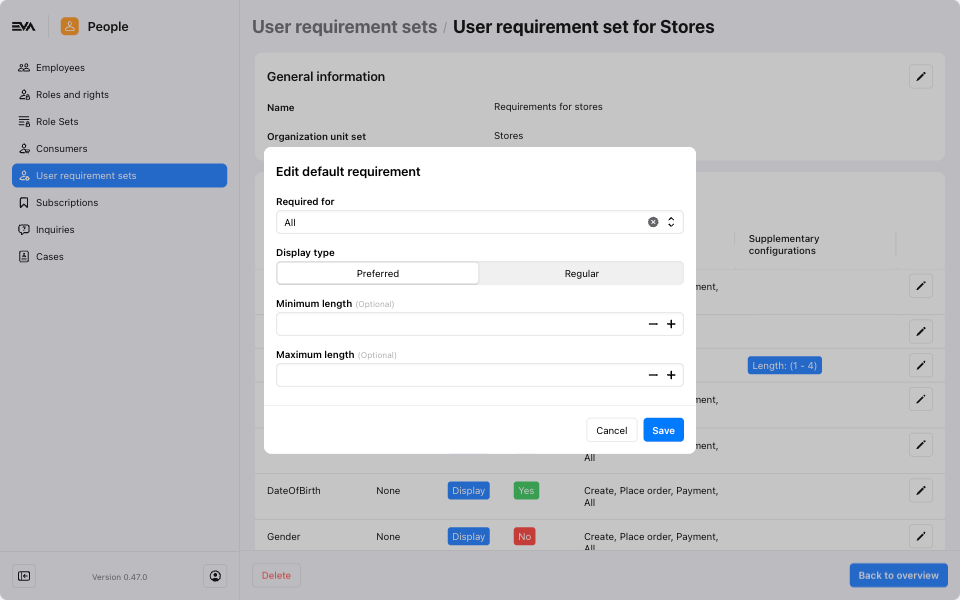
Required for
Required for can be set to one of the following values:
- None
- Create
- Place order
- Payment
- All
Selecting one or all would make that field mandatory to fill in prior to proceeding with the selected flow. Selecting None would make that field adhere to the input of Preferred regardless the flow.
Example
When setting this to Create, the corresponding user requirement will be required to fill in during create user flows. Hence, a user will not be able to proceed until a value is filled-in for that user requirement. On the other hand, None would mean that the user requirement is not required, and thus optional at all times (regardless the flow).
To override a specific Default User Requirement in certain scenarios, utilize the Additional User Requirements card. This is particularly useful if, for instance, you need the Phone Number field to be mandatory for customer users placing delivery orders. While for other processes, it would remain on its default setting for example, optional.
Supplementary configurations
Depending on the user requirement, supplementary configurations may apply. For example, you can specify a minimum and maximum length on the Initials field. If the user's input falls outside those boundaries, the value will not be accepted.
Additional user requirements
There could be instances where you'd want an additional custom configuration on a certain default user requirement. This is where this card comes into play.

Example 1: Initials Required for Create Customer & Minumum and Maximum Length
This example uses the Example configuration as its base setup.
Let's take the default user requirement named initials. Originally, under the default settings, this was marked as Required for None, indicating it was optional. However, we want this requirement to be mandatory specifically for the Create customer process. In such scenario, using the additional user requirements card becomes handy. Here are the steps you would need to follow to implement this:
- Click the '+' icon on the additional user requirements card.
- Select the Initials from the drop-down list in the Name of requirement field.
- Set the user type to Customer.
- Define the Required for field as Create.
- Keep the Display type as regular, as the requirement is already set to Required for Create.
- Optionally, specify a minimum and maximum character length for input validation.
By following these steps, the requirement will only be mandatory during the creation of customer profiles and will remain optional for all other processes.
Example 2: Phone number Required for Place order and Shipping method
This example uses the Example configuration as its base setup.
Let's take the default user requirement called Phone number. Originally, under the default settings, this was marked as Required for None, indicating it was optional. However, we want this requirement to be mandatory specifically for the Place order checkout process. In such scenario, using the additional user requirements card becomes handy. Here are the steps you would need to follow to implement this:
- Click the '+' icon on the additional user requirements card.
- Select the Phone number from the drop-down list in the Name of requirement field.
- Set the user type to Customer.
- Define the Required for field as Place order.
- Keep the Display type as regular, as the requirement is already set to Required for Place order.
- A field called Shipping method will appear presenting a drop-down list of available Shipping method based on your configuration. Selecting one makes this additional user requirement apply only to it.
- Optionally, specify a minimum and maximum character length for input validation.
By following these steps, the requirement will only be mandatory during a Place order checkout process for that shipping method and will not be required for all other processes i.e. Create & Payment.
Scripting on user requirements
You can use a script to make user requirements. This can be done for the following required for options only:
- Create
- Place Order
- Payment
To attach a script simply tick the Script checkbox. Once ticked, a dropdown will be presented with applicable results. The results here are based on whether a script exists or not. Check sample scripts here and more about scripting in general here.