Runner Tasks
Runner tasks have two main uses. For one they can be used to notify your colleagues to find a specific product for you, while you remain with a customer. Its main use however is to easily create lists of items which need to be stocked up in the customer-facing part of the store.
Performing a Runner task
Runner tasks can be displayed in three different sections in the App:
- Urgent tasks
- My tasks
- All tasks
Urgent Tasks
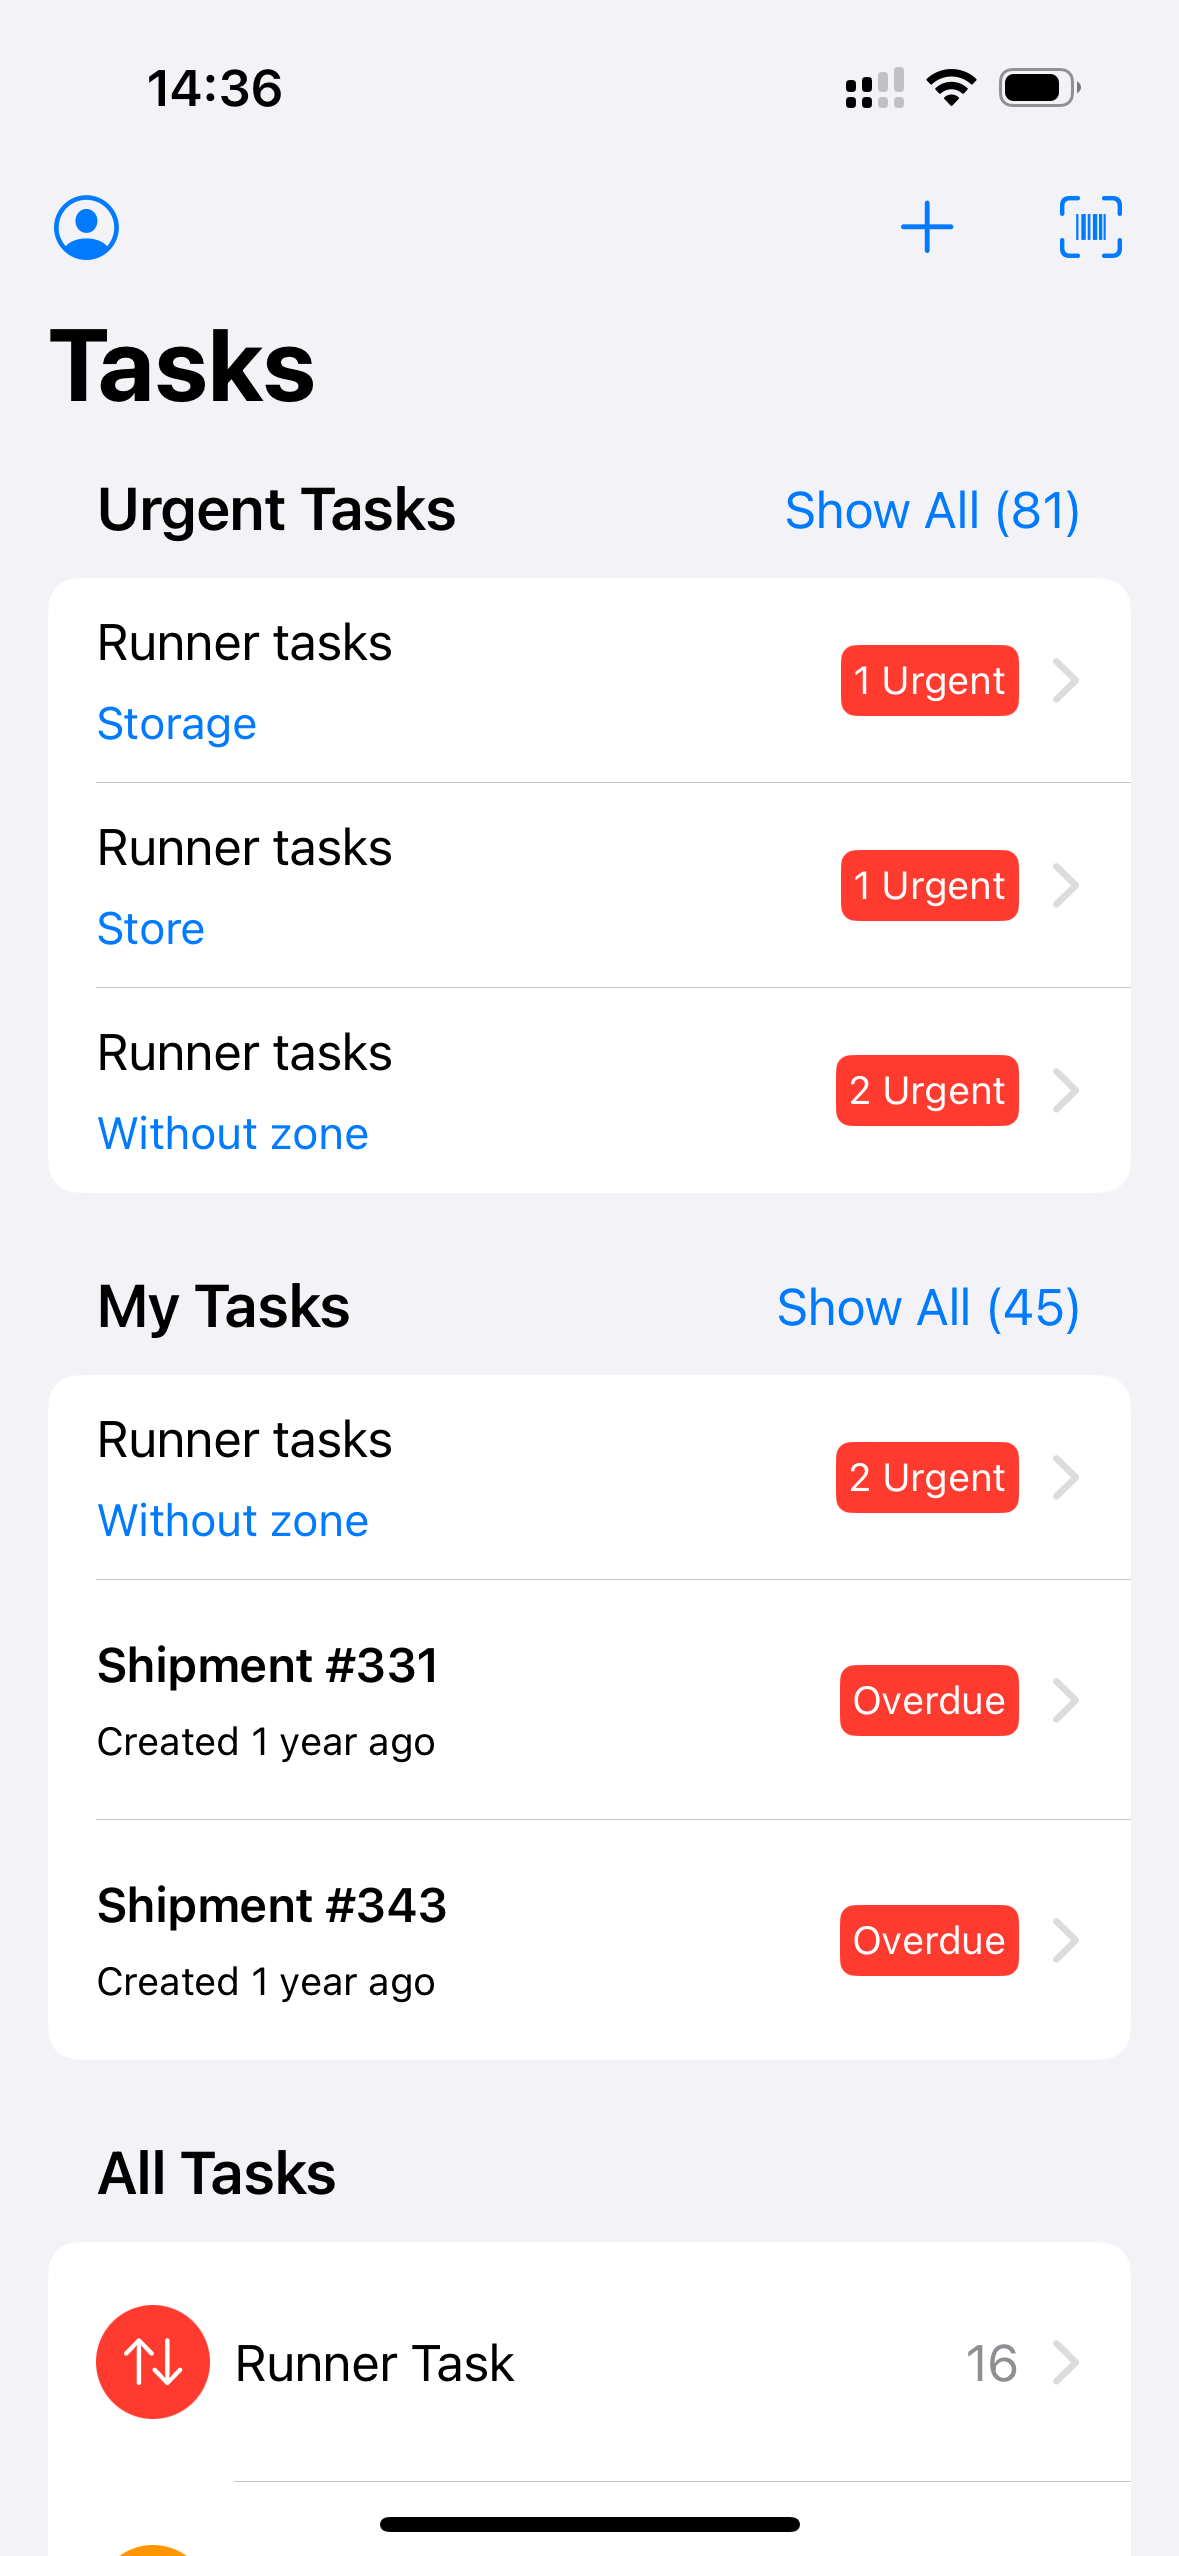
The Urgents Tasks section shows you all runner tasks which are urgent, per zone.
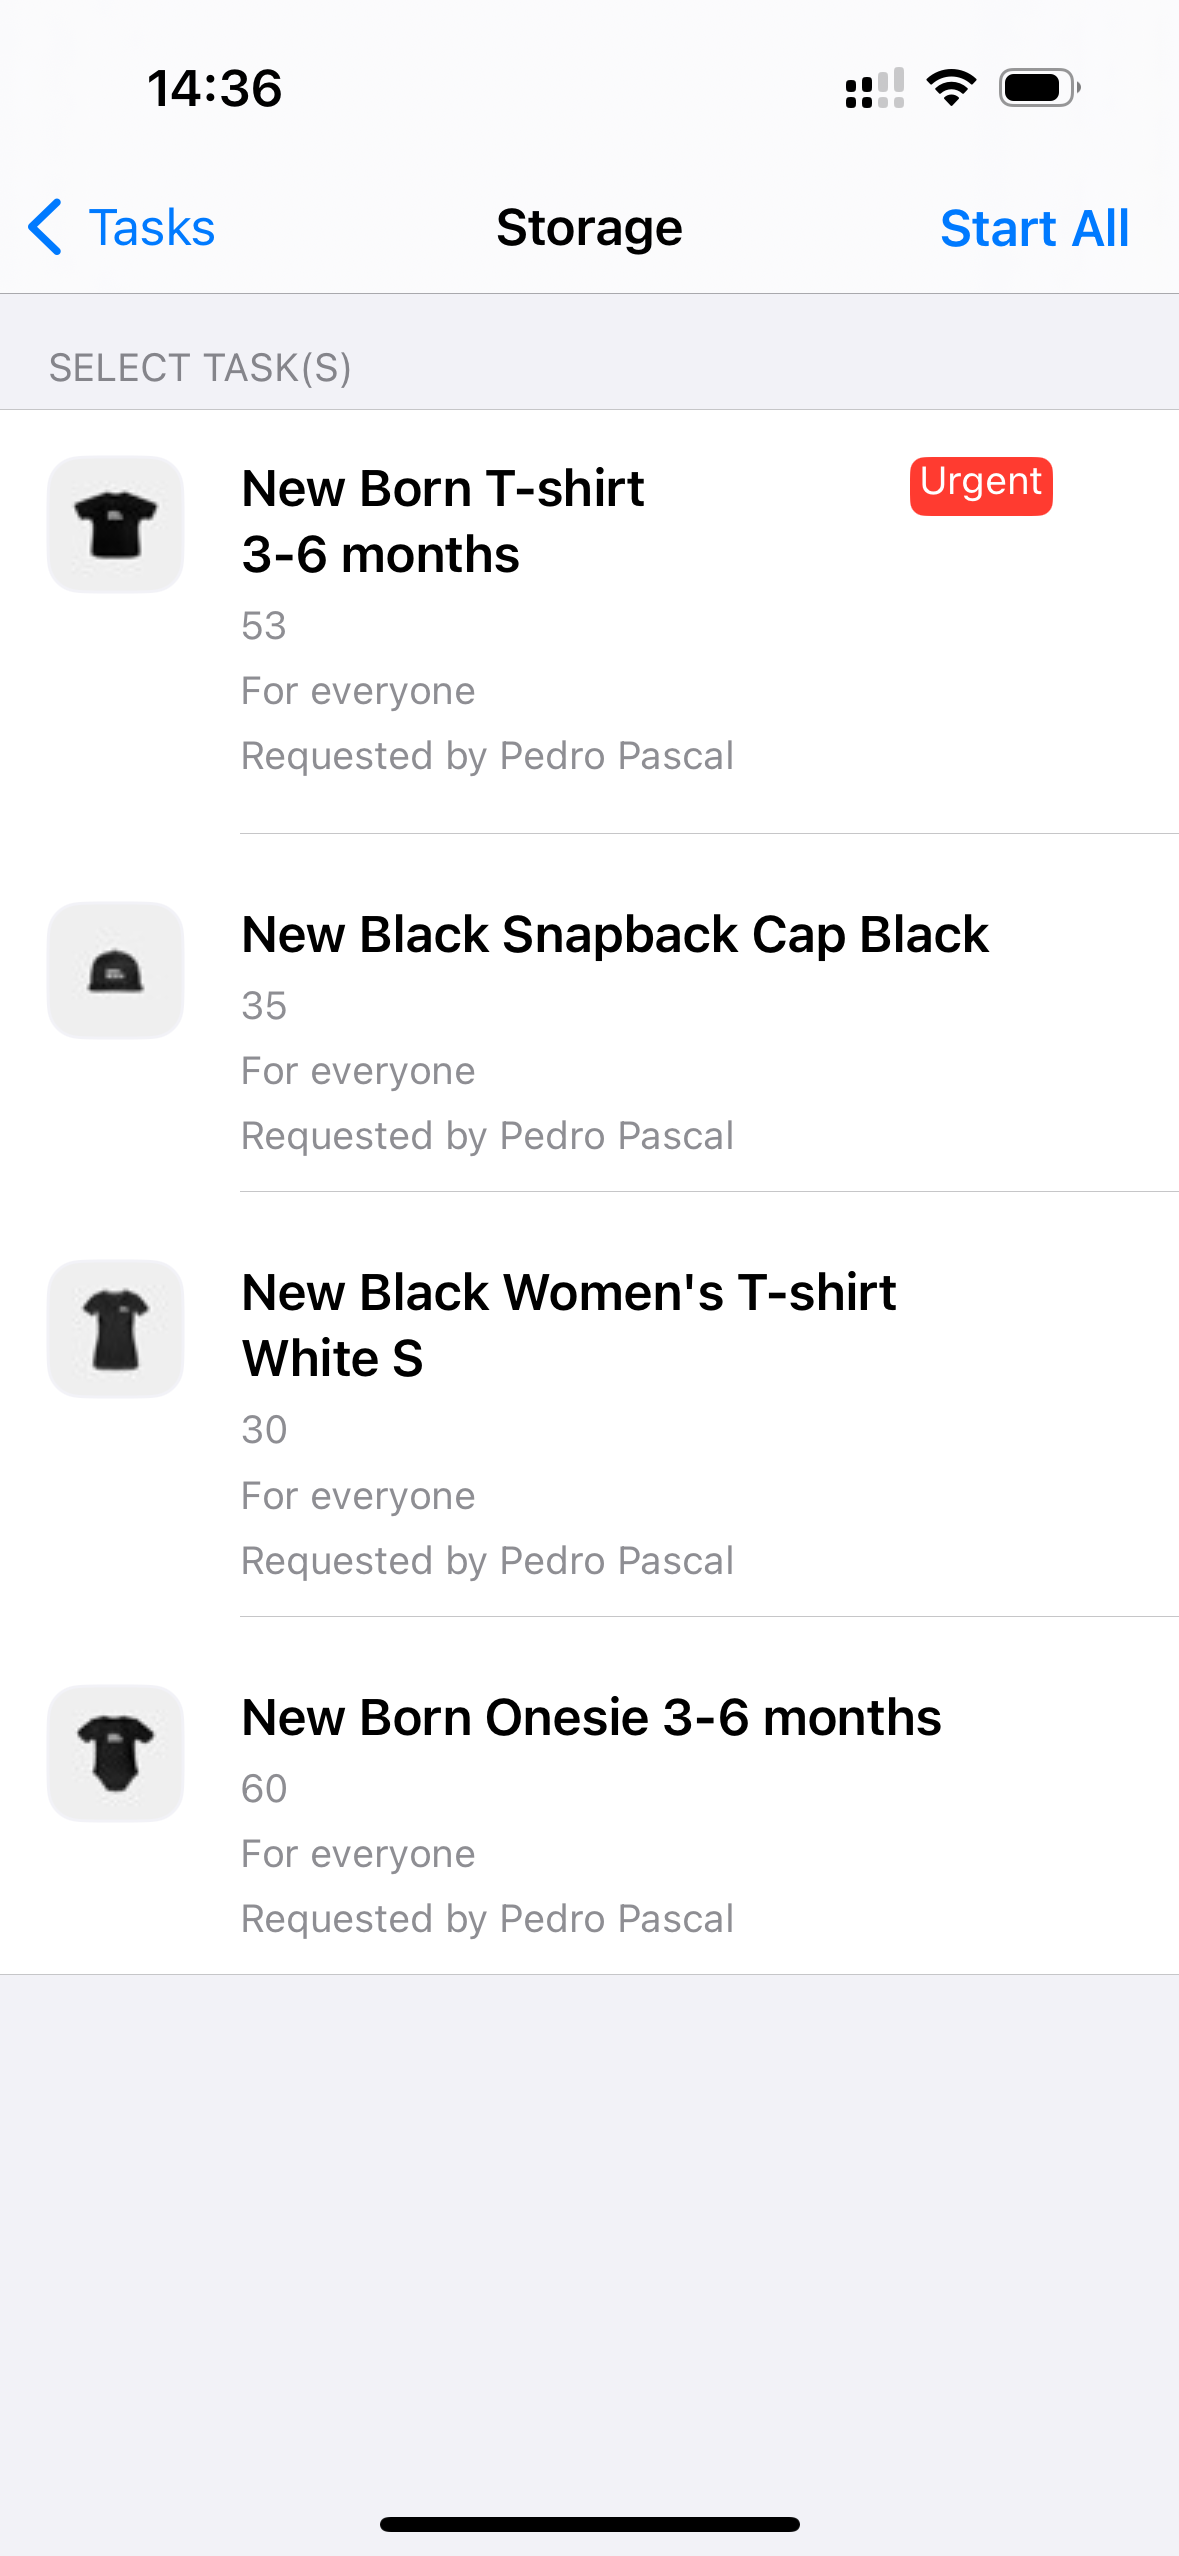
Clicking one of these urgent tasks for a zone, will display all the current runner tasks in that zone, with the urgent one on top.
Note that it also displays who requested the product, to make it easier to see whom to bring the products to, and to whom the task is assigned (if anyone specifically).
Opening a task
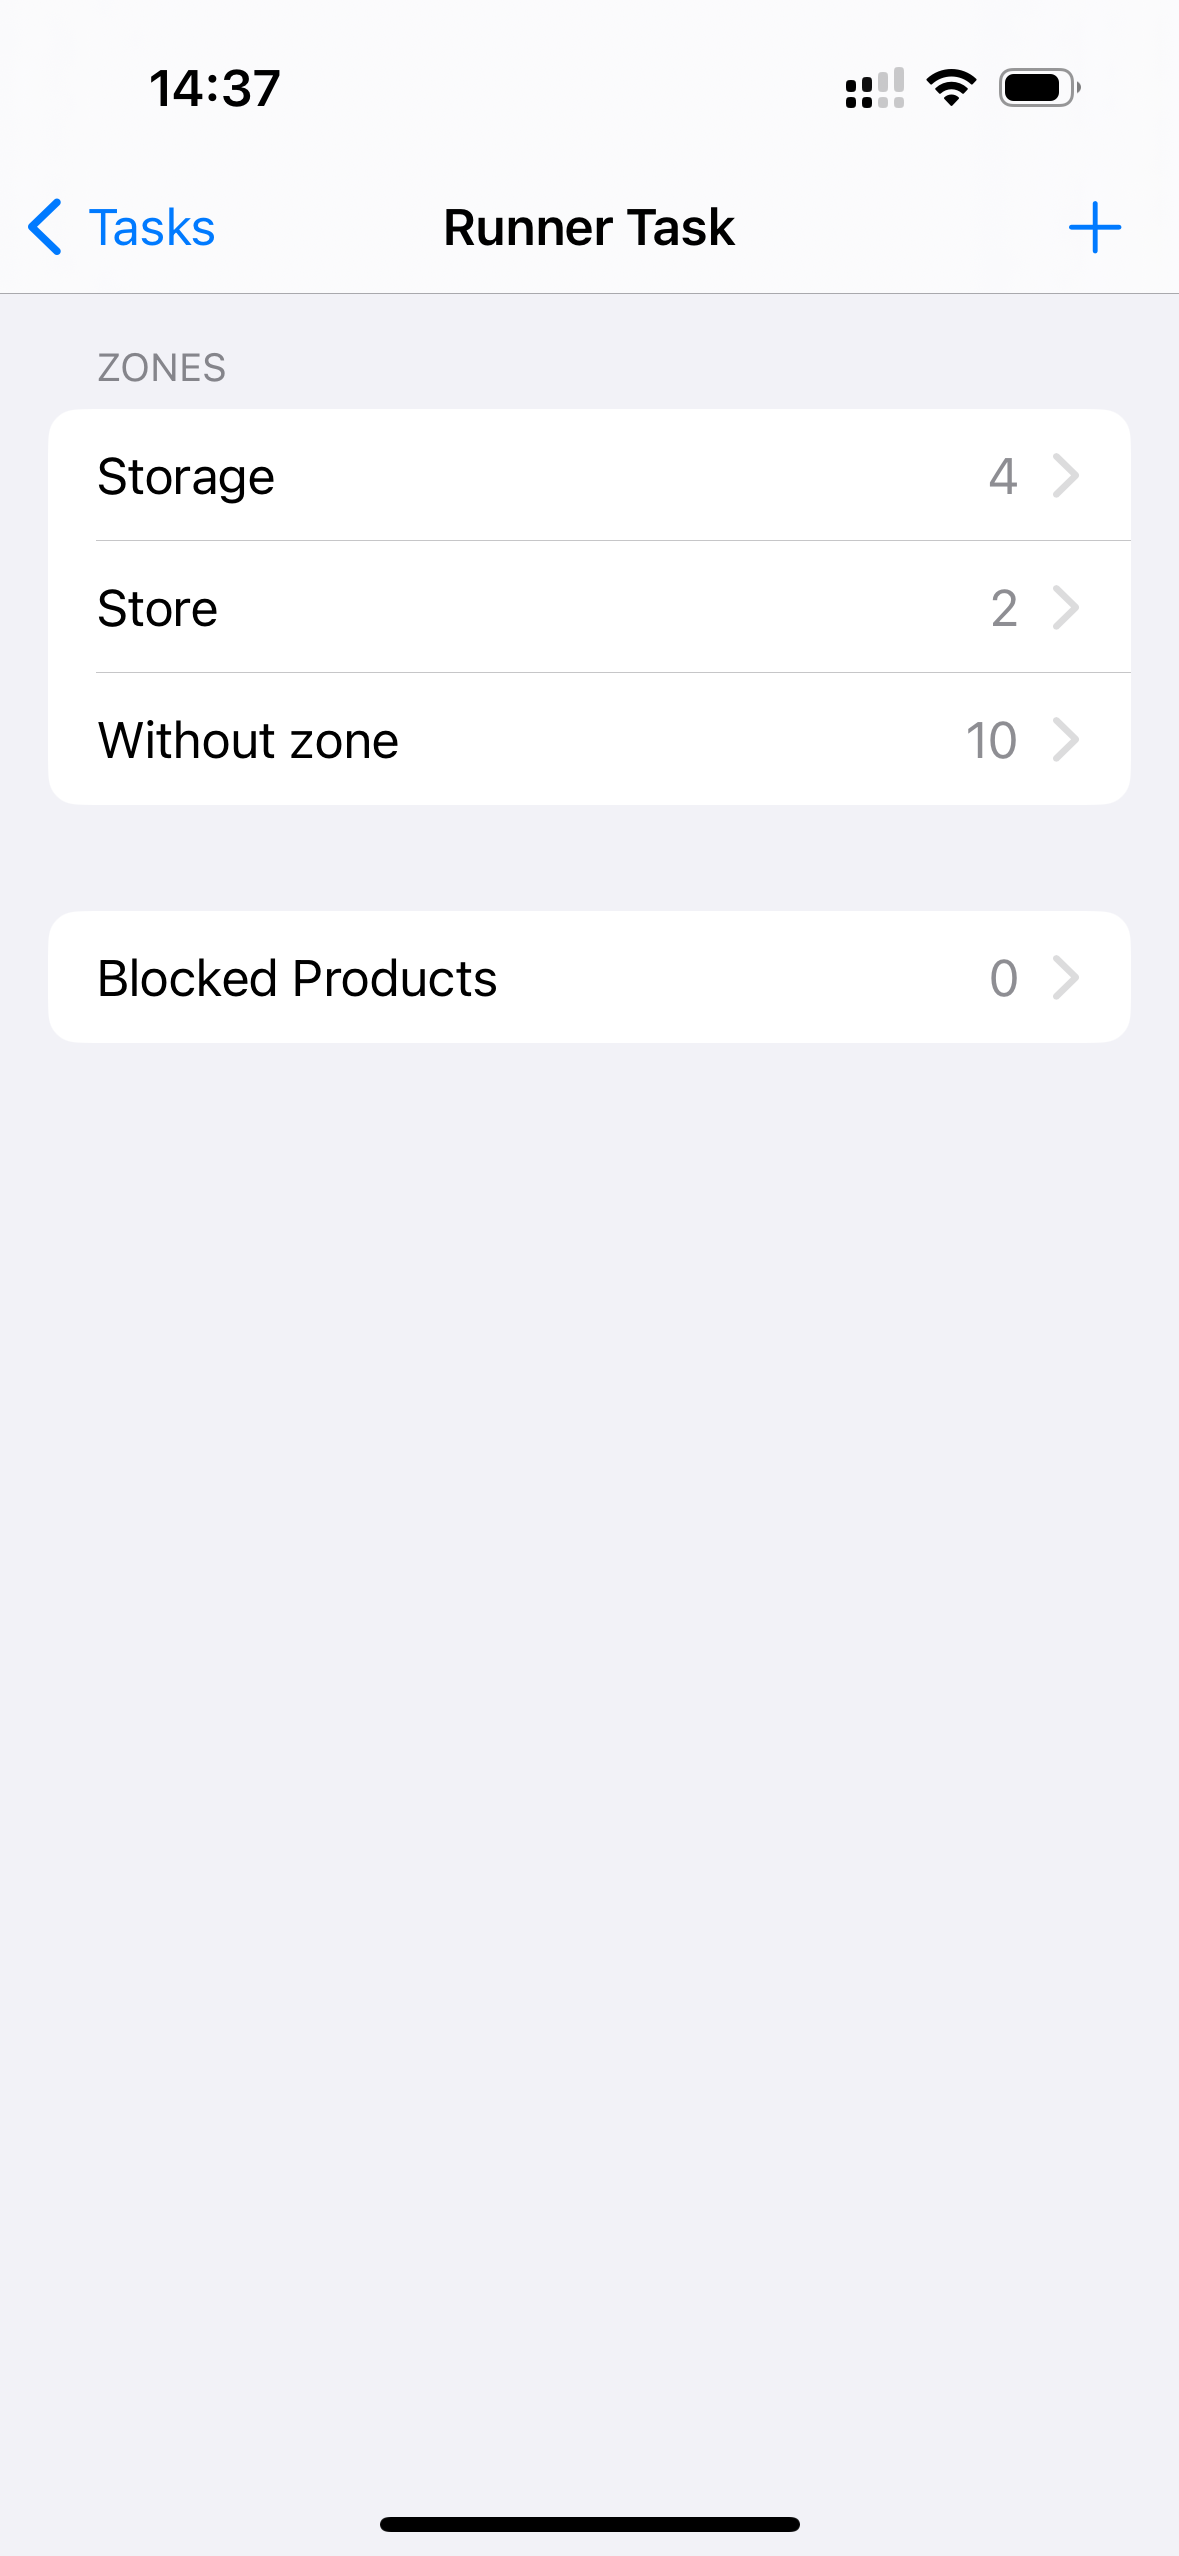
You can also open runner tasks from within the All Tasks > Runner Task section, which will then show you all different zones currently containing a runner task.
Regardless of the section (and zone) you start however, you can tap and select as many runner tasks as you like before starting the task(s), or Start all of them at once.
By doing so, you will enter a new screen containing the scanner and all of the products contained in your selected runner task(s). Swipe any product to the left to either Pick it or to Remove it from the runner task.
To speed up the process of runner tasks, you can set App:RunnerTask:QuickPicking to true. This will then skip the step of manually picking the products. We recommend using this with caution, as it removes a layer of checks meant to ensure the right products are picked.
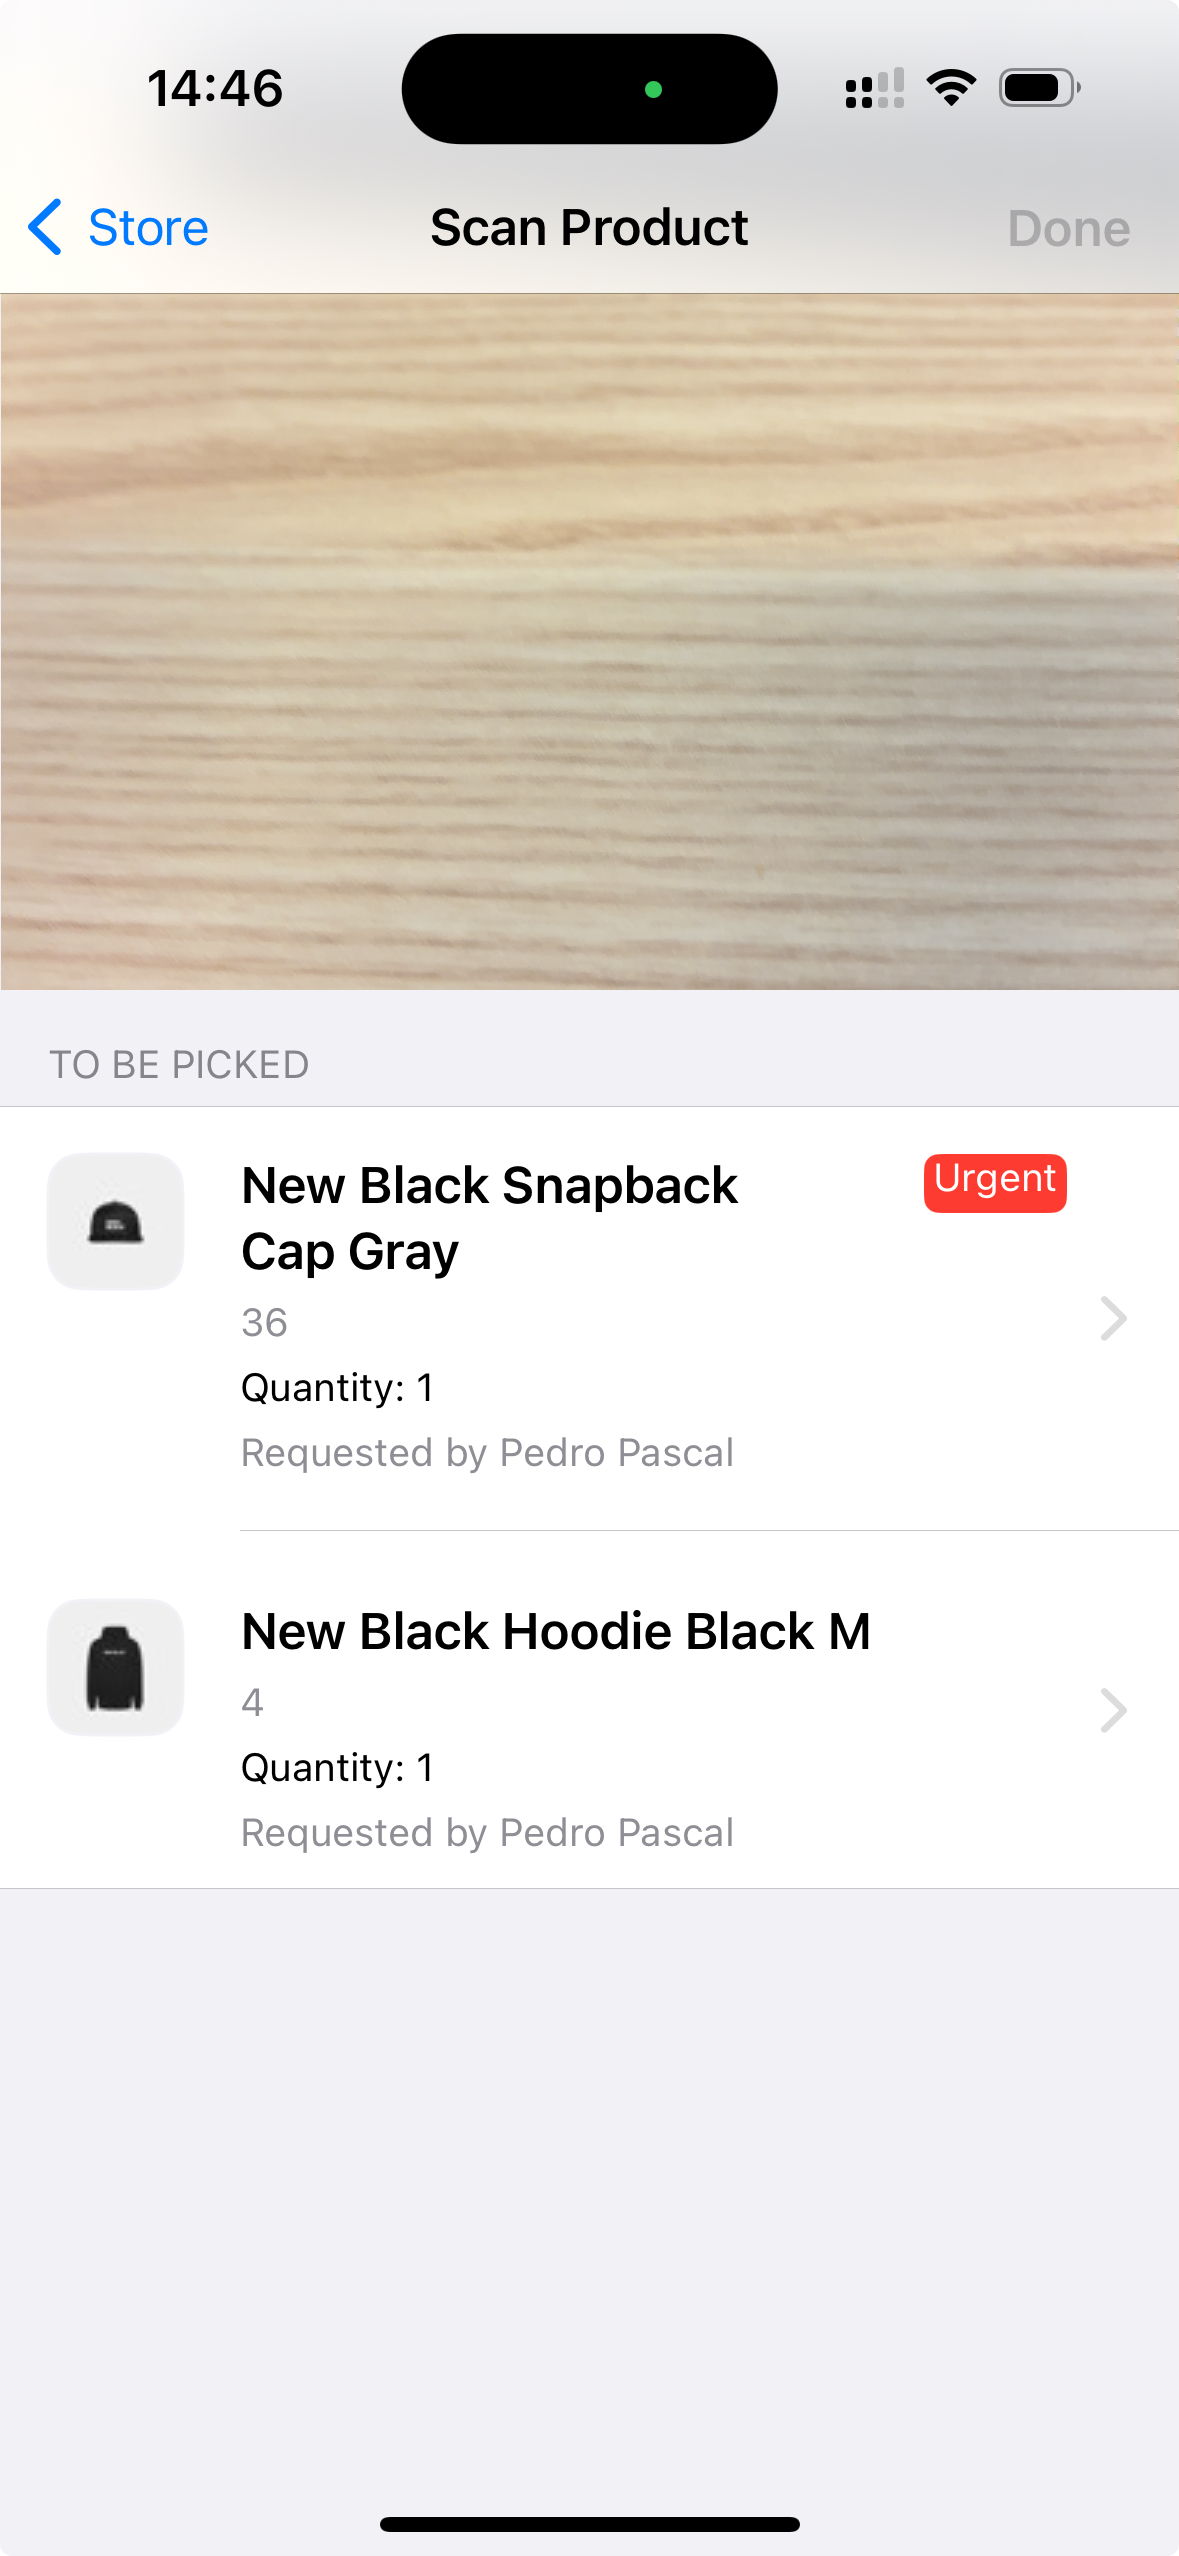
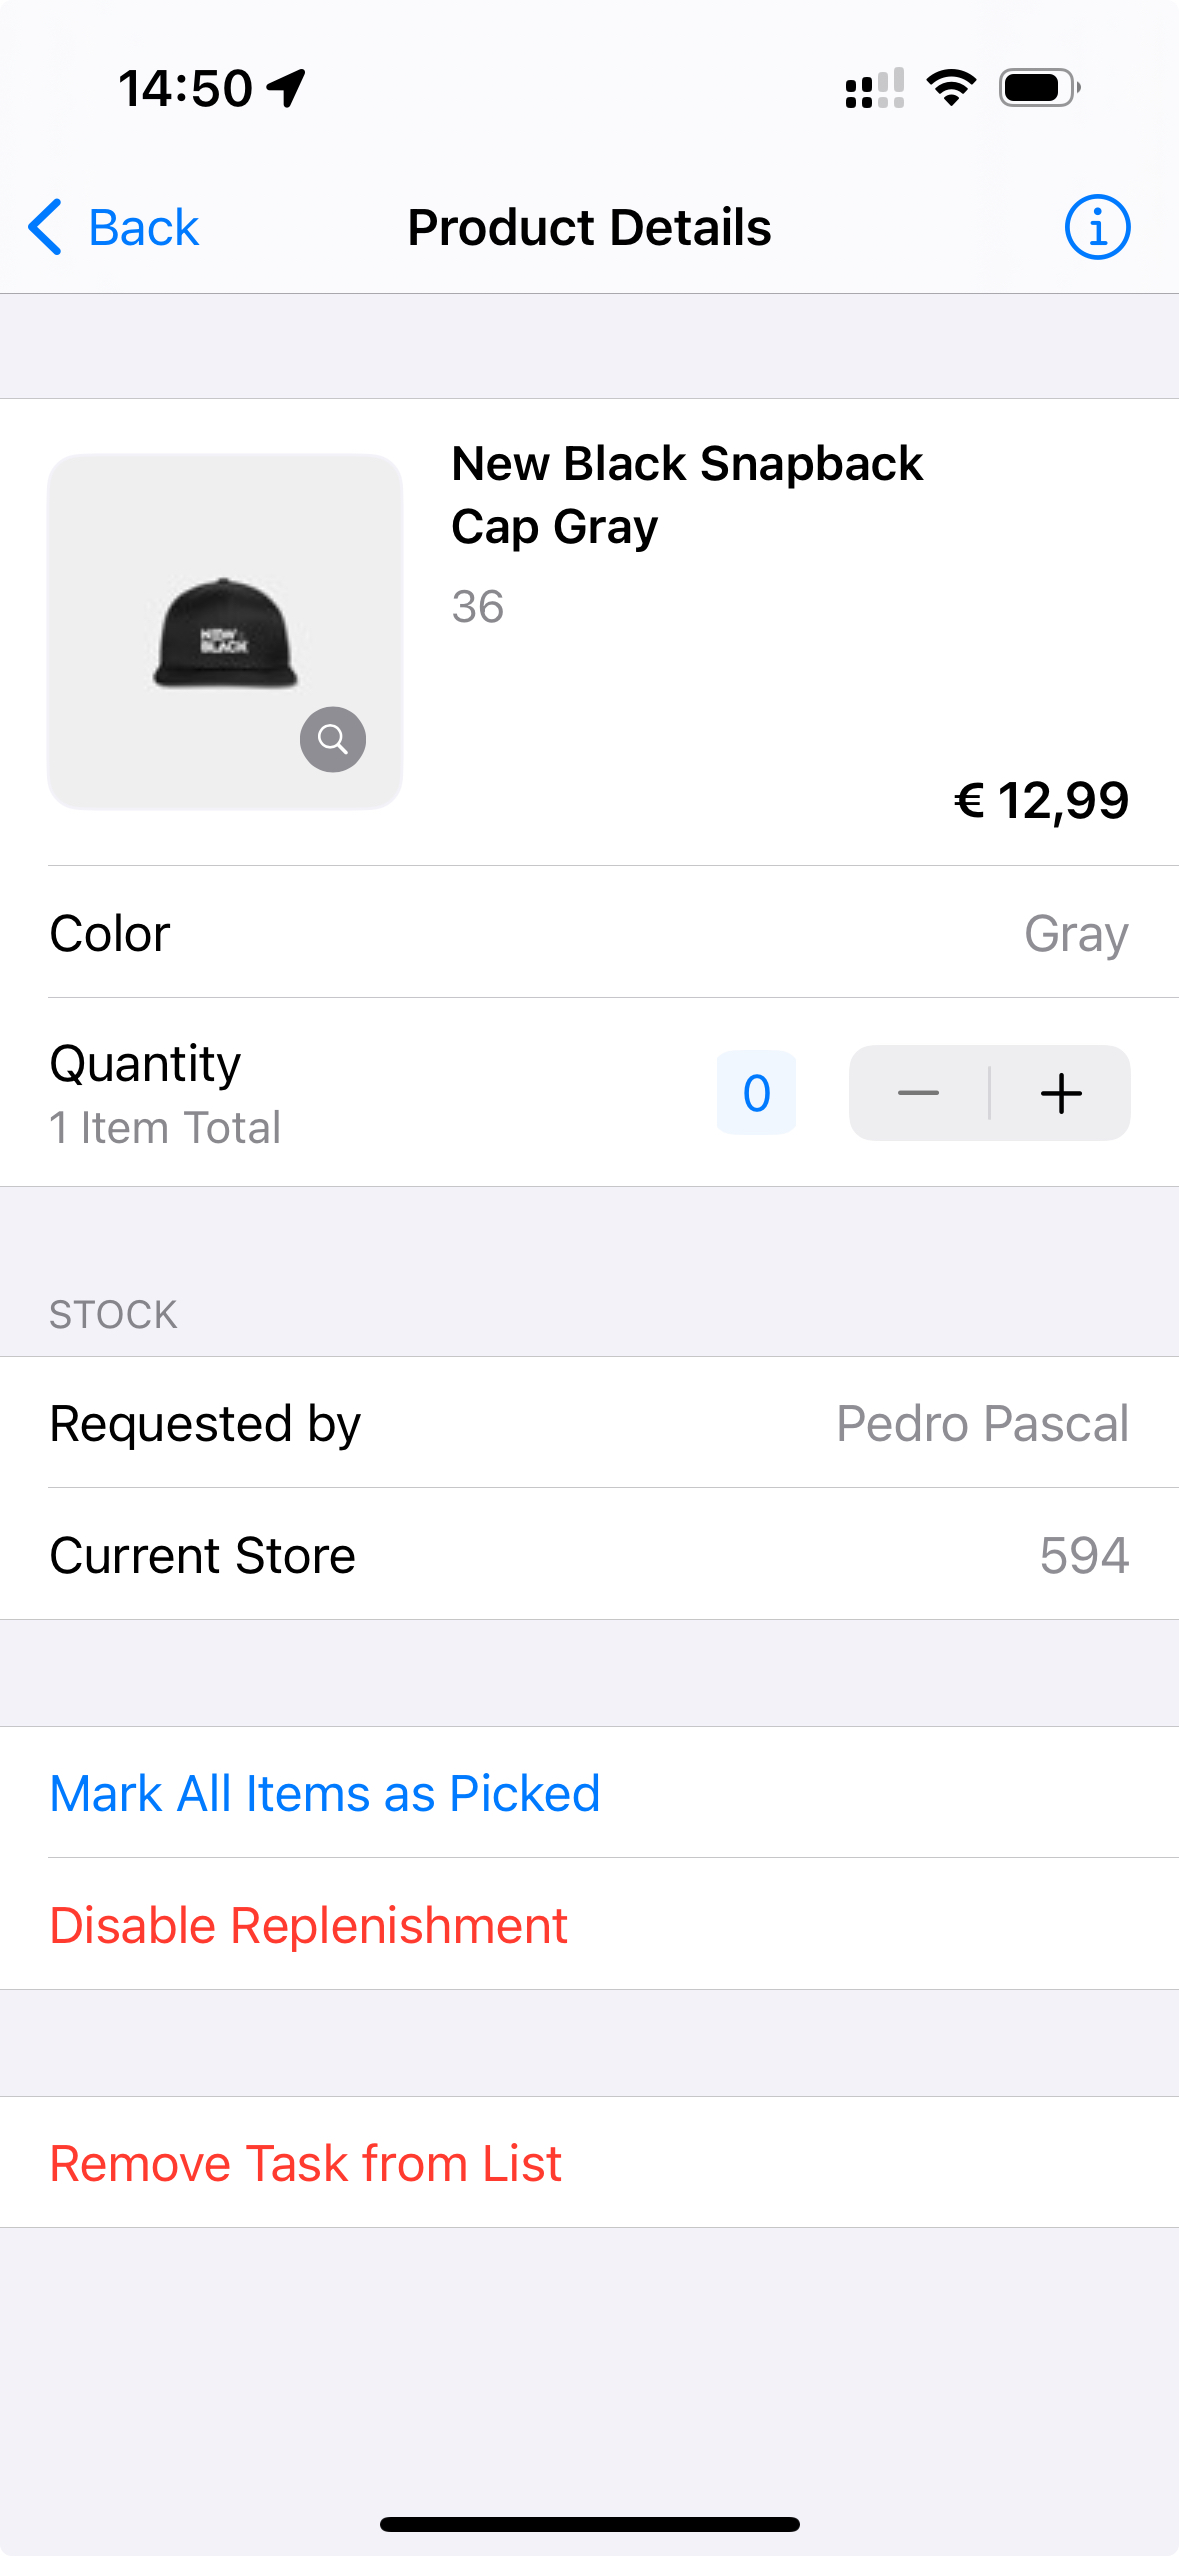
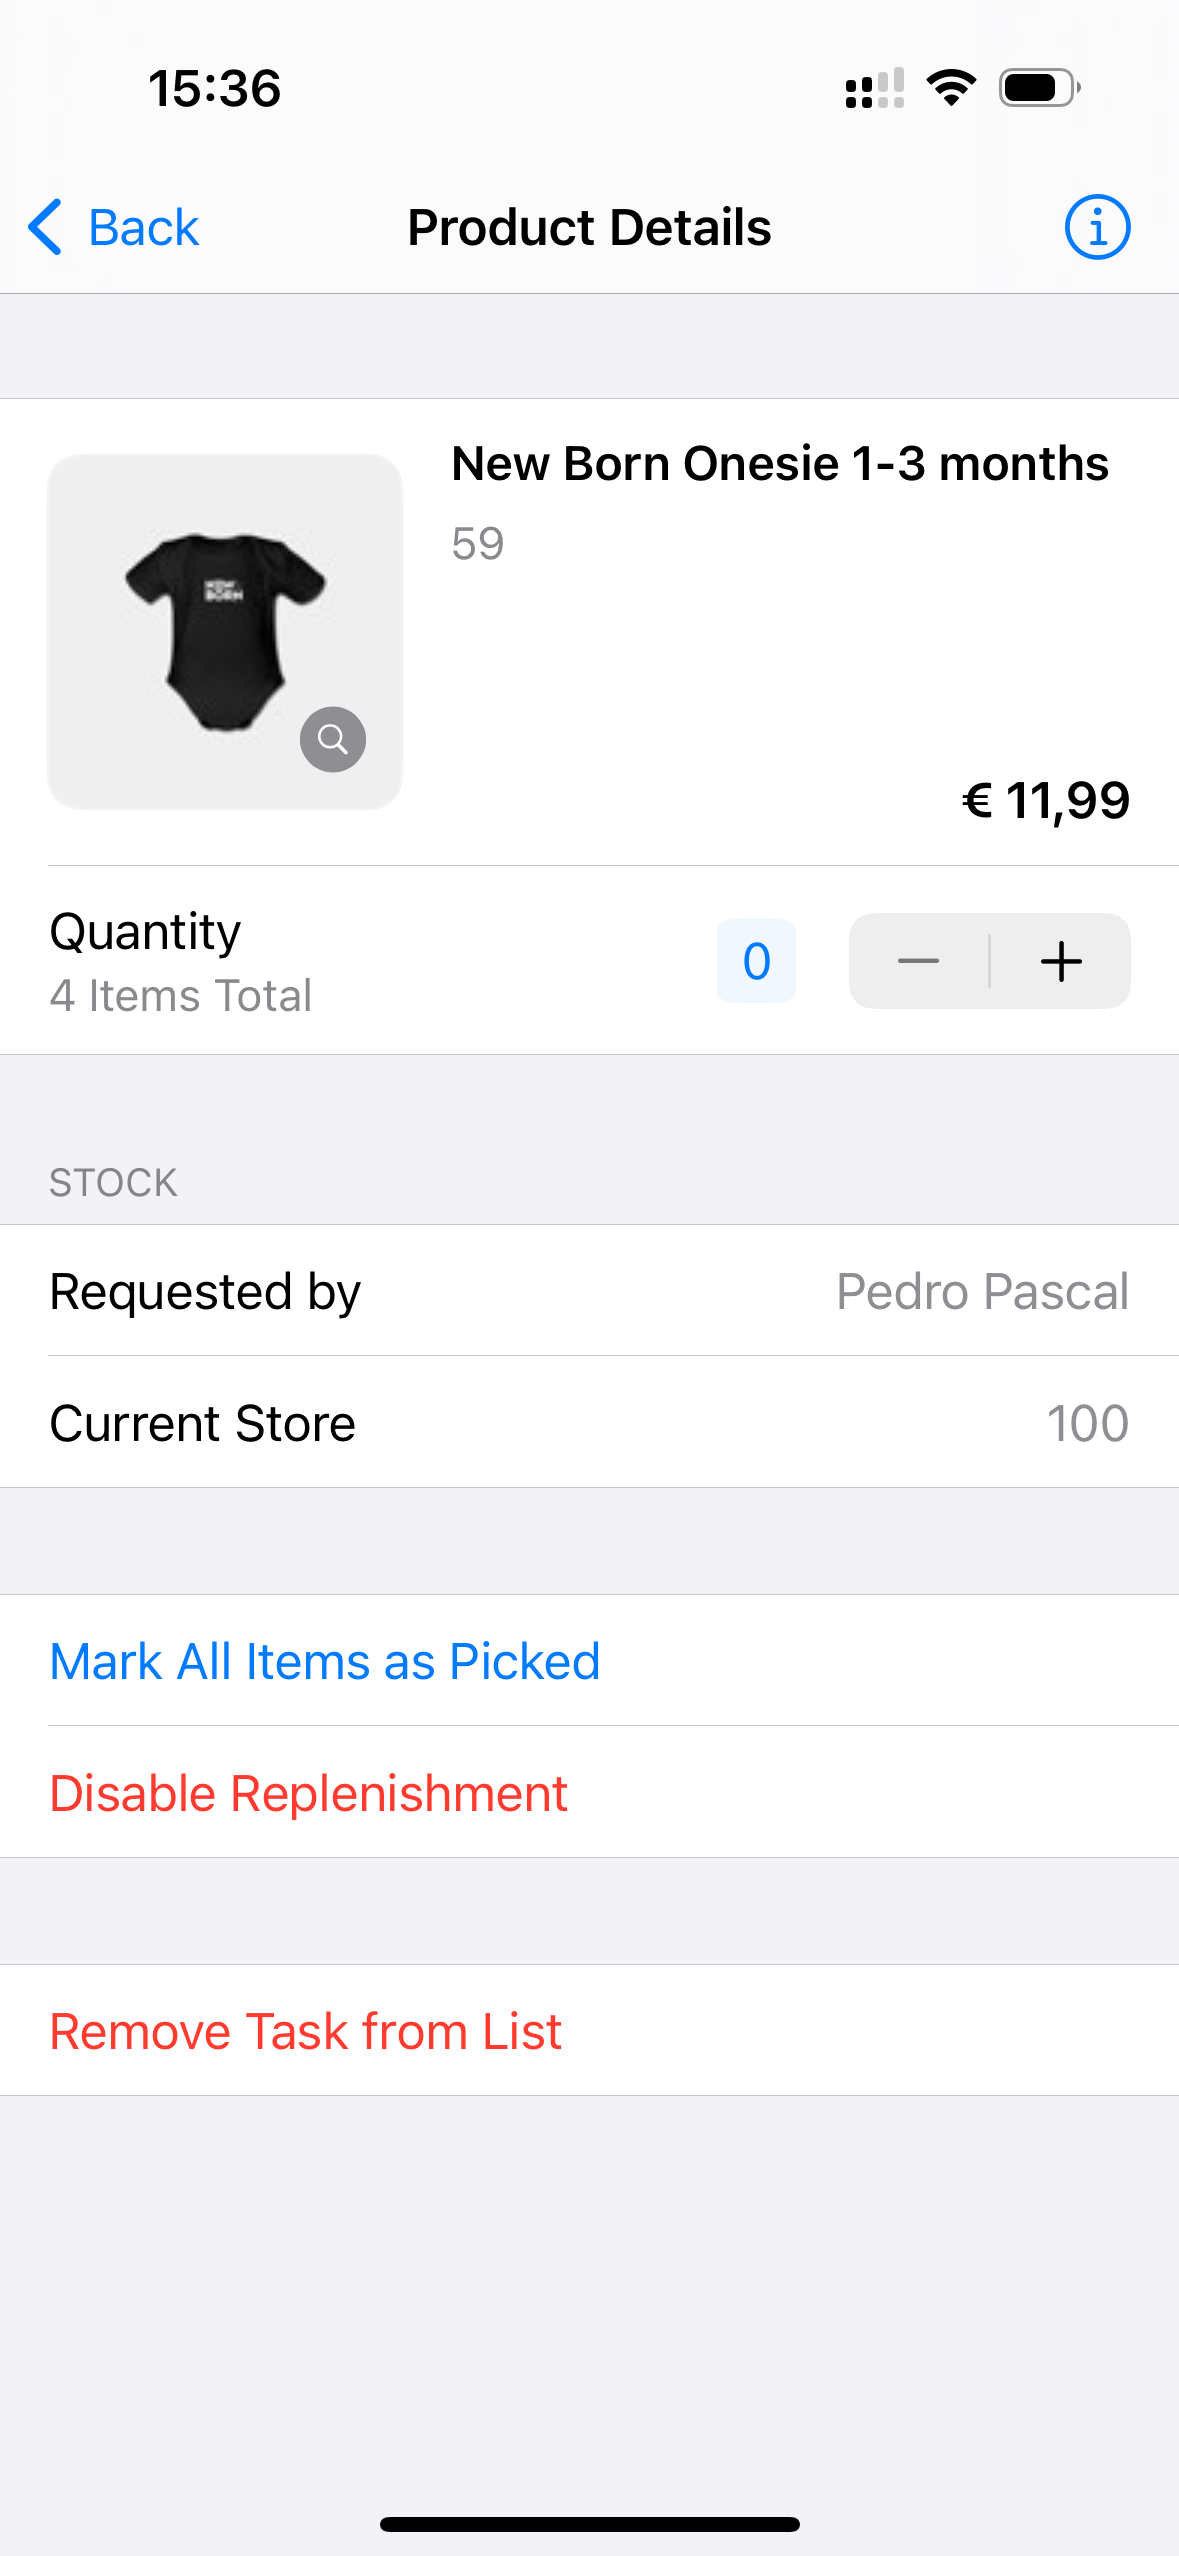
You can also tap an item to enter its details page. Here you can either select a number of items to pick (allowing for picking more than requested) or Mark All Items as Picked straight away.
You can also Disable replenishment. This entails blocking it from being selected for runner tasks. Consequently, when creating a runner task with a blocked product, a notification will be displayed and you are prompted to return to the Runner tasks page in order to mark the said product as available.
Lastly, by tapping Remove Task from List, the product will be removed from the runner task. This is the same action as tapping Remove in the previous screen.
Creating a Runner task
You can create runner tasks from multiple spots in the Apps, depending on its purpose.
Top-up
If you're looking to create lists of items that need to be stocked up somewhere in the store from the store's own storage room, the runner tasks are best created via the Tasks App.
You can either tap the '+' icon to create a new (runner) task, or you can tap the same icon from within the Runner task section itself.
Either will lead you to the Scan product(s) section. Here you can add your product by scanning its barcode or by tapping the 'looking glass' icon. The latter will let you search across all products.
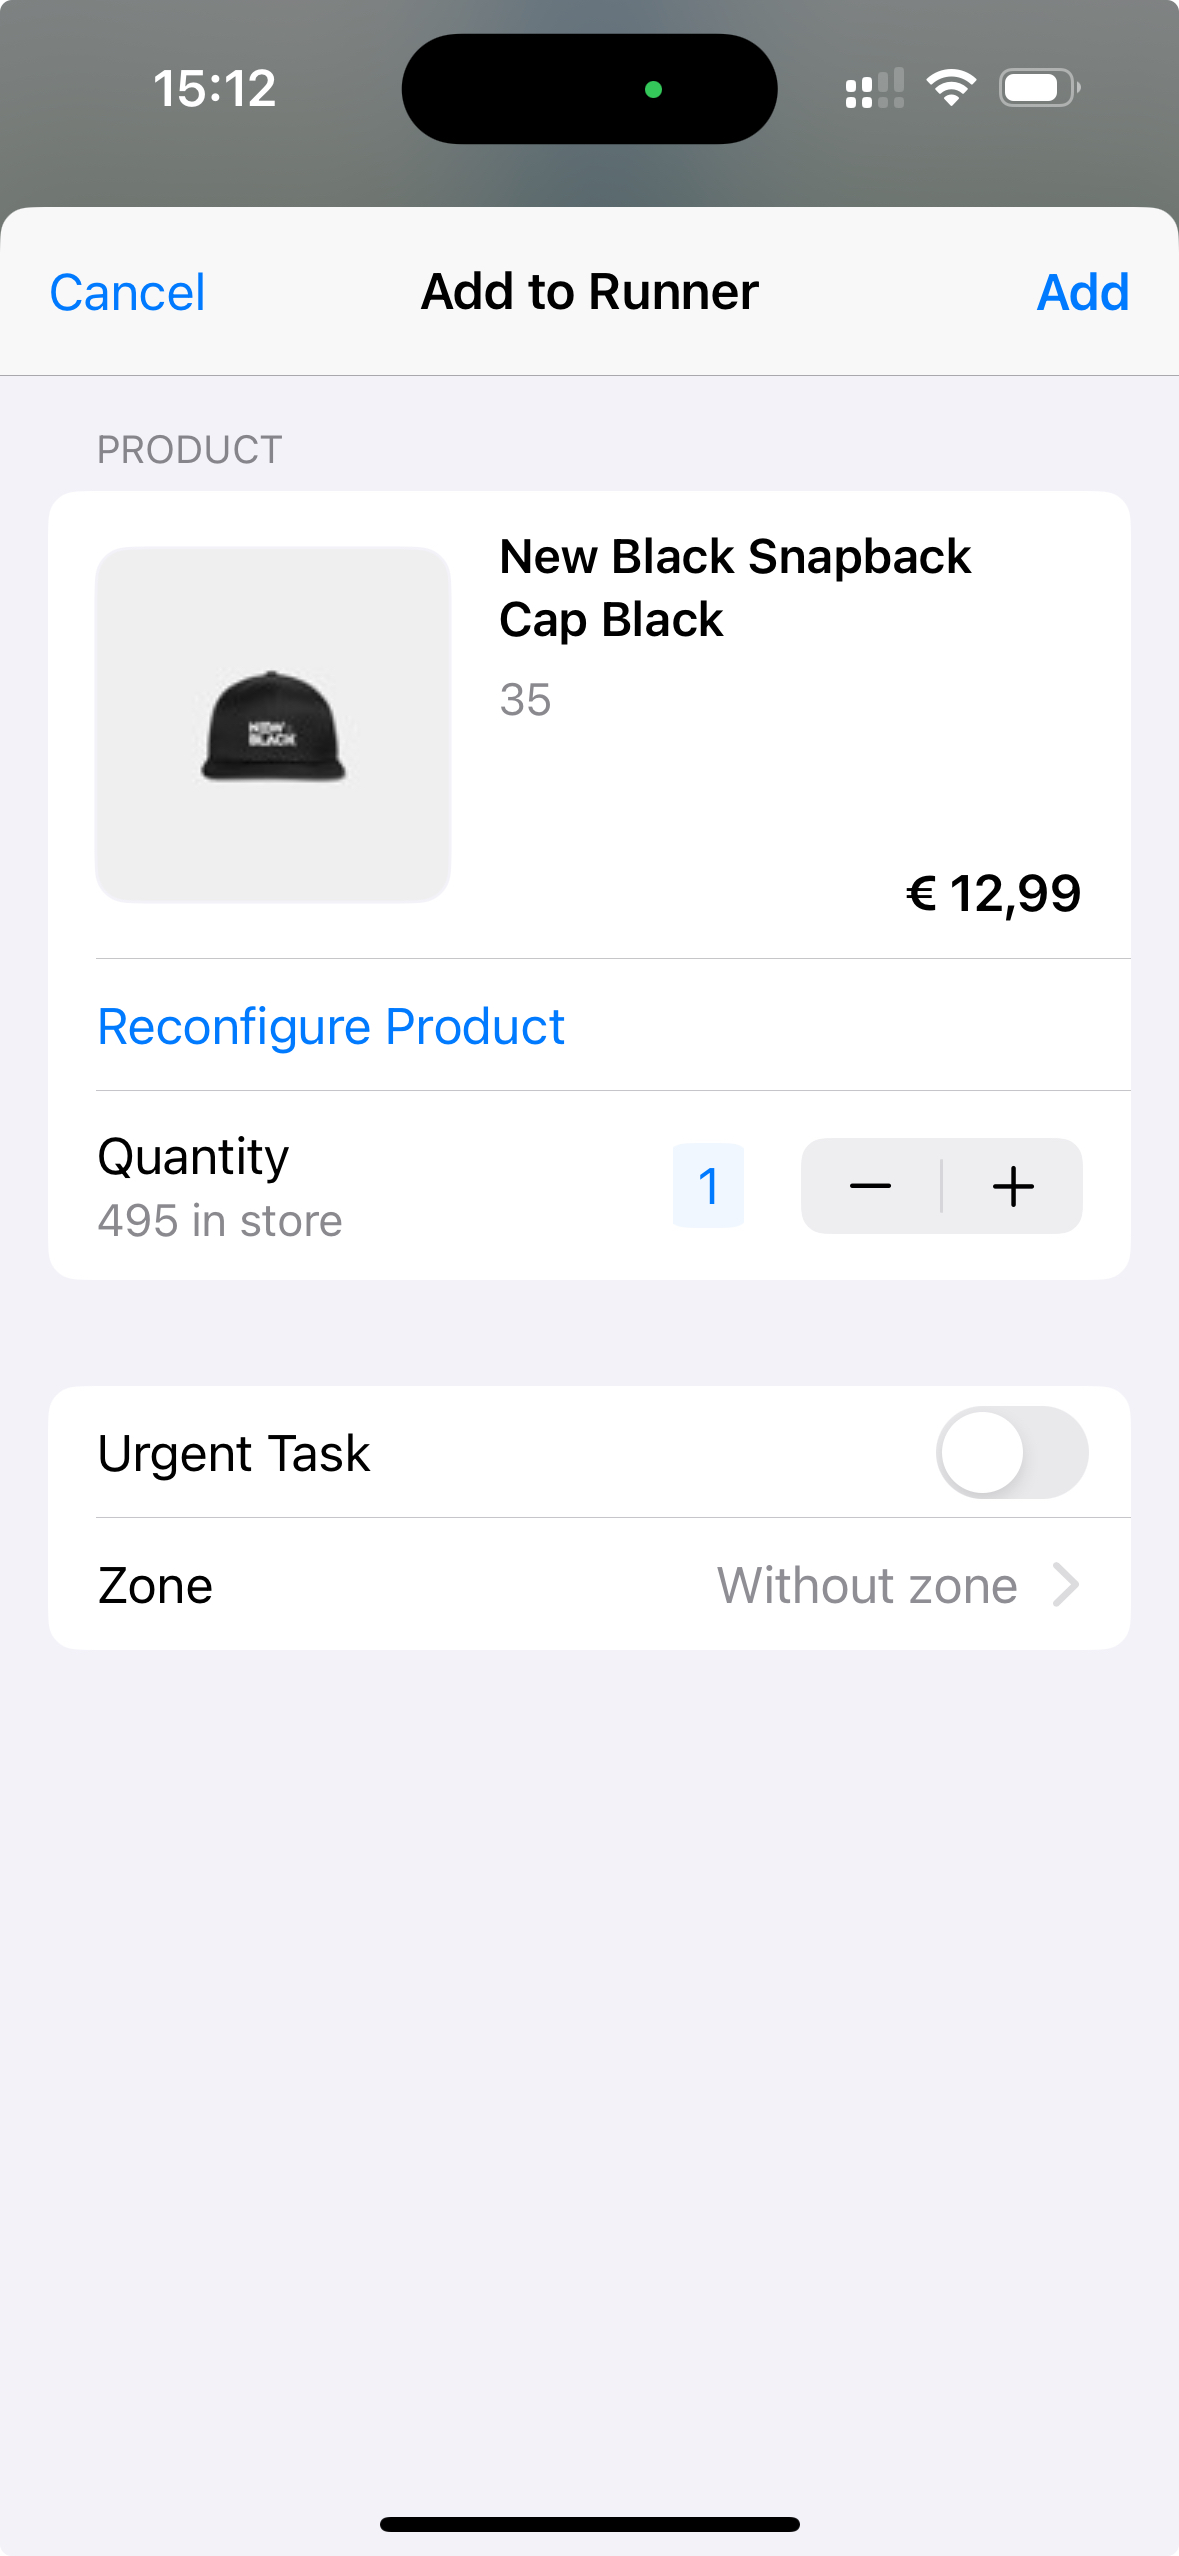
Once you've selected your product, you will enter the Add to Runner screen. Select the number of products required, optionally mark it as Urgent and lastly: pick a Zone.
You can set your preferred zone(s) on OU level by adding them in the StockReplenishmentTasks:Zones setting. It accepts comma-separated values.
While with a customer
If you're in need for a specific product to show your customer, and would like your colleagues to fetch it for you, you can either do so via the Tasks App, but it's more likely you are in the Checkout App.
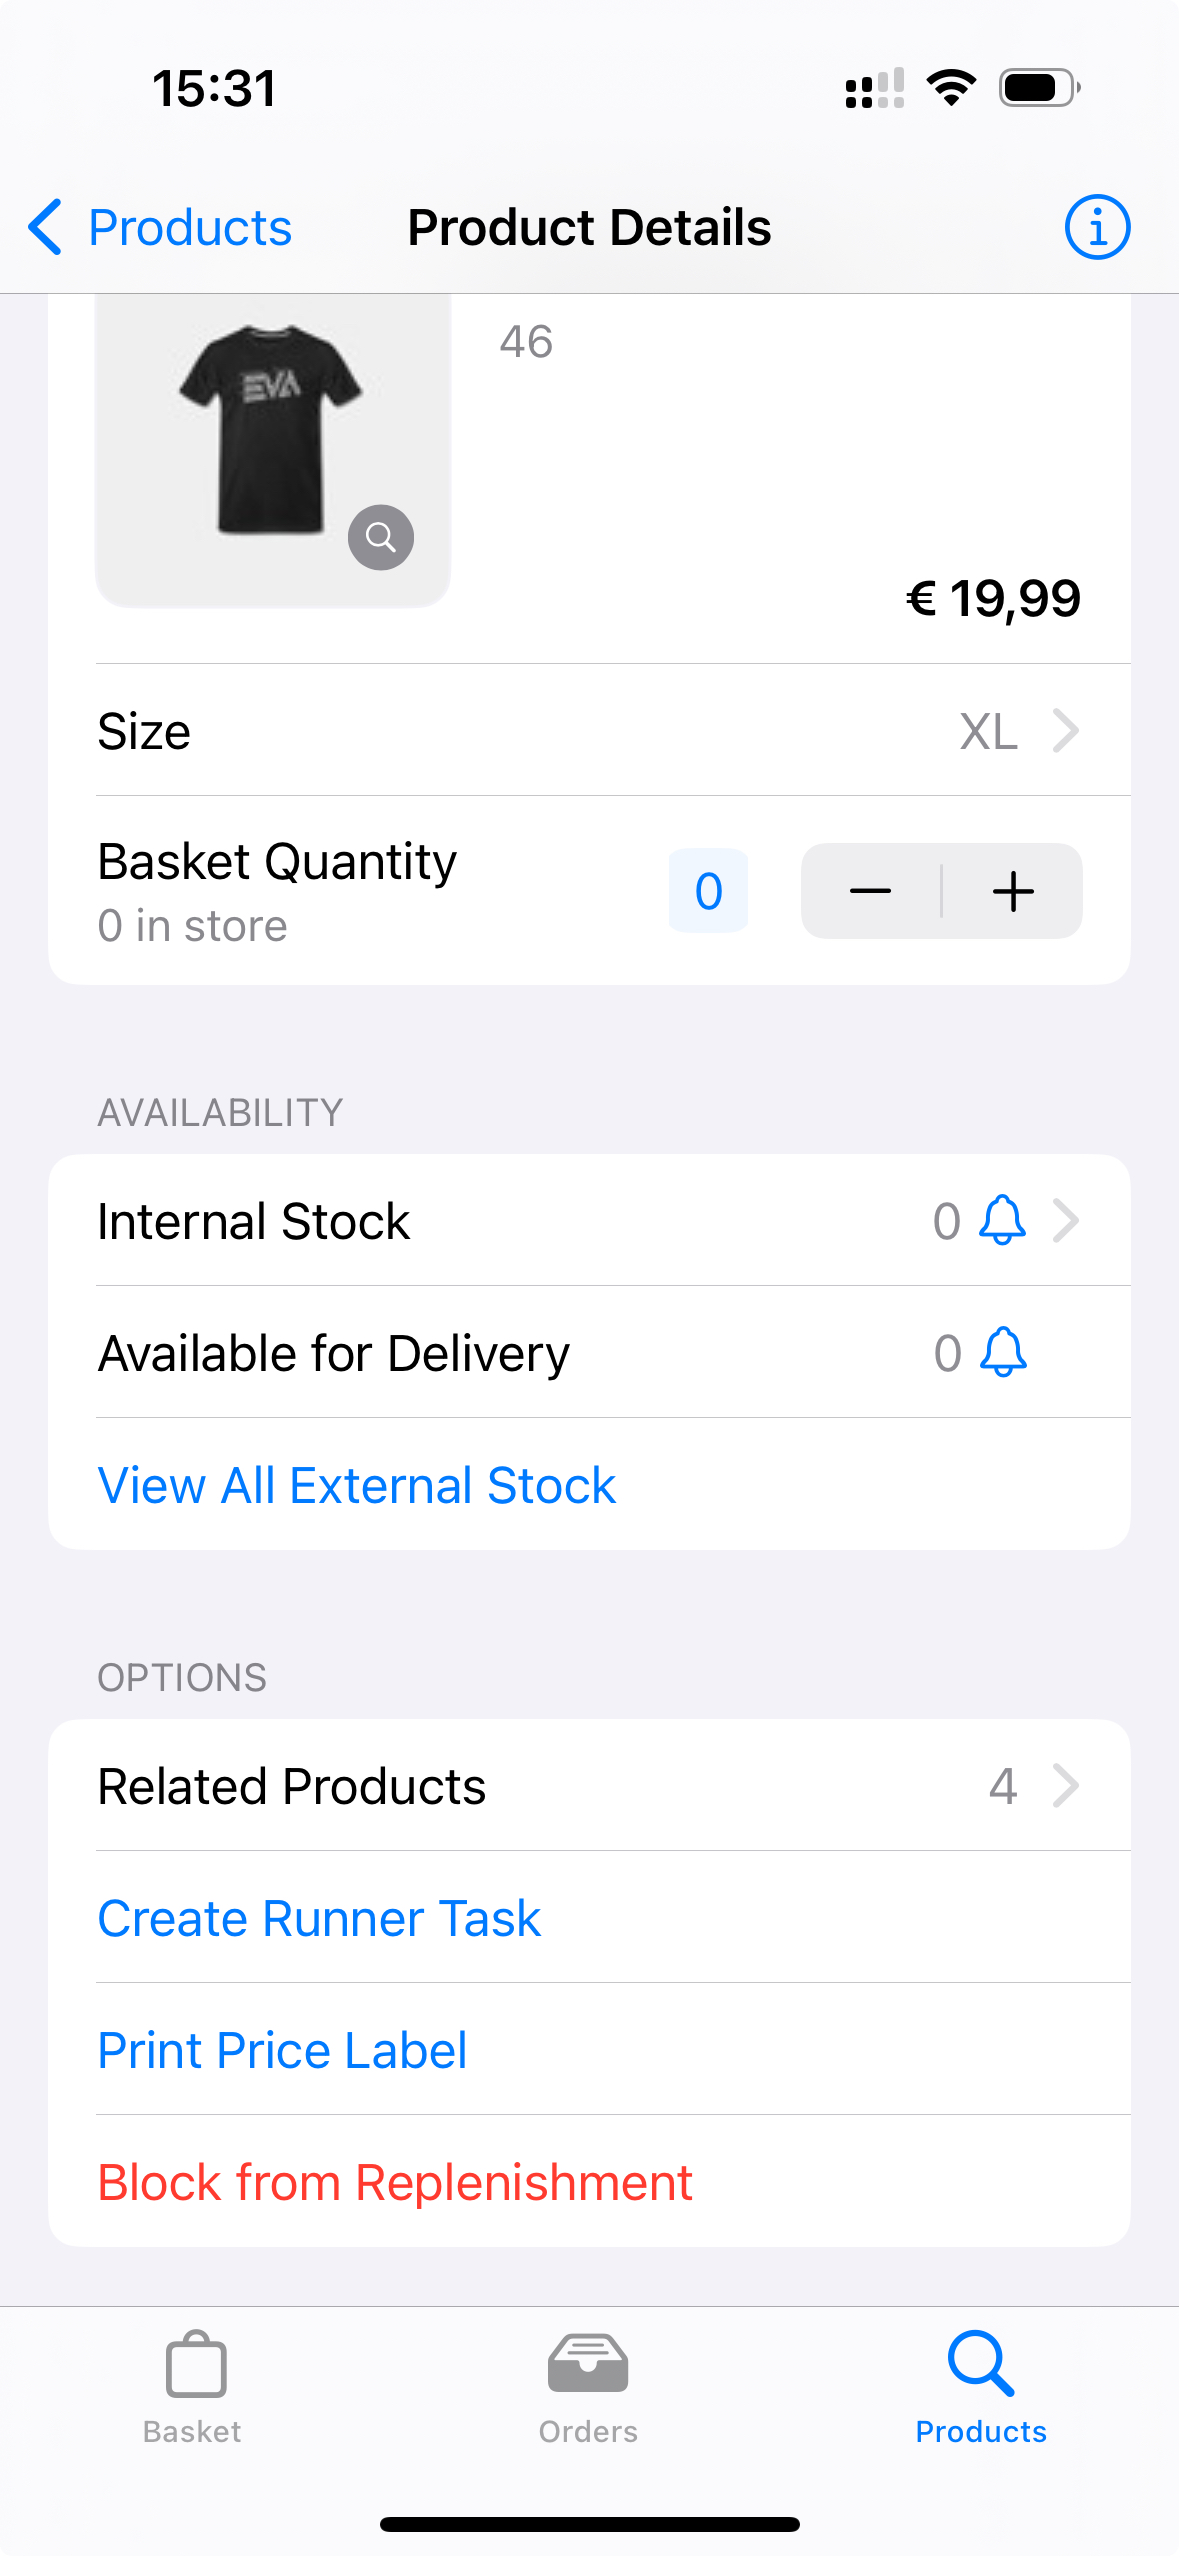
In case of the latter, you can create a runner task directly via the product's detail page.
You may want to tap Urgent as well, to spotlight the task for your colleagues.
Blocking products
Although it's also mentioned in the section here above, there are multiple ways of marking a product as blocked from runner tasks (AKA Disable Replenishment).
If you create a runner task with a blocked product, you will receive a notification requesting you to first mark the said product as available.
Runner Task section
You can tap Blocked Products in the Runner task section to enter the screen listing all currently blocked products.
Tap the '+' icon to enter the scanner page (where you can once again also search for products manually),

Product Details section (Checkout App)
While in the Product details page of the Checkout App, you can tap Block from Replenishment.
Product Details section (Tasks App)
When picking products for a runner task you get the option to Disable Replenishment.
Regardless of which App you are in; whether it's called disabling or blocking, the effect will be the same: the product will not be available for runner tasks. The same goes for unblocking.
Unblocking products
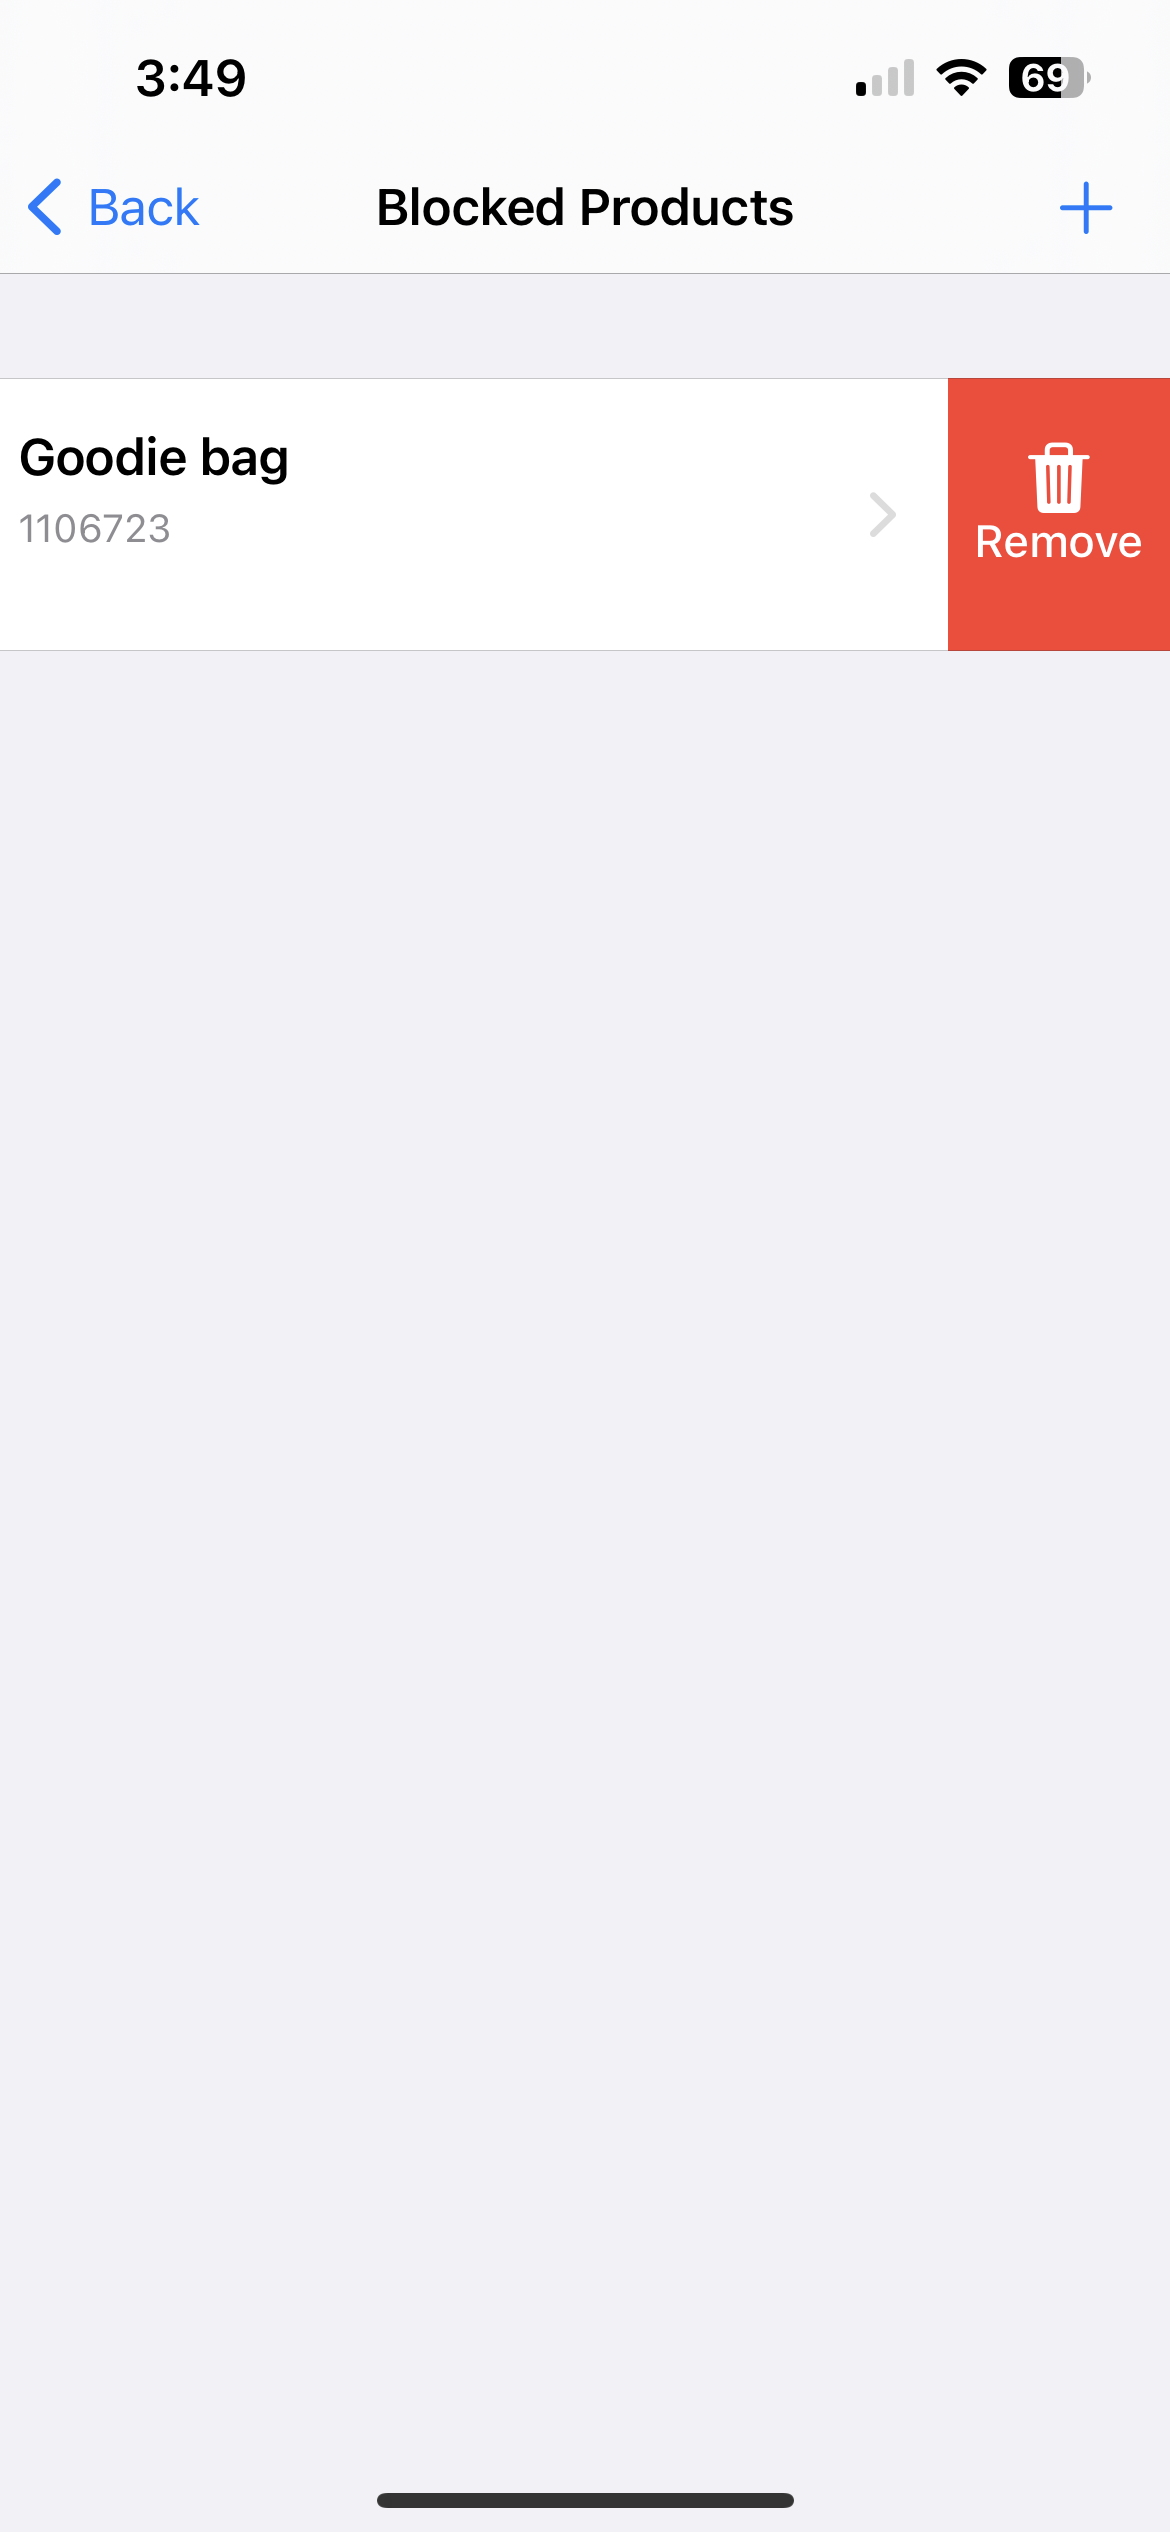
The quickest way to unblock a product is via the Blocked Products page. Either swipe left to Remove the product, or tap the product in question, and select Remove from Blocked List.
