Login
Your first order of business when opening the POS application is logging in. EVA supports several methods of logging in, we will walk you through them one by one.
Login methods
- Username and password
- QR-code
- Identification PIN
- SSO
By default, POS will show Username, QR-code, and SSO as login methods. More configurations are required to enable Identification PIN.
The preferred login method can be influenced using the App setting App:Login:PreferredMethod and one of the following values: Email | QRCode | SSO | PIN |. If the setting is not used, the preferred login method will always default to Username. Further, if PIN is the desired preferred method, the necessary configurations are first needed.
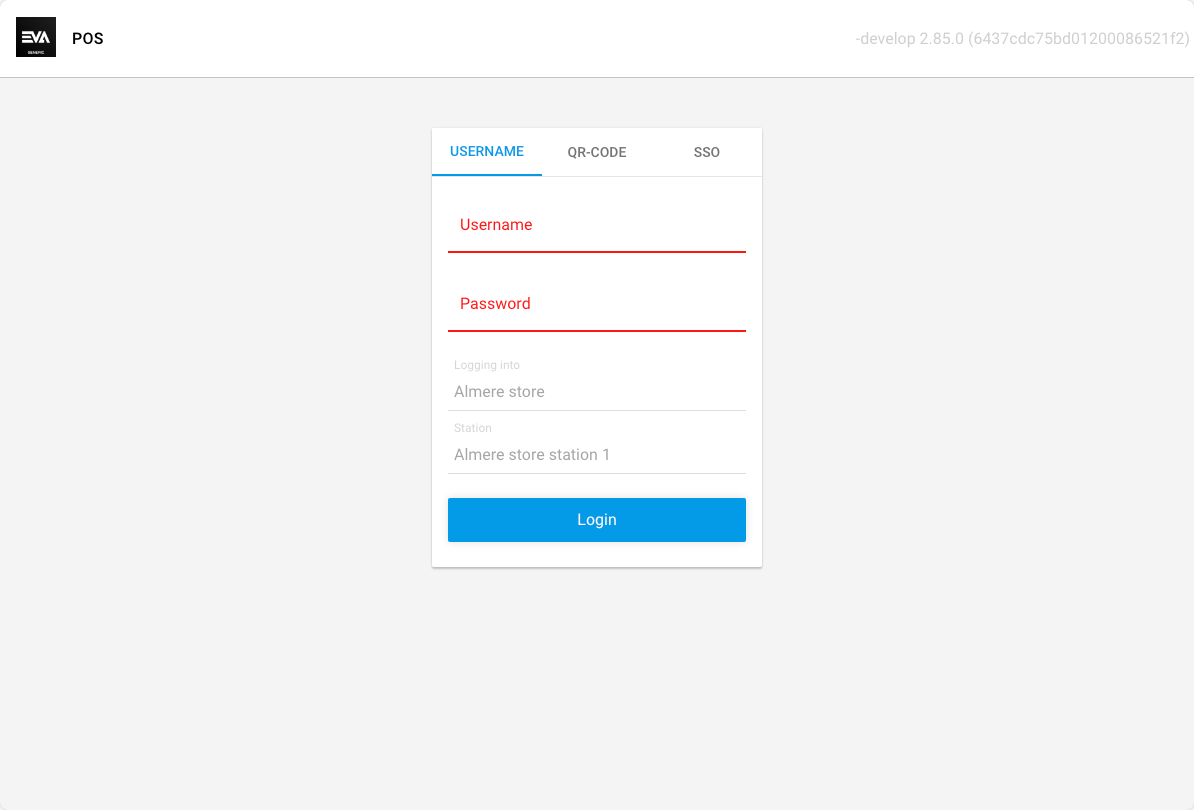
Username and password
This login method requires you to specify your EVA login credentials (username can be substituted with your e-mail address). When creating a password, a minimum of 8 characters is required.
Adding new users can be done via the Employees chapter on Admin Suite.
QR-code
Selecting the QR-code login option will display a QR-code on your screen.
There are two options of logging in using QR-code:
- Option 1: Scan the displayed QR-code via the Companion or POS App (this will only work if you are already logged in on the respective App and your session is active).
- Option 2: Use your handheld scanner (if configured) to scan your personal identification QR.
Identification PIN
Check out the documentation on identification PIN to know more.
SSO
The SSO tab contains any OpenID login options you might have configured. On test environments, it also contains the New Black login option. Which is most definitely the sickest login option around, but that one is only for us.
The login flow
The login flow is determined based on whether it's your first-time login attempt or not.
If it's not your first time, you will be directly routed to the main login screen.
If it's your first-time login, you will be prompted with a series of screens to set up your POS environment. Those are as follows:
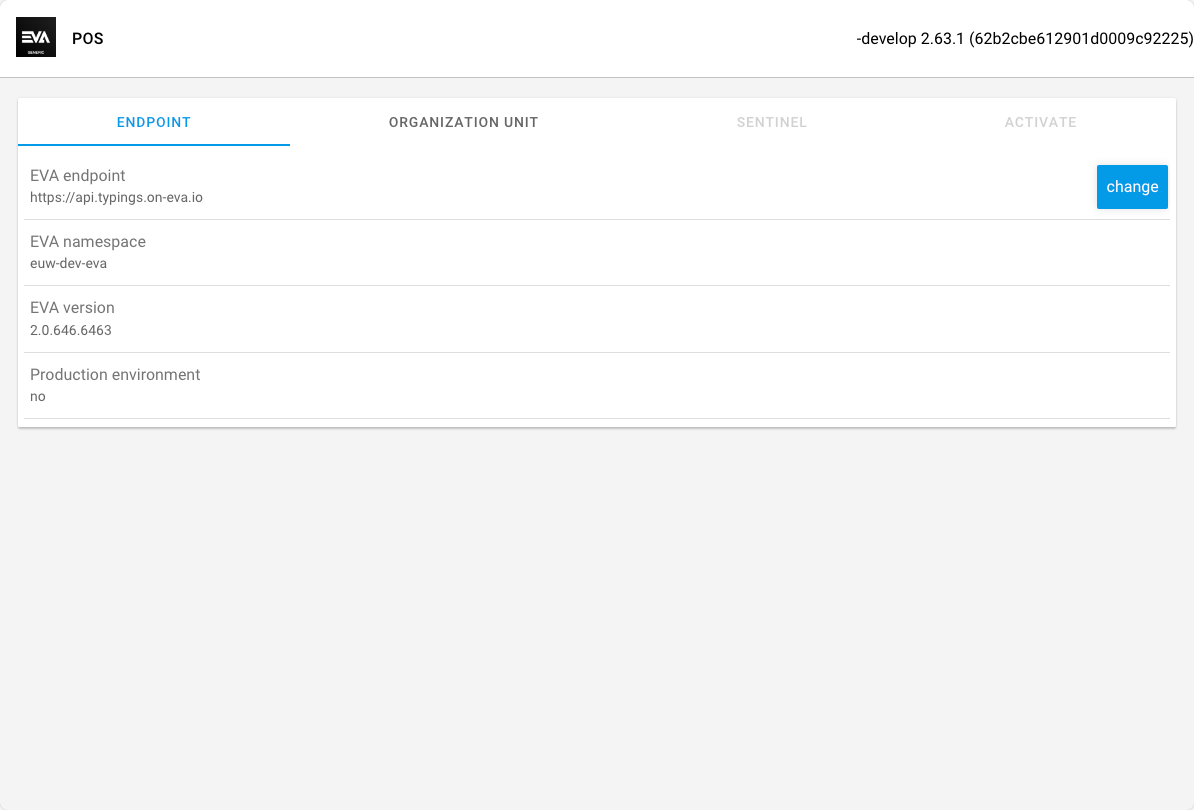
Endpoint
Input your EVA endpoint.
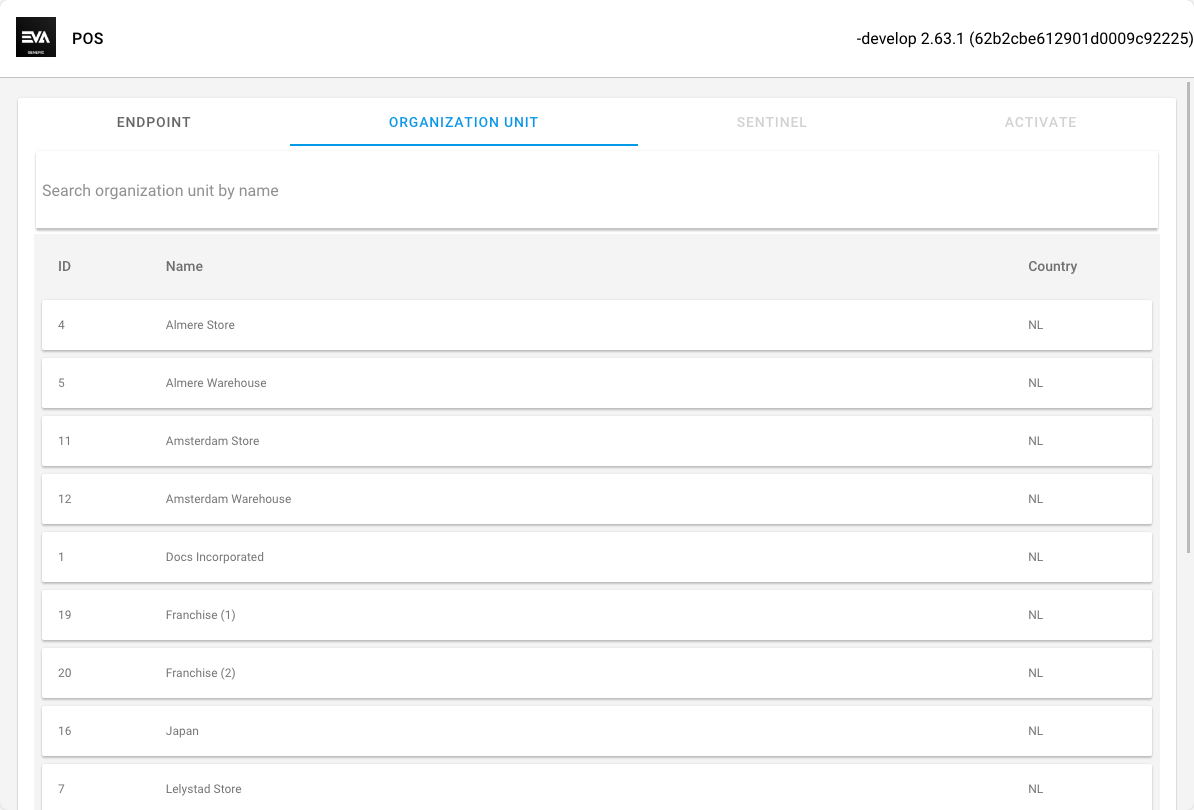
Organization unit
Select the desired Organization unit you'll be using your POS for. The list of organization units you get here is based on your configured organization units.
Live Guard
Input fields based on your Live Guard configuration (this tab will be greyed out if not applicable to the chosen organization unit).
Activate
The activation tab will become tappable once (at least) Endpoint and Organization unit have been filled (Live Guard - if applicable).
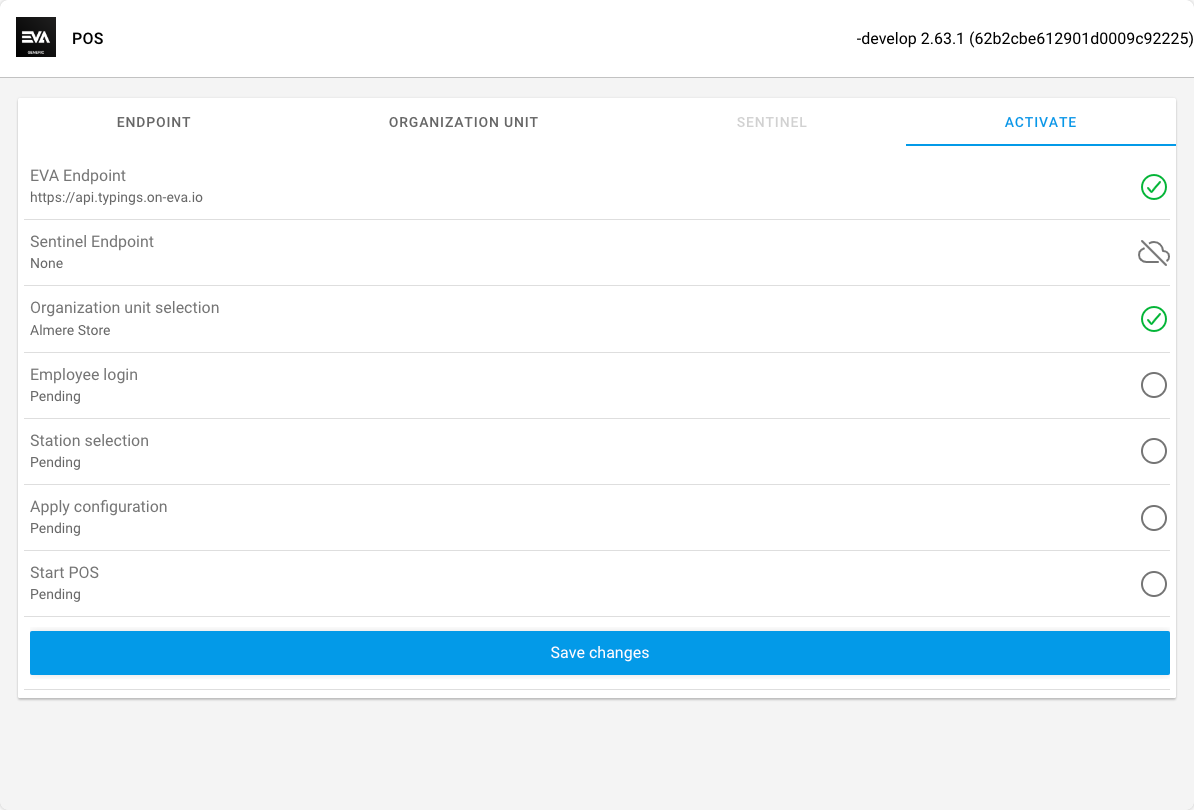
Once you tap Save changes you will be prompted to enter your credentials to confirm the changes made.
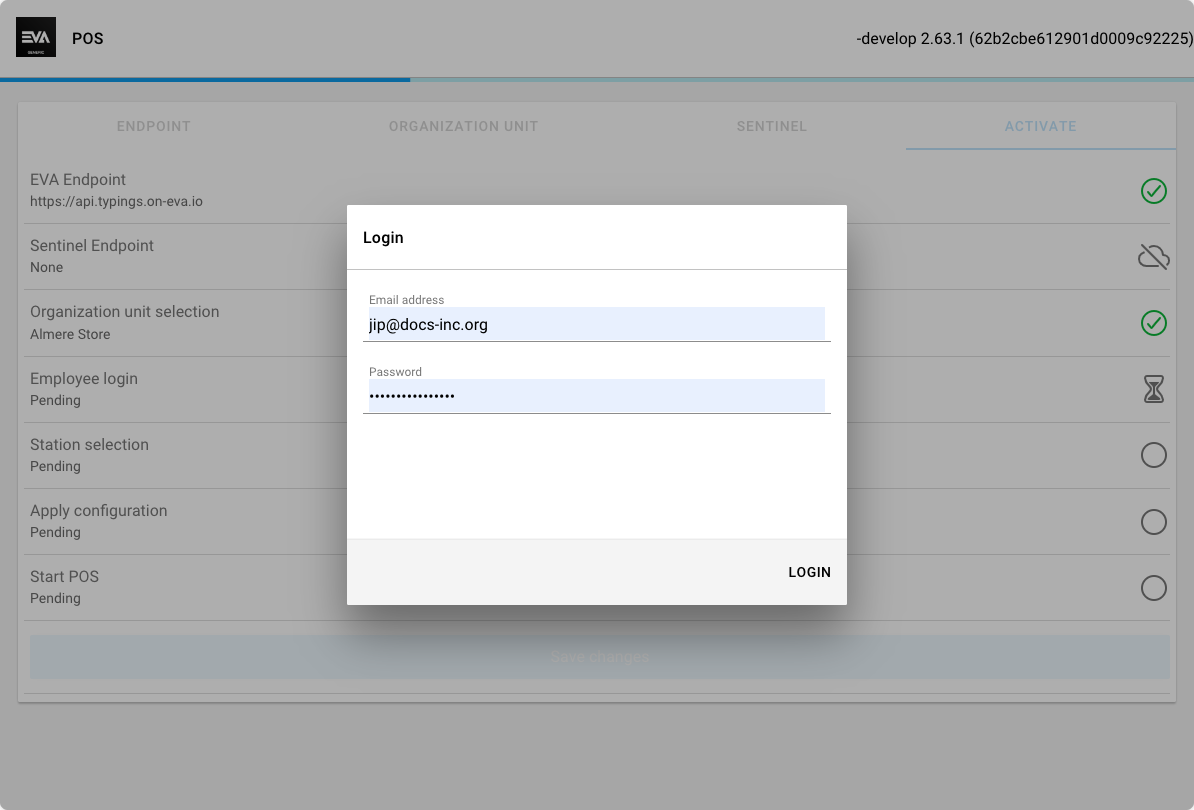
Once done, the next redirect will take you to the standard login screen.
Repeating first-time login flow
A scenario could arise where you would for example move device(s) used for POS from one store to another. This would in turn require that you change the selected organization unit of the device(s).
To do so, repeating the above (first time) login flow is necessary. You can do so in two ways:
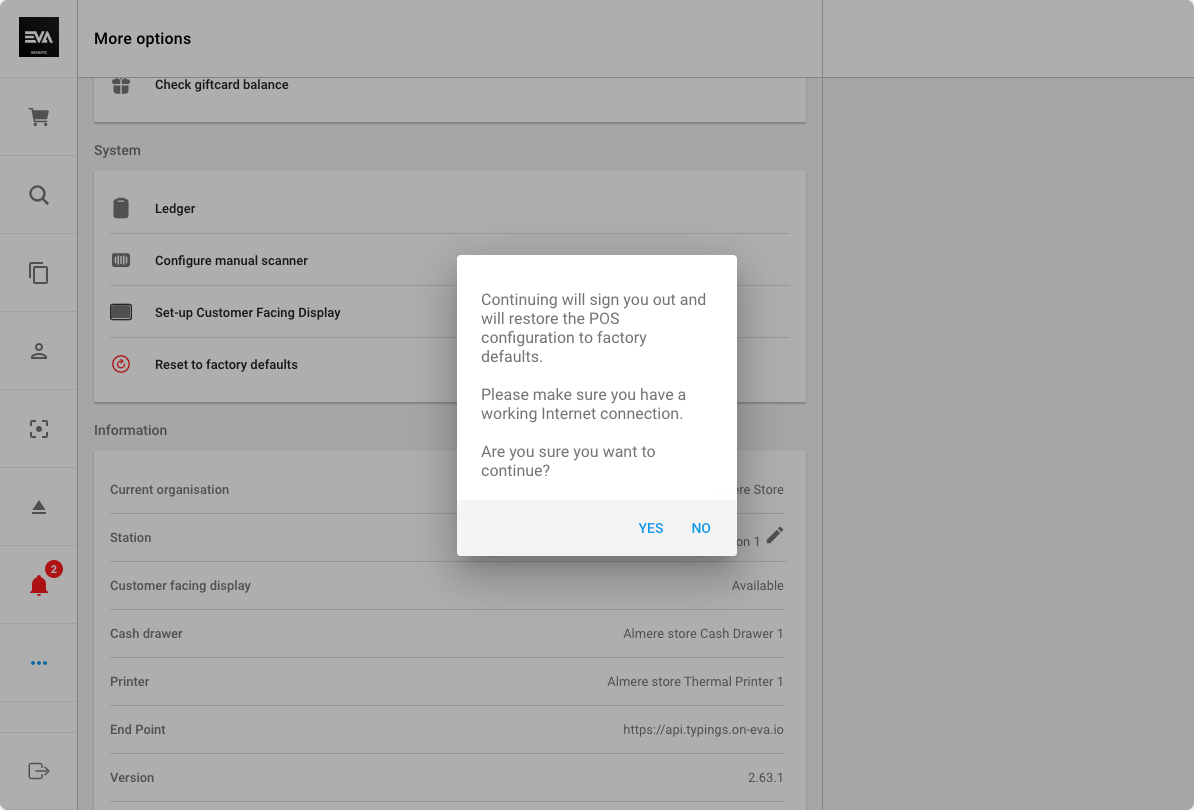
- When logged in: go to the More options tab, Systems card, and click Reset to factory defaults.
- While logged out: tap the top left corner icon (usually an EVA icon) 3 times
In both cases a toaster will prompt you about restoring the POS configuration to its factory defaults; ensure you have an active Internet connection. Once accepted, the first-time login flow is repeated where you can now change your inputs for endpoint, organization unit, and Live Guard.
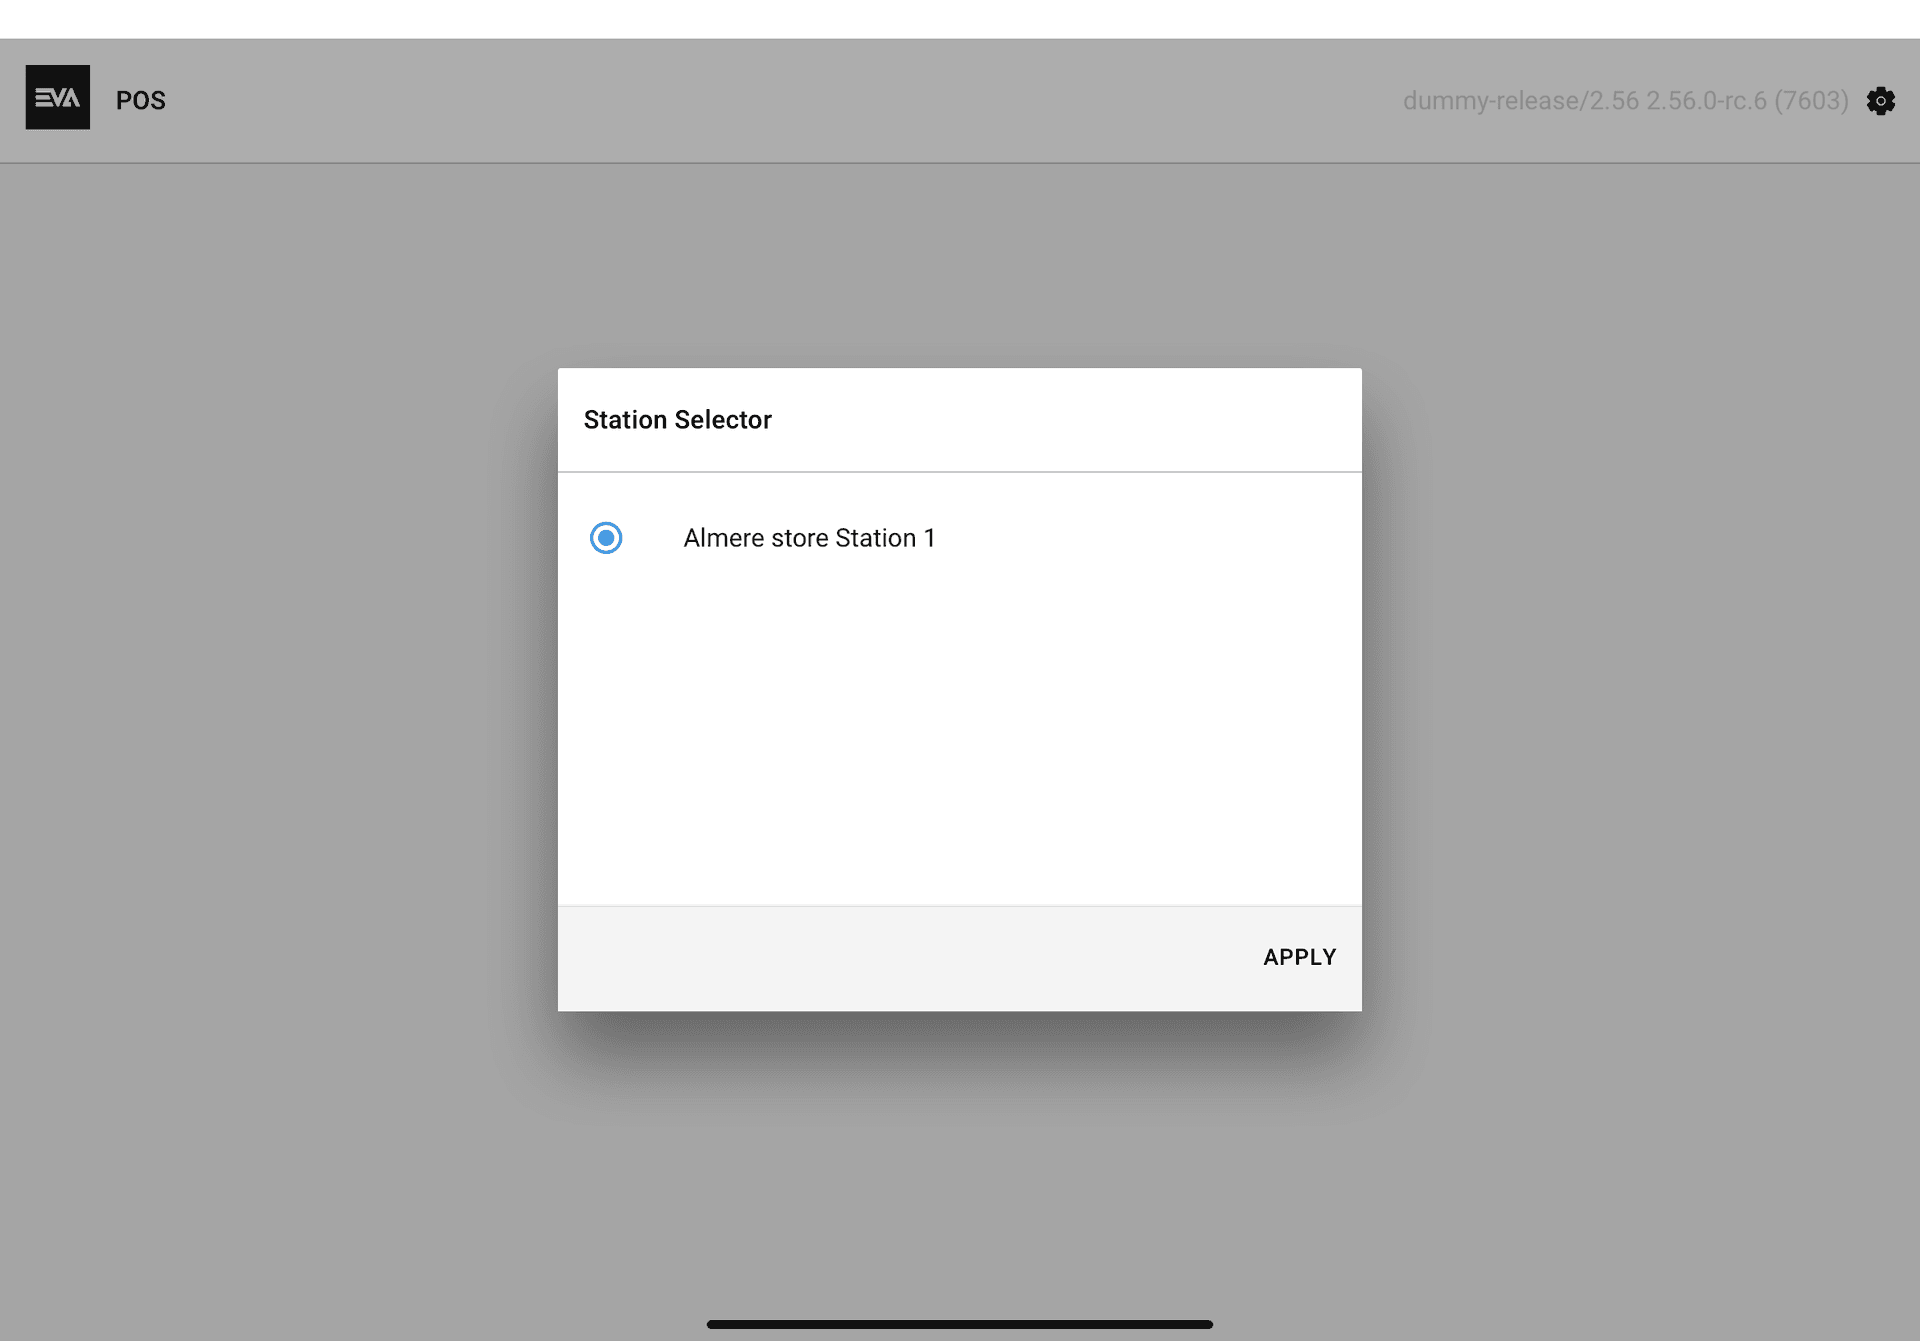
Selecting station
You will be prompted to select a station after you log in. The list of stations is based on your store infrastructure. This behavior can be configured in the Admin using the setting App:ShowStationSelectorOnLogin by setting the value to true or false; default isfalse If set to true, users will be prompted with a station selector upon logging in.
After logging in
POS opens on the Basket page by default, unless Dashboard has been set up.
Logging back in
To ensure being you can log back into POS with your pincode, make sure that LoginWithIdentificationPin:Method is set to 3. The apps will first attempt to match an OU based on the IP address. If no match is found, they will then try matching using an app token. This is so that when you log in again, the pincode is retained between apps.
Change default login route
Using the setting App:Pos:DefaultRoute, you can change the path that POS will take after logging in. This has the possible destinations of sales, customerSearch, orderSearch, productSearch, tasks, dashboard, and moreOptions.
POS will only listen to this setting while logging in online, as it can not access the dashboard while offline.
If the setting is set to any other page than moreOptions, it will warn you at logging in, if the cashdrawer or the financial period is closed.