Orders
The Orders menu gives you an overview of all orders associated with your OU, sorted by creation date by default.
The overview also has a simple search field, much like the product search we discussed before. Search possibilities include, but are not limited to: order number, customer name or e-mail and product names. Additionally, we provide a set of filters in the right side pane to narrow your search.
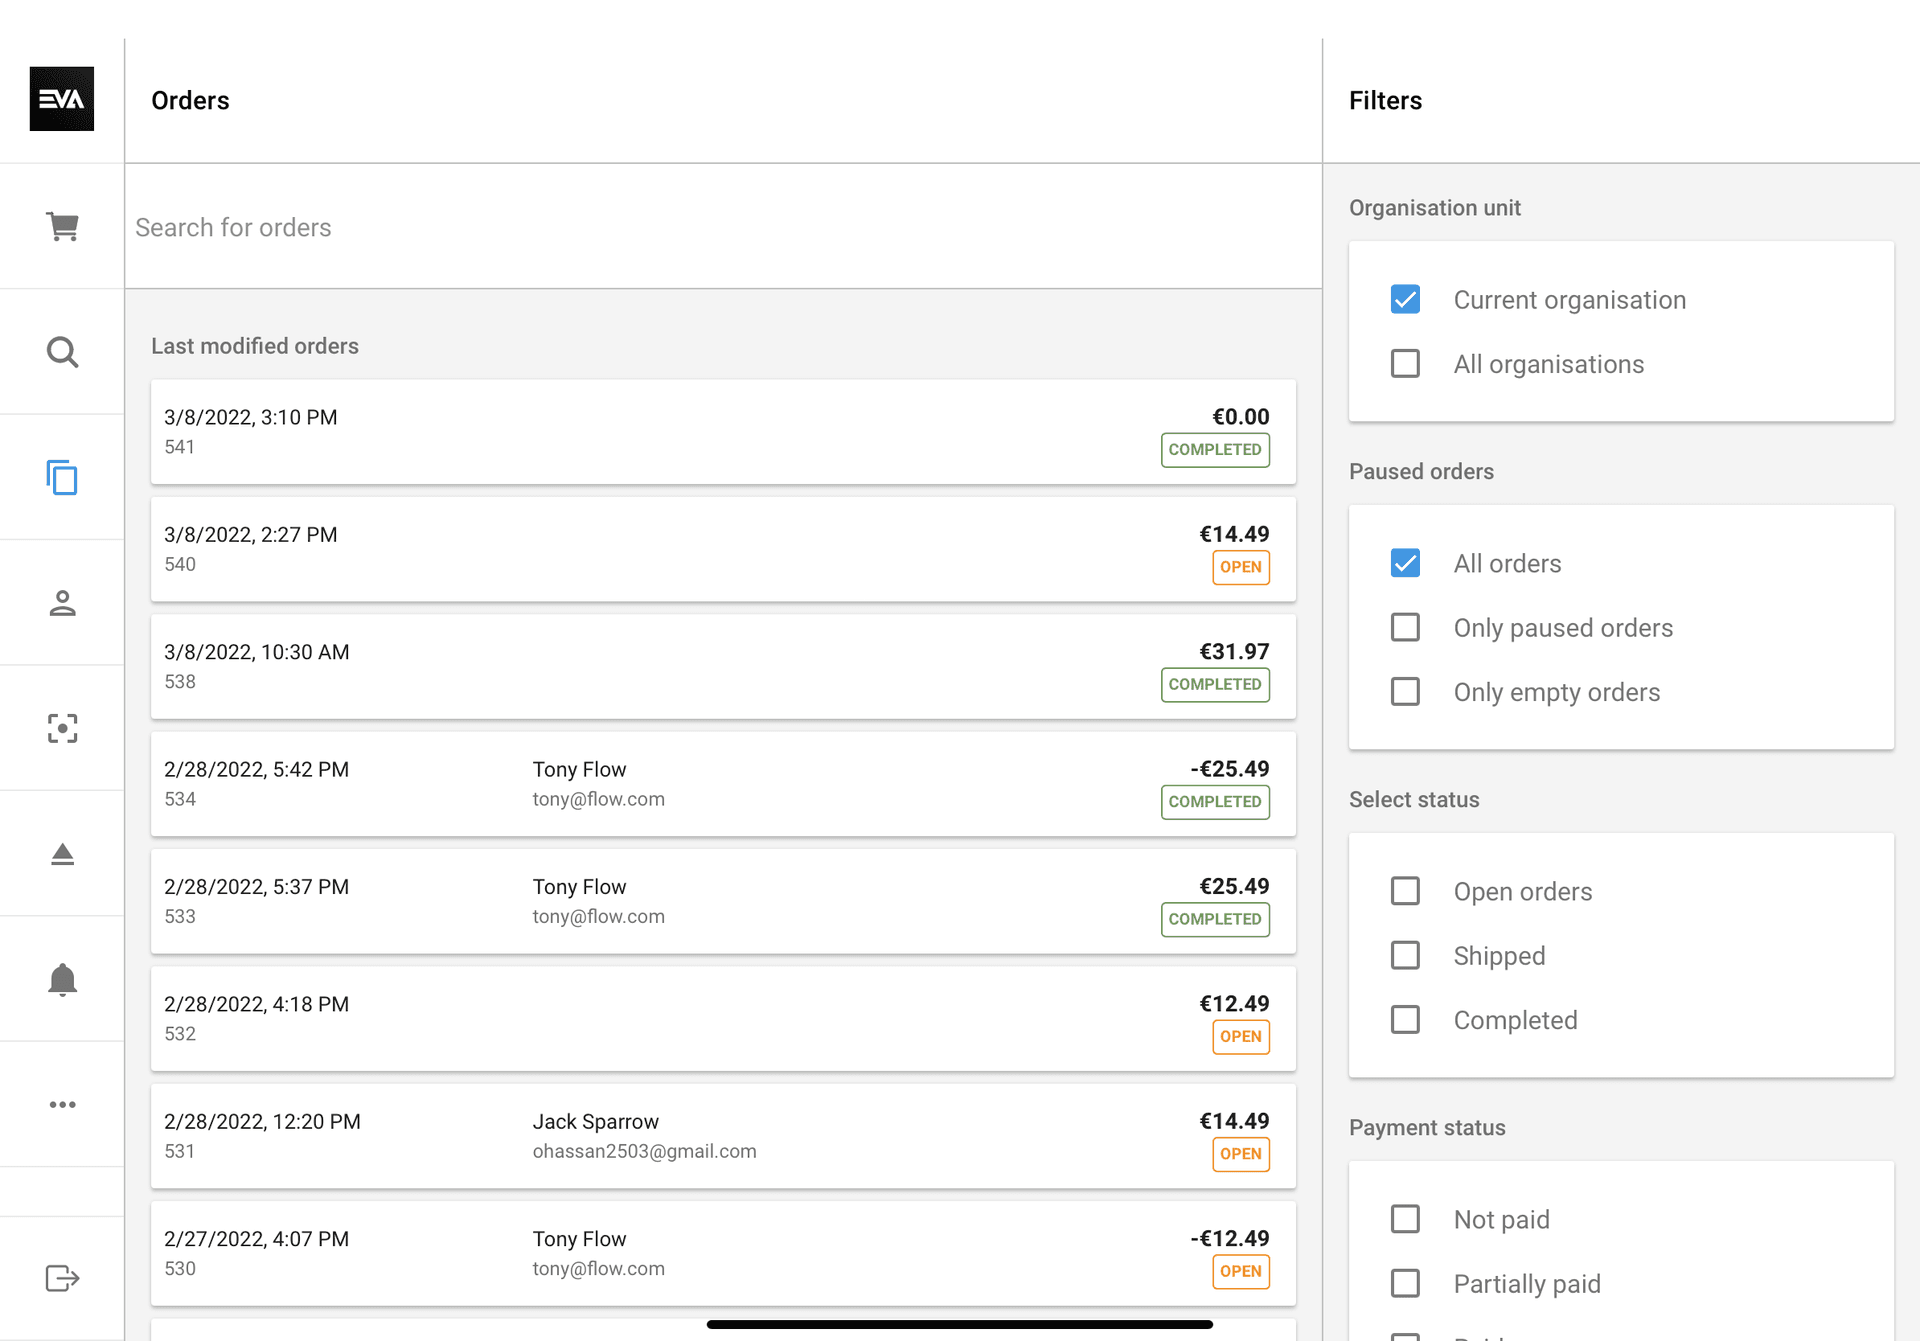
If you'd like to focus on your sales order, you can filter out the internal transfer orders. When App:Orders:HideTransferOrders is set to true, transfer orders are filtered out by default. When set to false or unset, we don't filter out transfer orders.
Order details
Tapping any order in this overview will open up some order details in the side pane.
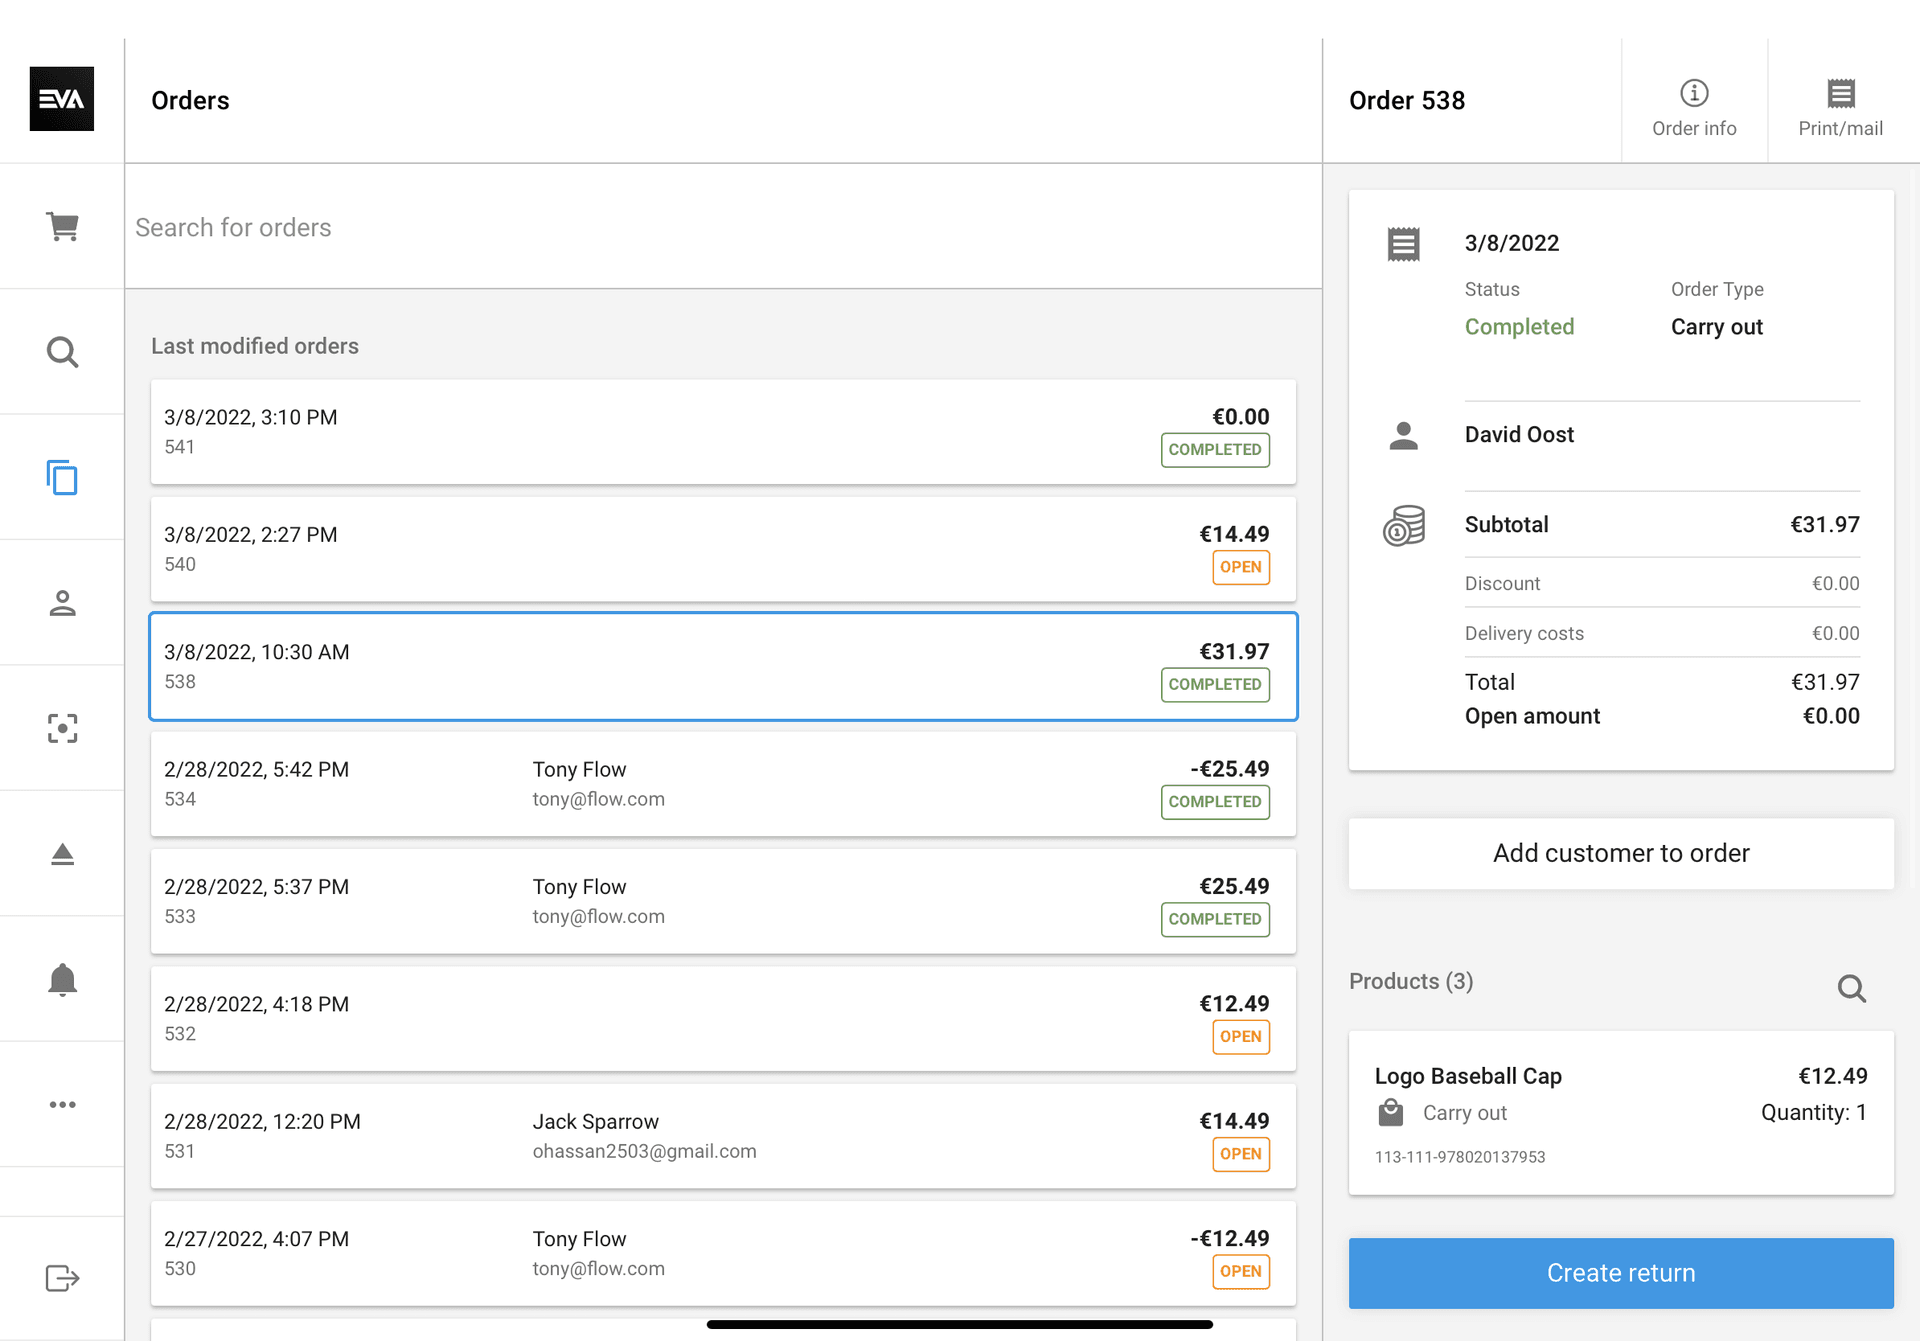
There are several options available to you, some depending on the order status:
- Attach a customer (open, paid and completed orders)
- Create active shopping basket, which allows you to resume the order (open and paid orders)
- Edit order (open, paid and completed orders)
- Return order (completed orders)
When editing an order, the available options once again depend on the status of the order: both open and paid orders allow you to cancel order lines, but completed ones allow for a price correction instead of a cancellation.
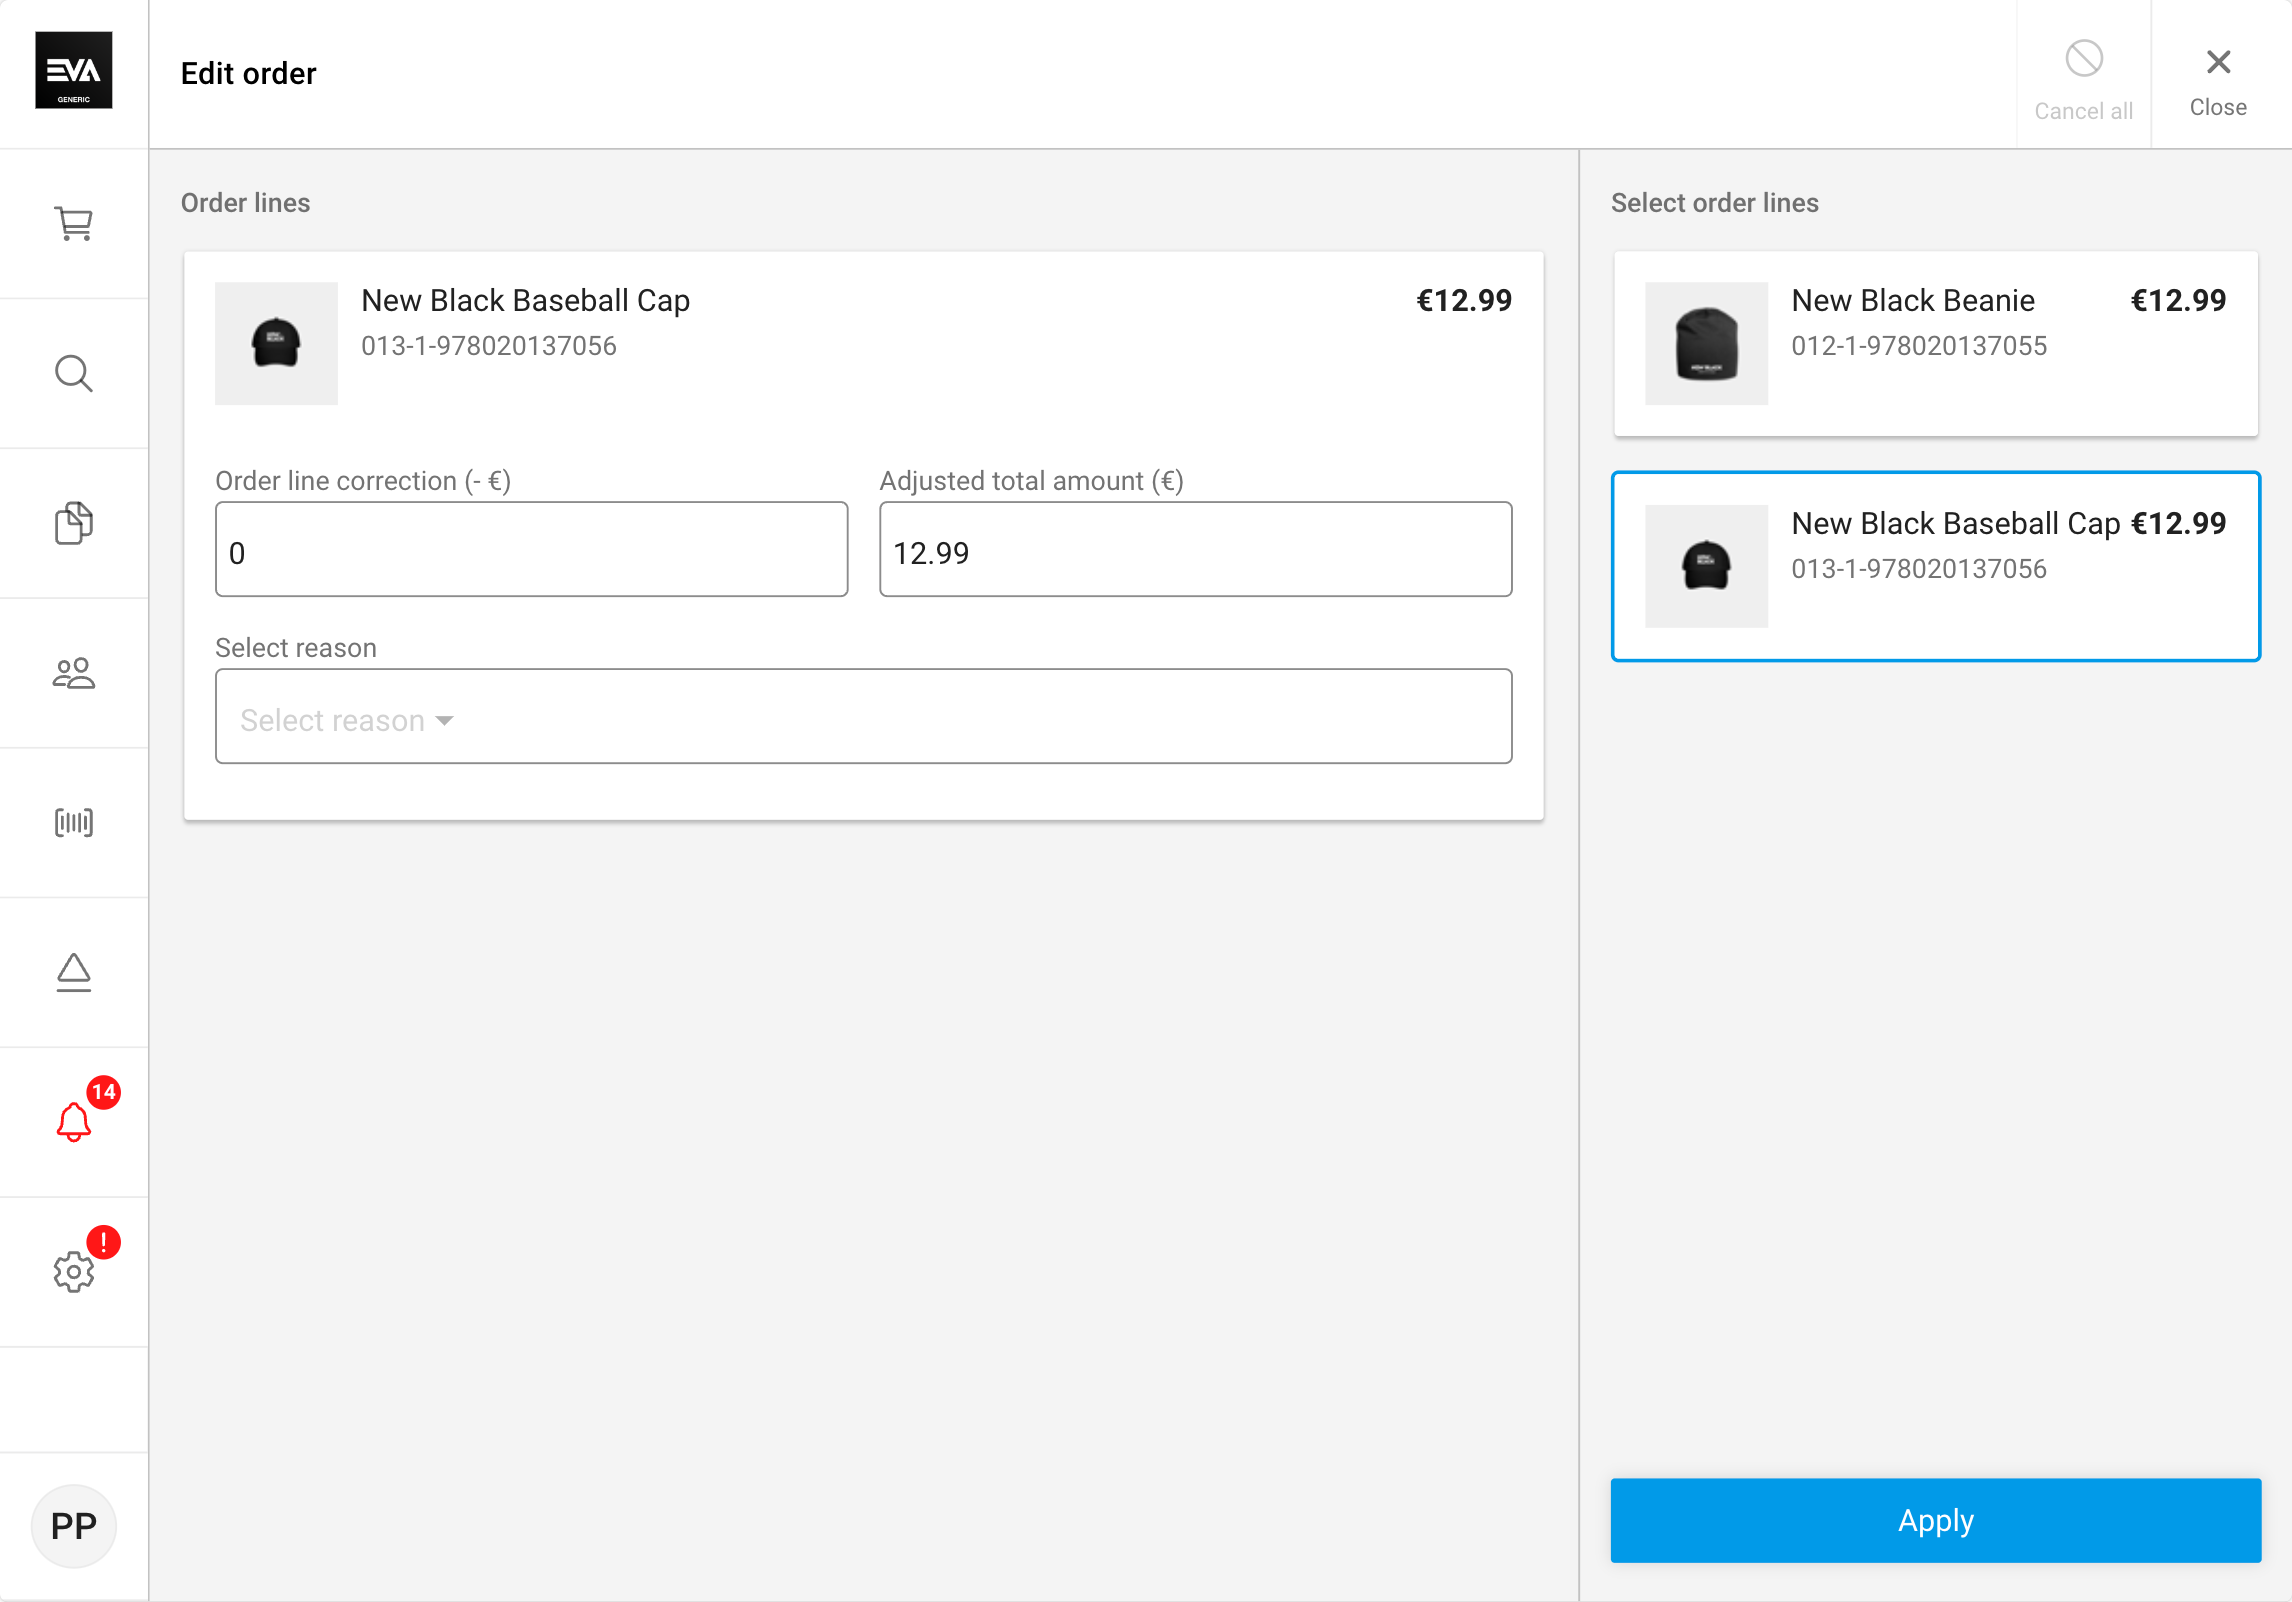
- The App setting
App:Order:MaxLineCountcan be used to display a warning that the number of order lines exceeds the limit, and it's best to use Admin Suite. The setting's default value is 50. - The App setting
App:Order:DisplayUserCustomFieldscan be used to display custom fields here. The setting expects a value that corresponds to theBackendIDof the custom field. Multiple Backend IDs separated by a comma are allowed as values to the App setting (e.g.fieldA,fieldB,fieldC) which would in turn display multiple custom fields in the order details.
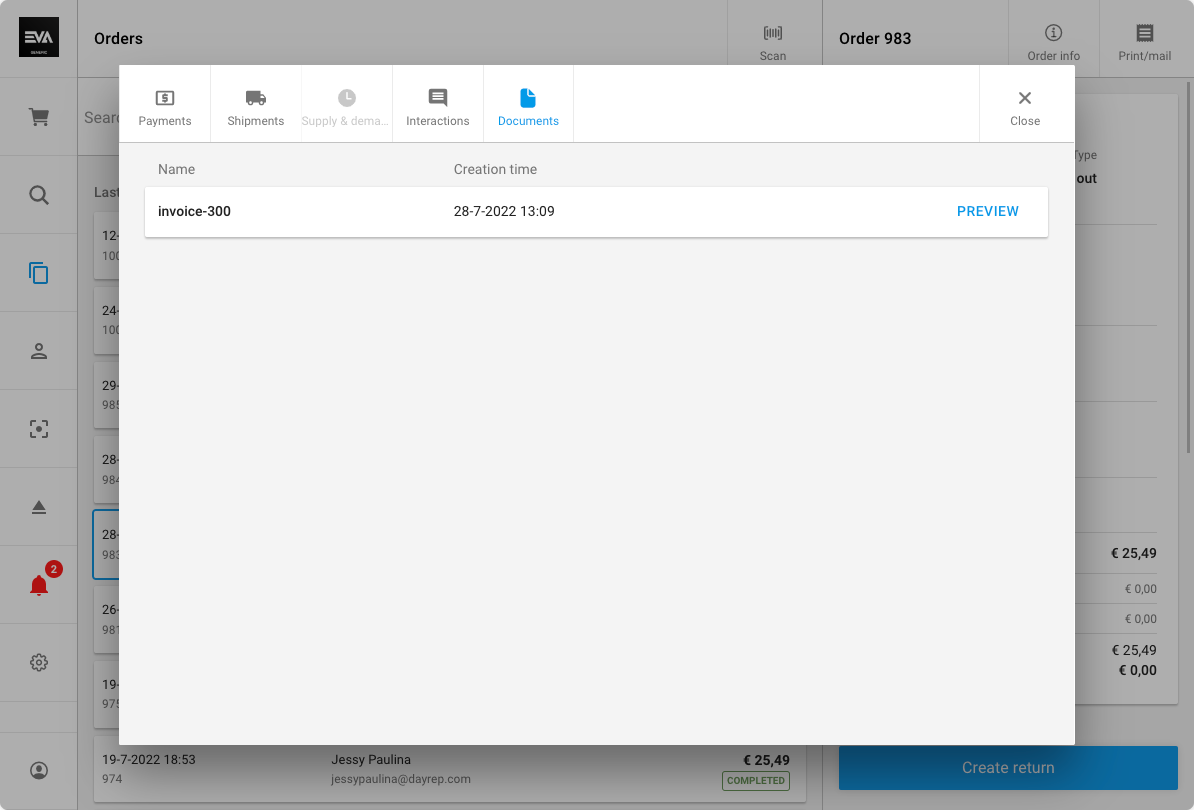
Order info
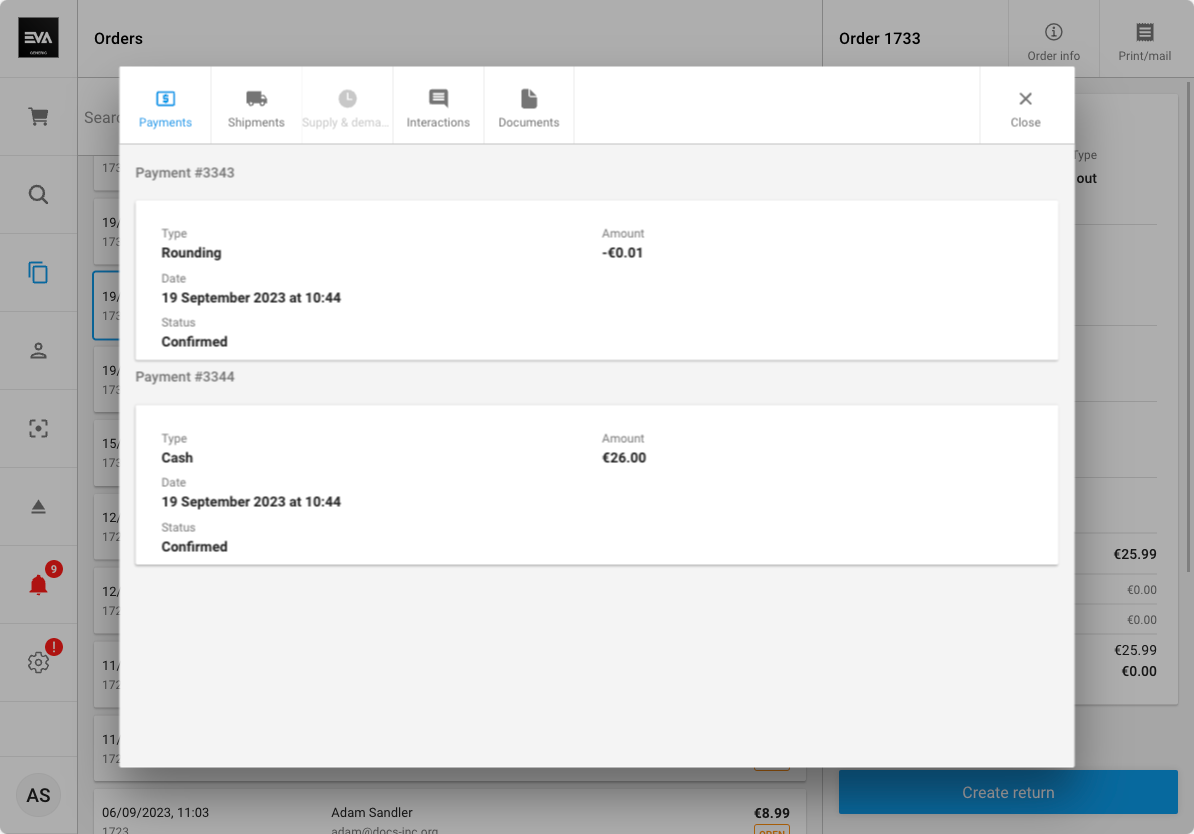
The top bar in the details side contains two buttons. The Print/mail button will allow you to (re)print some order documents. The Order info button will open a popup containing further information on the order, like payments, shipments, and documents.
Return order
You can create a return order in one of two ways.
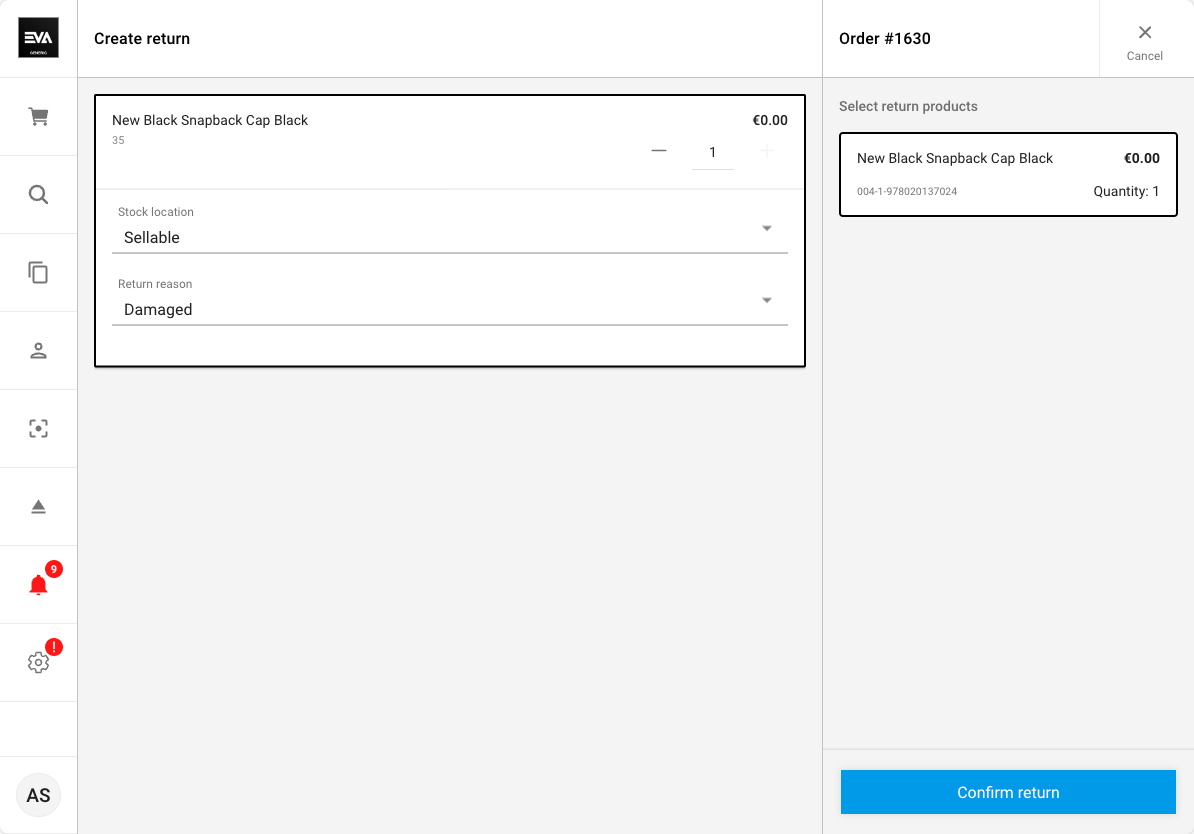
For return orders are created based on the original sales order from which the customer would like to return certain items. Click on an existing, completed order. On the right, you will find a blue Create return button.
It will navigate you to this page, where you will be able to specify the quantity, and select a stock location and return reason. These are mandatory. By selecting the option Use answers for all returned products, the stock location and return reason will be applied to all products, including both regular and gifted.
If an order contains return order lines or a return fee, you cannot change the line action type from Carry out to any other types.
If there is no record of the original order however, return orders can be created in the basket and then transformed into a return order.
From the top bar in your basket, the Return button can be used in this case.

If you don't have permissions for returns, a text is displayed to inform you that you aren't authorized to do so.
Once you have created a return order with only return order lines, you won't be able to modify the customer's billing or shipping address or detach them from the order.
If you return an e-com order where the e-com OU falls under a different Company, EVA will handle handle the return and refund automatically.