Repairs
The Repairs task is a vital part of Case management, allowing you to select a case and initiate and manage its corresponding repairs task from A to Z.
Repairs can be initiated in both Admin Suite and the Tasks App as described on this page.
Creating a new repair task
Creating the actual repair task is very intuitive. Contrary to the flow in Admin Suite, no OU selection is required since it's based on the currently logged in OU (although it can be changed later on in the flow). Additionally, this flow does not require you to attach a case directly, but instead creates a new case for you based on the details you add in the New Repair Task overview.
The available Topics in this overview are based on the Case topics topics configured in the Cases chapter of Admin Suite.
Mind that both Email Address and Phone Number are required for the attached customer; if they are missing you will have to add both via Admin Suite or one of the front-end Apps. If you pick the wrong customer, please reset the flow.
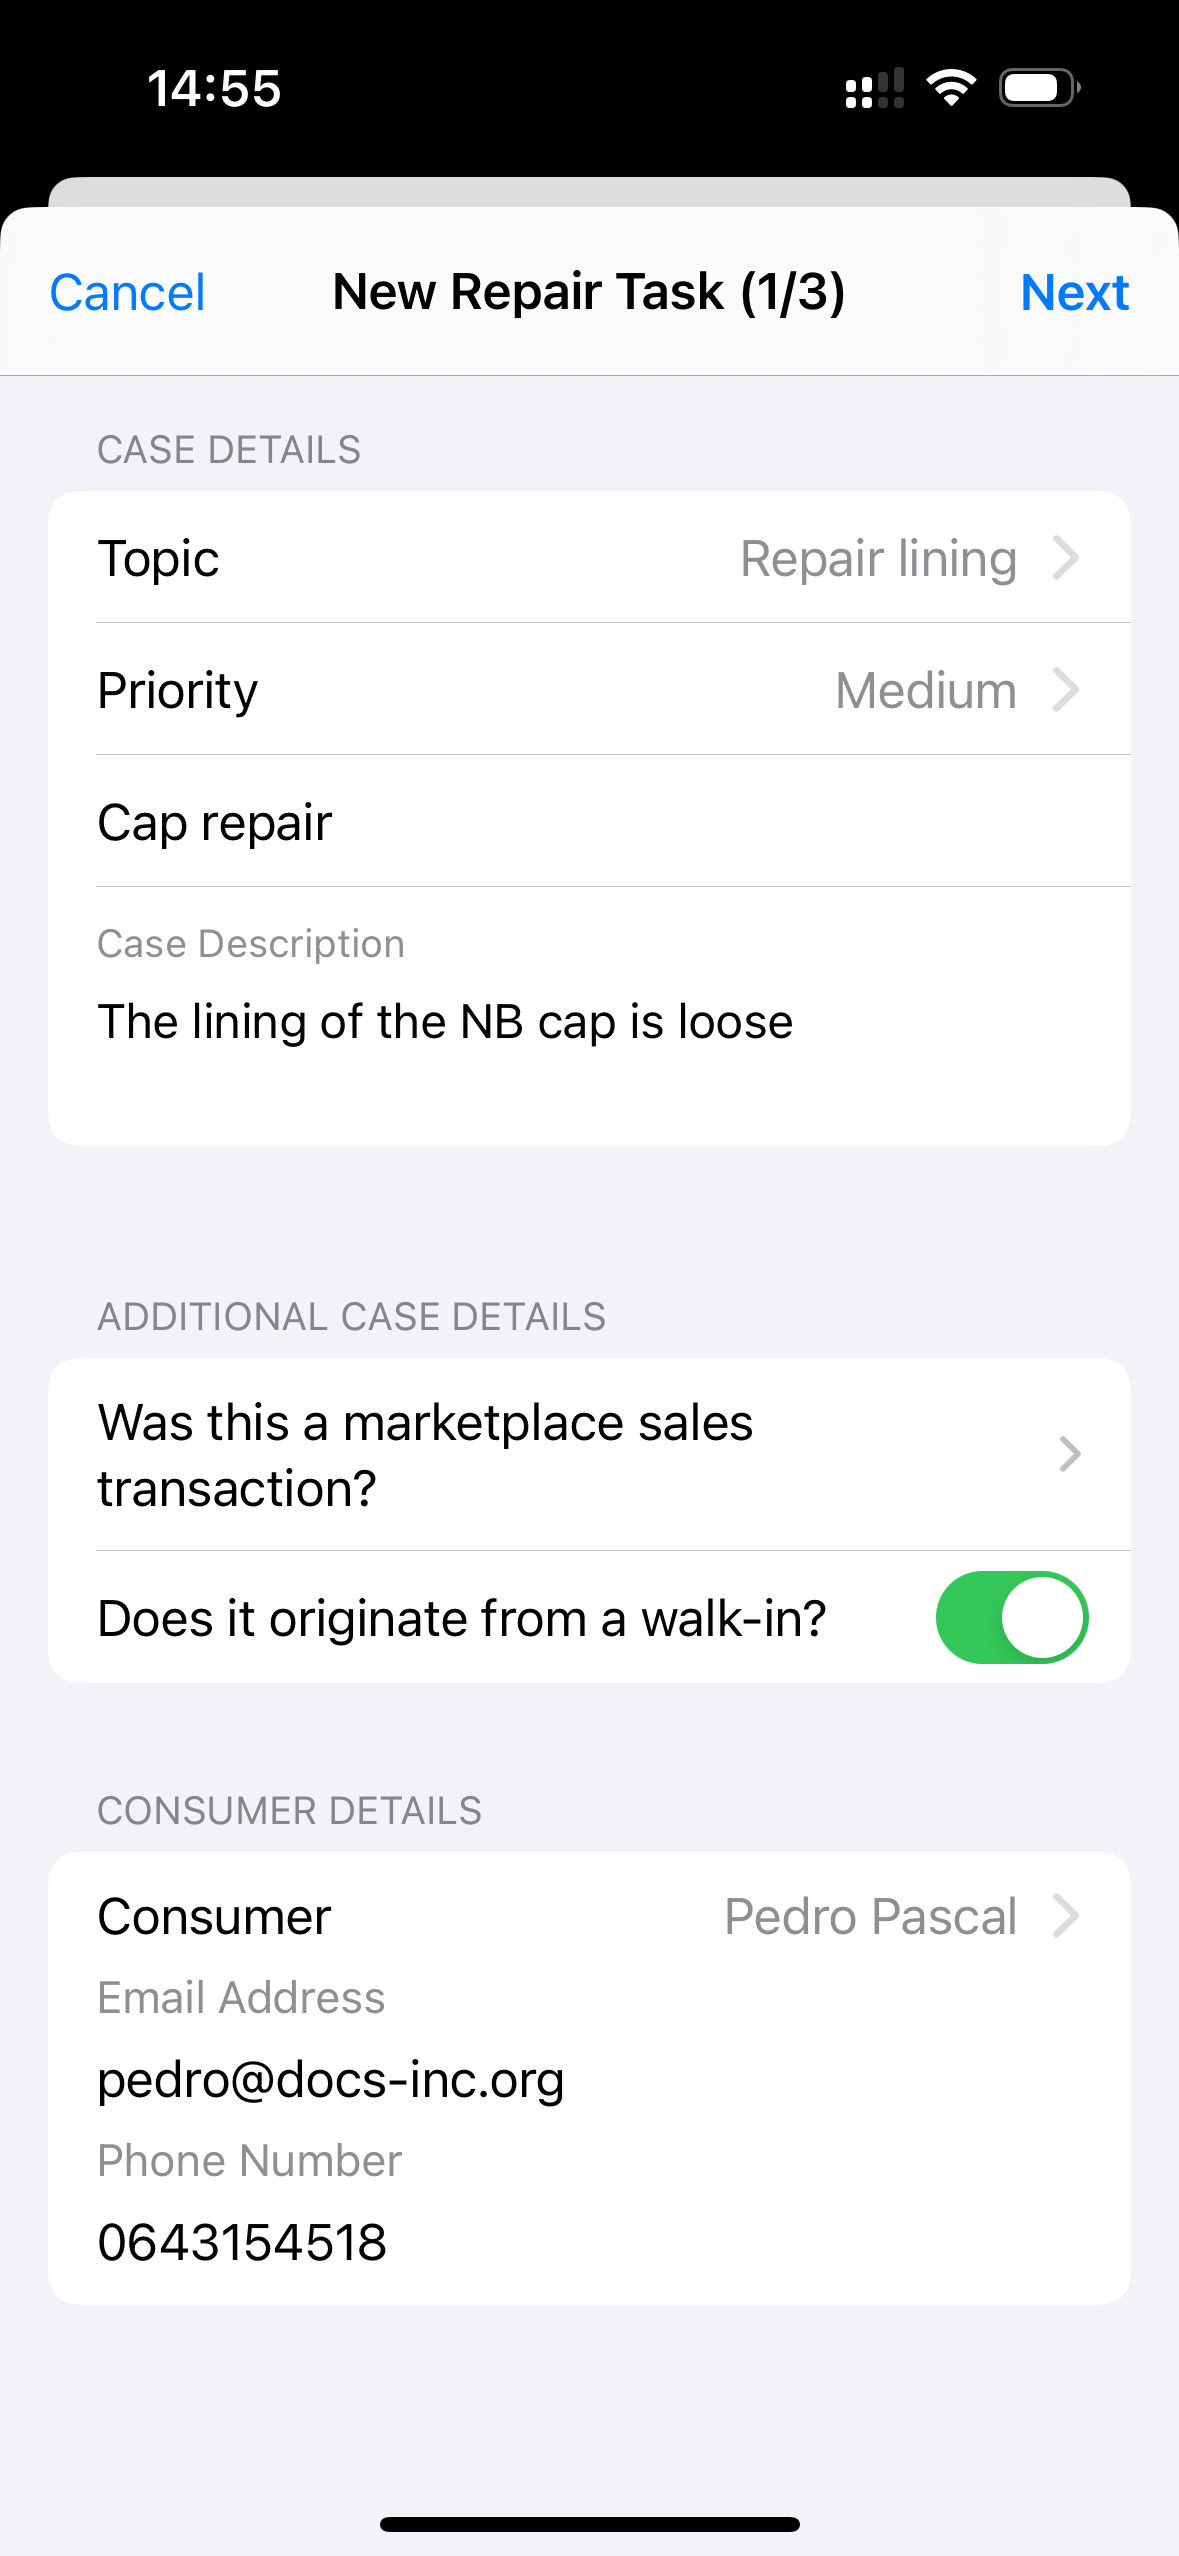
The options under the Additional case details stem from your case-related custom fields.
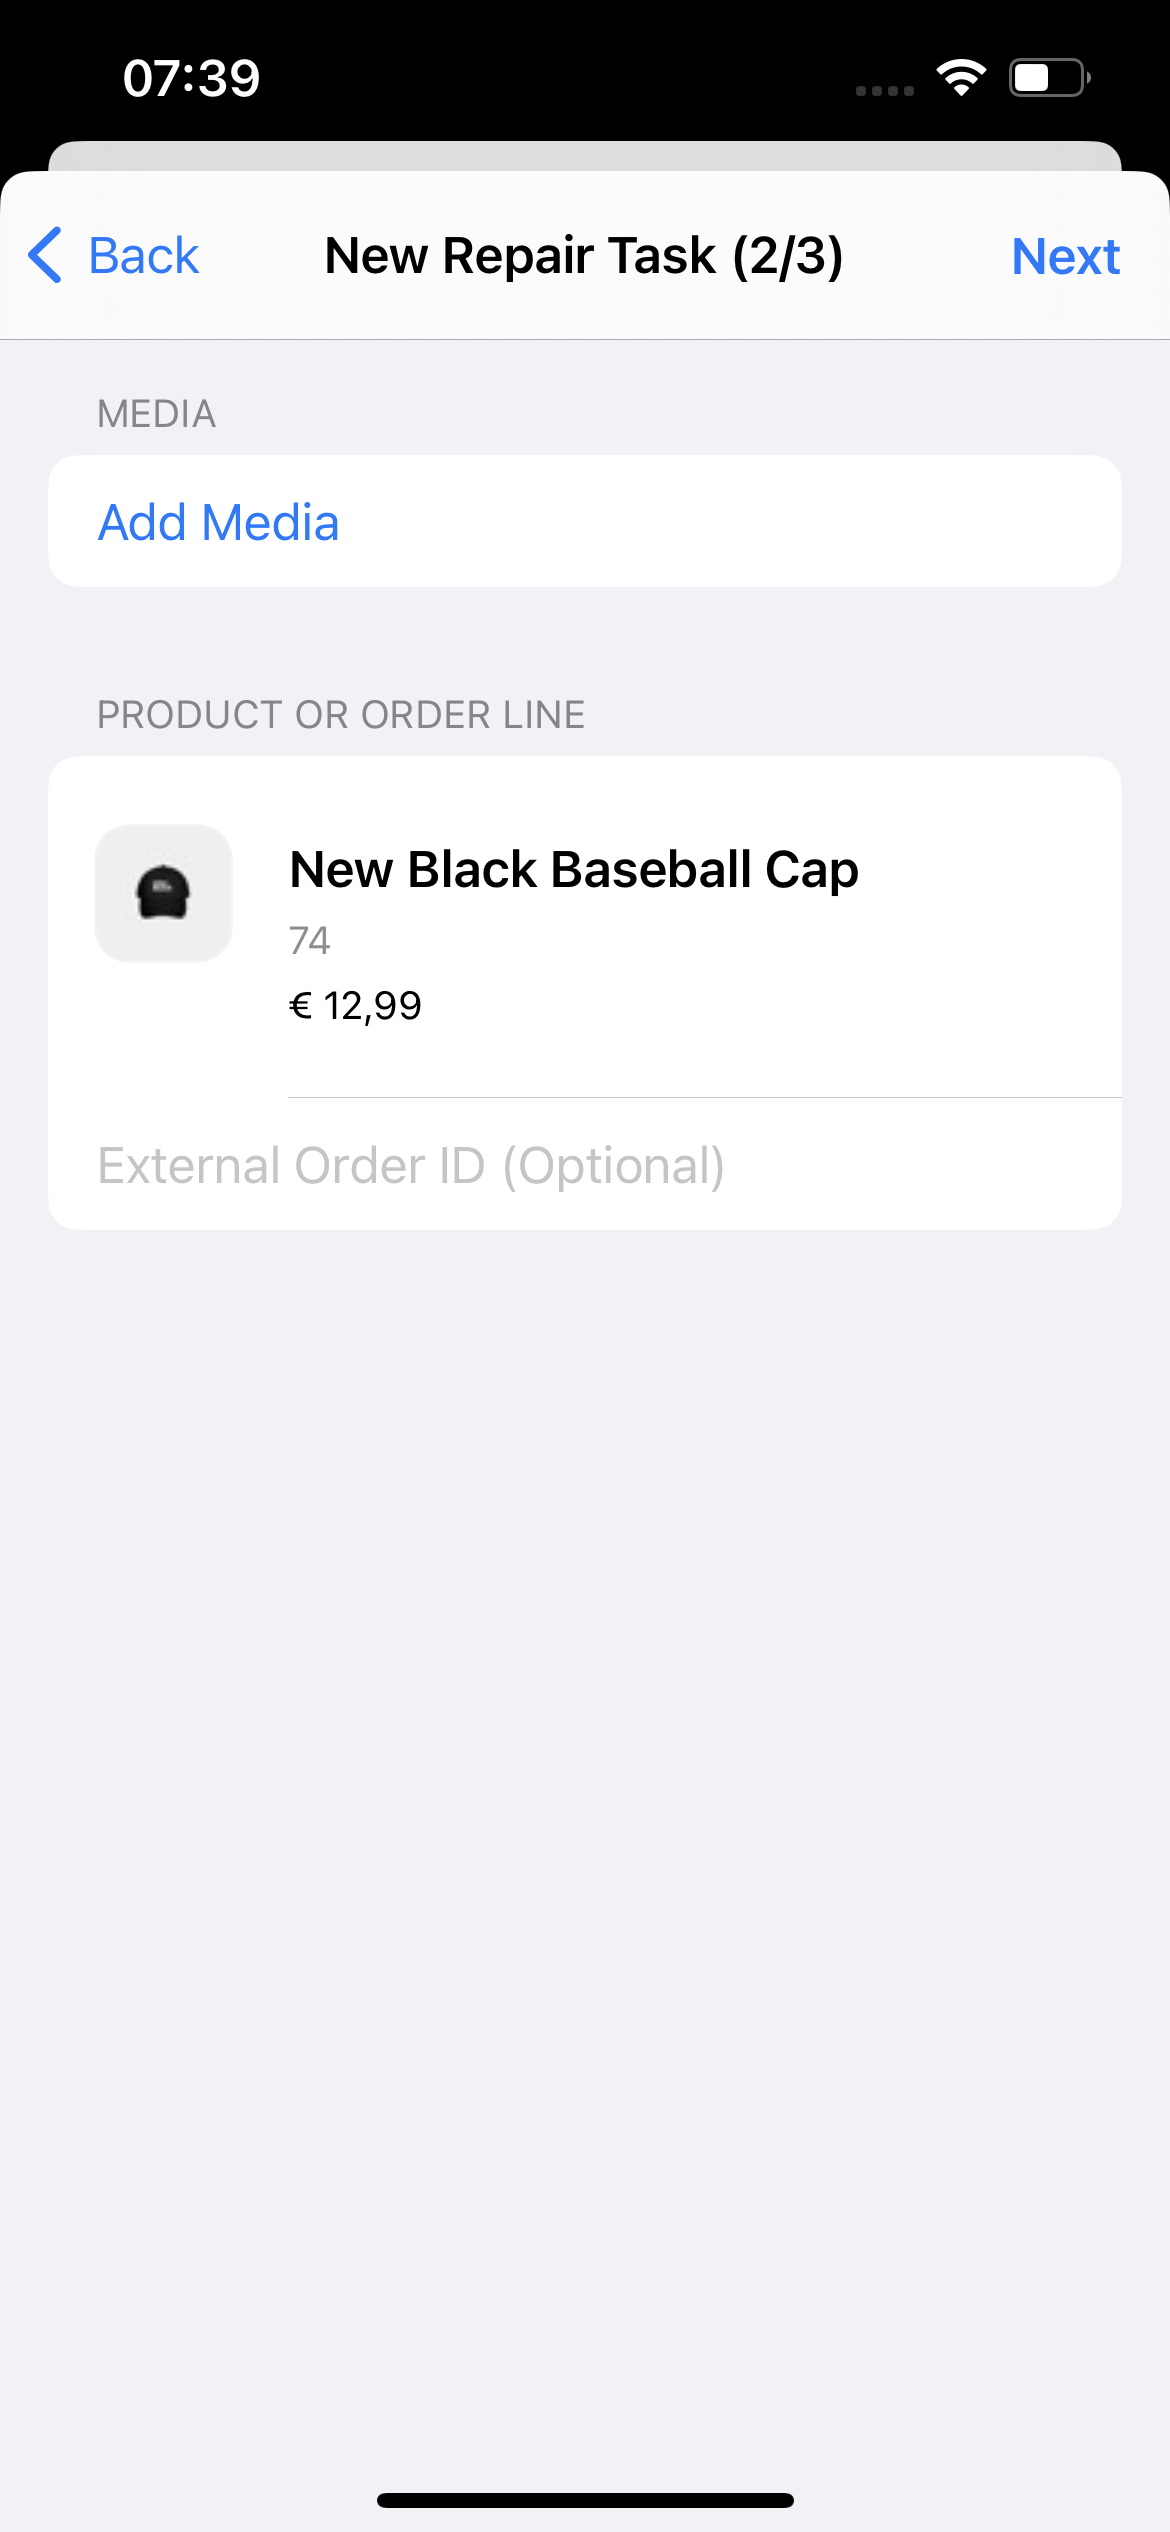
Adding the repair product and media
In step 2 (out of 3), you can optionally add pictures of the product in question.
You can add a product by tapping either Search product, Search in Customer Orders or Search Owned Product. We recommend you add the item via the latter option, since the original order becomes attached as well that way.
Option 1: Search product
A search field is presented where you can scan a product or openly search for one using the search box. You can also filter through your search results. Once identified and selected, the product then becomes tagged to the underlying repair being created.
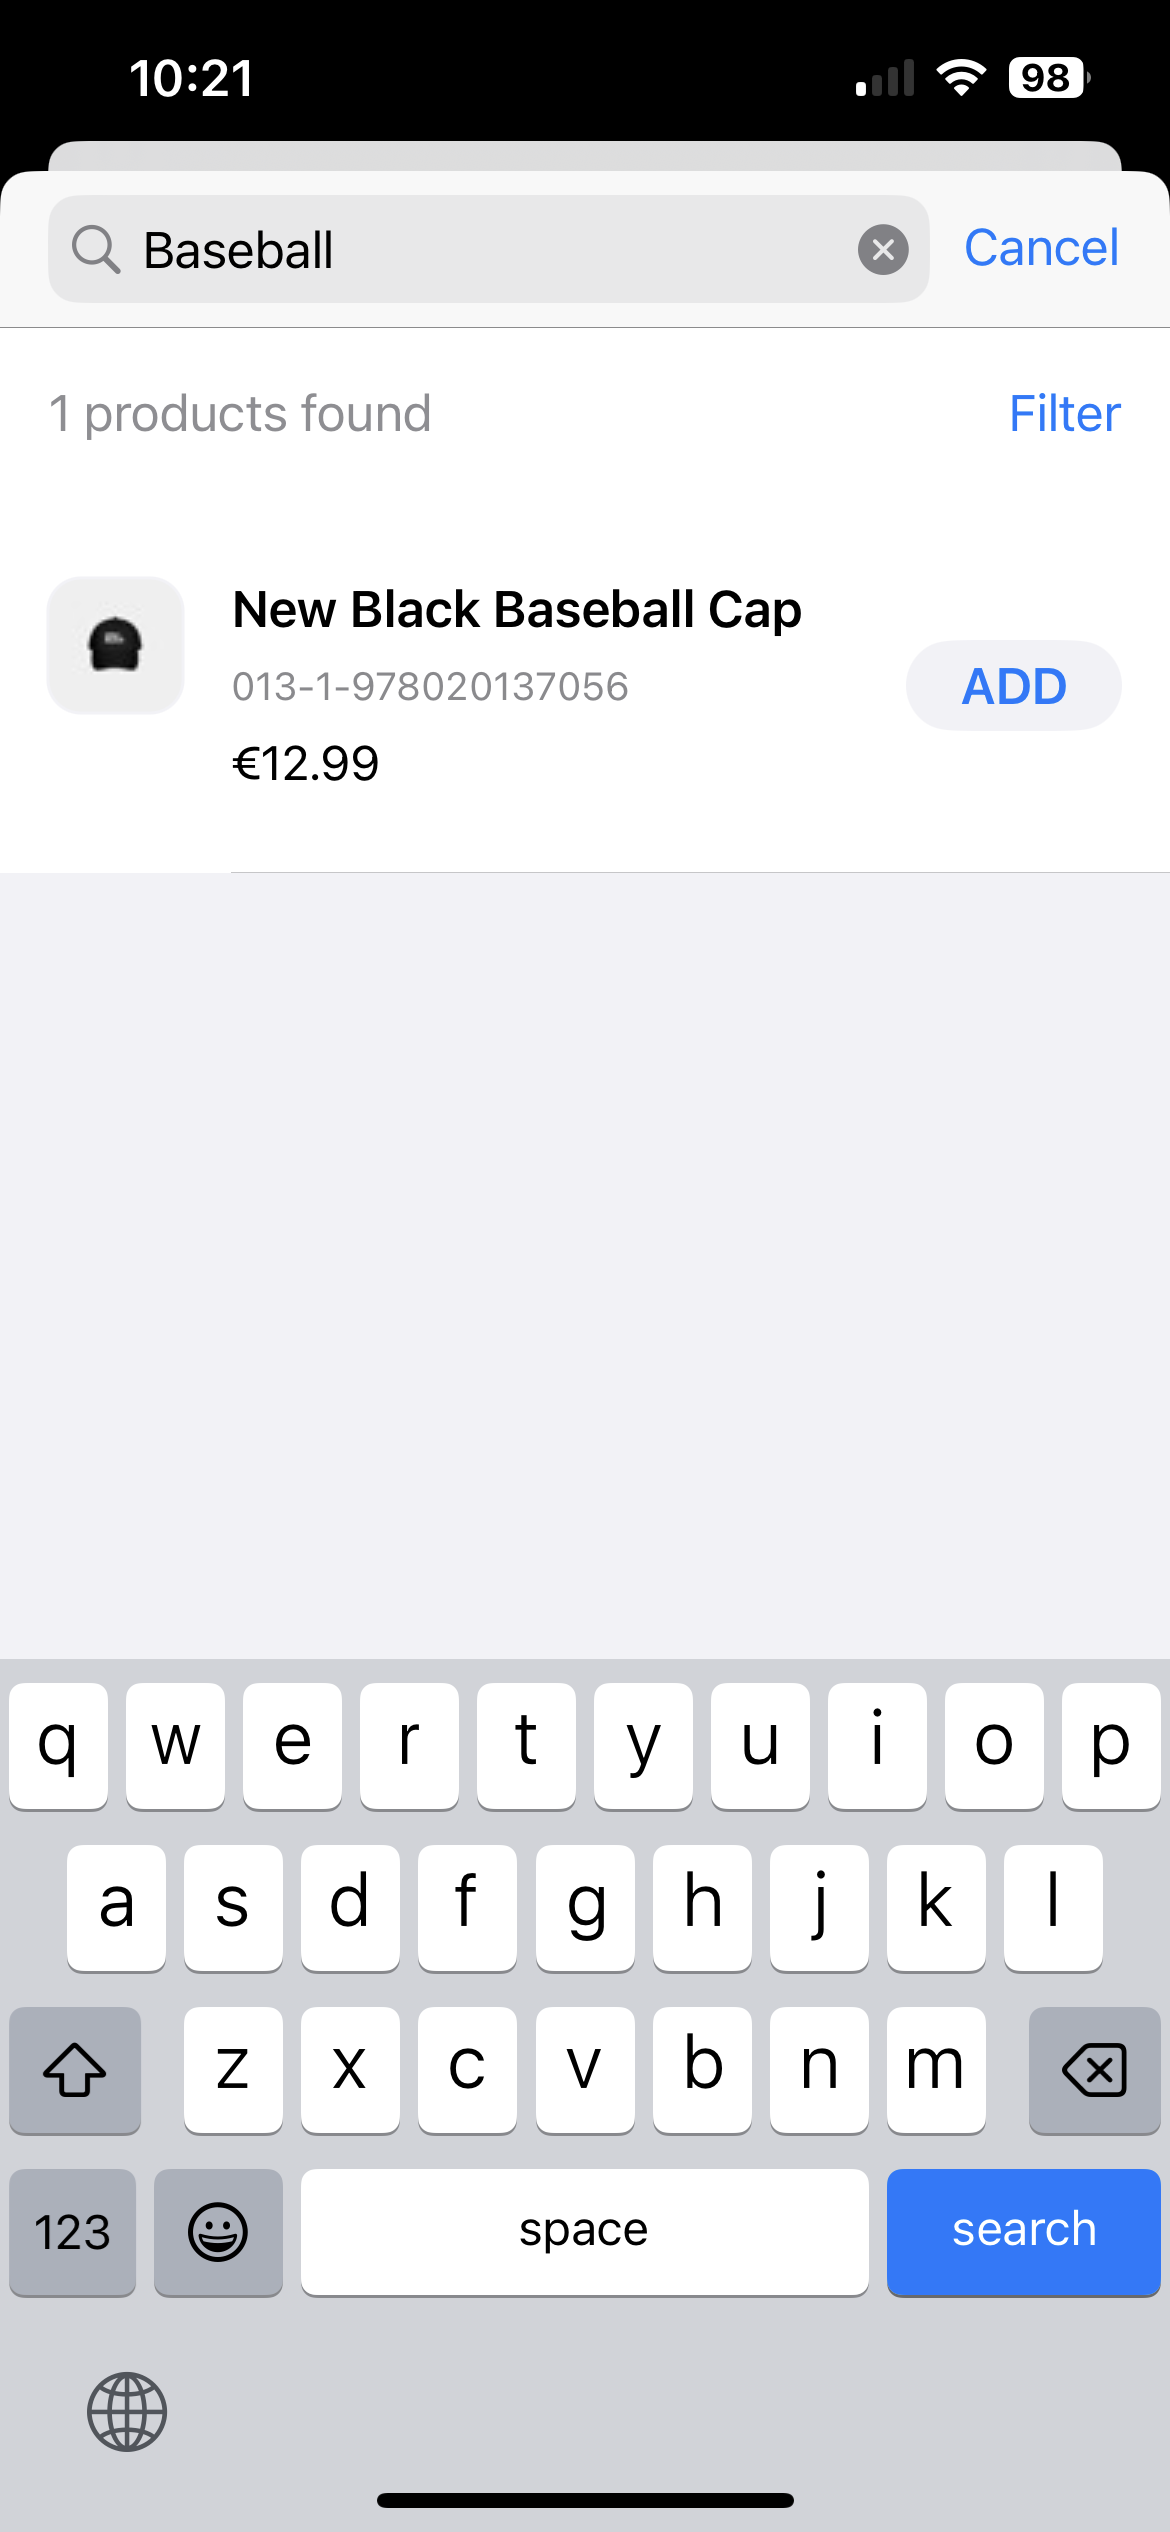
The products selected will display the serial number (if applicable). but you can change what kind of Product ID is displayed.
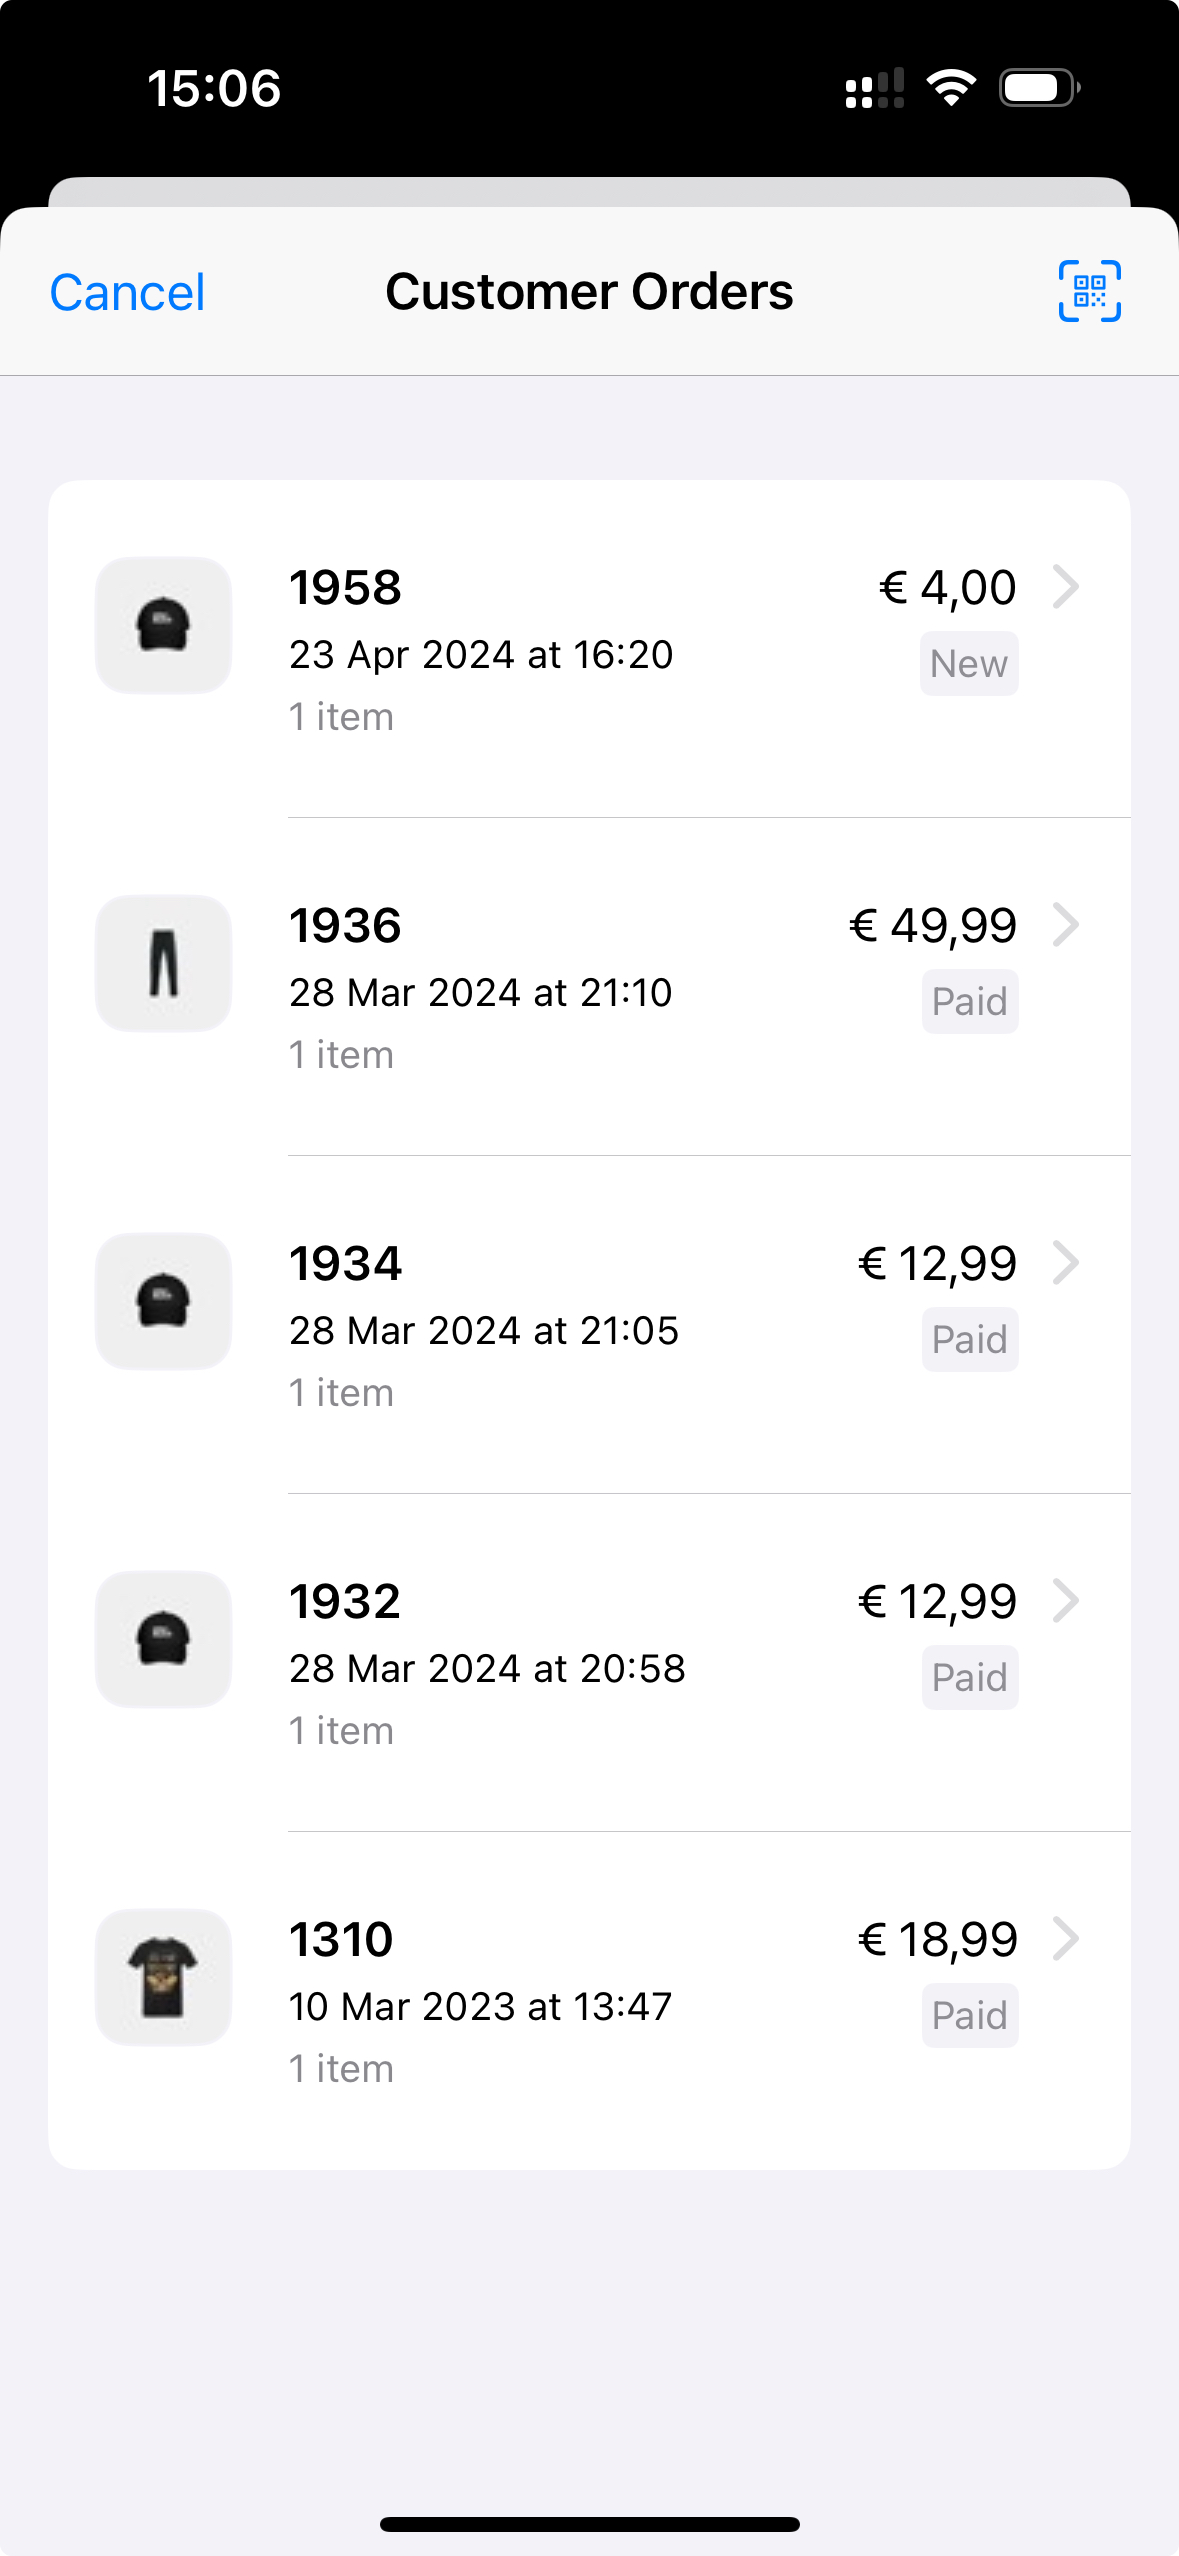
Option 2: Search in Customer Orders
A search field is presented where you can see all products present throughout the orders pertaining to the chosen customer. Once identified and selected, the product is then attached to the underlying repair being created.
Option 3: Search Owned Product
If the user has bought products which are registered in EVA by means of serial numbers, then those are displayed in this section.
For more information about this kind of product, see Customer bought products.
Completing the creation
The final page lets you alter the pre-set Organization Unit (if necessary), specify the Assignee that will perform the repair and also indicate the Receive Method. The latter is mandatory and is used to indicate whether the item in question is already on hand, or is yet to be handed over/delivered by the customer (in which case a date picker will be displayed).
If you want to create the task with Goods are present, make sure that a printer is attached to the station.

The options under the Additional repair details stem from your custom fields in the Repair custom fields section (limited to those specifically created for repairs (in the Tasks module)).
Initiating the repair
Now that you've created a repair task for the actual repair, you can either continue in Admin Suite or head over to the Repairs section of the Tasks App.
The overview itself is sorted based on creation date: the most recent repair is displayed at the top. Additionally, each repair shows its current status.
You can also filter the overview based on these states, by tapping the 'filter' icon at the top right. Mind that repairs with some states are filtered out by default.
You can scan a RepairID barcode to initiate the right task directly, for example the repair's ship task.
.06.24.png)
Details
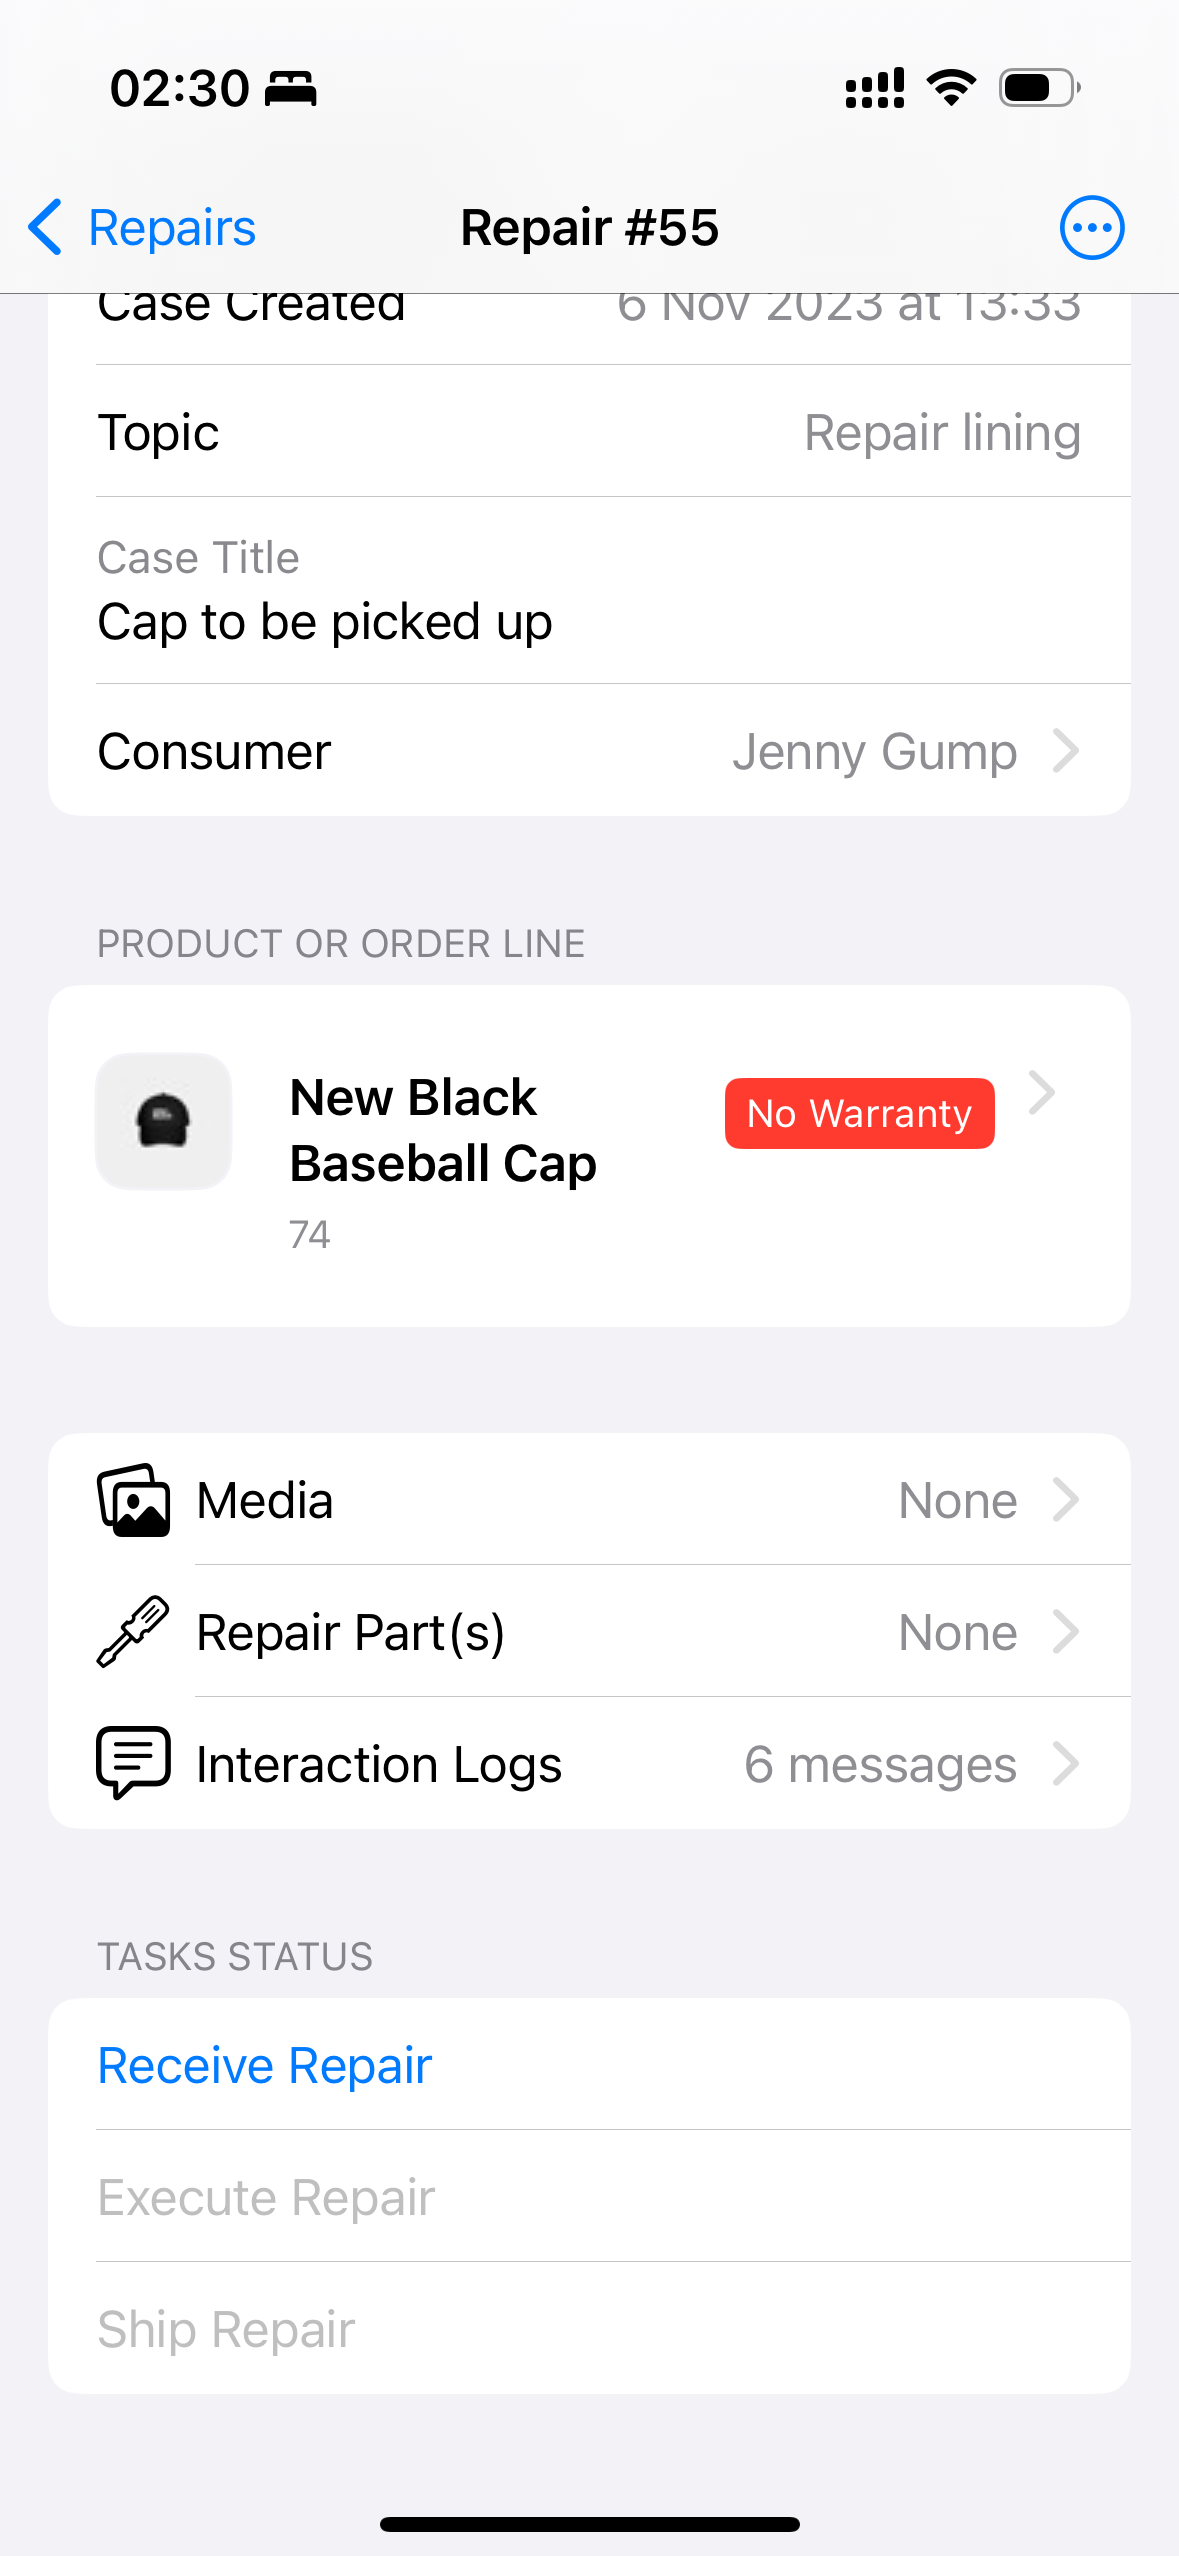
Tapping any repair will lead to an overview containing all its notable details and allows you to interact with it.
Case Details / Repair Details
The top card displays both the repair details itself and the attached case's details. You can switch between the two by means of the Case Details / Repair Details tab at the top.
The former is what the repair displays initially.
.06.24.png)
The Repair Details tab shows you the general details of the repair itself.
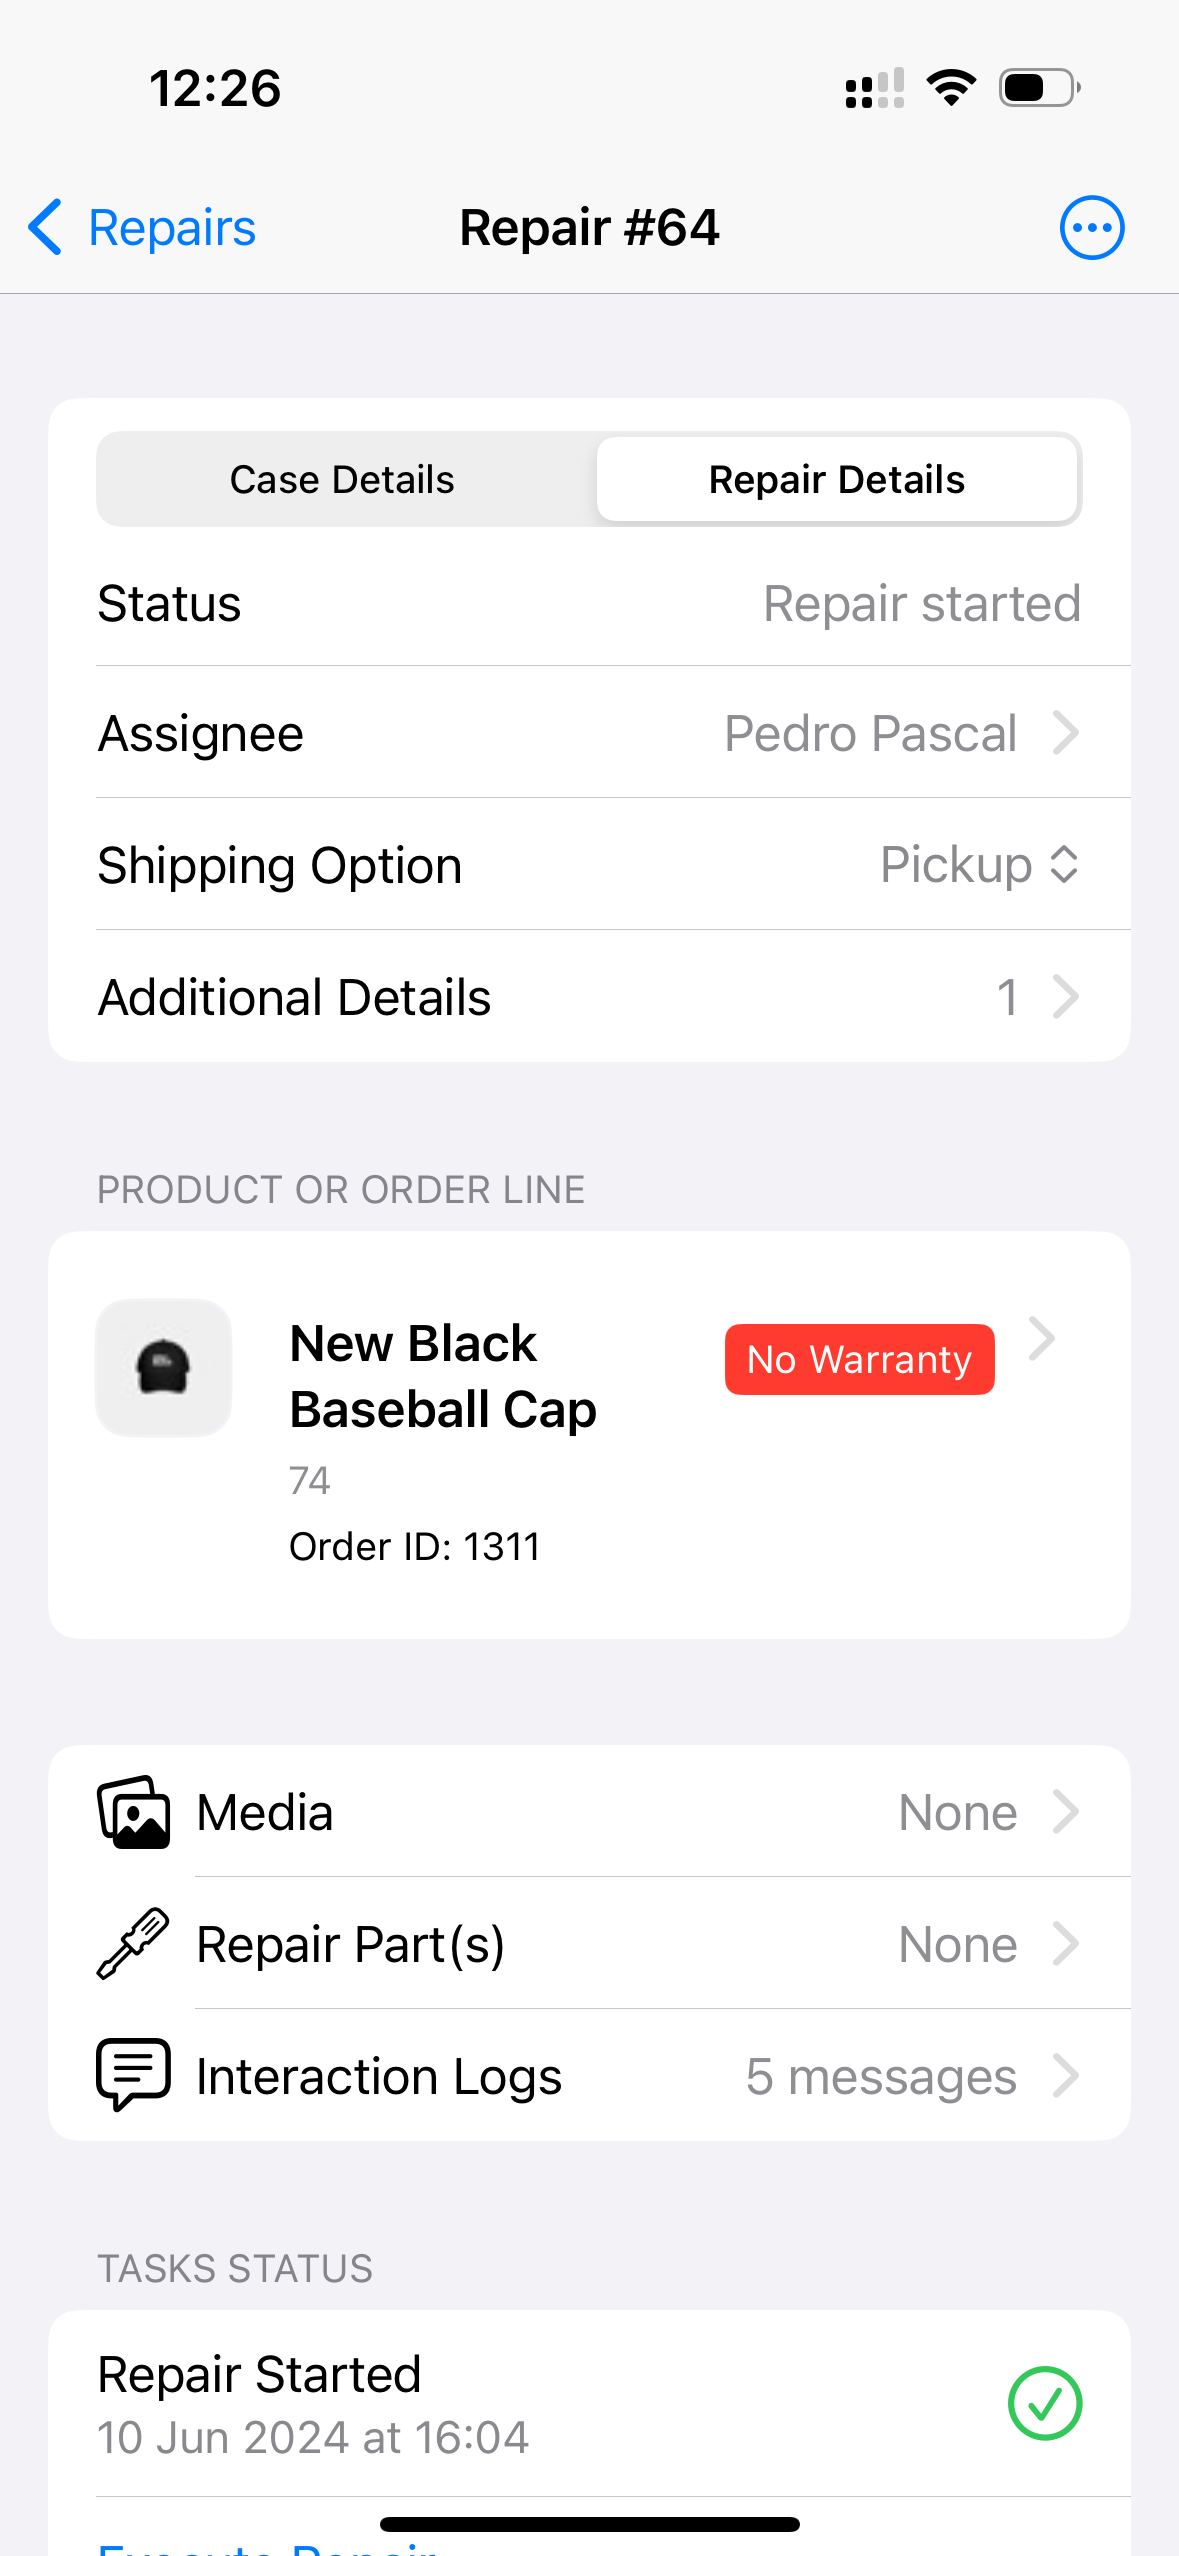
To reiterate: all other cards in the overview are the same regardless of which tab you are on.
Interacting with the repair
You can tap the 'More options' icon in the top right of the repair to alter its status in general or print a receipt.
When a repair is paused, it will not be visible in the default overview listing all repairs - you'll have to specifically filter for it. No actions can be performed on the repair either until it's unpaused.
.06.24.png)
The second card in the overview shows you the information about the product in question. Tapping it leads to a new page with a bit more information on the product, mostly product images, but it also allows you to navigate towards the repair's corresponding order in the Checkout App.
.06.24.png)
The next card contains three options, which are mostly straightforward.
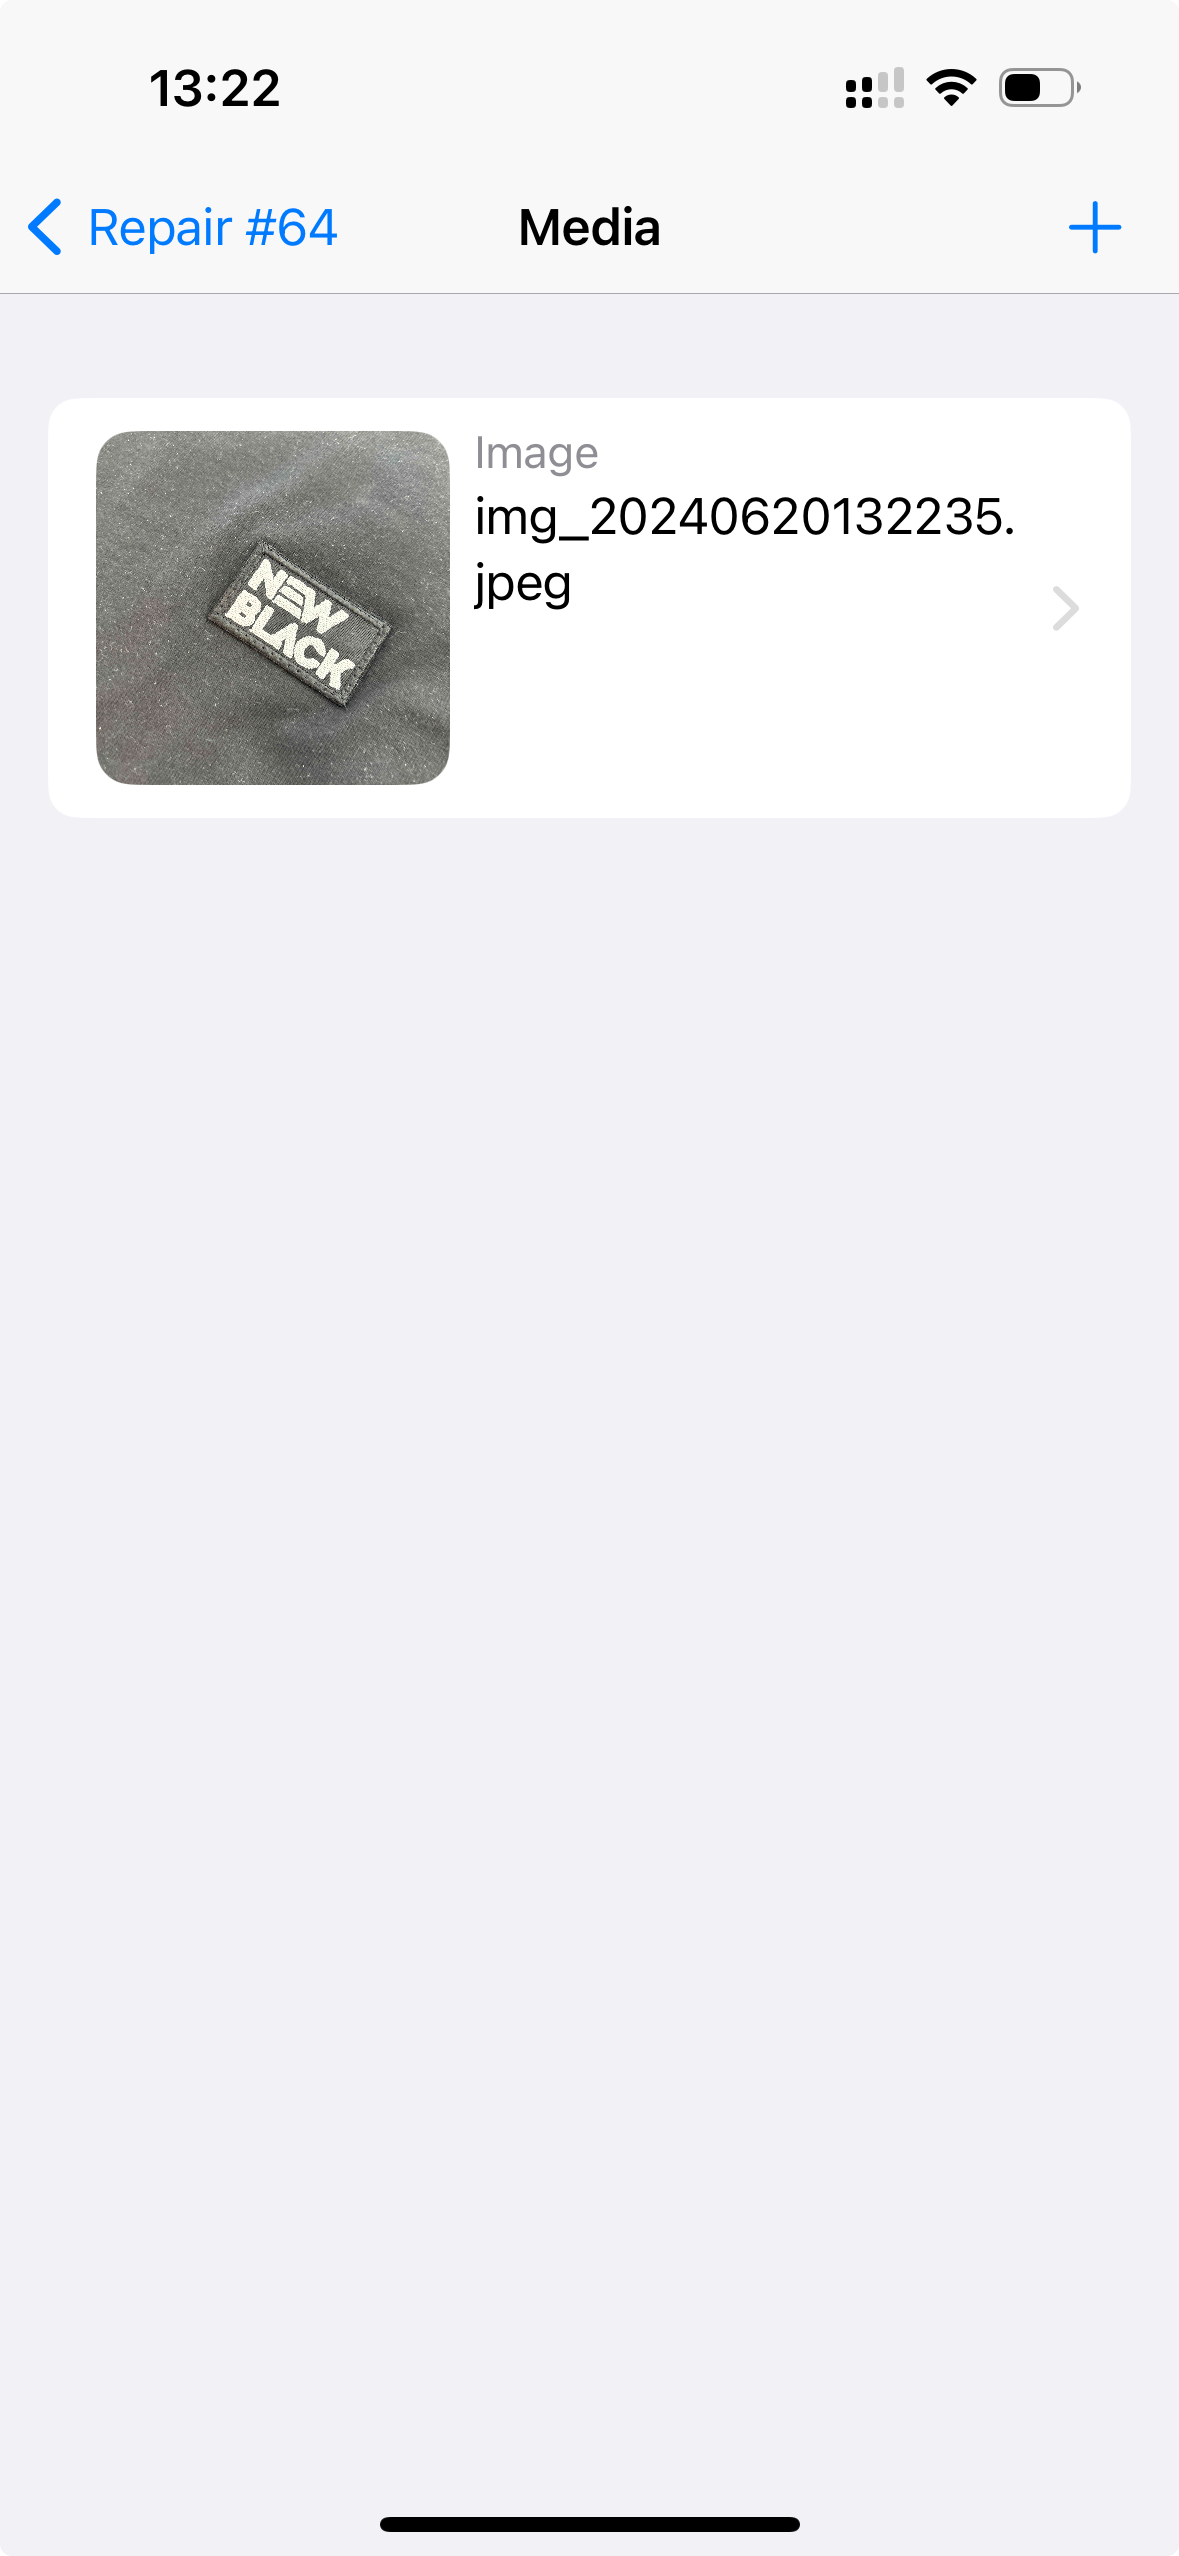
Media
Tapping the Media section will show you all currently attached images and allow you to add new ones. You can either take pictures and add them straight away or choose either a photo or document from your device.
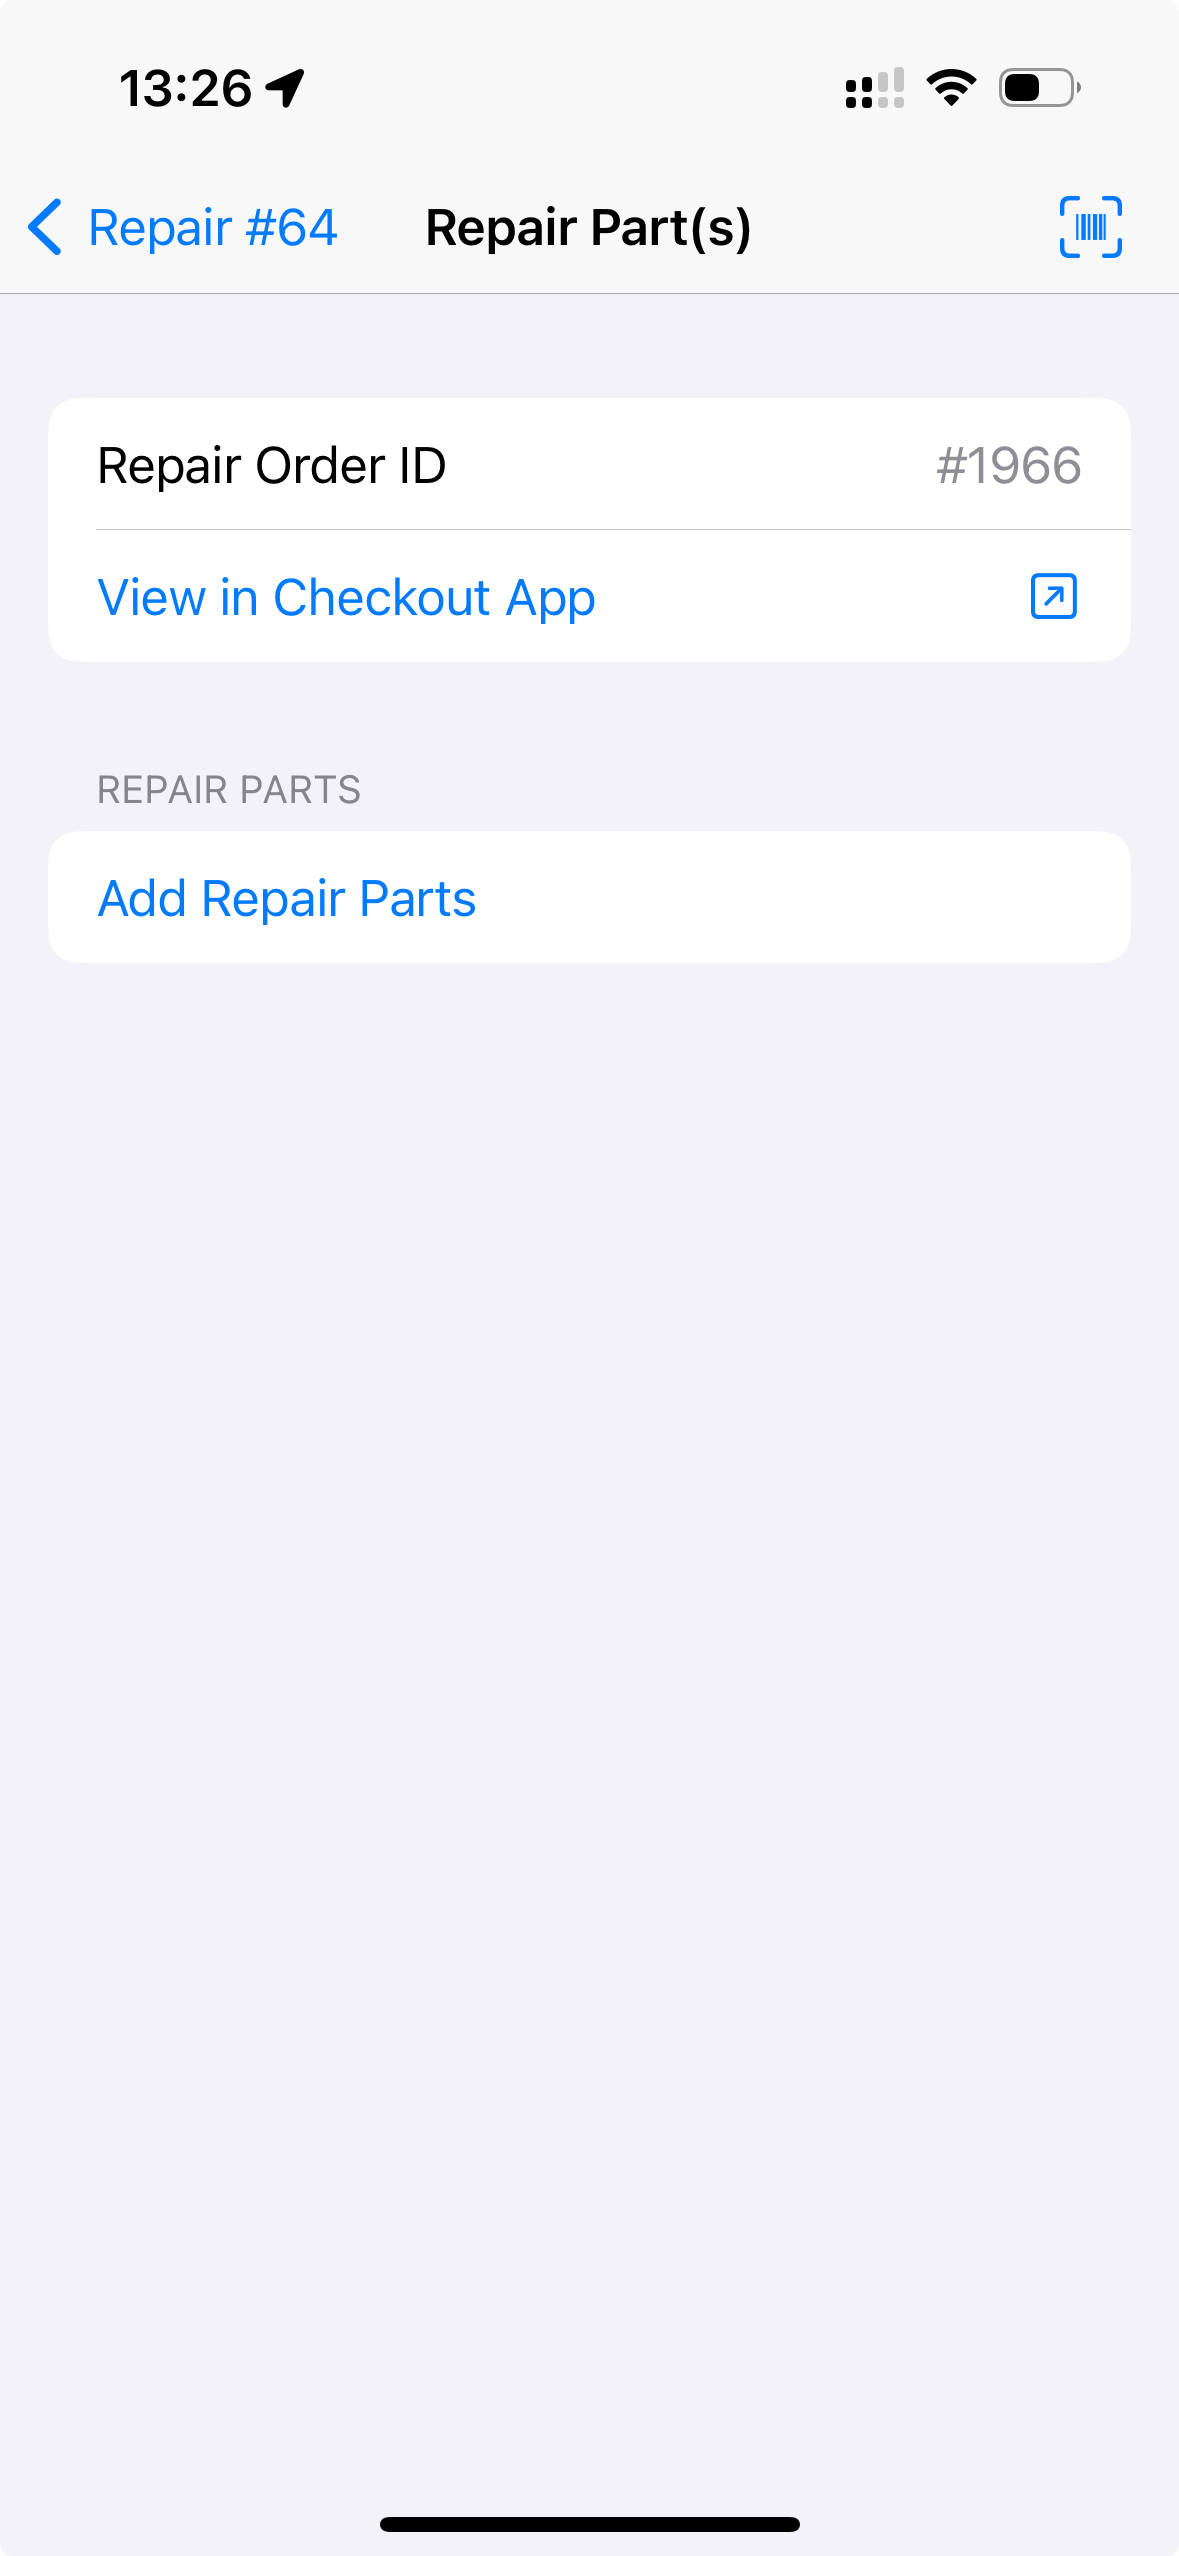
Repair Part(s)
Tapping the Repair Part(s) section will show you all currently attached repair parts and allow you to add new ones either by scanning or searching EVA.
These products are then attached to the repair order (as shown in this overview) to store the products and to facilitate their payment.
You can also tap Open Order in Checkout App to navigate specifically towards the repair's order.
It's possible to remove repair parts by swiping them. The entire quantity of that product will be removed.
Take in mind that if Orders:AllowCartsToStayOpen is NOT set to true, any order with all quantities set to 0 will be automatically completed - which would mean the repair task becomes unusable.
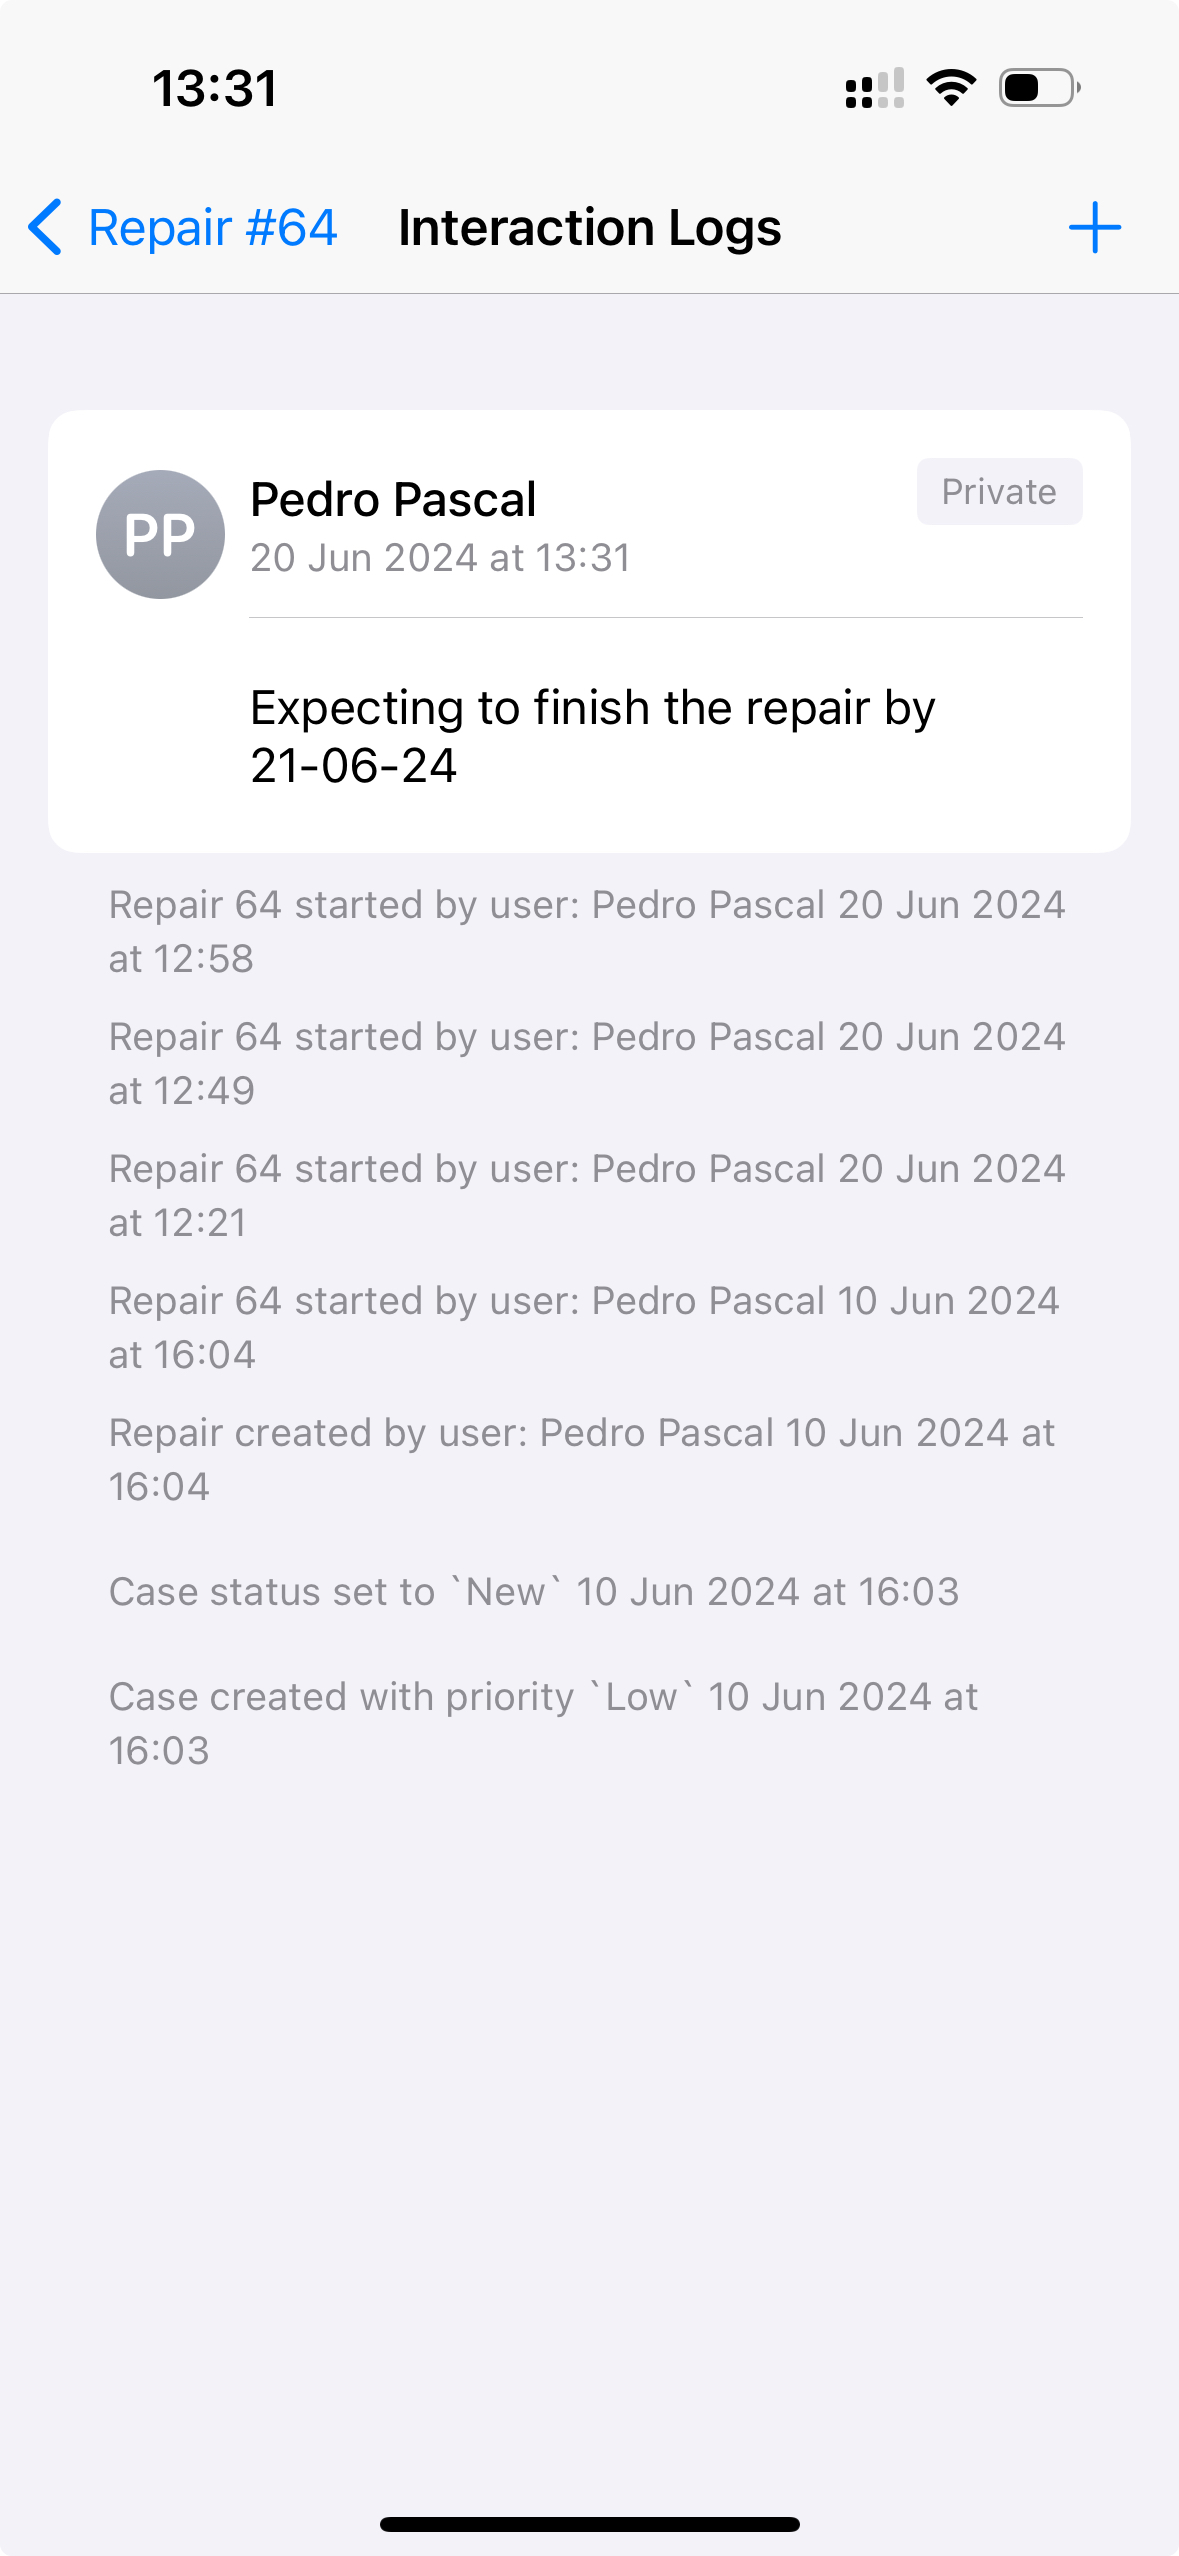
Interaction Logs
The Interaction Logs leads you to an overview of both all system-related statuses the repair went through, as well as any user-created messages.
Tap the '+' icon to create new private or public message.
At the very bottom of the repair's overview, you can see the status of the task and the current step in the flow. It contains an action for you to perform.
Executing the repair
Once you perform the Execute Repair step, you will enter a new overview.
.06.24.png)
This overview is similar to the Repair Part(s) section to remind you to add any parts that were used during the repair.
This step of the repair flow also allows for setting Additional Details, which lists any custom fields created for repairs specifically.
Completing the repair
The last step to completing the repair involves setting the new status for the repair and the method for returning the repaired product to the customer.
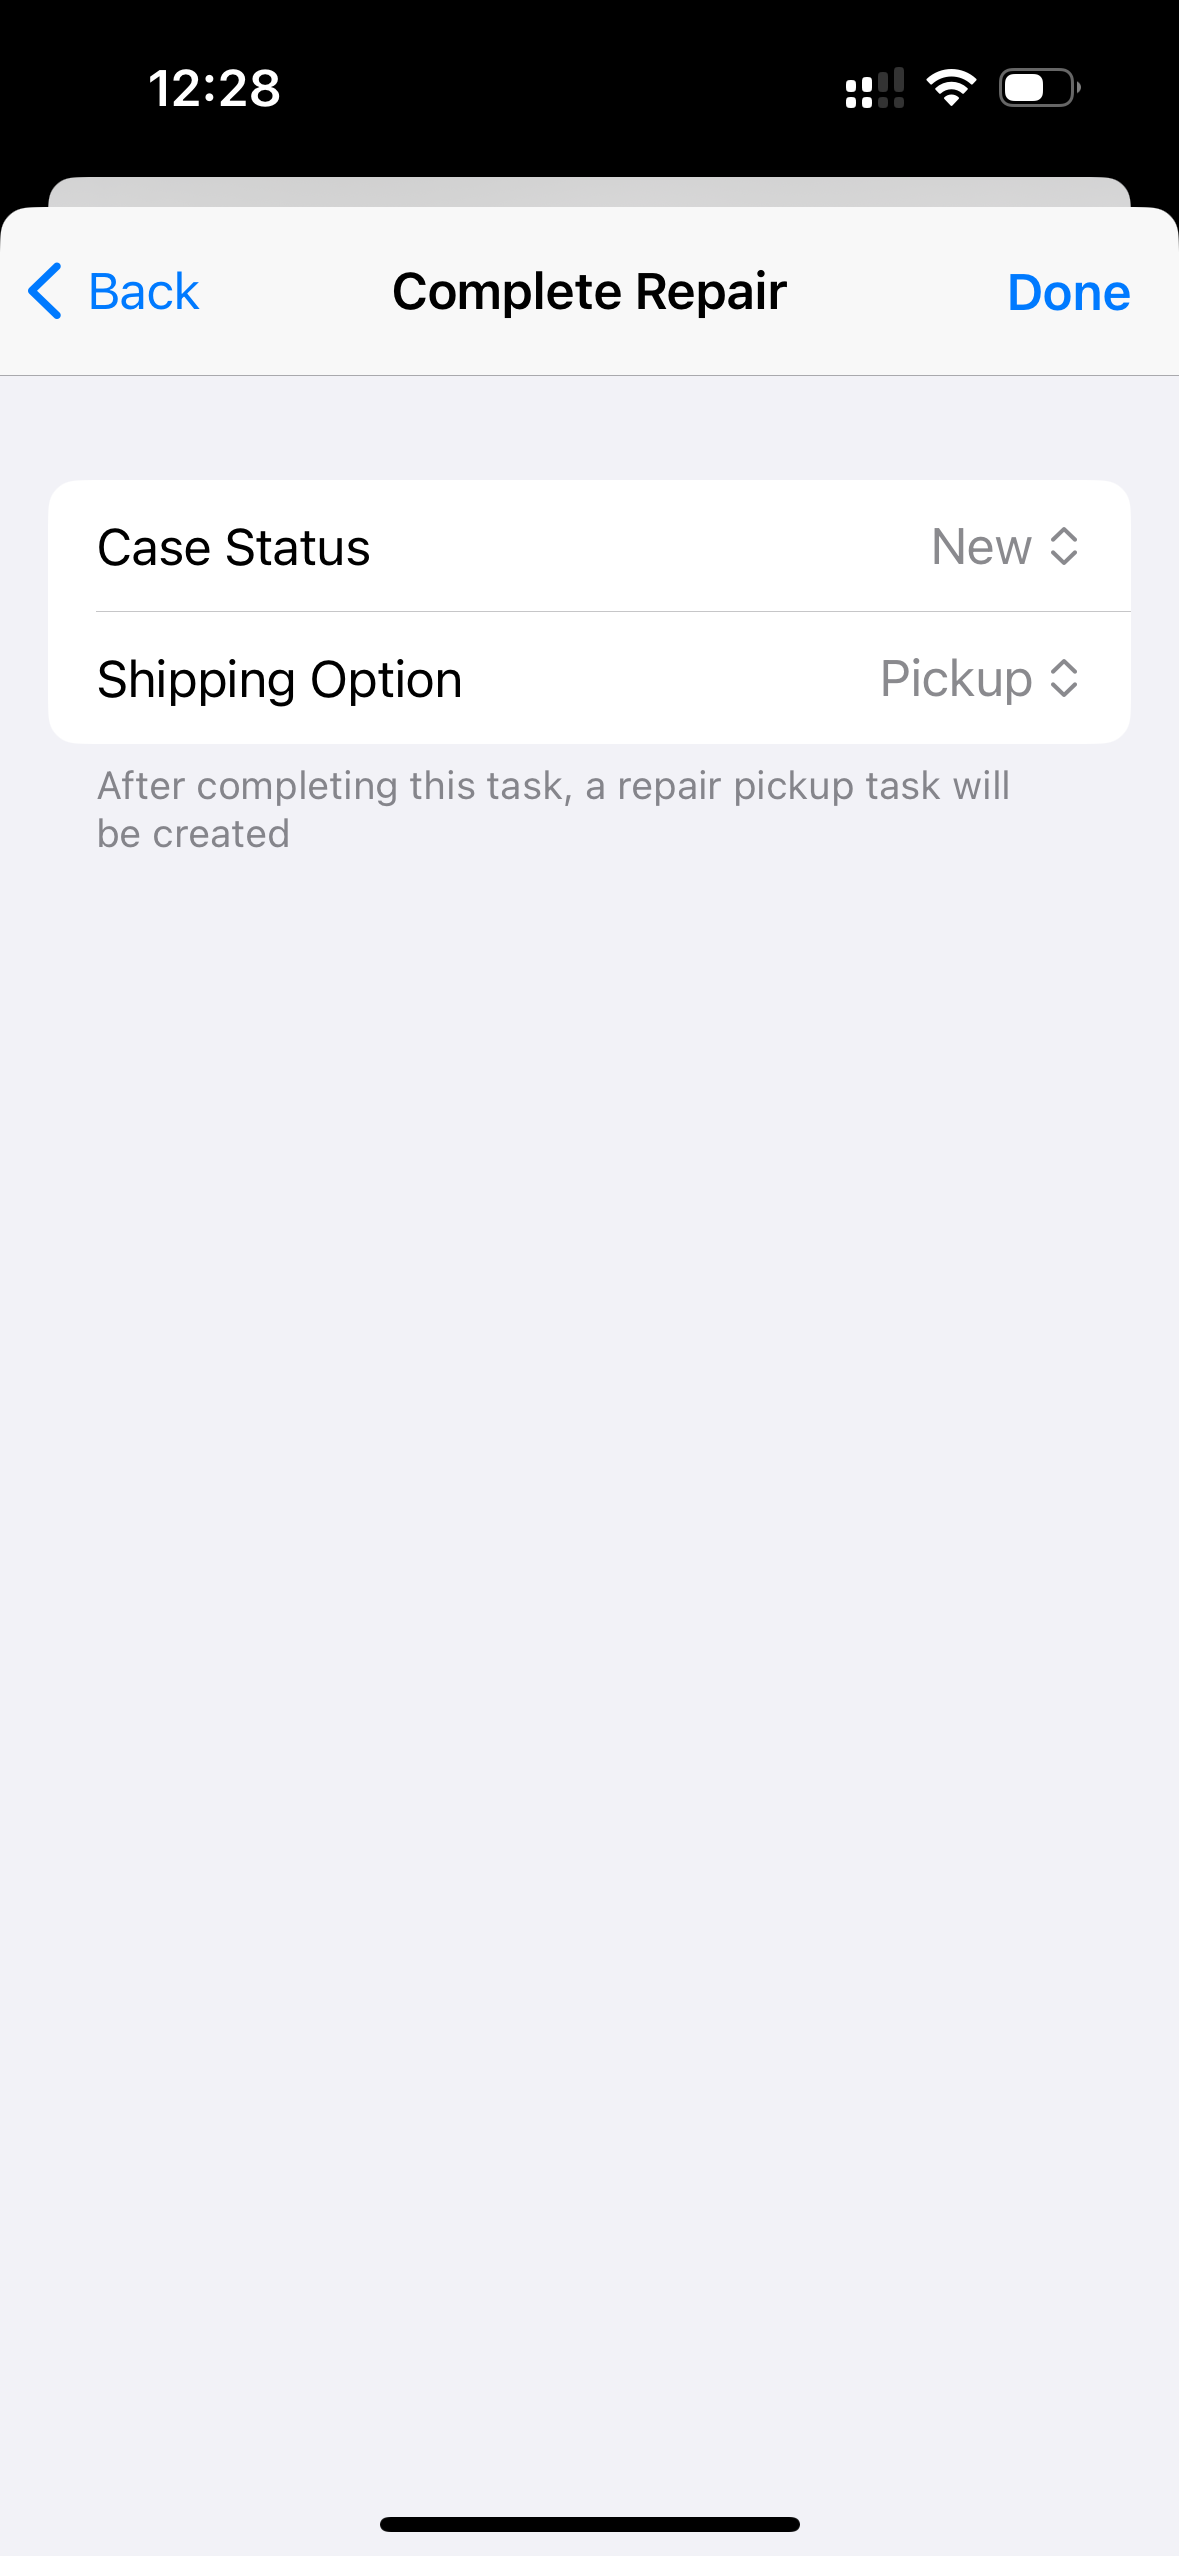
Getting a repair back to the customer
There are two ways to get the repaired product back to the customer, either by shipping it, or by having the customer pick it up. You are required to indicate which one by means of the Shipping option field.
Repairs processed via the Tasks App as well as Admin Suite can trigger the following tasks.
Shipping
Tap the Shipping option to select the Delivery option.
A ShipRepair task will be created only after the order has been paid, that is, if payment is required. The task will once again be displayed in the repair's main overview in the Tasks Status card at the bottom.
Tap Ship Repair to confirm it has been shipped.
Use the RepairShipped template to customize your message towards the customer when the repair is being shipped.
This template will be triggered whenever a repair's shipping method is not pickup and its open amount is zero.
Pickup
Instead of shipping the repair to the customer, the customer can opt to pick it up instead. Tap Pickup.
A Pickup task will be created for this pickup, which you can see in the Tasks Status card at the bottom of the repair's main overview.
This logic includes the following:
- The repair's Shipping option must be set set to Pickup.
- If no shipping method is set, EVA falls back to the receive method specified during creation of the repair:
- If it's set to Goods are present, a pickup task will be created.
- If it's set to Goods will be shipped in, no pickup task will be created - a ship task will be created instead.
Use the RepairReadyForPickup template to customize your message towards the customer when a repair is ready for pickup.
This template will be triggered whenever a repair is finished and indicated to be picked up.
Follow-up task
After completing the repair itself, and selecting either Pickup or Delivery, you will enter the repair overview once more.
You can now see the repair's status is updated and you're in the next stage of the flow, which corresponds to the shipping option you selected.
By tapping Repair Pickup at the bottom, you can view the open amount. If there is an amount to be paid, you can navigate towards the Checkout App directly so you can create a basket and consequently perform payment for the order. Performing payment will complete the pickup task.
