Customer Details
Add, view or edit customer details.
Customer Details
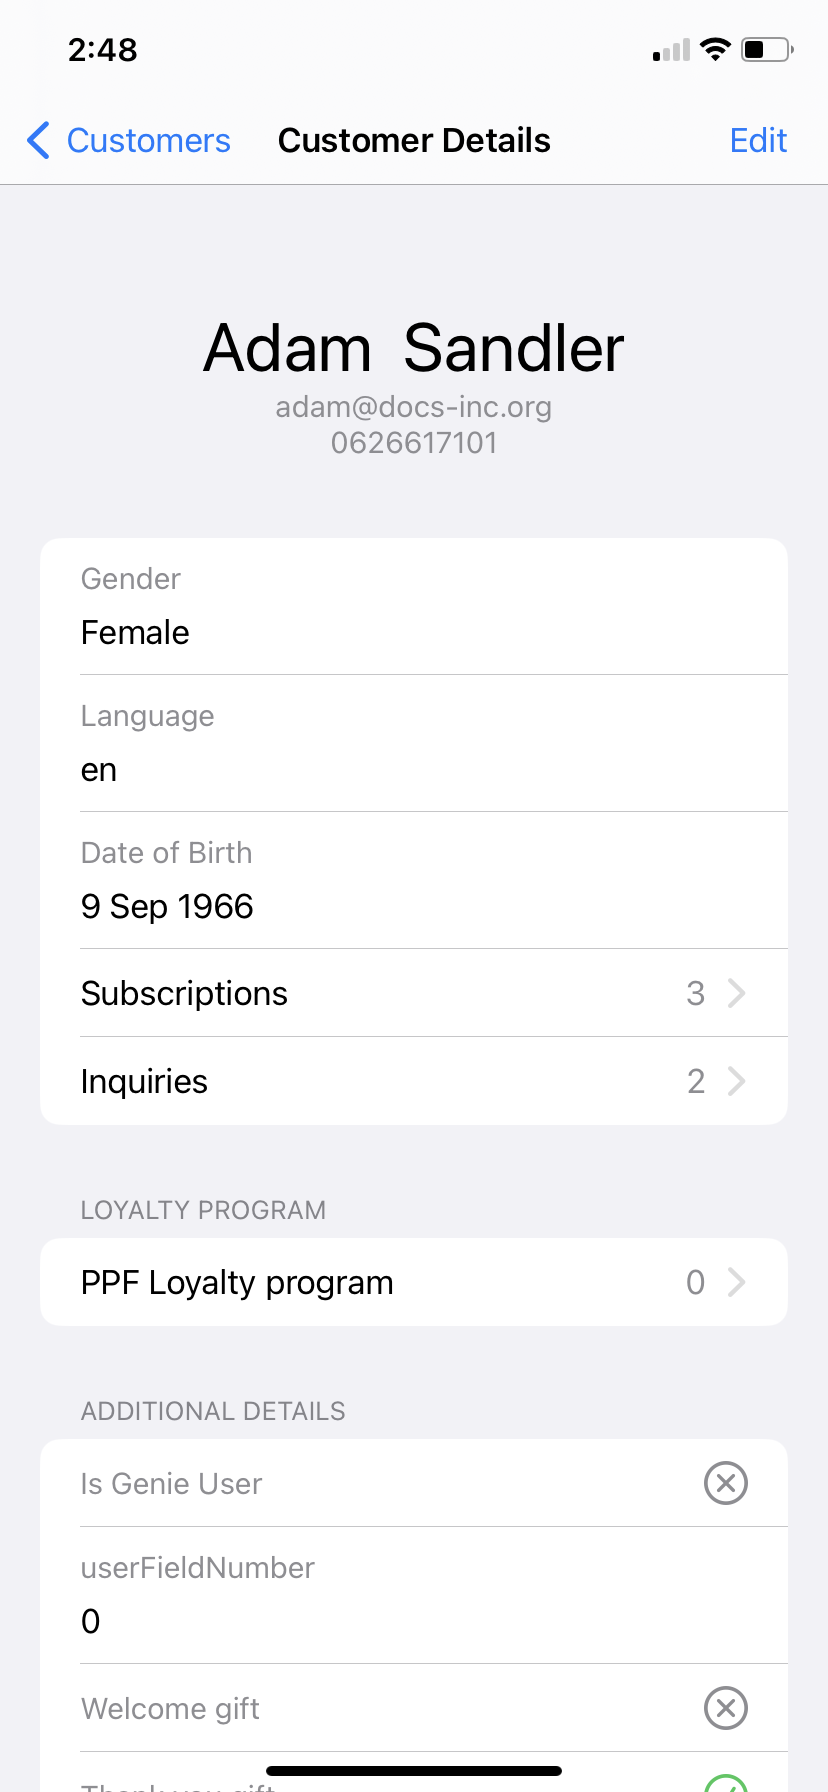
Tapping a customer will open the Customer Details page. Here you can get a 360 overview of the customer and activities like Order history, Subscriptions, Cases, and more.
You'll also notice that the user type is quite visible via the chip (placed under the name). In our example here, we see that this user is also an Employee. This will also be visible for user type Debtor. More on User Type.
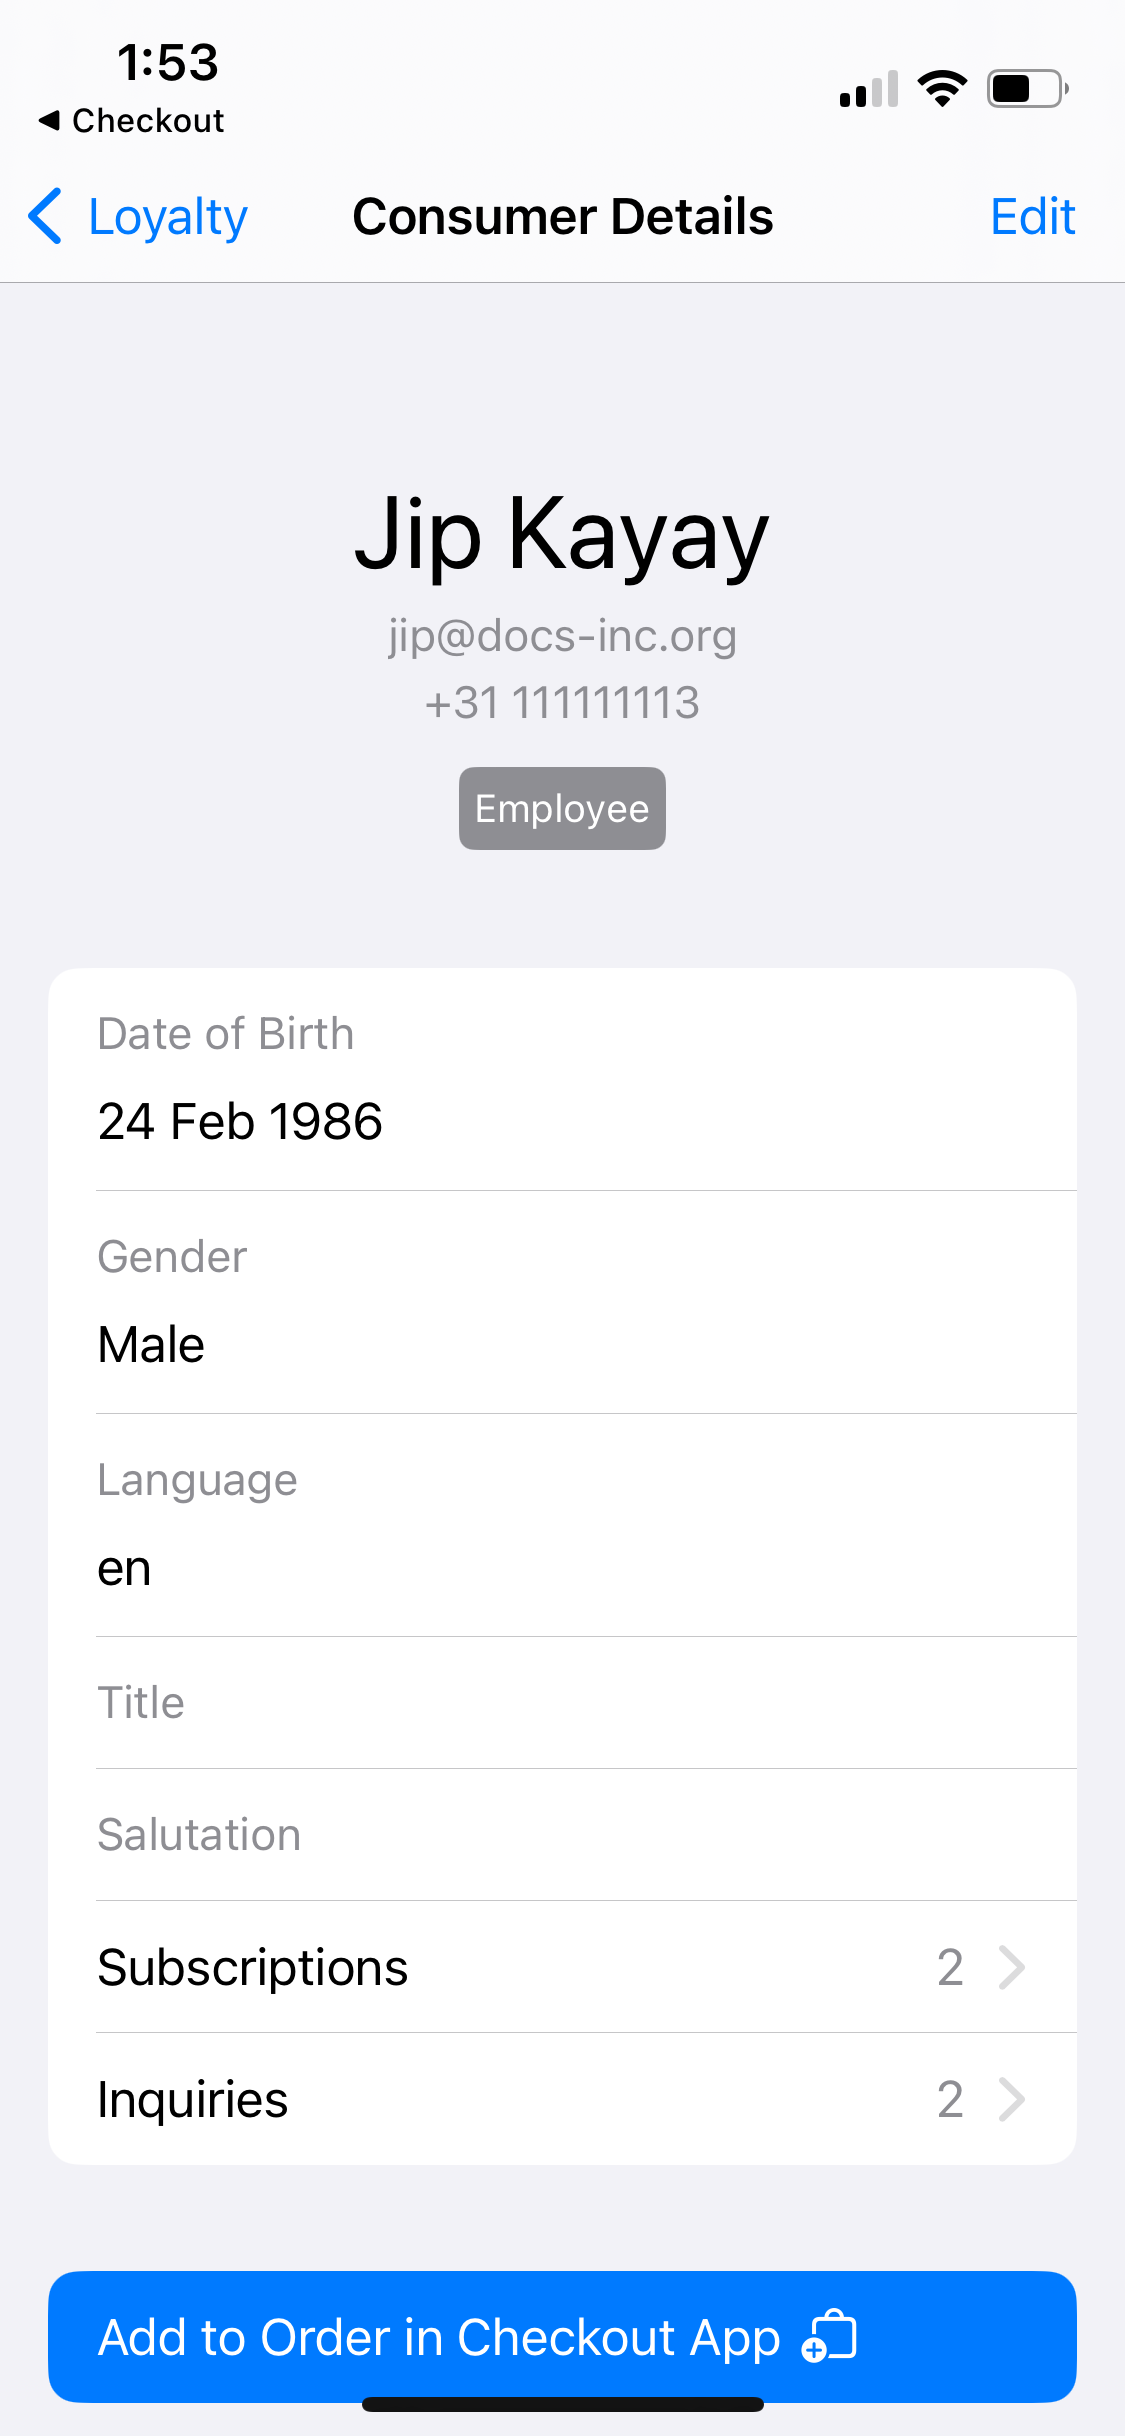
Use the Add to Order in Checkout App to instantly add the open customer/user to a basket on the Checkout App. As applicable, the user will be added to an active basket or a new basket will be created.
When adding a new customer, it'll become clear to you which fields are required.
Edit Details
To edit the details, tap the Edit button in the top right to open a menu to change all the attached customer details.
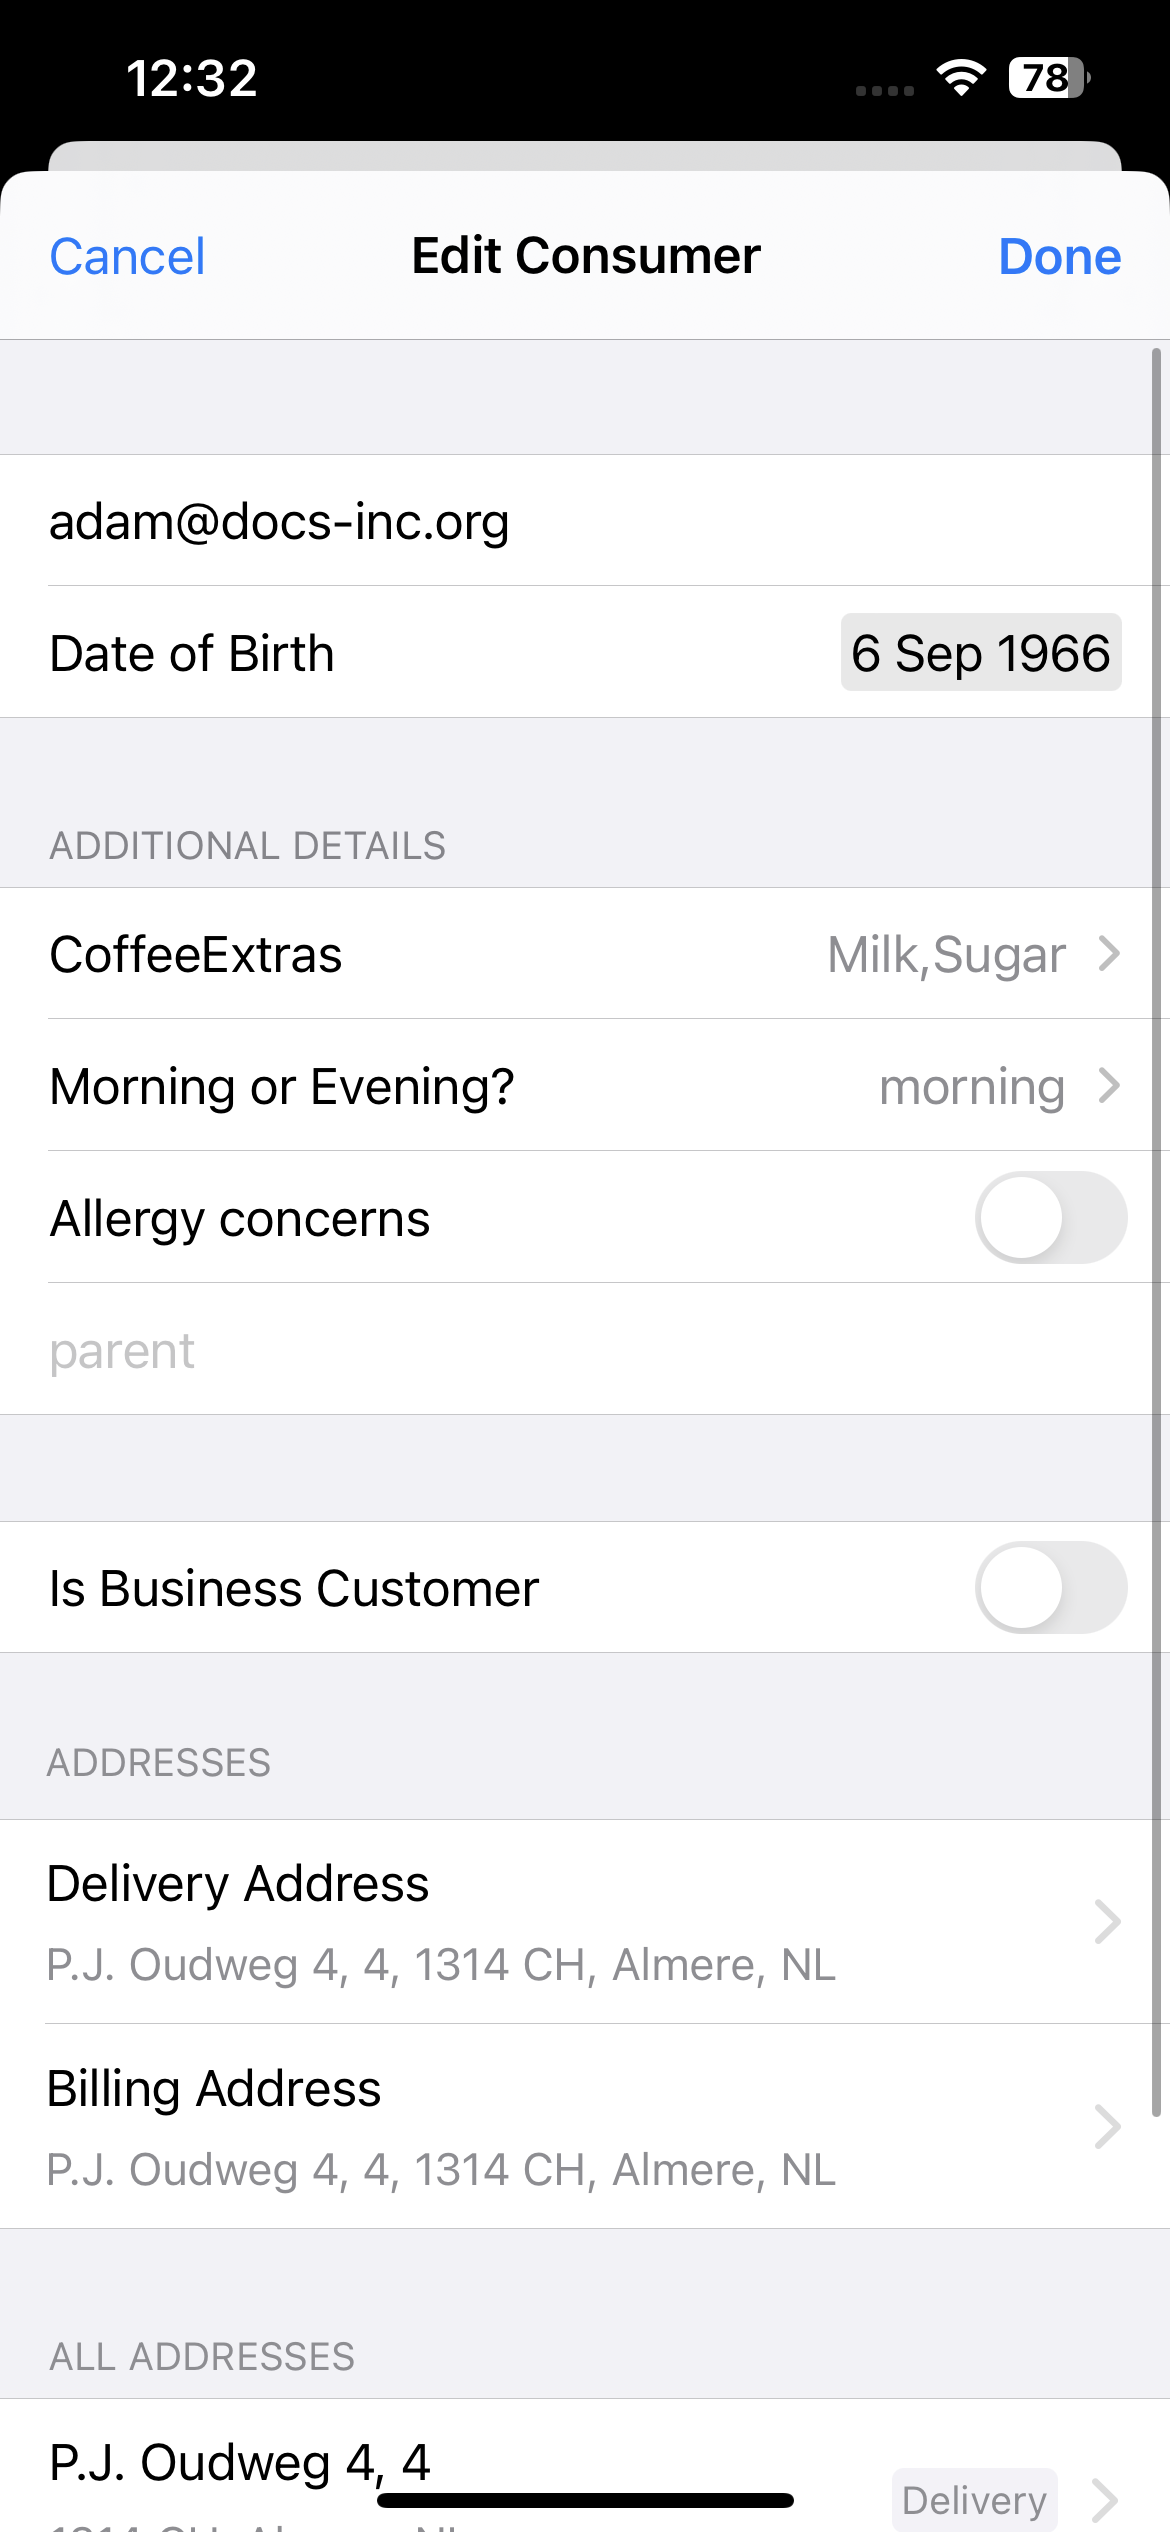
Using a setting called Customer:BlockChangeEmailAddress you can influence whether users can edit the email addresses of customers. A value true means no email address edits are allowed (default of this setting is false).
Subscriptions
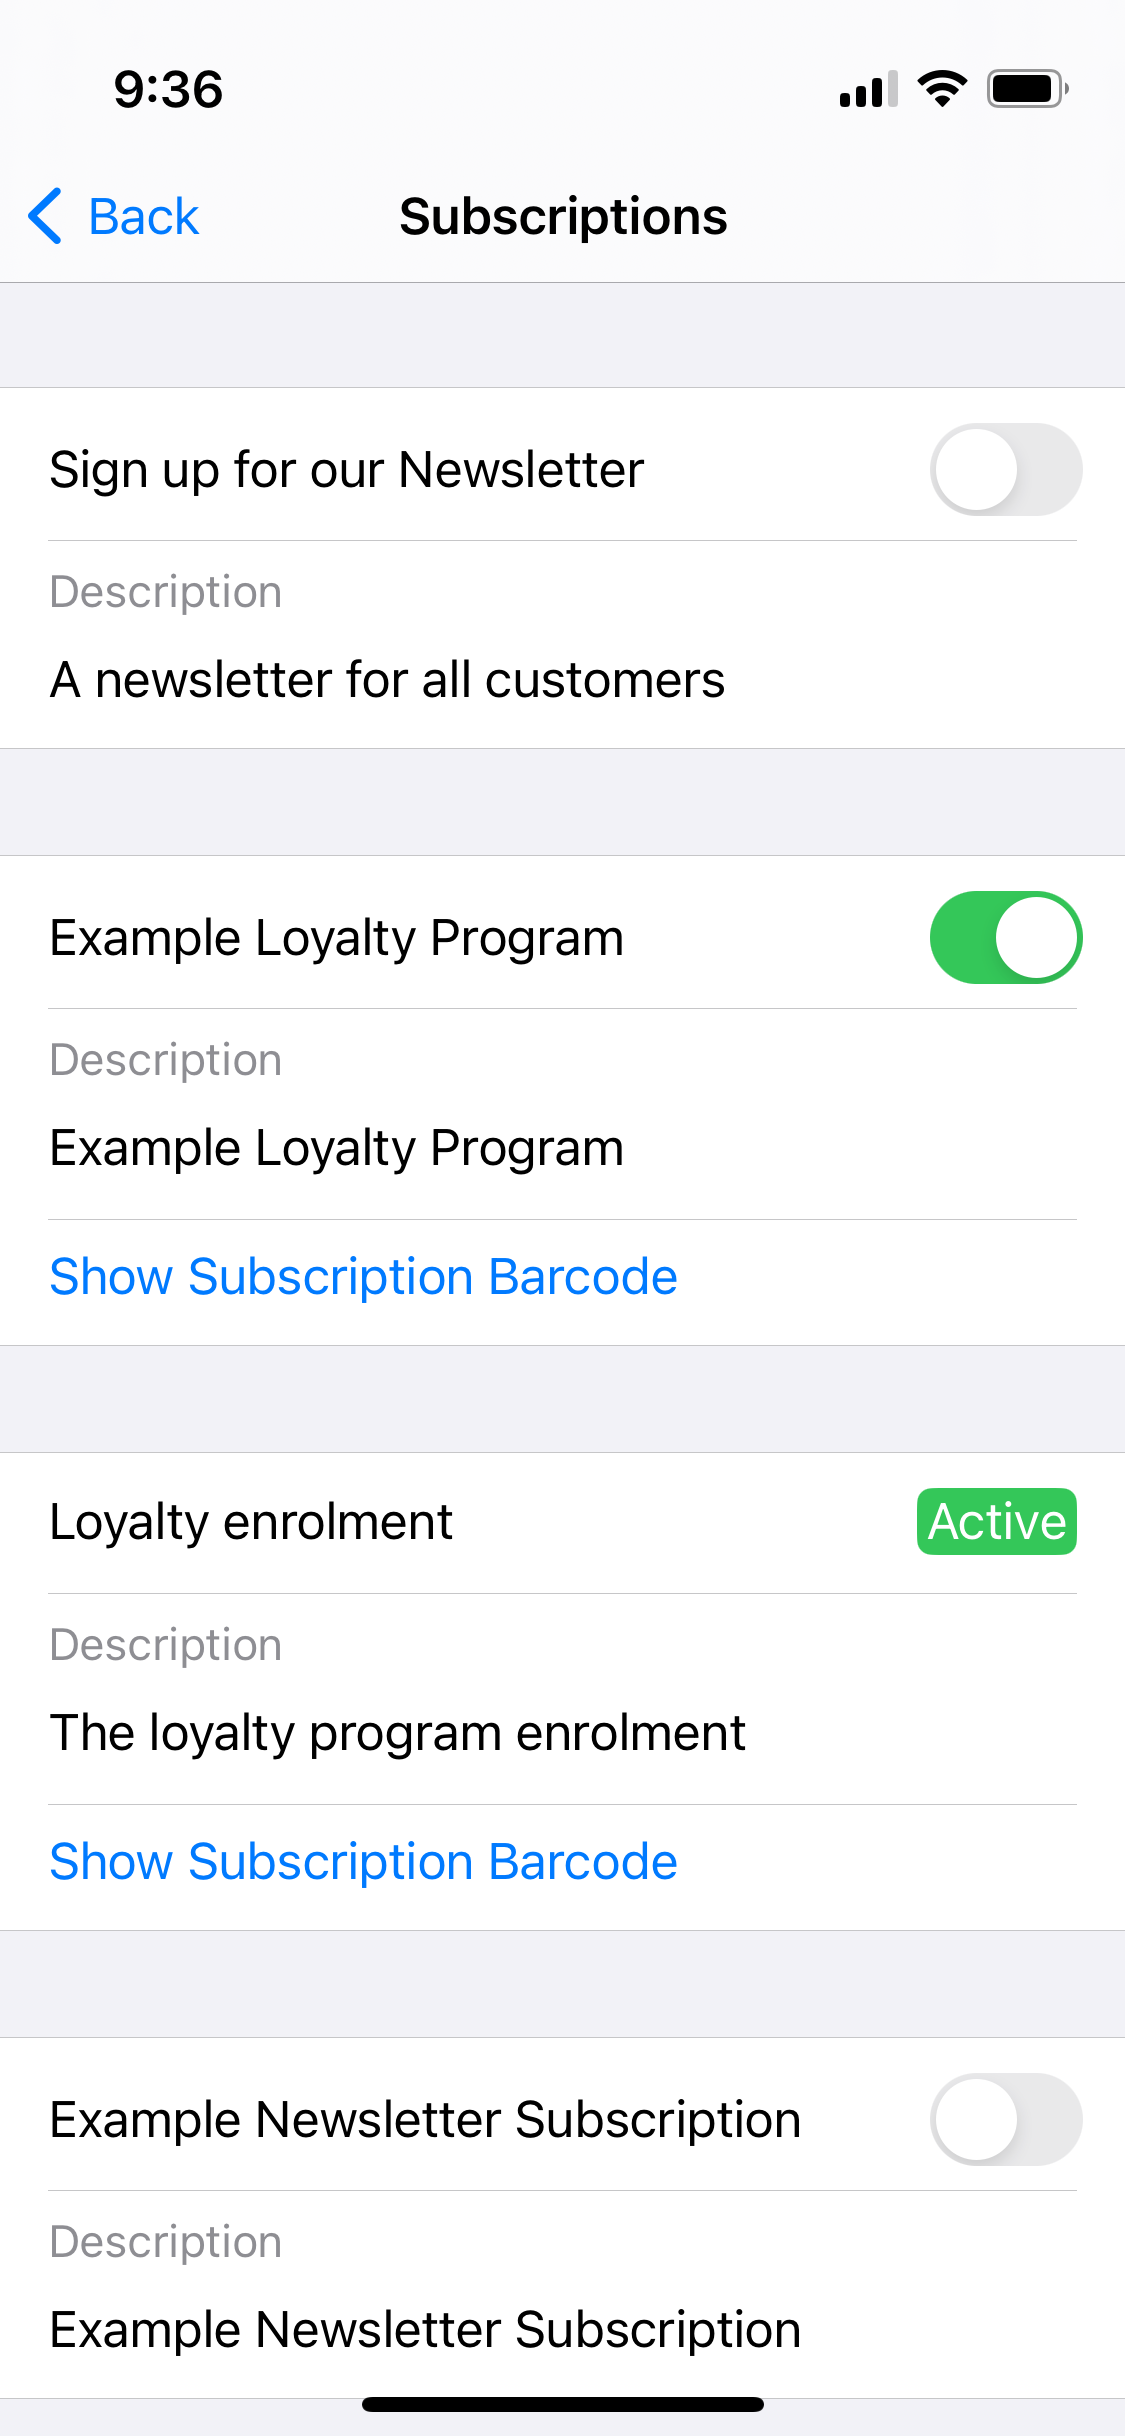
Manage customer subscriptions by using the Subscriptions button.
The possibility to unsubscribe is based on the input of the field Allow unsubscribed by in the subscriptions configuration on Admin Suite.
Subscription Barcode Identifier
To enable having a subscription barcode identifier button in the user customer details, set the App:Customer:ShowBarcode setting with a value true. Once set, a subscription barcode button will appear and can then be used as a unique identifier for the users subscription ID.
Custom field Barcode Identifier
To enable having a custom field barcode identifier button in the user customer details, set the App:Customer:BarcodeCustomField App setting with a value that corresponds with the BackendID of of the custom field. Once set, a barcode button will appear and can then be used as a unique identifier for the specified custom field. The barcode will represent the value of the custom field.
Loyalty Programs
In order to be able to view user coupons, you need the LoyaltyPrograms permission with scope View
Permissions are managed from the Roles and rights chapter namely, from the functionalities card of a users role.
The Loyalty program card will display a customer's loyalty program subscriptions and balances. You can also block/unblock programs from here pertaining to the underlying customer.
Blocking a loyalty program can be performed from here as well. Proper permission needs to be in place in order for the user to have such feature. Please refer to the section Loyalty related functionalities for more on all the related permissions impacting what users can and cannot do when it comes to loyalty.
Inquiries
In order to be able to view inquiries, you need the Inquiries permission with scope View.
Permissions are managed from the Roles and rights chapter namely, from the functionalities card of a users role.
Manage customer inquiries by using the Inquiries button.
Order history
View all customer orders regardless the status (new, completed, pending, etc.). From here you can open the full list on the Checkout App order details page. You can also tap one of the orders to view more details, and from there you can once again open the order in the Checkout App where more actions, like create return is possible.
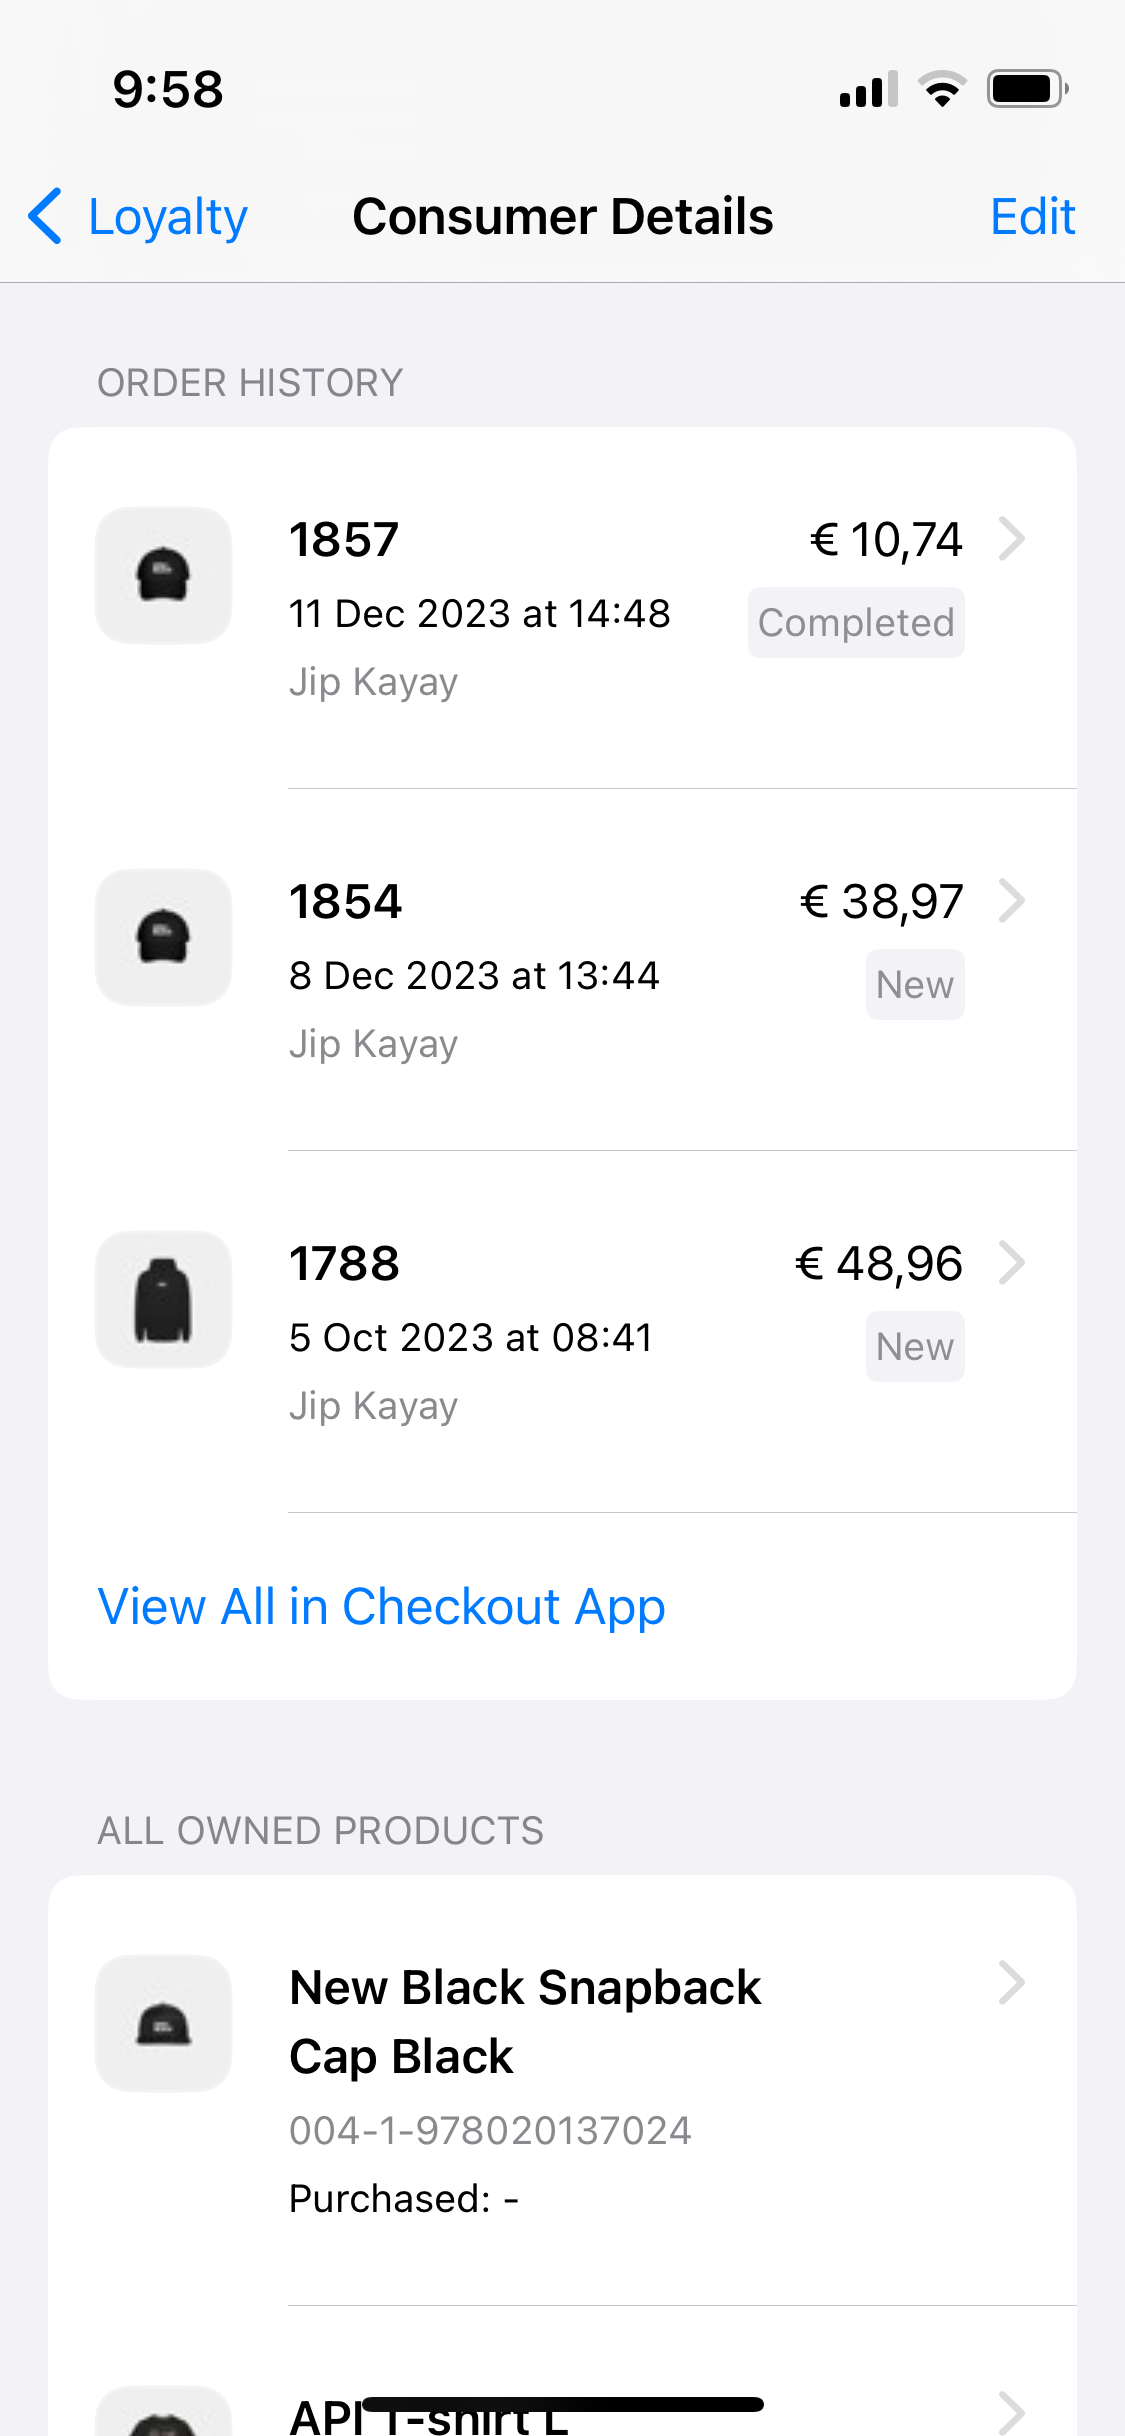
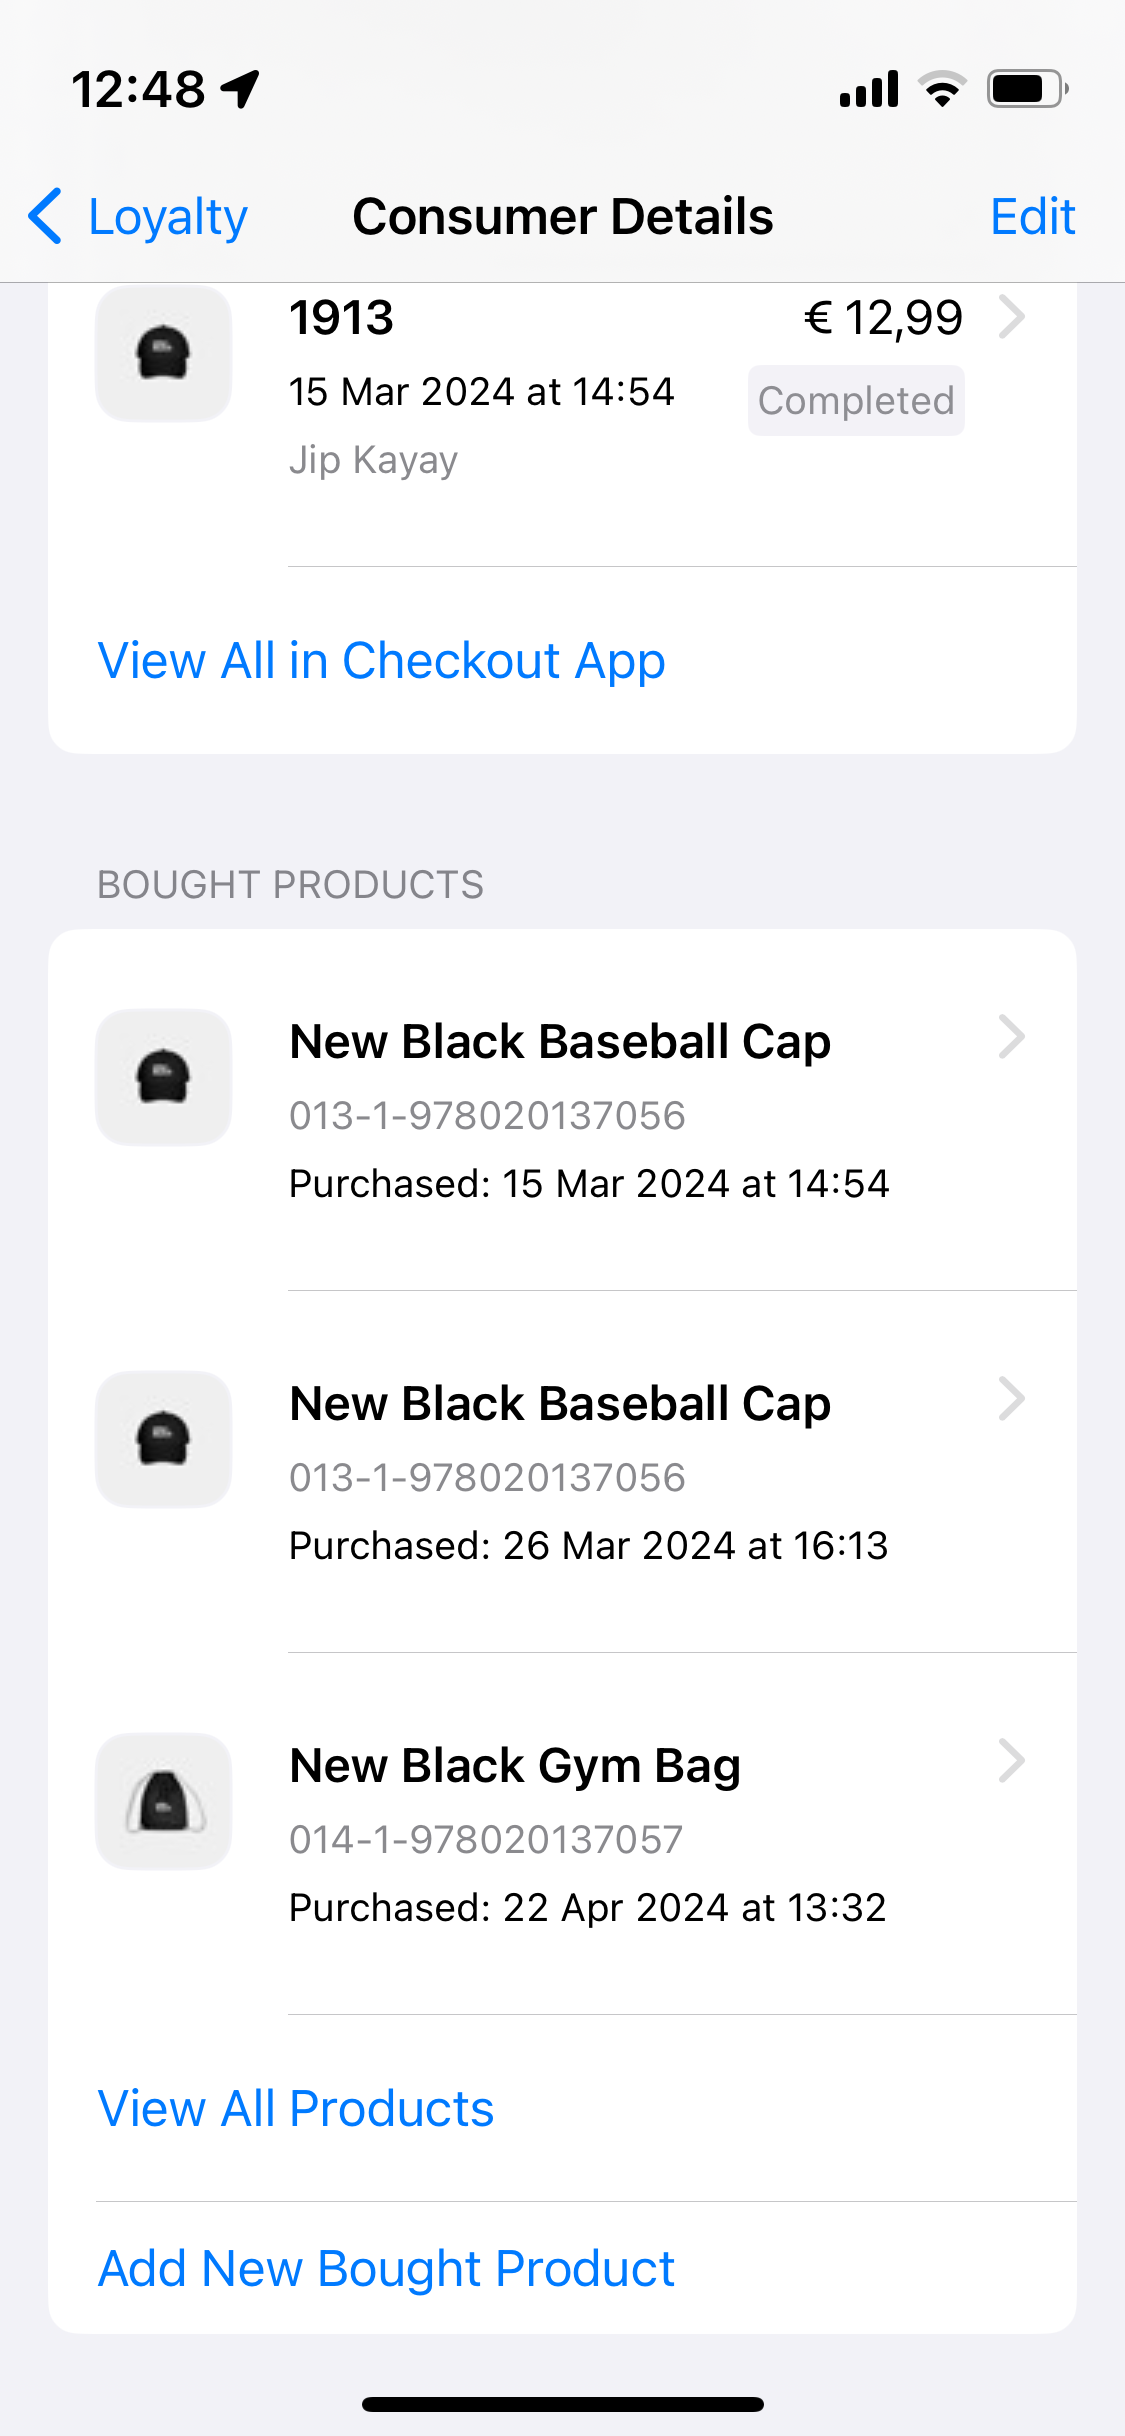
All Bought Products
View and manage all customer bought products.
If the setting EnableUserBoughtProductFunctionalities is set with a value true (default is false) this would mean that the App would listen to the corresponding users user bought products functionalities and scope. If the App user does not have the functionality UserBoughtProducts with a scope Create then the option to Add new product will not be available. Further, the whole “All bought products“ block will not be visible if the user does not have the UserBoughtProduct functionality with a scope View.
The app setting App:Customer:ShowBoughtProducts determines whether customer's bought products are displayed or not. When set to true, their bought products are shown, and when set to false, they are not (defualt value is false).
Adding a bought product
Start off by adding a product using the Add New Bought Product.
Of course, adding a bought product requires identifying that product. This can be done in two ways:
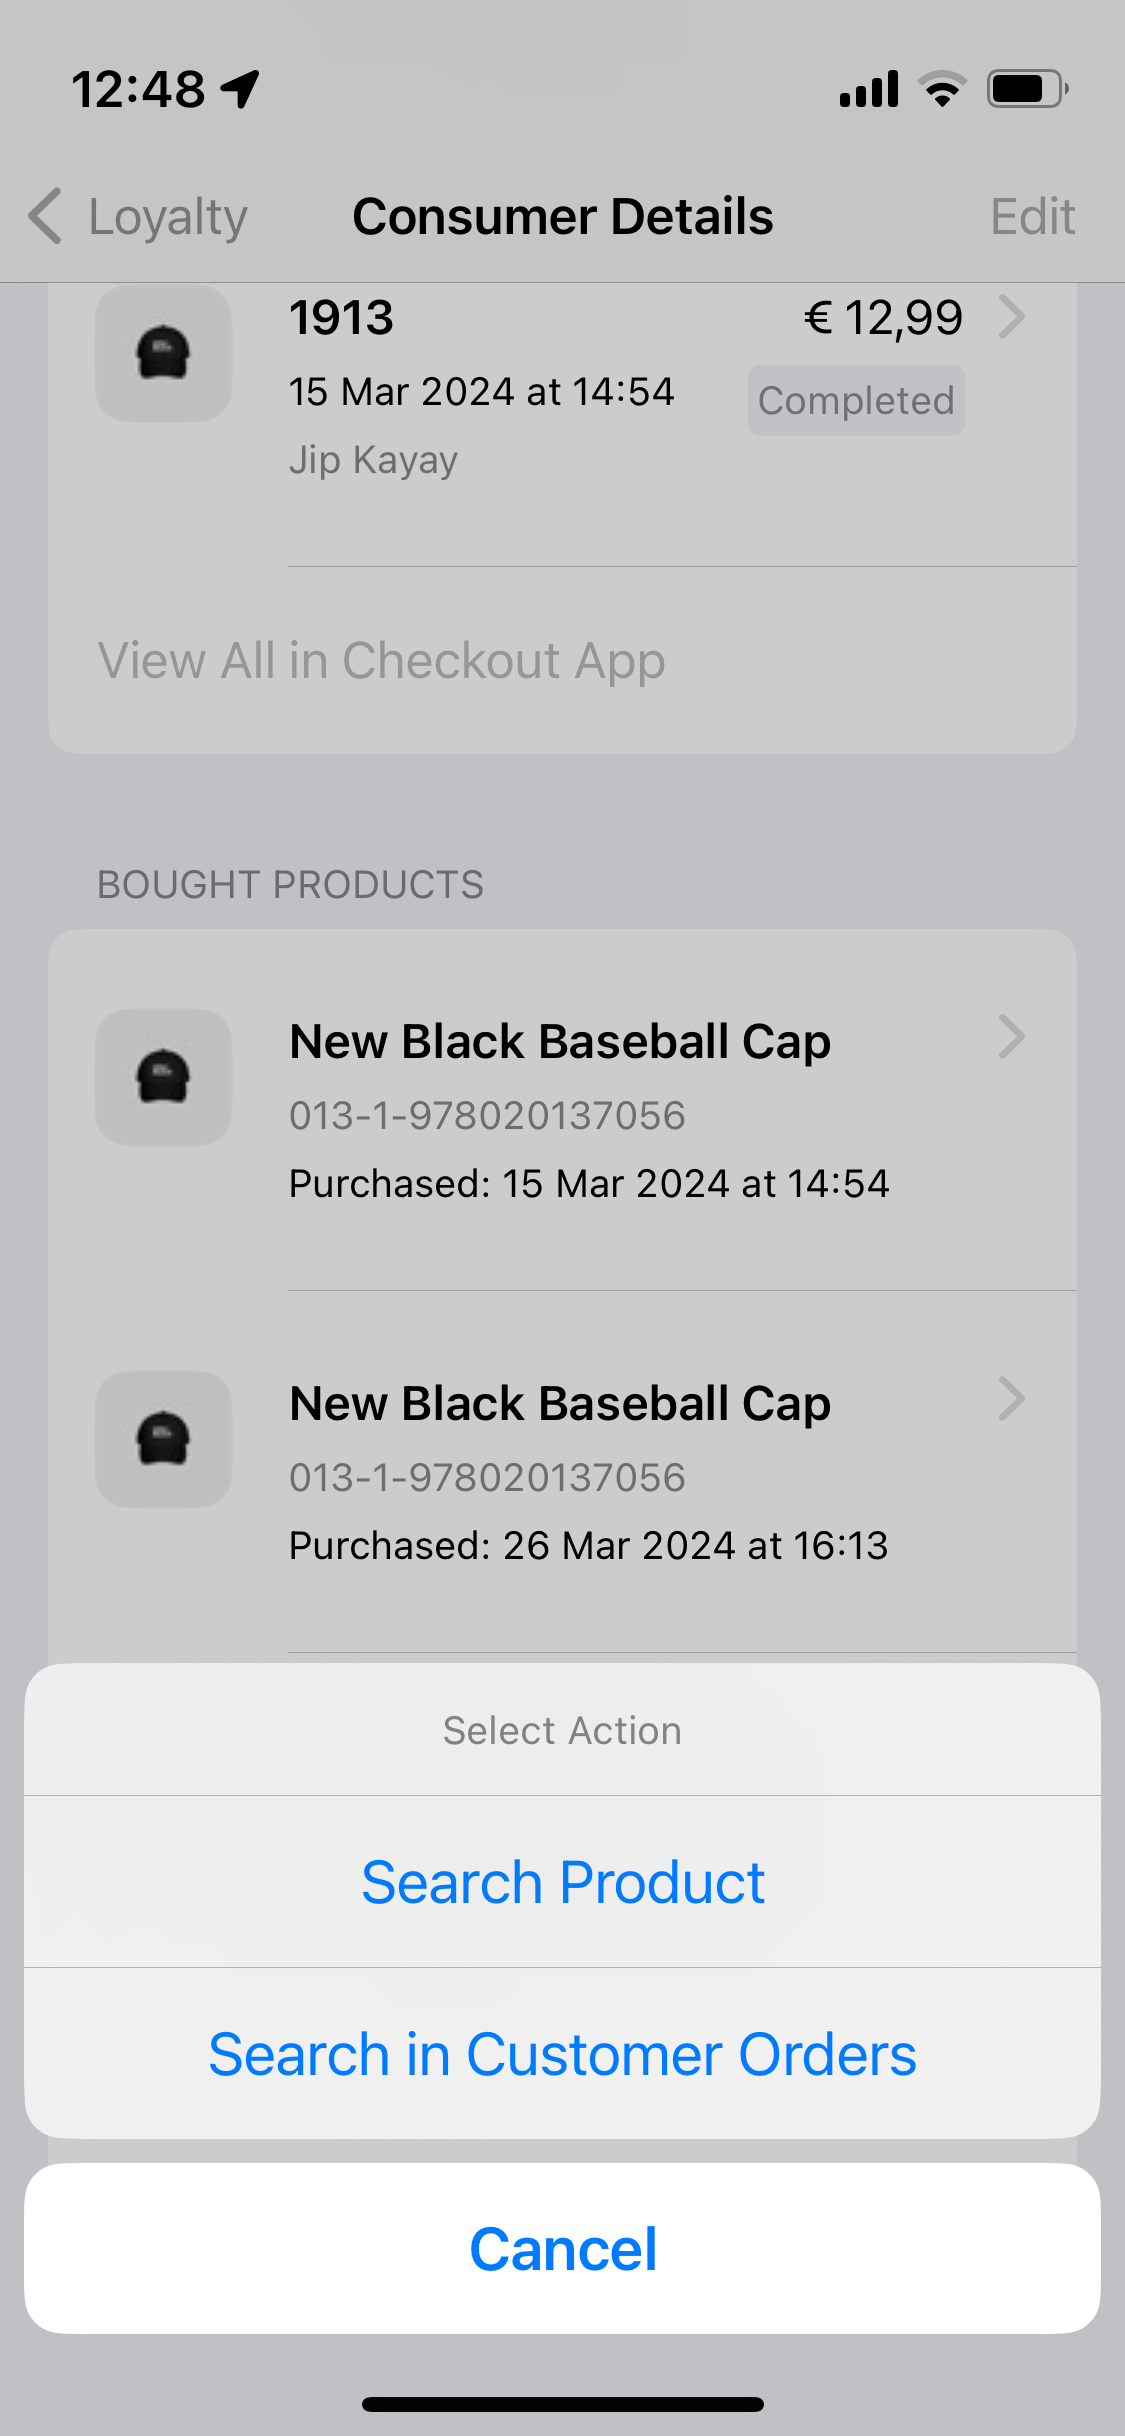
Search Product: A manual search by product name, Product ID, etc. or by scanning.
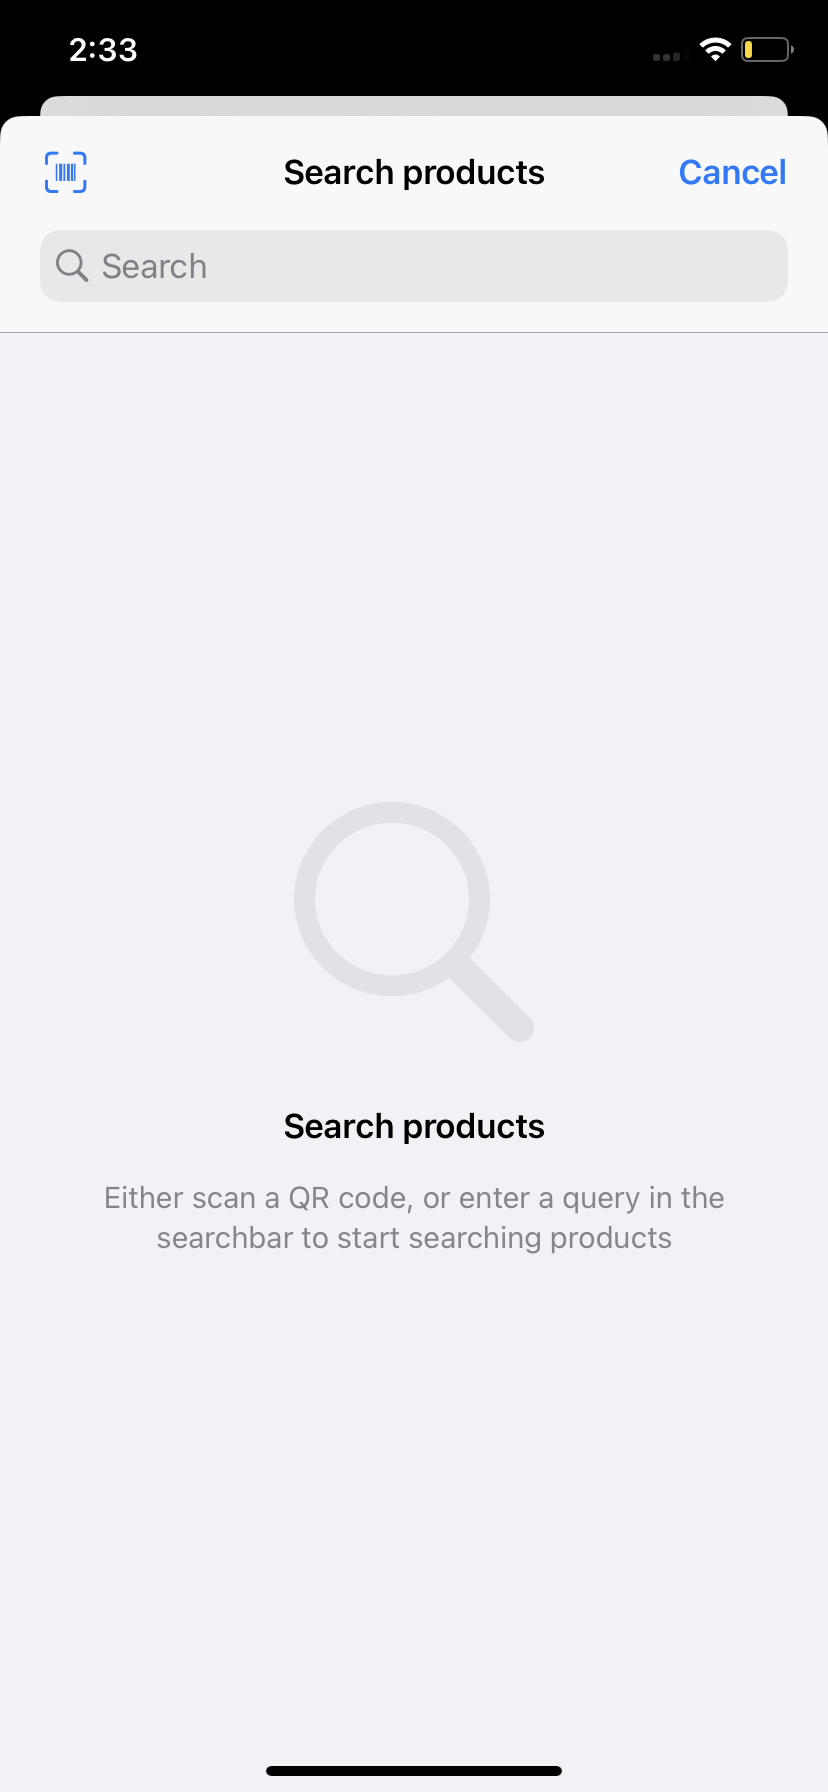
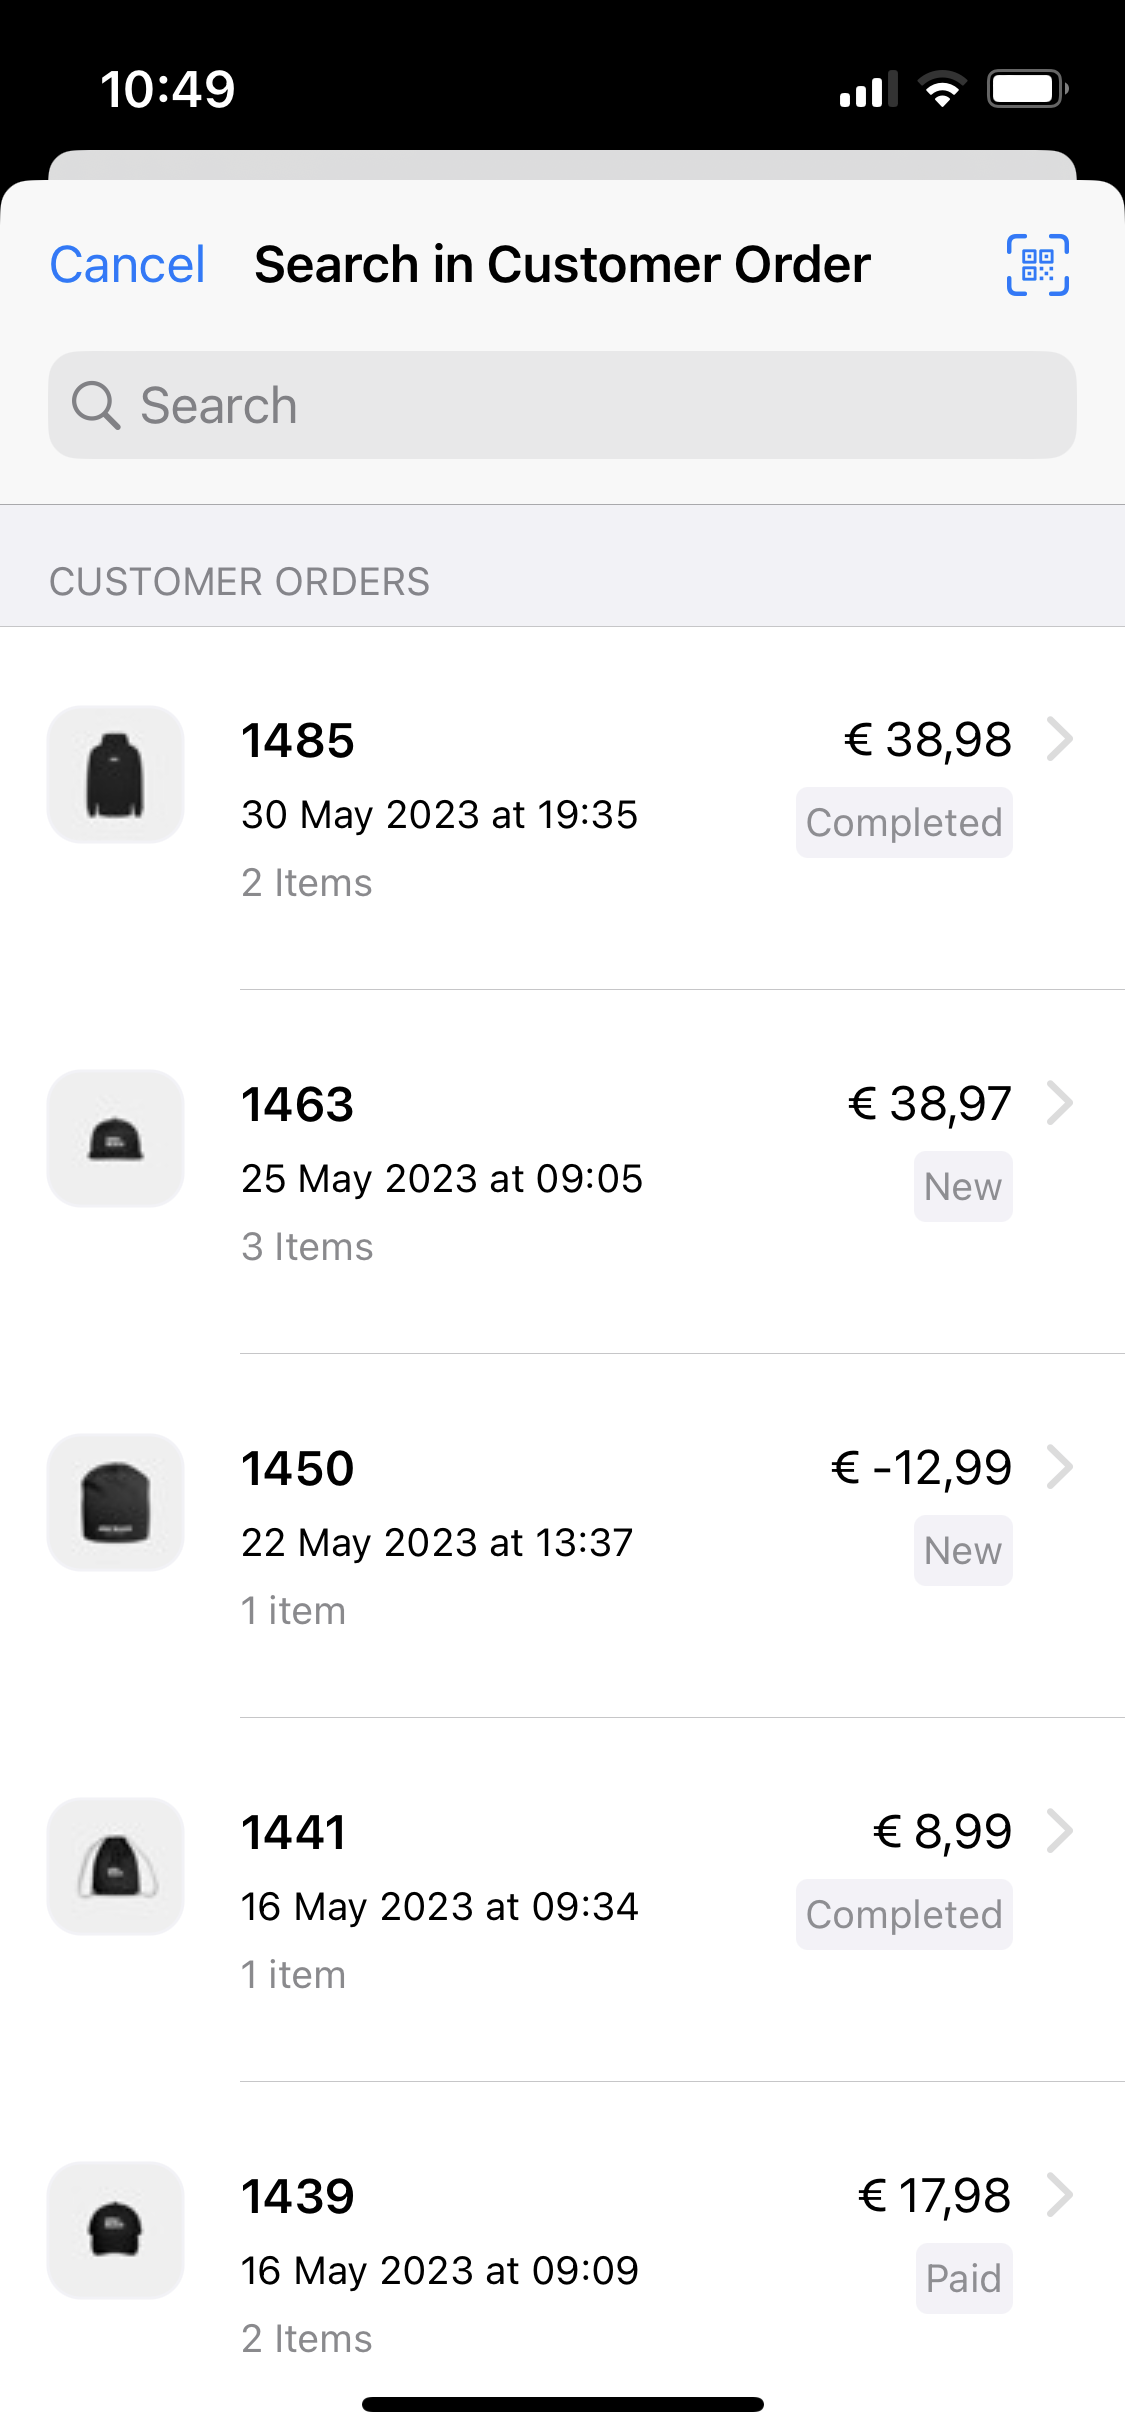
Search in customer orders: View customer order(s), select the desired one, and further the product.
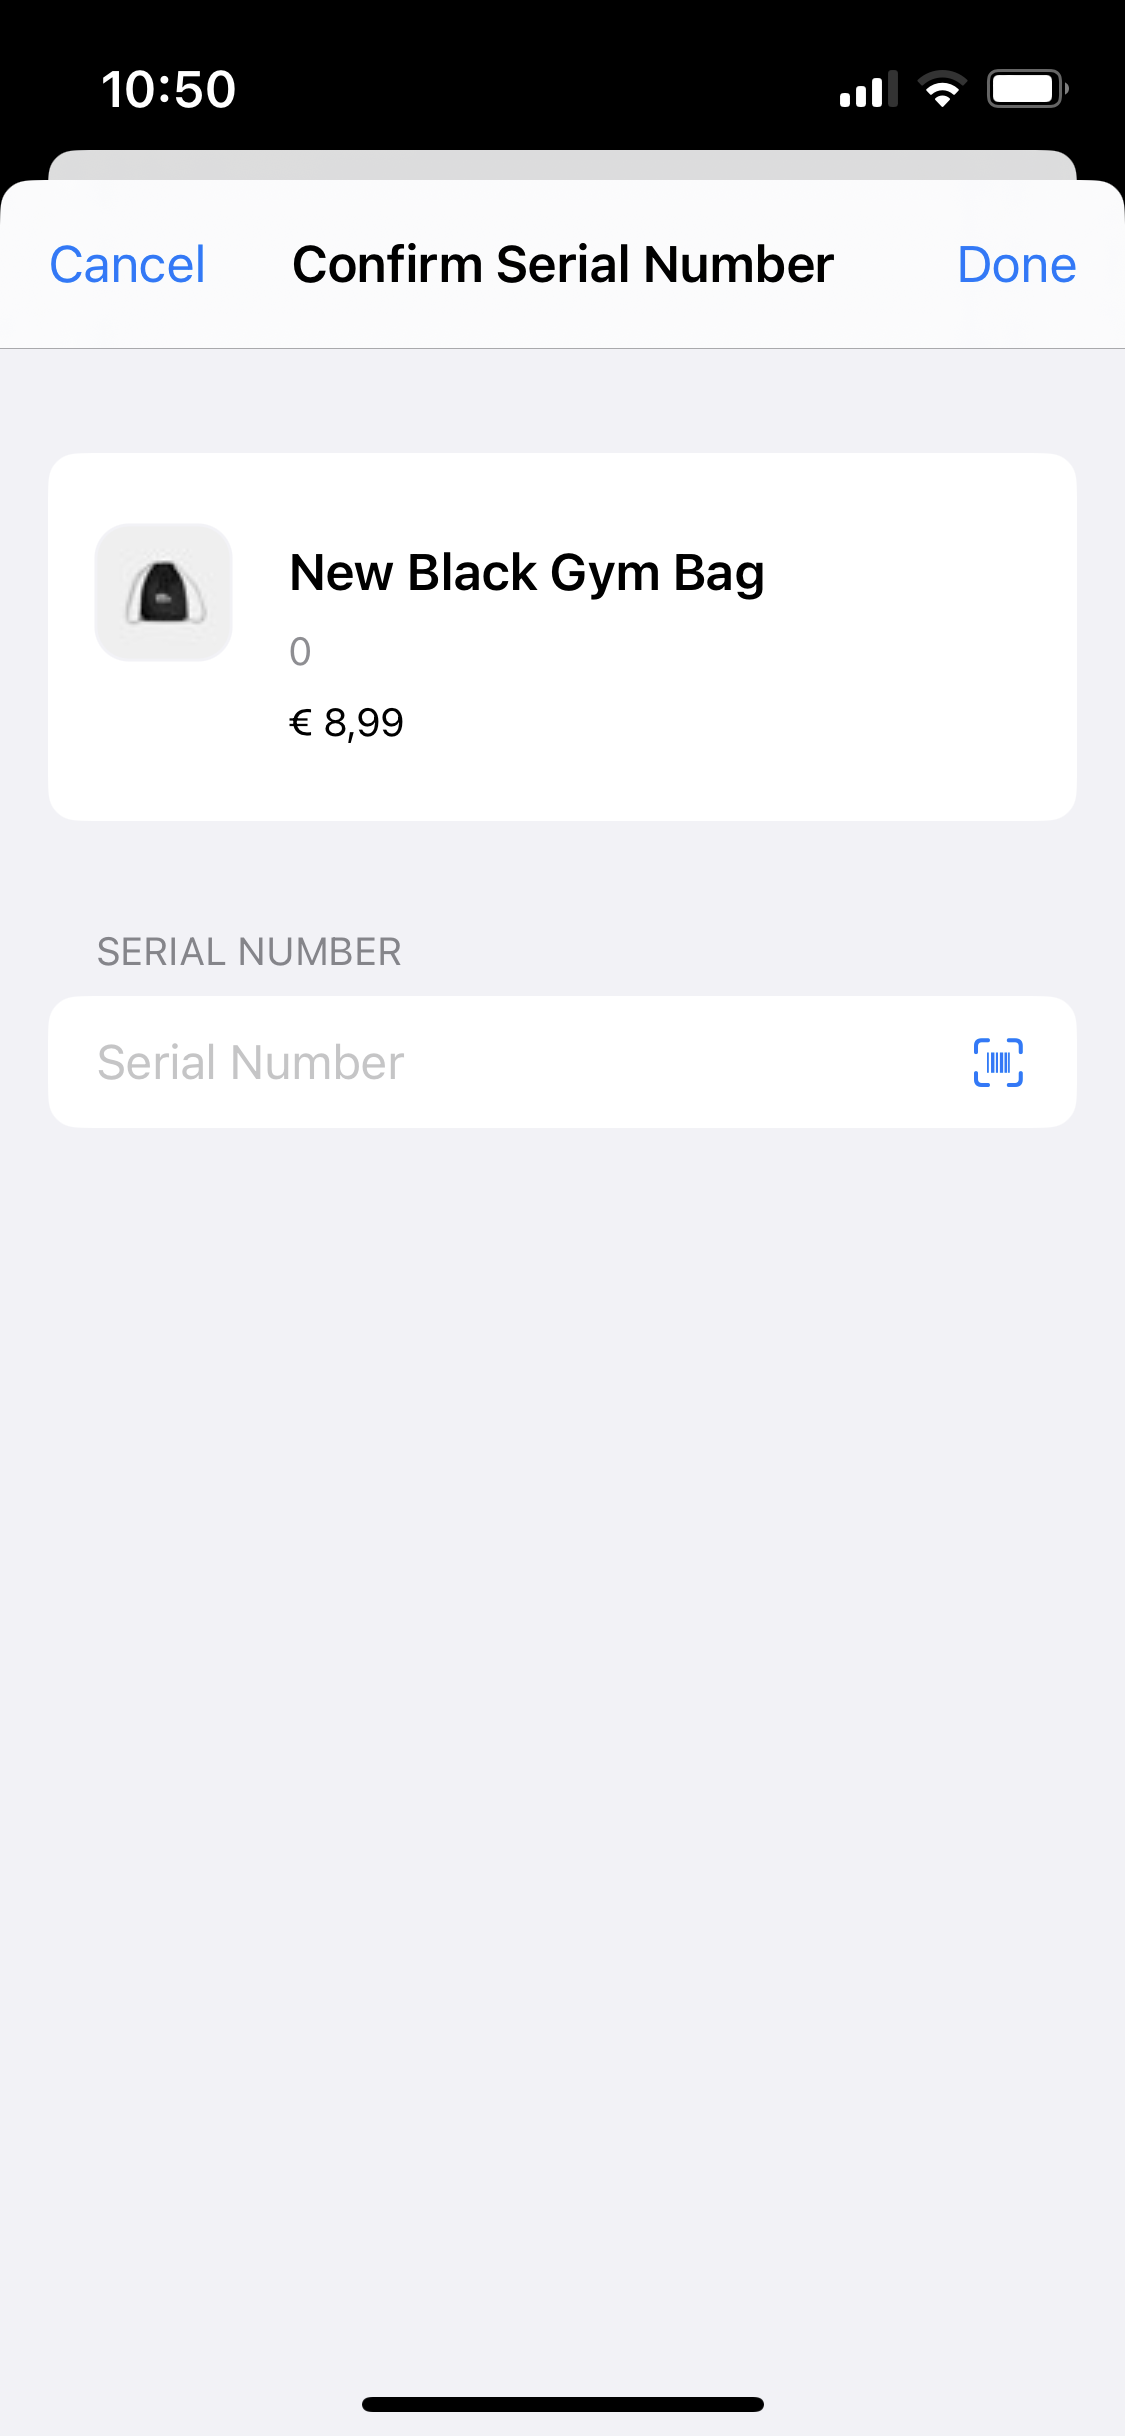
Once a product is selected, confirm and add a serial number (if applicable). This can be done via manual input or by scanning.
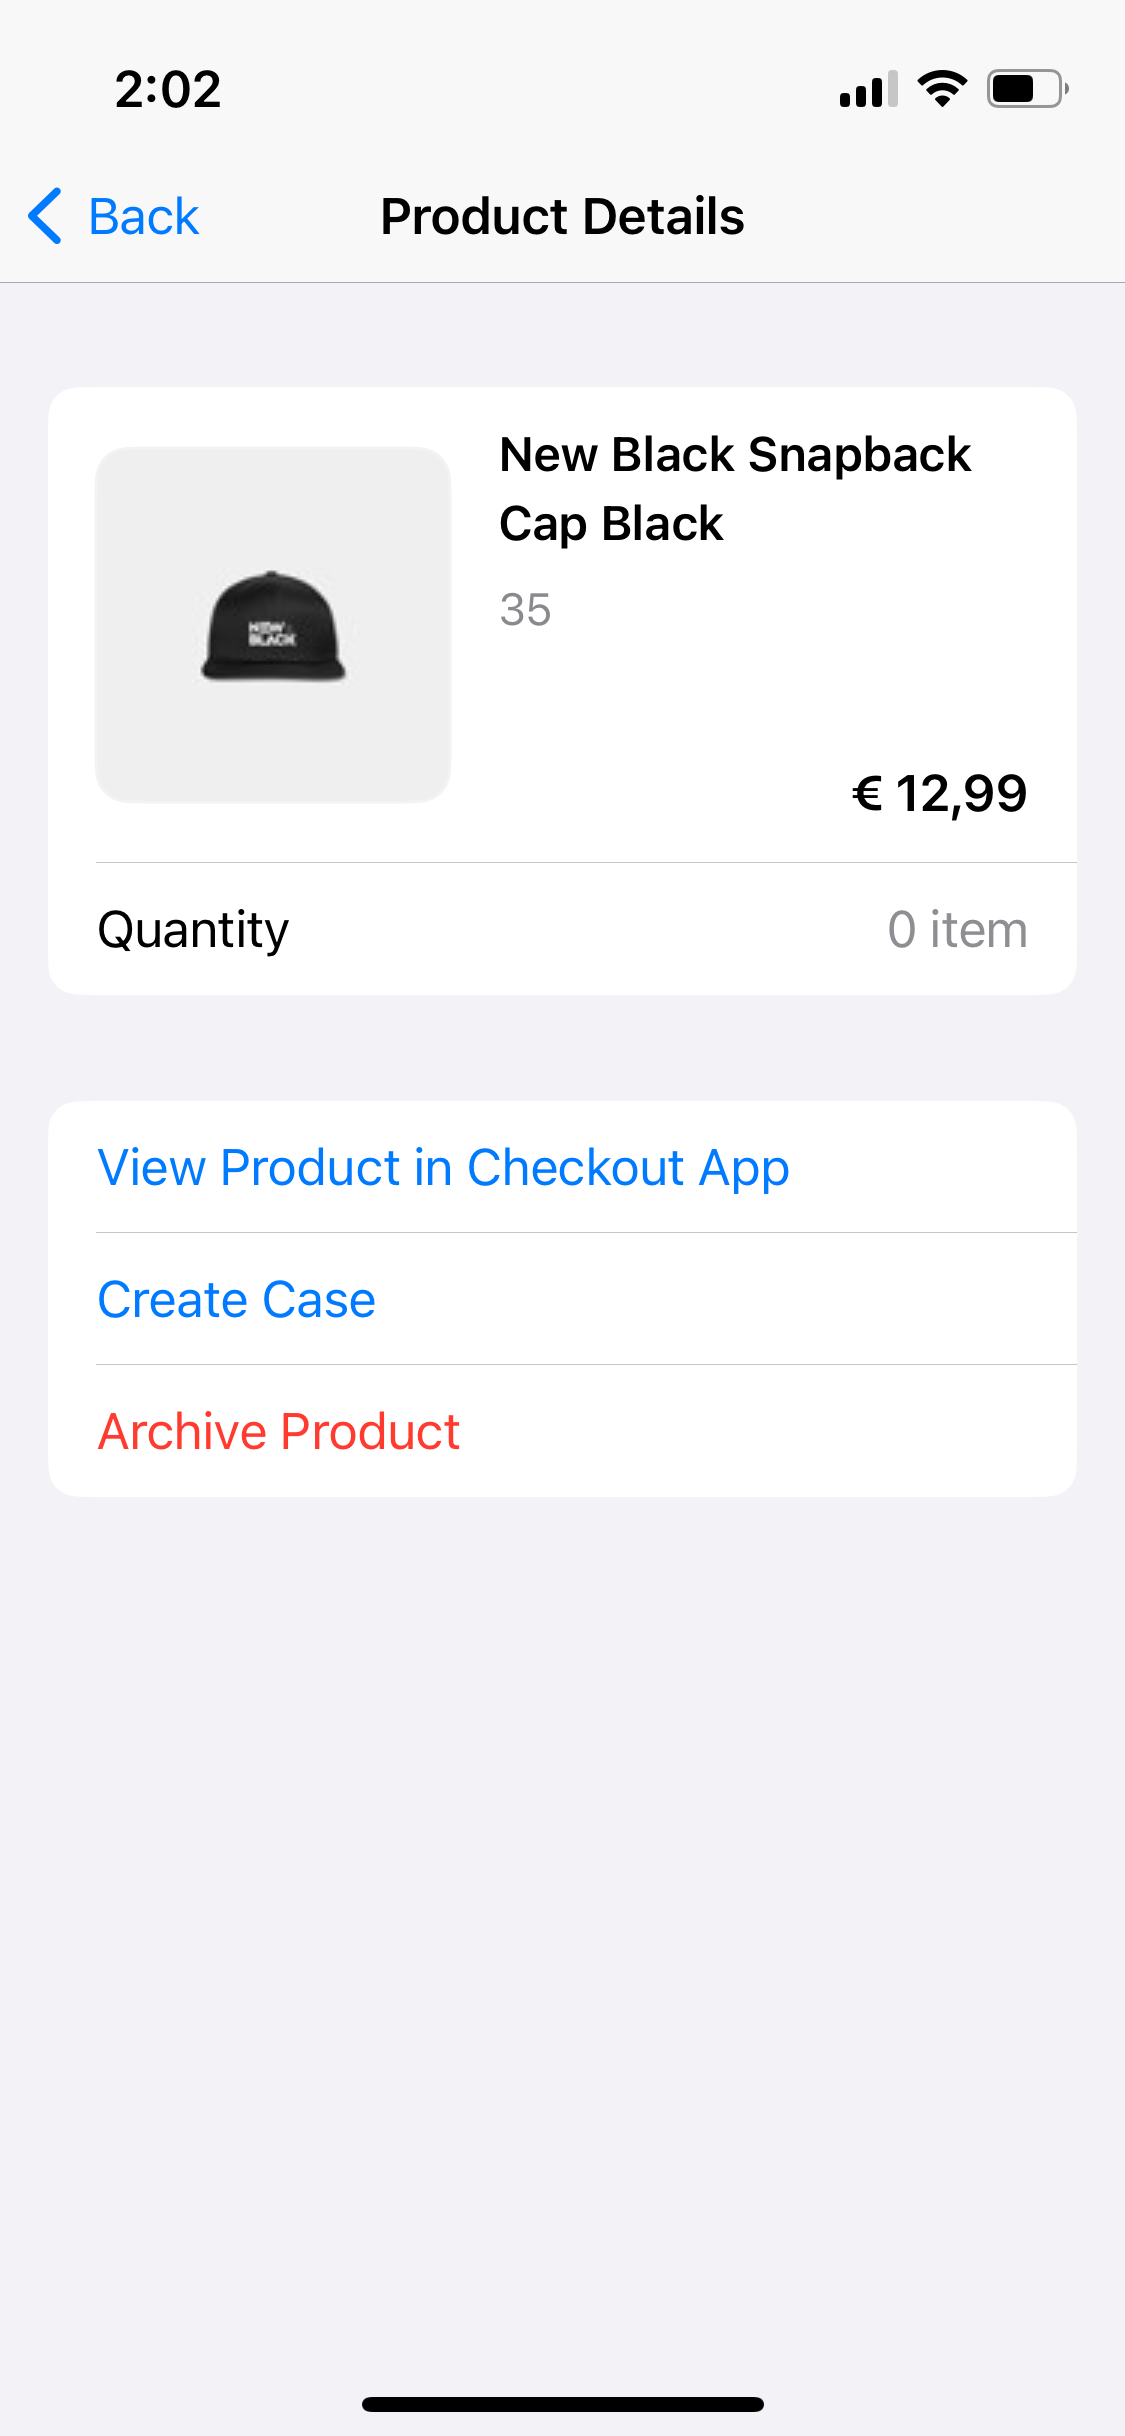
Viewing a bought product
By tapping a bought product from the overview, you'll be presented with a few options: View product in Checkout App; Create case; and Archive product. The last option removes the product from the bought products overview.
Borrowed products
This section will only display for user type Employees.
View and manage all employee borrowed products (view, add, and return).
- Viewing: If the employee already has a few borrowed products the product details (including price) along with the borrowed status will be shown.
There are three possible statuses: Open, Returned, and Purchased.
- Adding: You can add a borrowed product using the Add Product button which will then navigate you to a product search modal. Alternatively, a scan will also do.
The logged-in user will not be able to add a borrowed product to own account. Please ask a colleague to do that for you.
- Purchasing or Returning: You can purchase or return a borrowed product by swiping the desired product to the left.
A return will initiate a return flow where a quantity needs to be specified, and an answer to the question "Is the product damaged?". Yes will move the product to the Damaged stock label, while a No will move it to Sellable.
A purchase will open the Checkout App and onto the Basket. From there you can proceed with checkout.
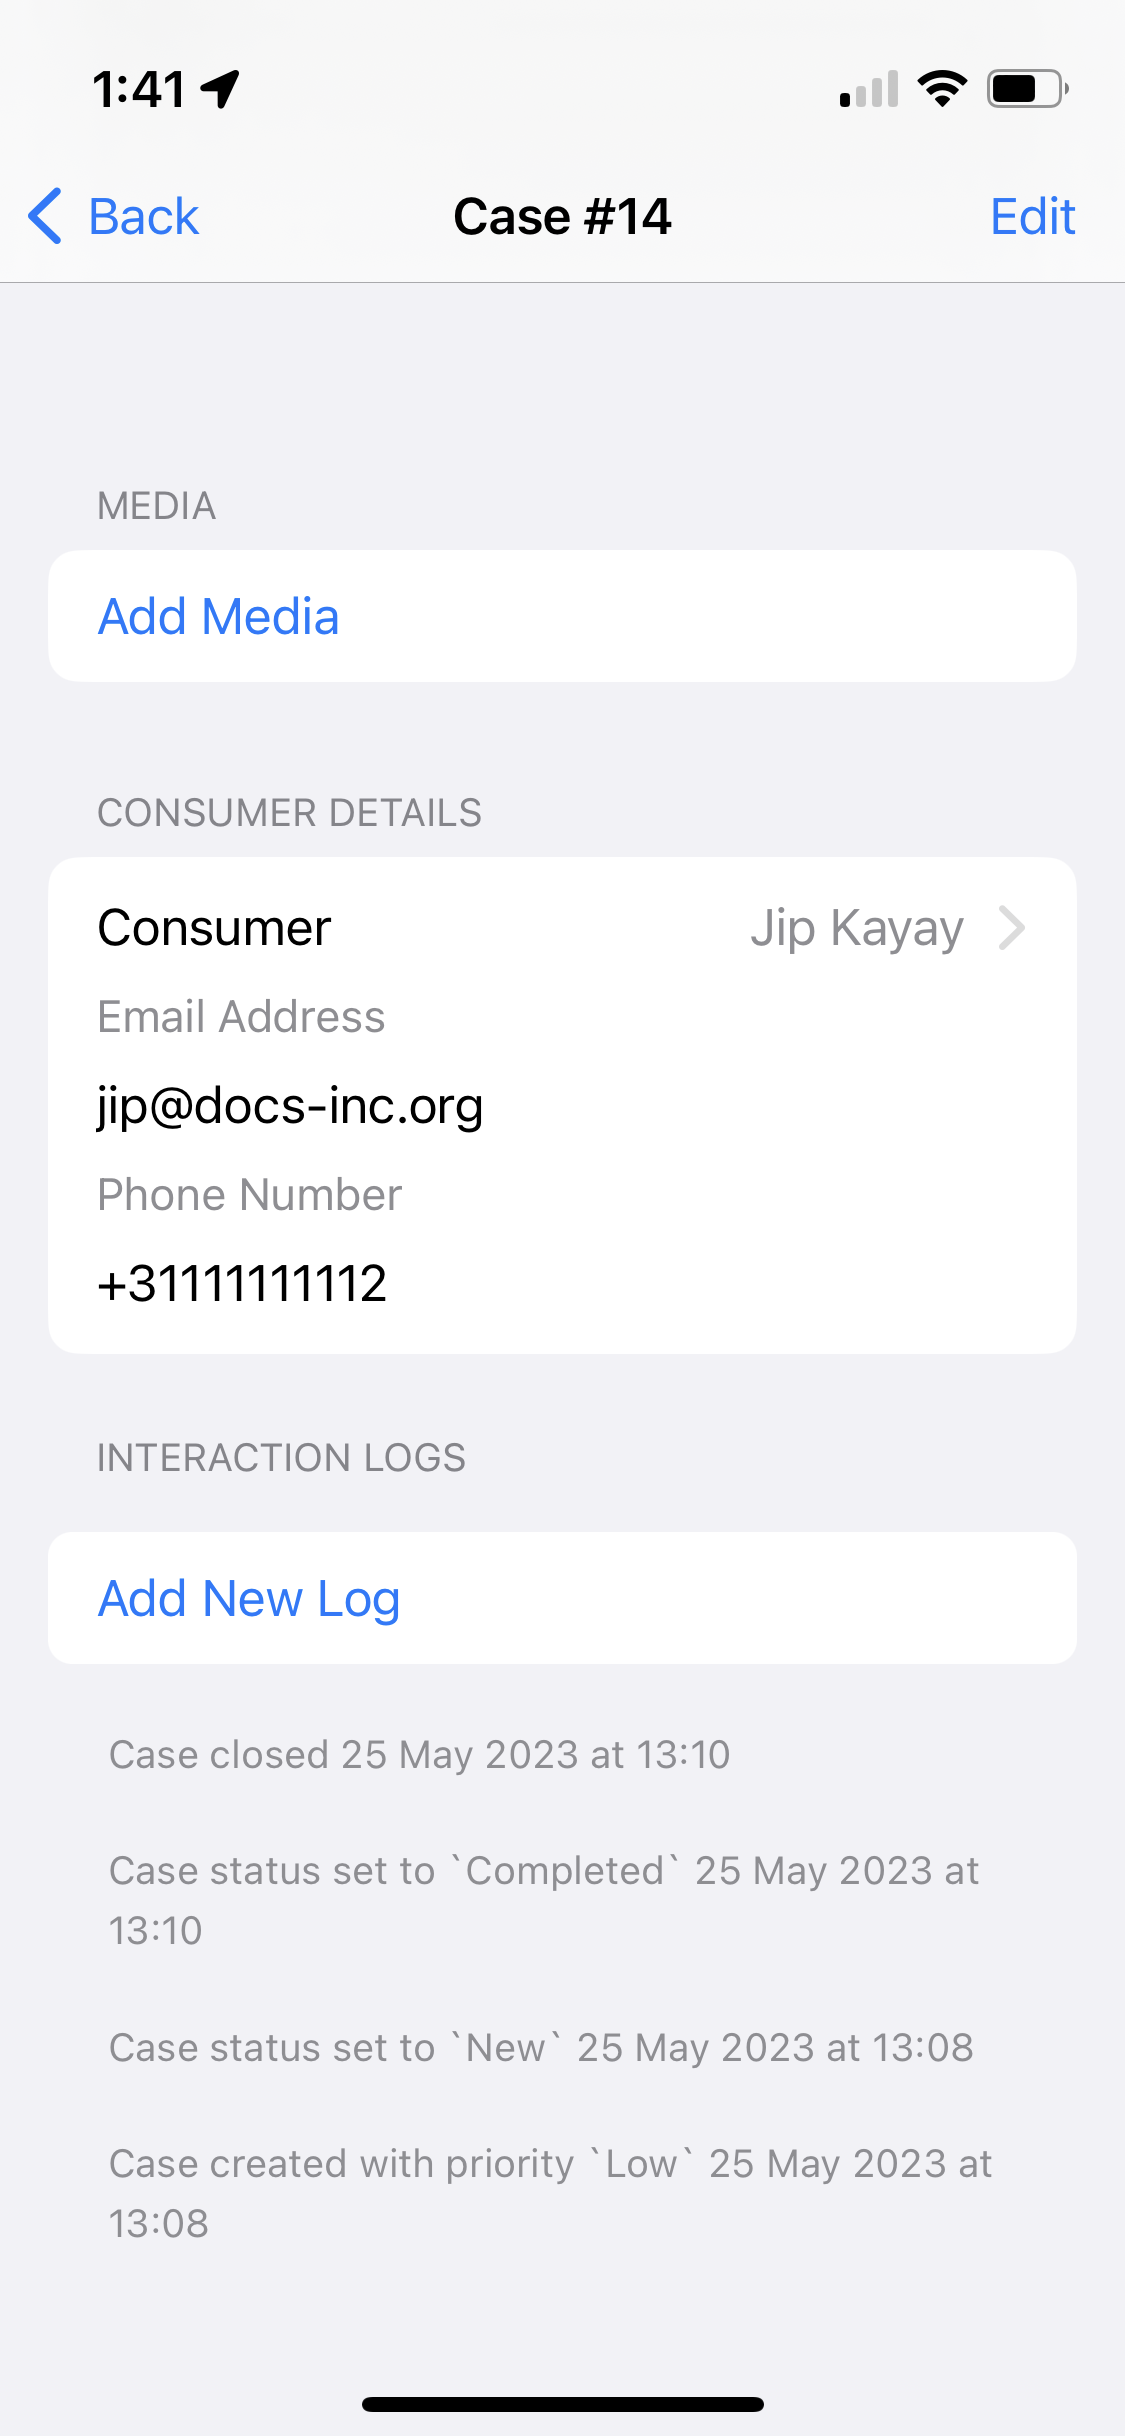
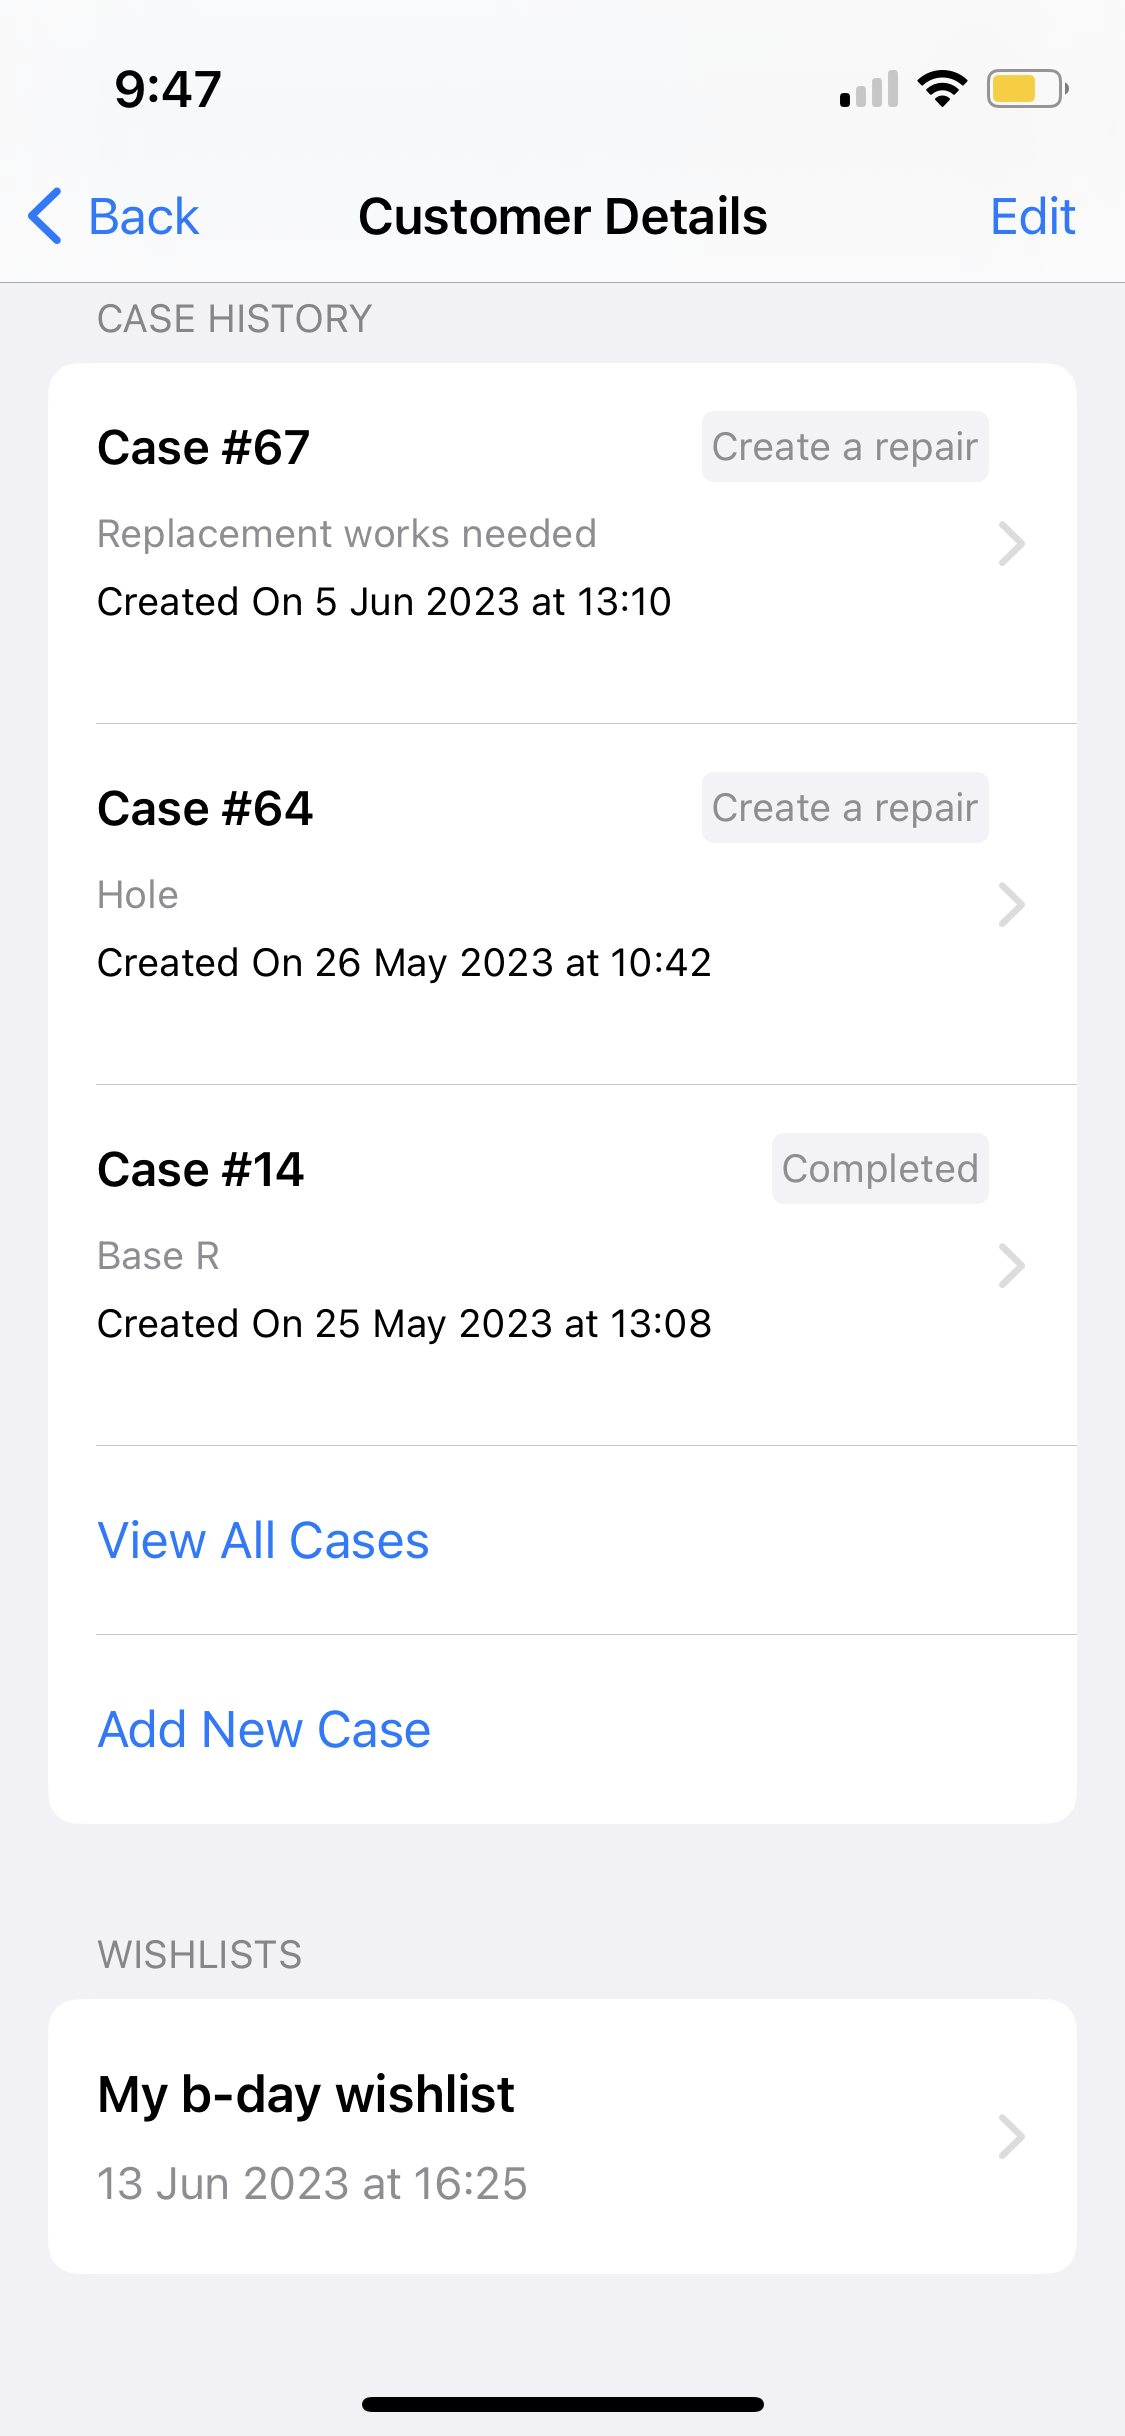
Cases
In order to be able to create cases, you need the Cases permission with scope View and Create. Other scopes like Edit, and Delete are needed to perform their respective actions.
Permissions are managed from the Roles and rights chapter namely, from the functionalities card of a users role.
Cases here work similarly to the Cases functionality of the Checkout App in terms of viewing, editing, and archiving, with one additional feature: the ability to Create New Case(s).
The Loyalty App follows the app setting App:Customer:ShowCases to determine the visibility of customer cases. The setting default is false, hiding the cases.
Check the Admin Suite section for more on Cases configuration.
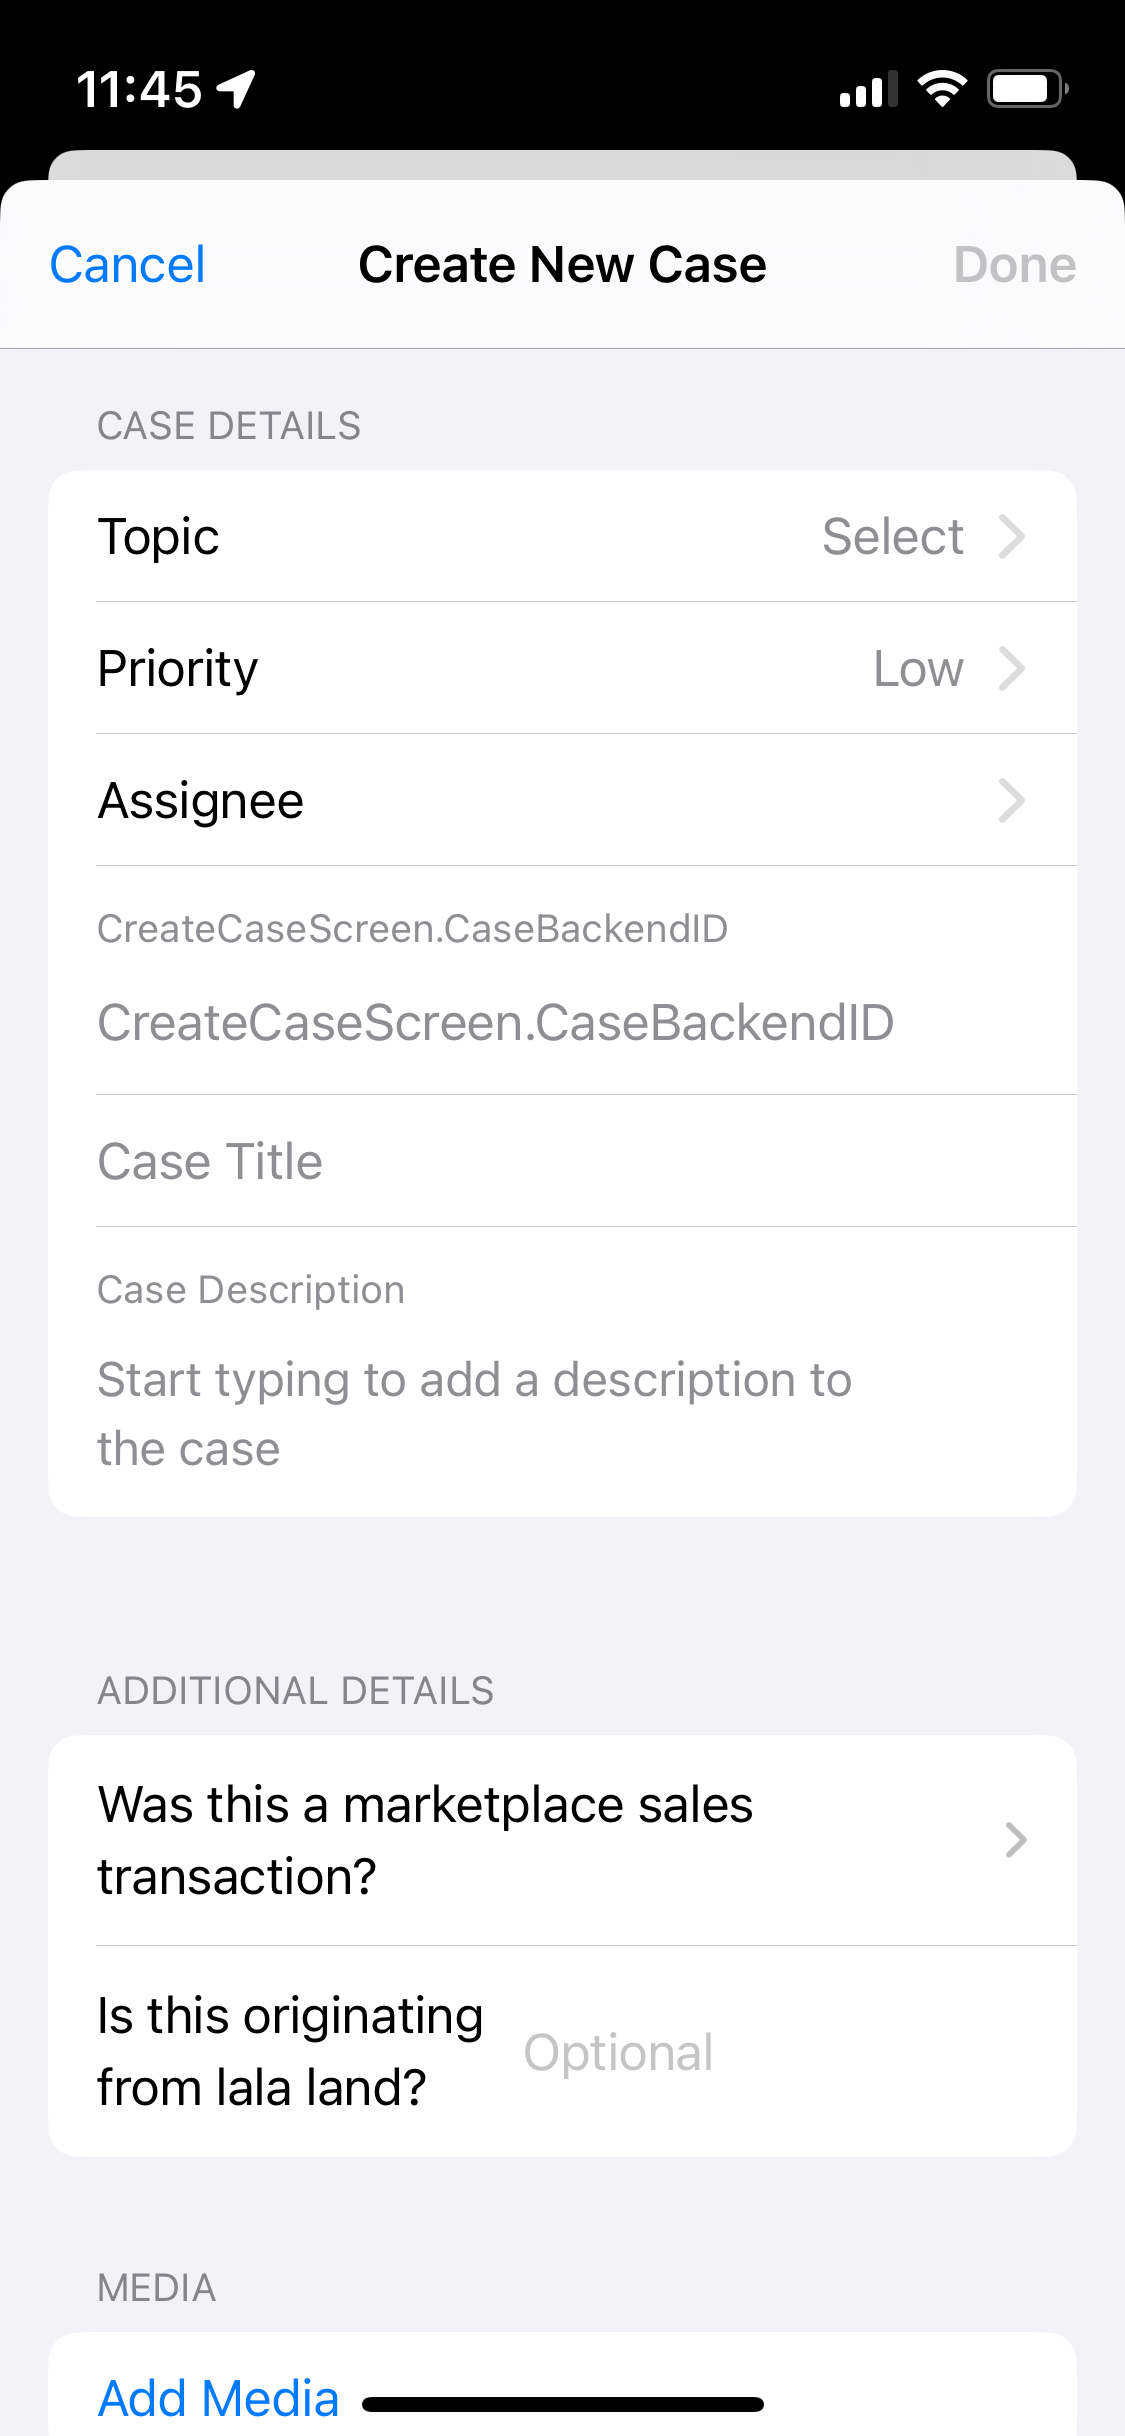
Create new case
The details required to be filled in are the same as described in the Cases section of the Checkout App. Add to those the option to attach Product or Order line using the Add Product or Order Line button.
Using the setting OverwriteCaseCustomerWithCustomerOfOrder and a value true (default is false) will allow a different customer to be tagged to a case than the customer who was originally tagged to the order.
Add Product or Order Line
There are three options that can be used to add a product to a case, as follows:
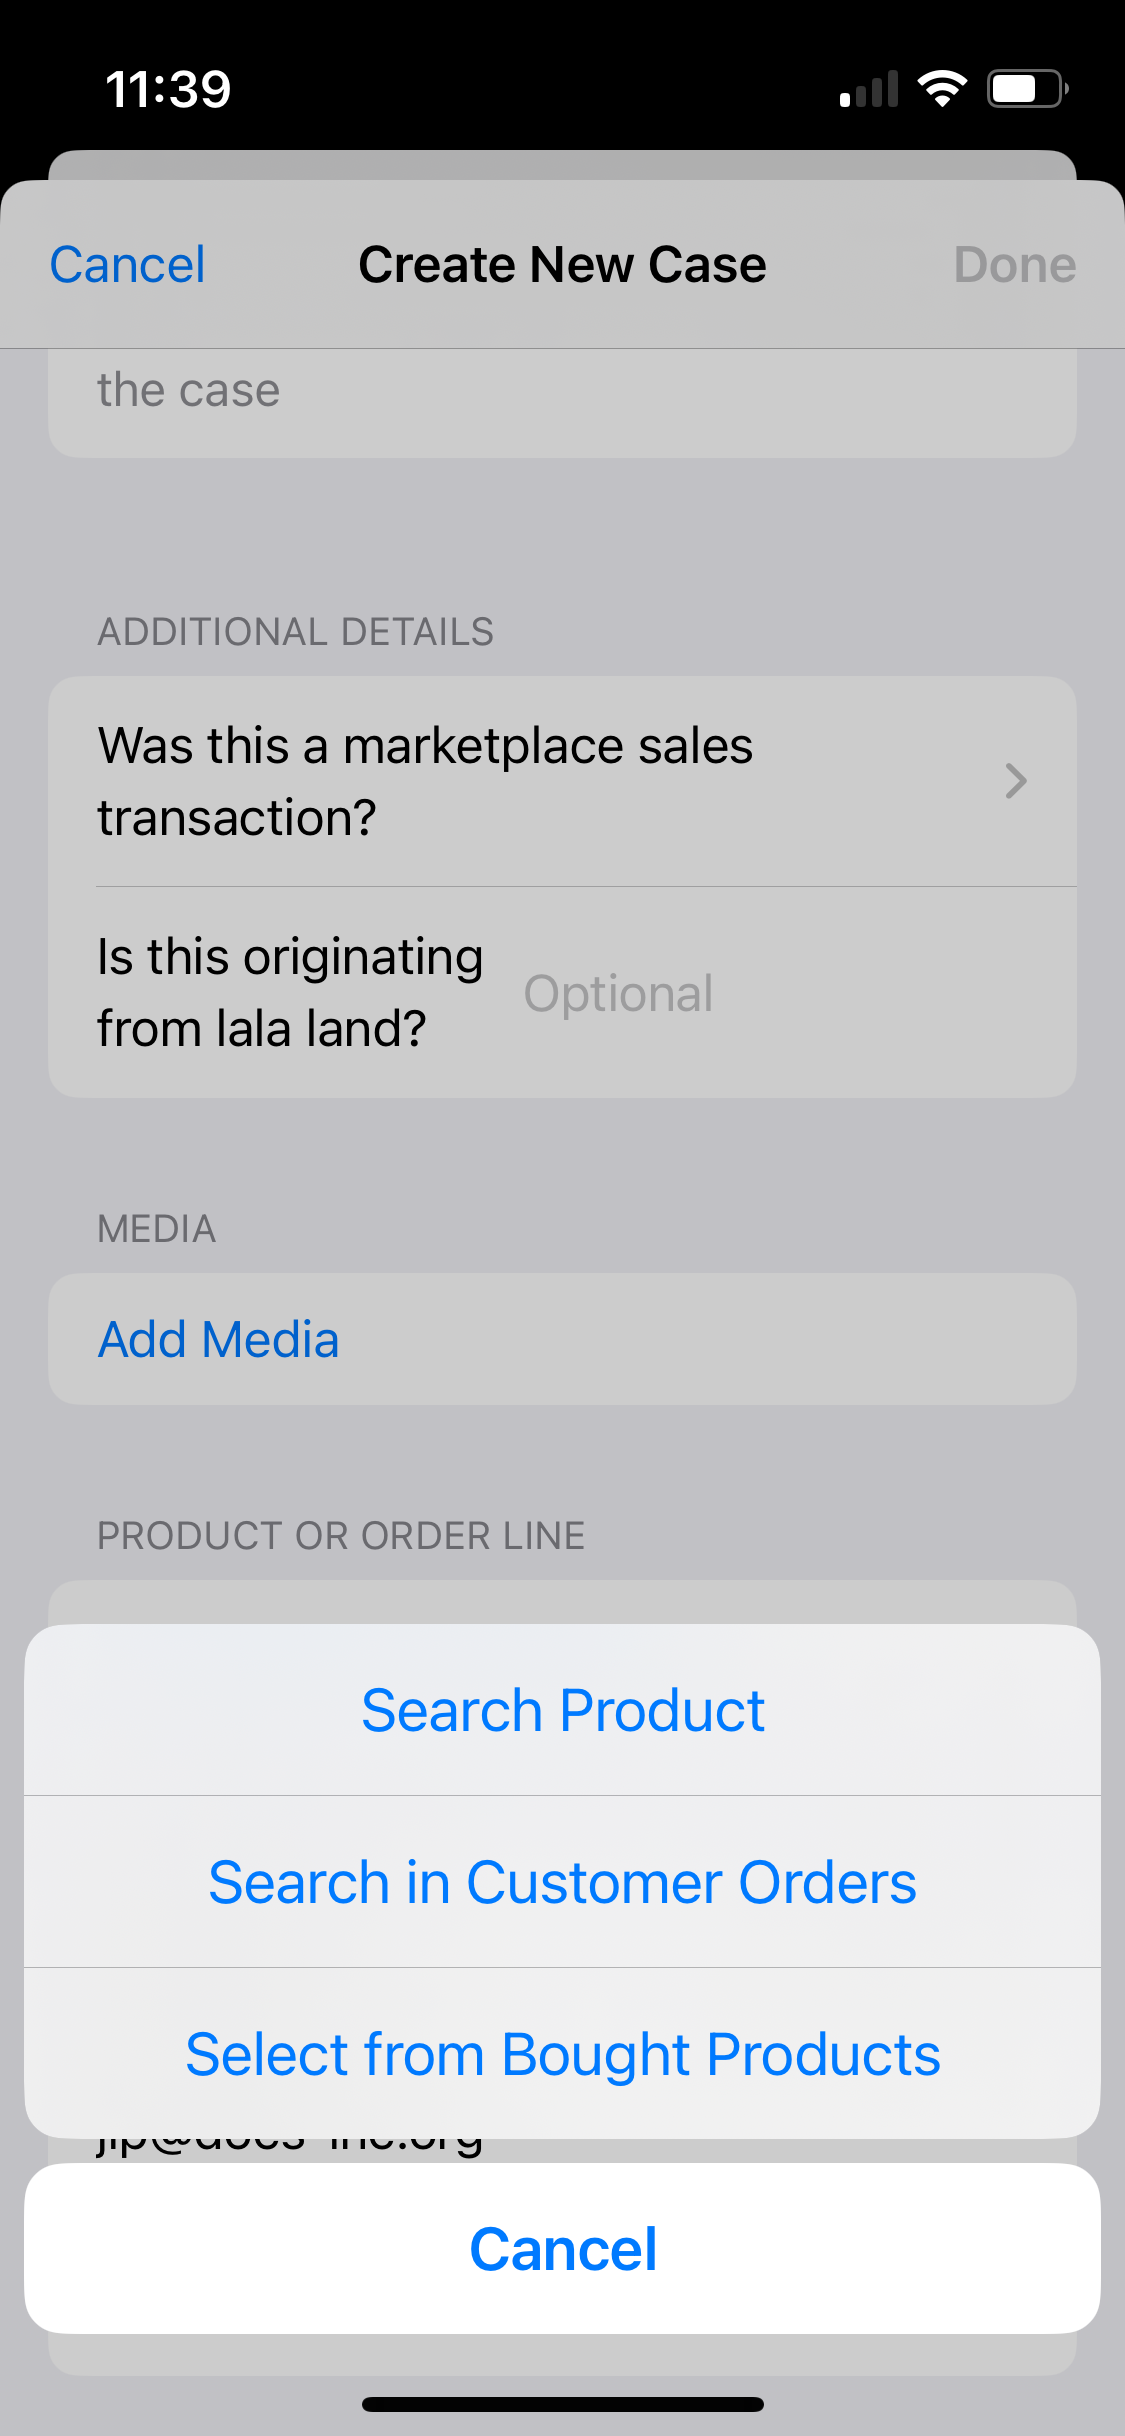
Search product
A search field is presented where you can scan a product or openly search for one using the search box. Once identified and thus selected, the product then becomes tagged to the underlying case being created.
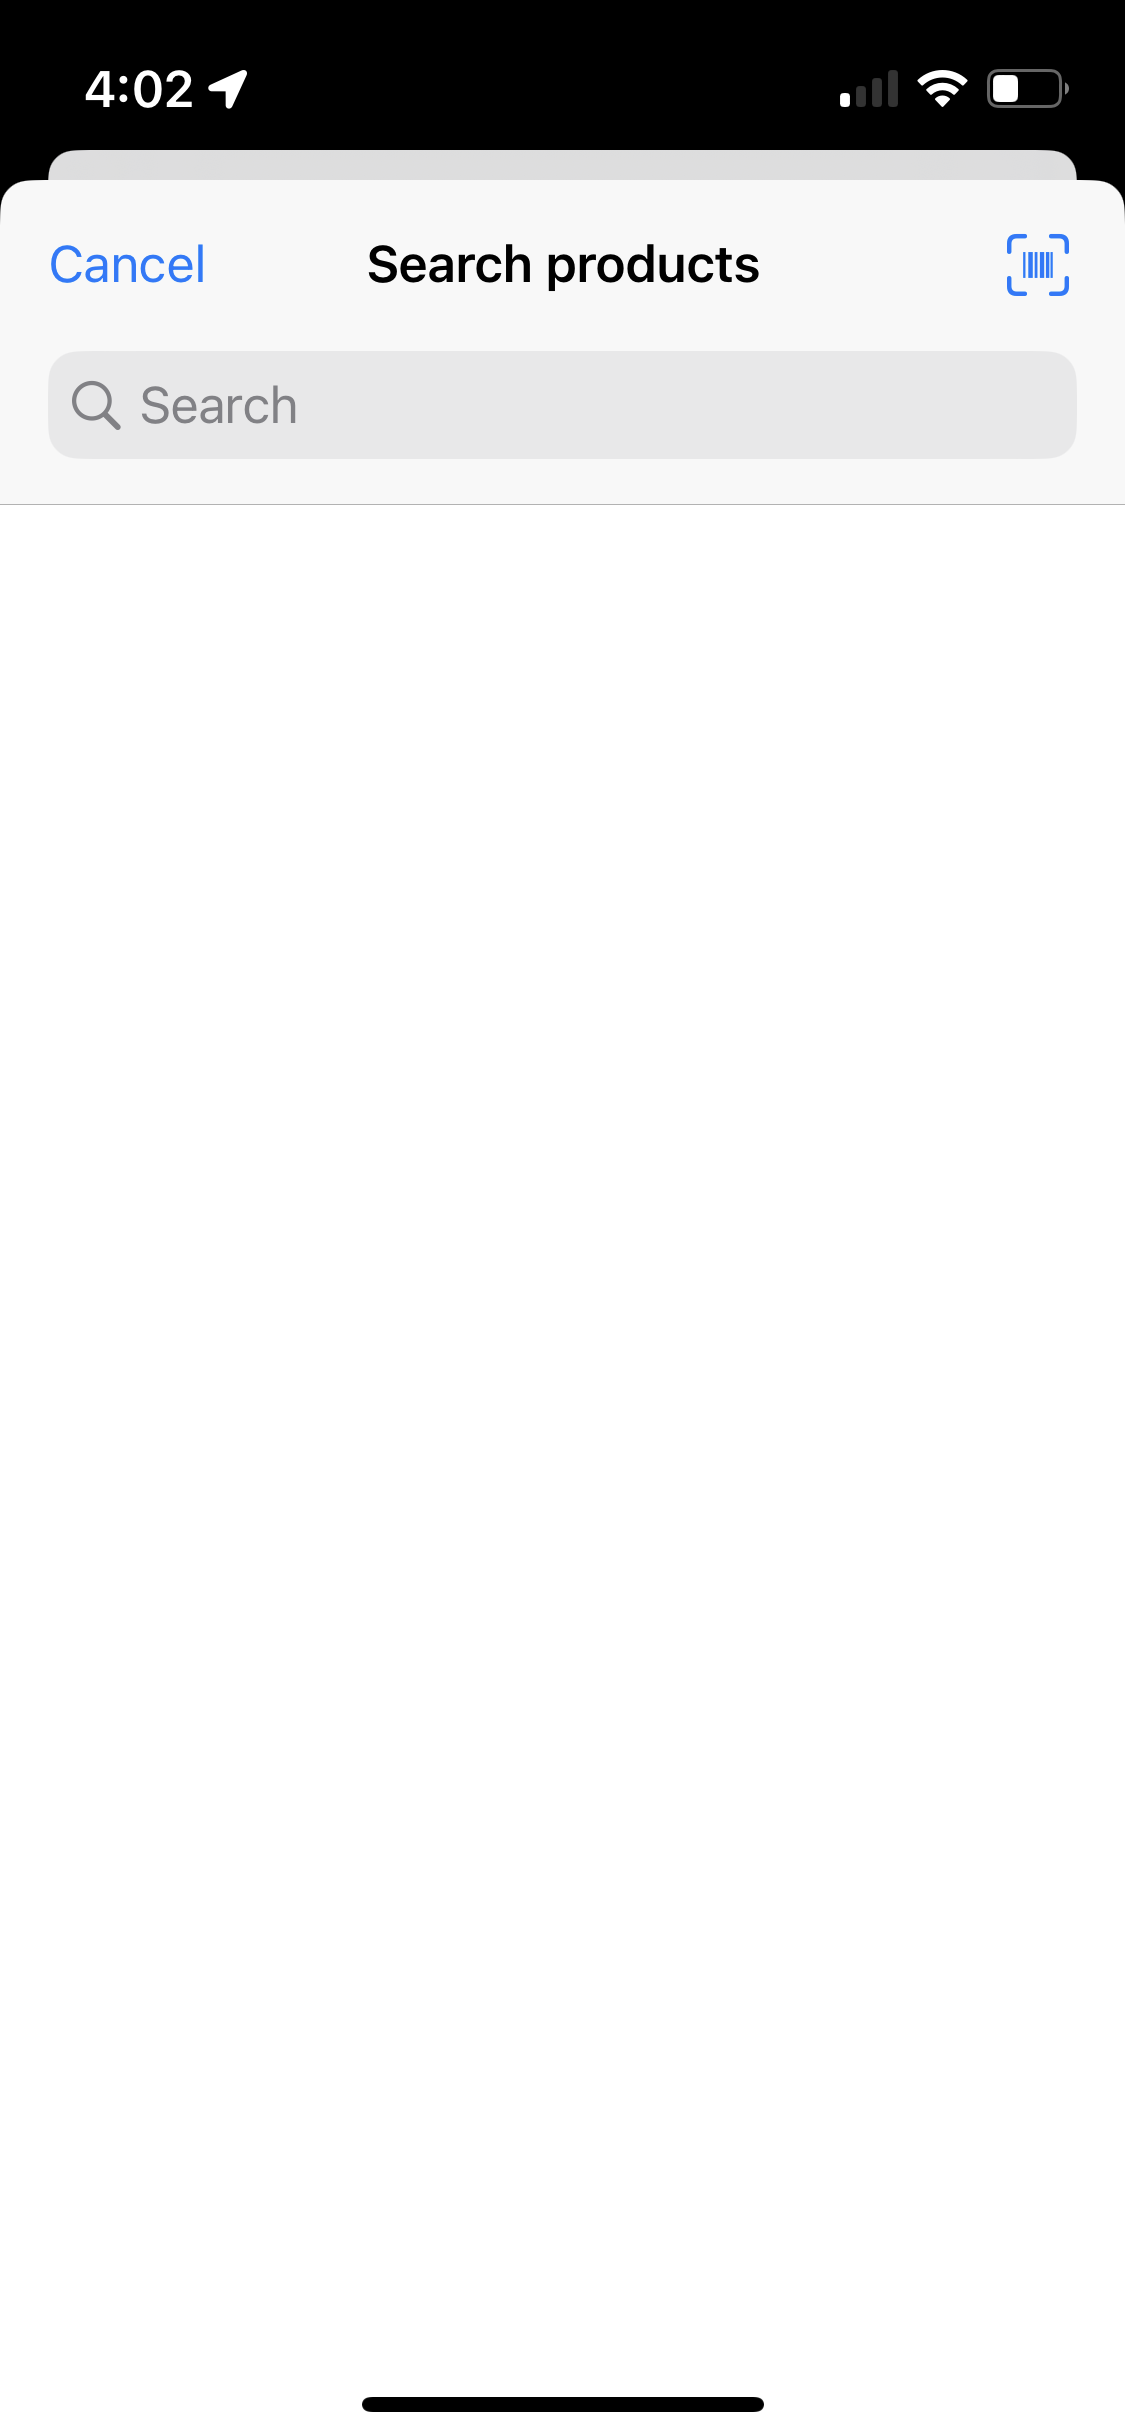
- The products selected will display the serial number (if applicable). Alternatively, a manual input or scan can be done (optional input).
- You can change what kind of Product ID is displayed.
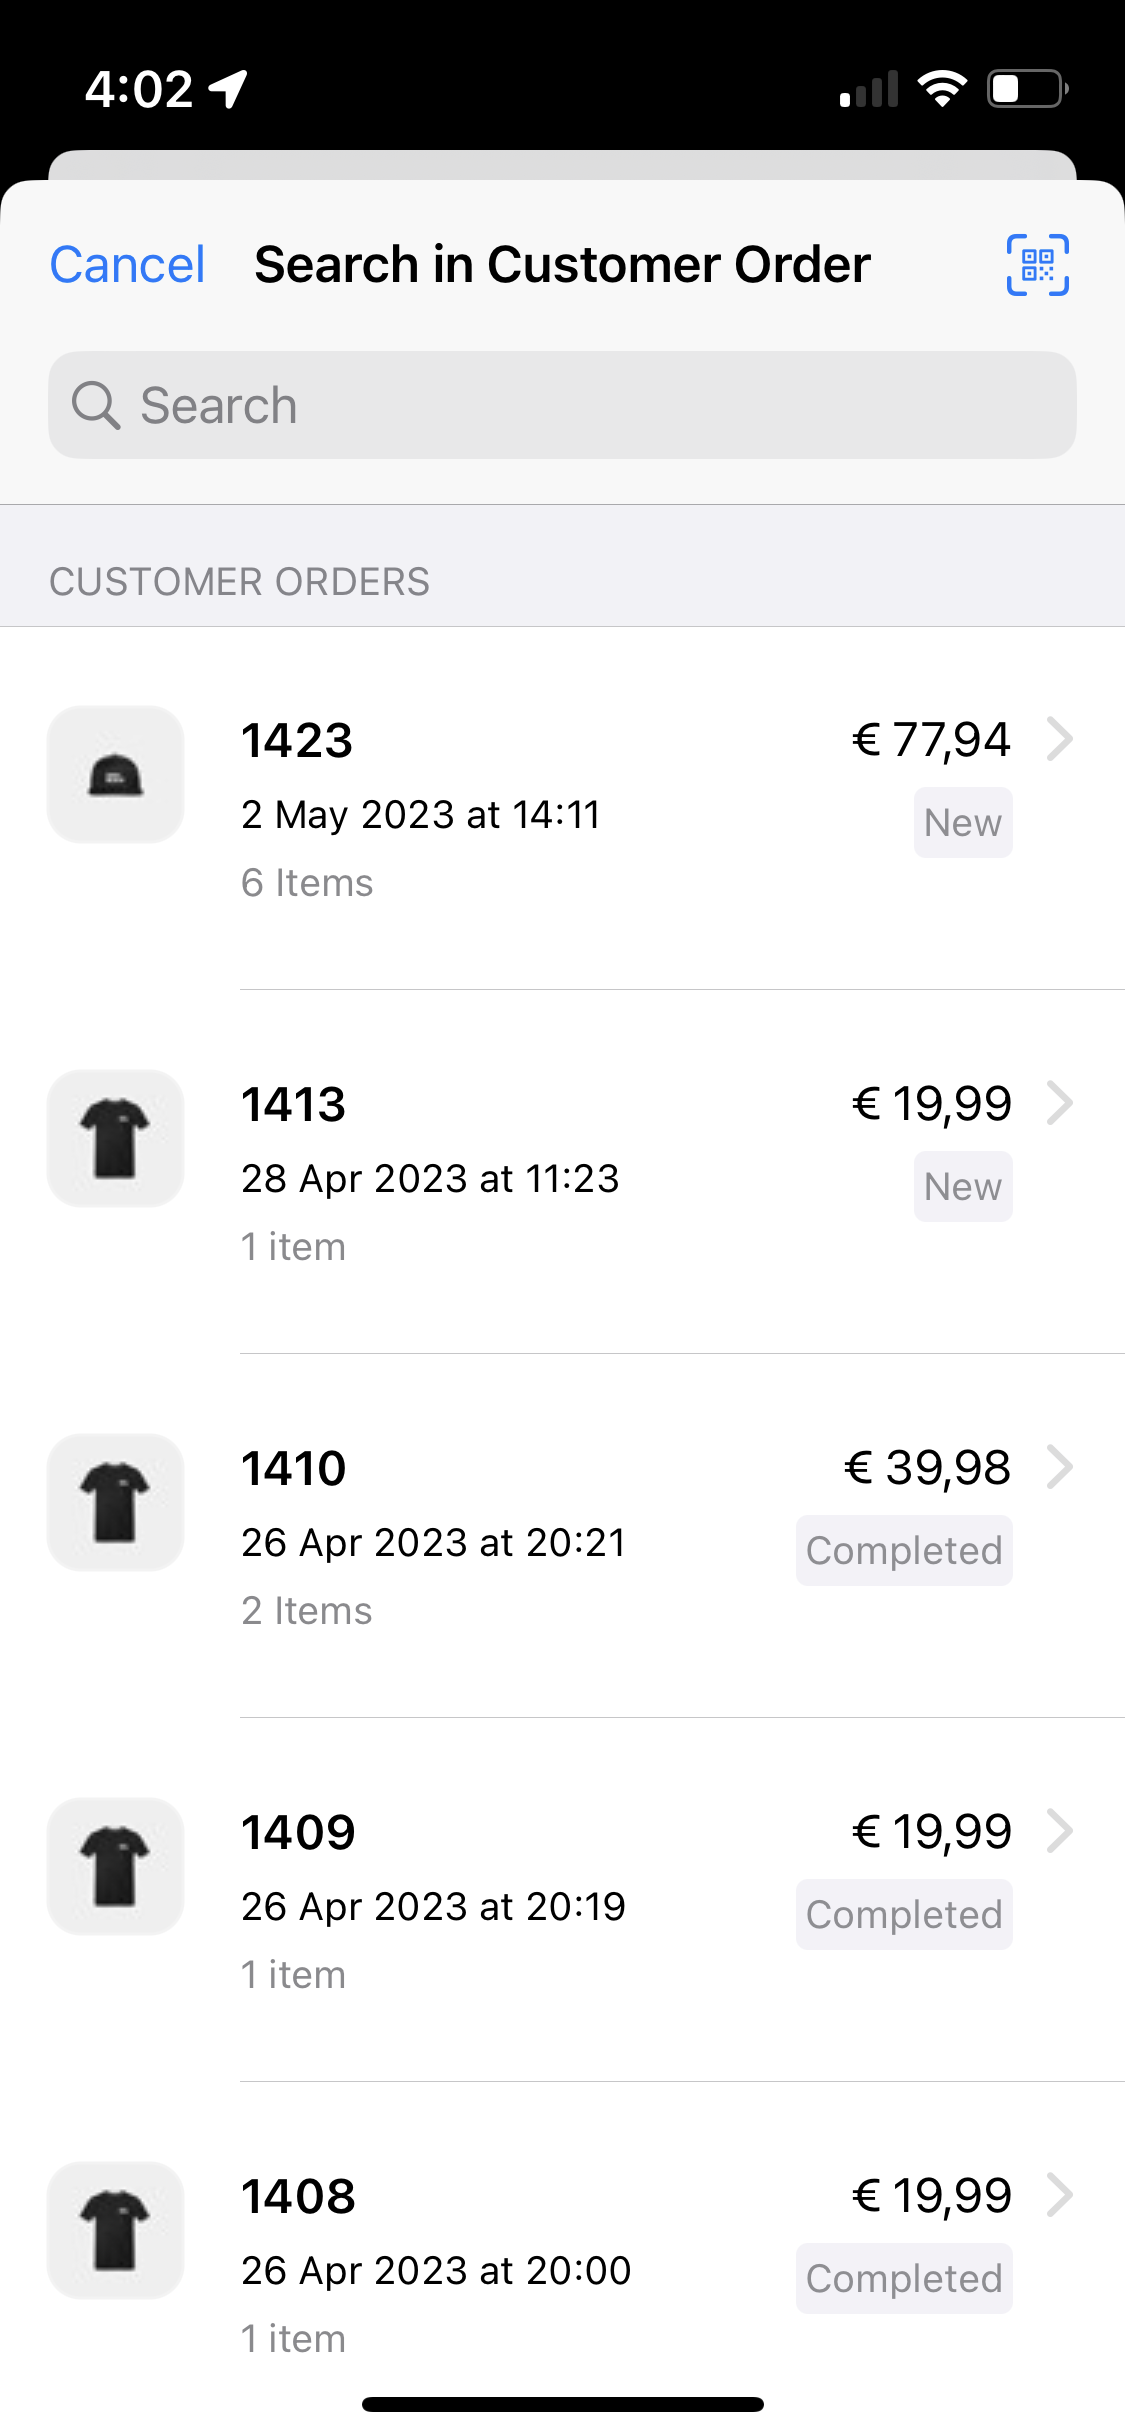
Search in customer order
A search field is presented where you can search through all orders pertaining to the chosen customer. Once identified and thus selected, the product then becomes tagged to the underlying case being created.
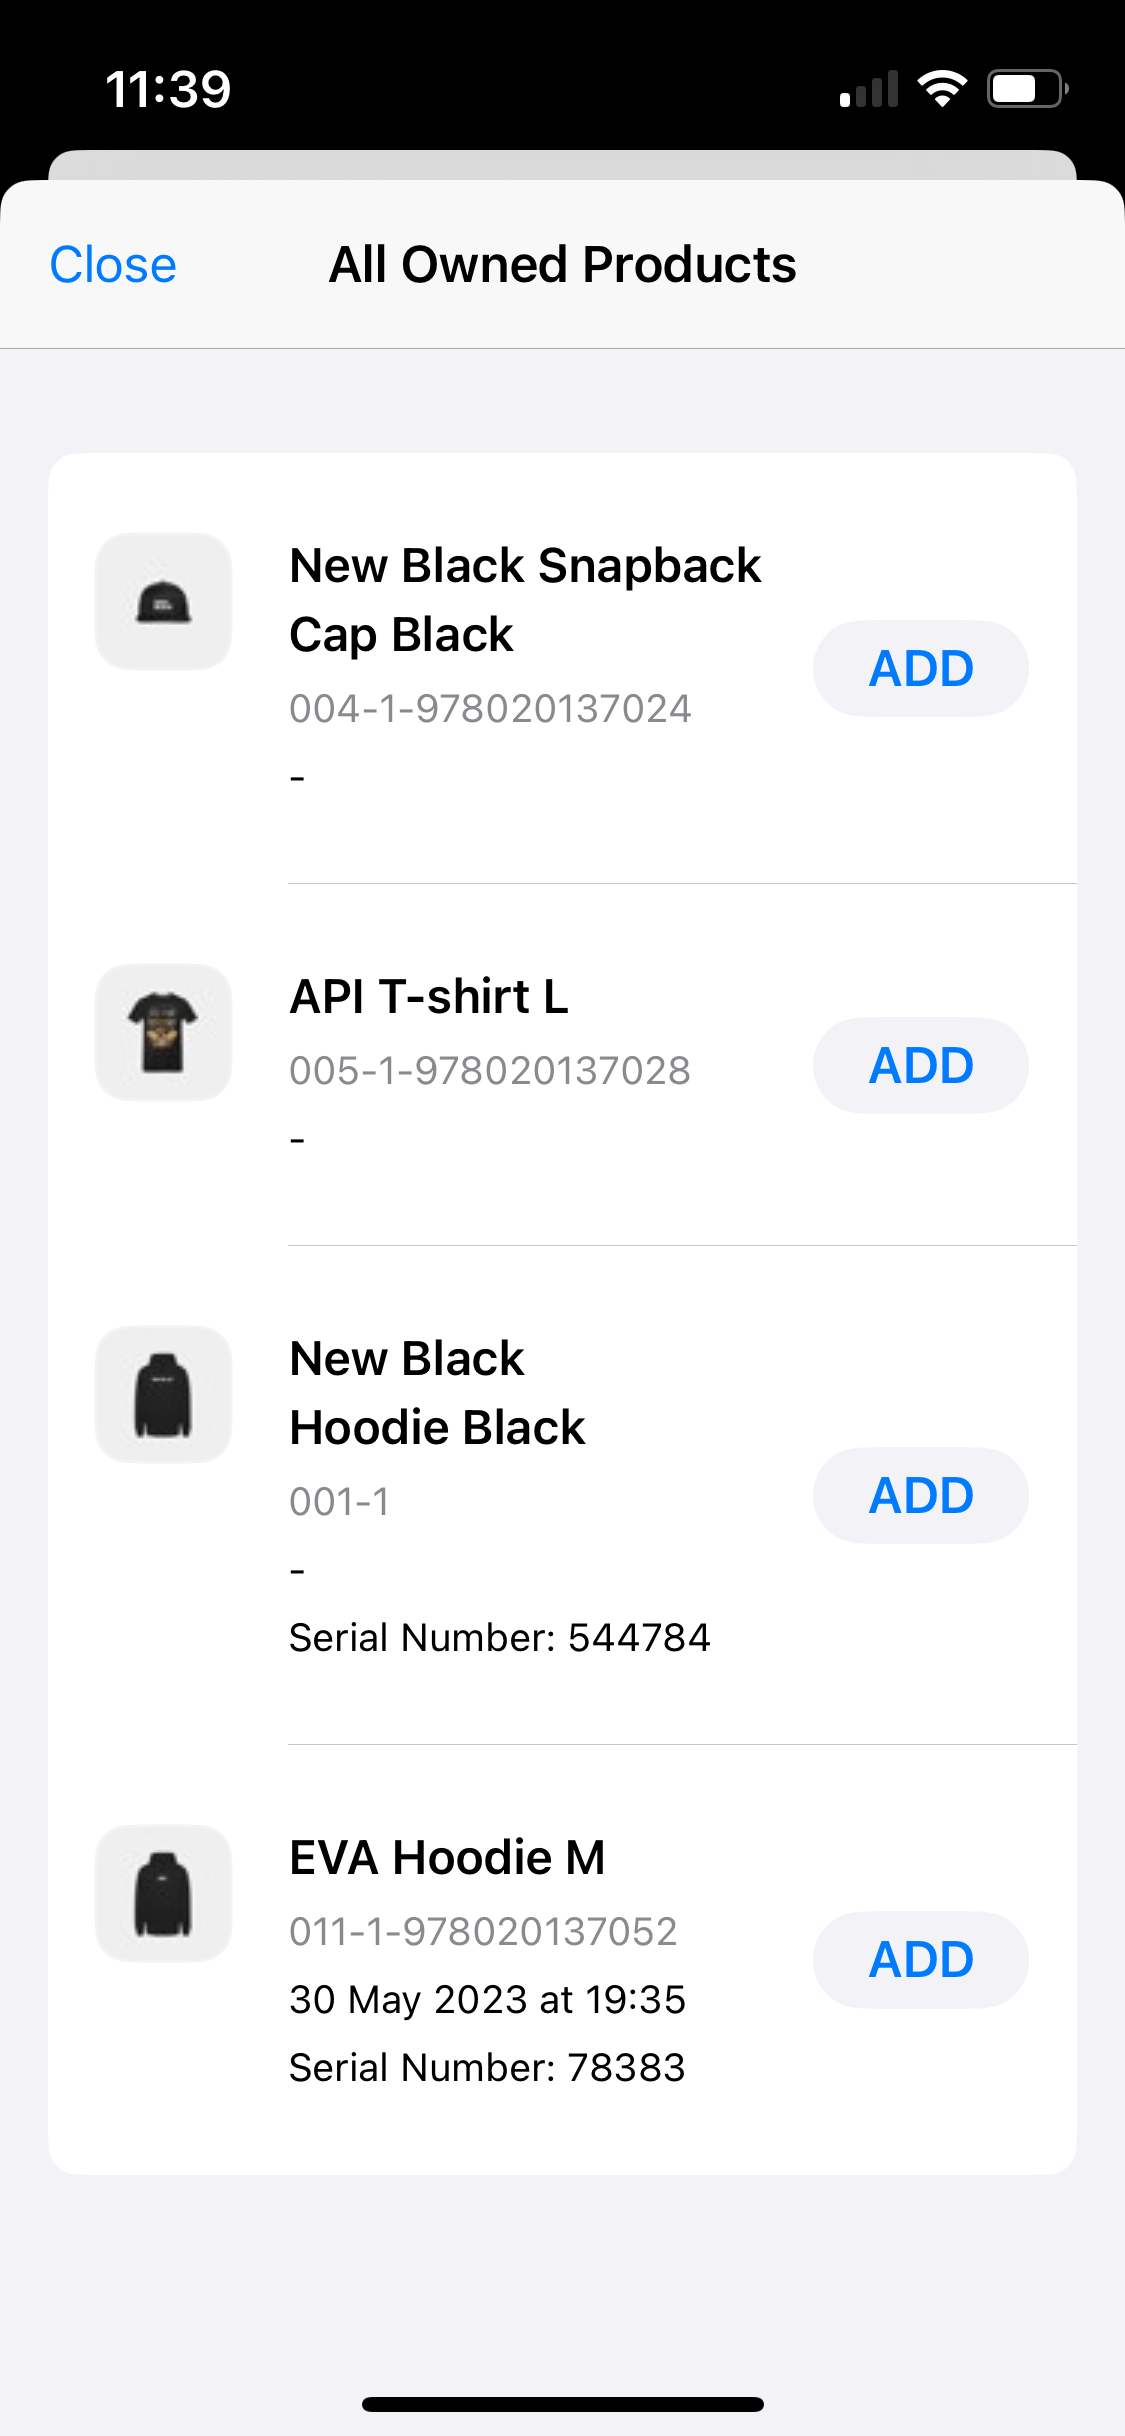
Select from bought products
The visibility of this search option is based on the users functionality/permissions and the value of the setting App:Customer:ShowBoughtProducts. More on this can be found here.
A list of all owned products by the customer will be displayed where you can simply tap one to add.
Interaction logs
The Interaction logs section provides an overview of the underlying case interactions (if any) as well as the option to Add new log.
The toggle button Show all related logs implies that repair related interaction logs (if any) would also be displayed if switched on.
Add new log
This is a multiline text field to fill as desired, and a radio button Message is Public.
Switching it on implies that the message will be shared with the consumer via email.
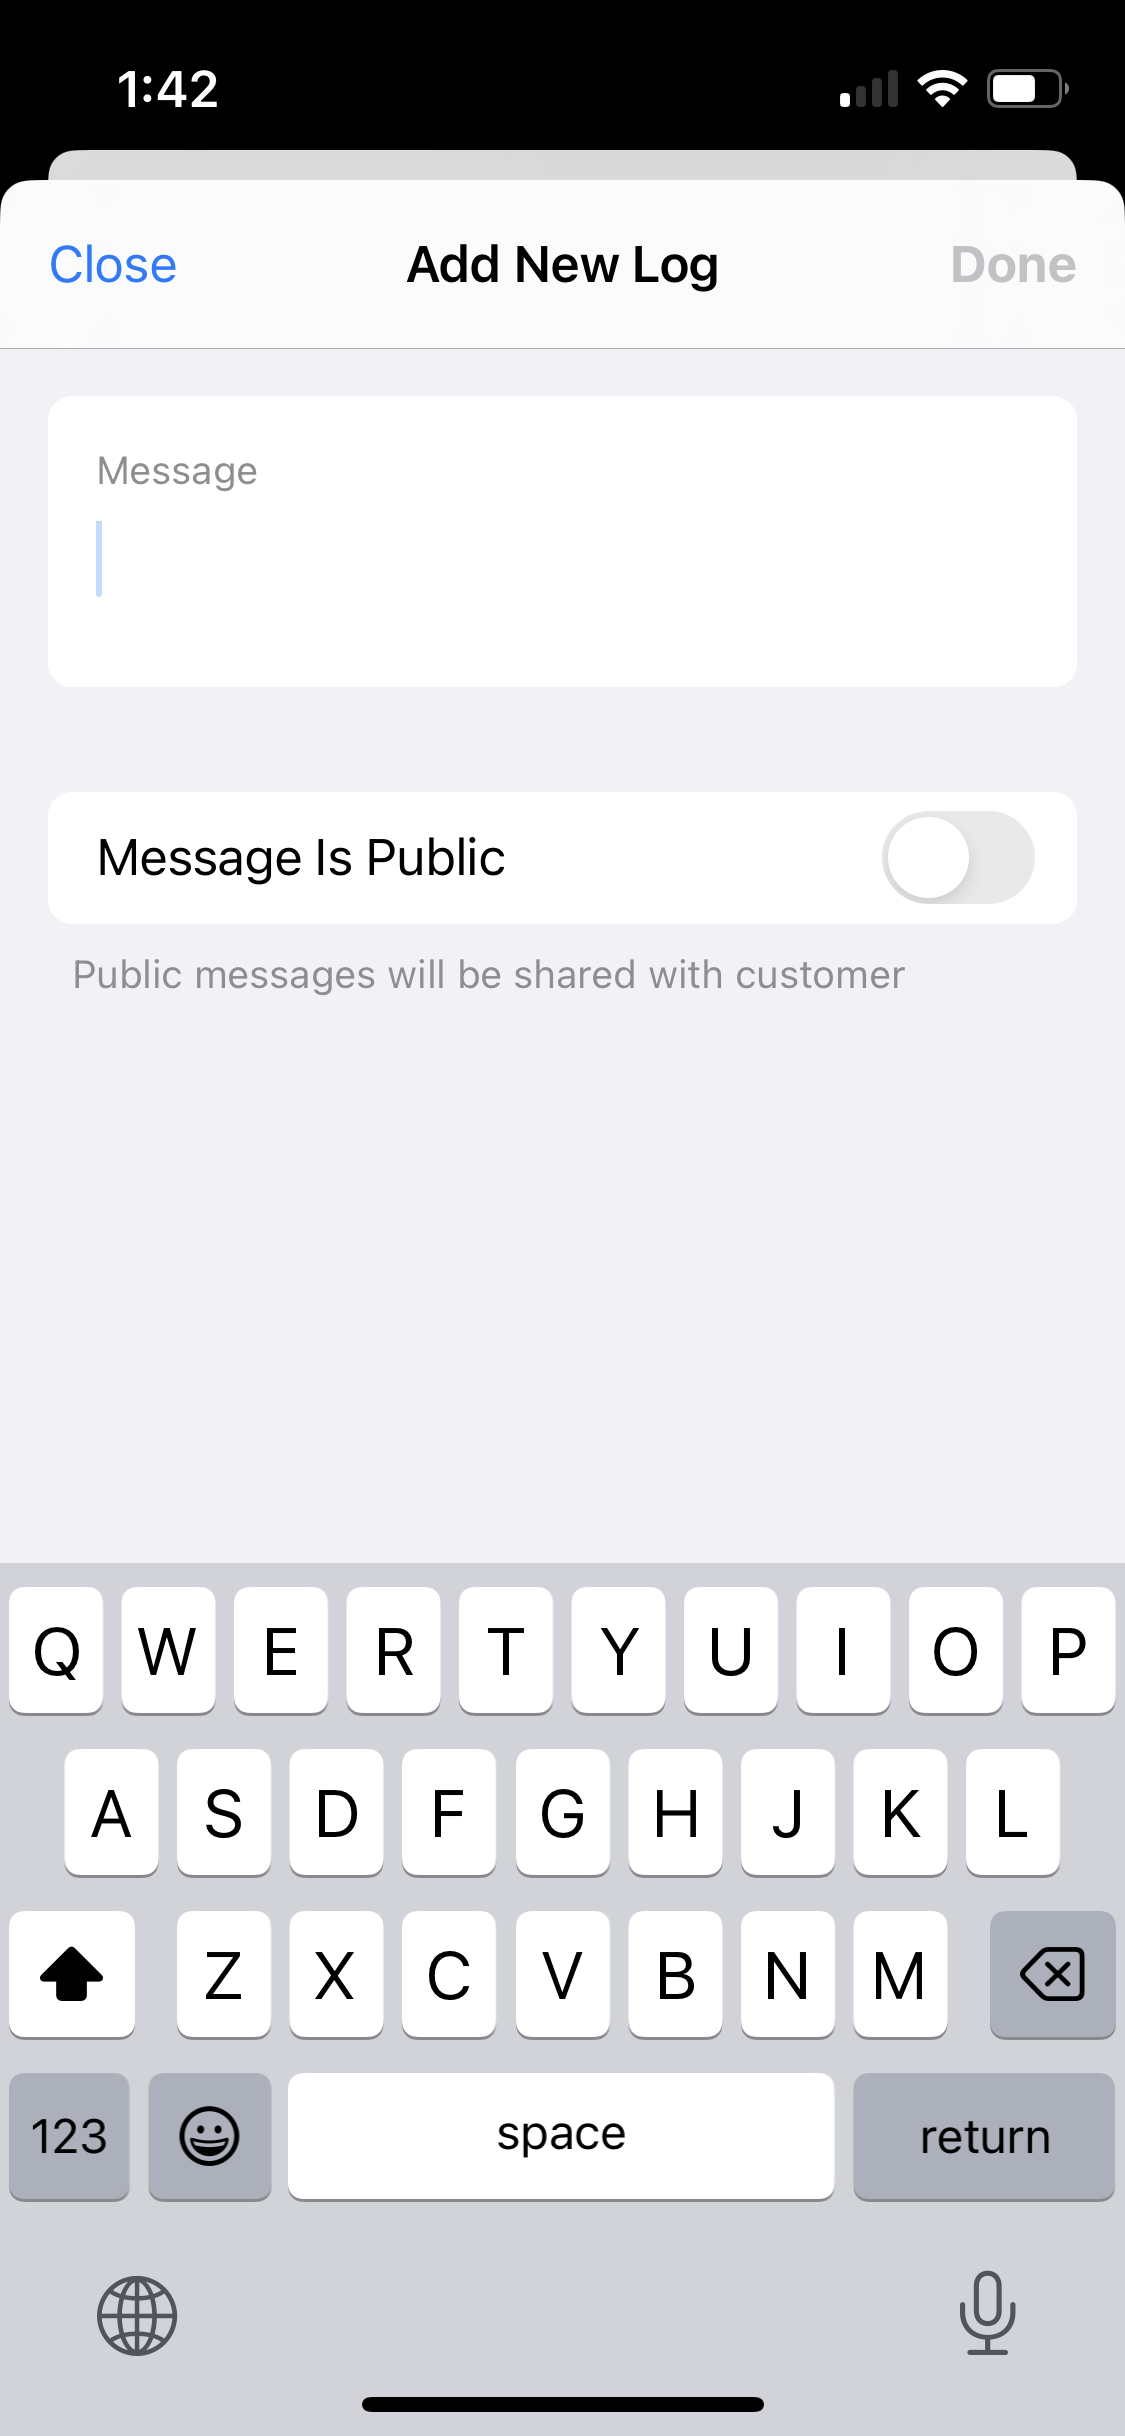
If you'll be using the Message is Public feature, make sure the respective case stencil is set up.
Case status
The Case Status button provides a dropdown list of available Case statuses based on your configuration or default ones. From here, you can change the status as desired.
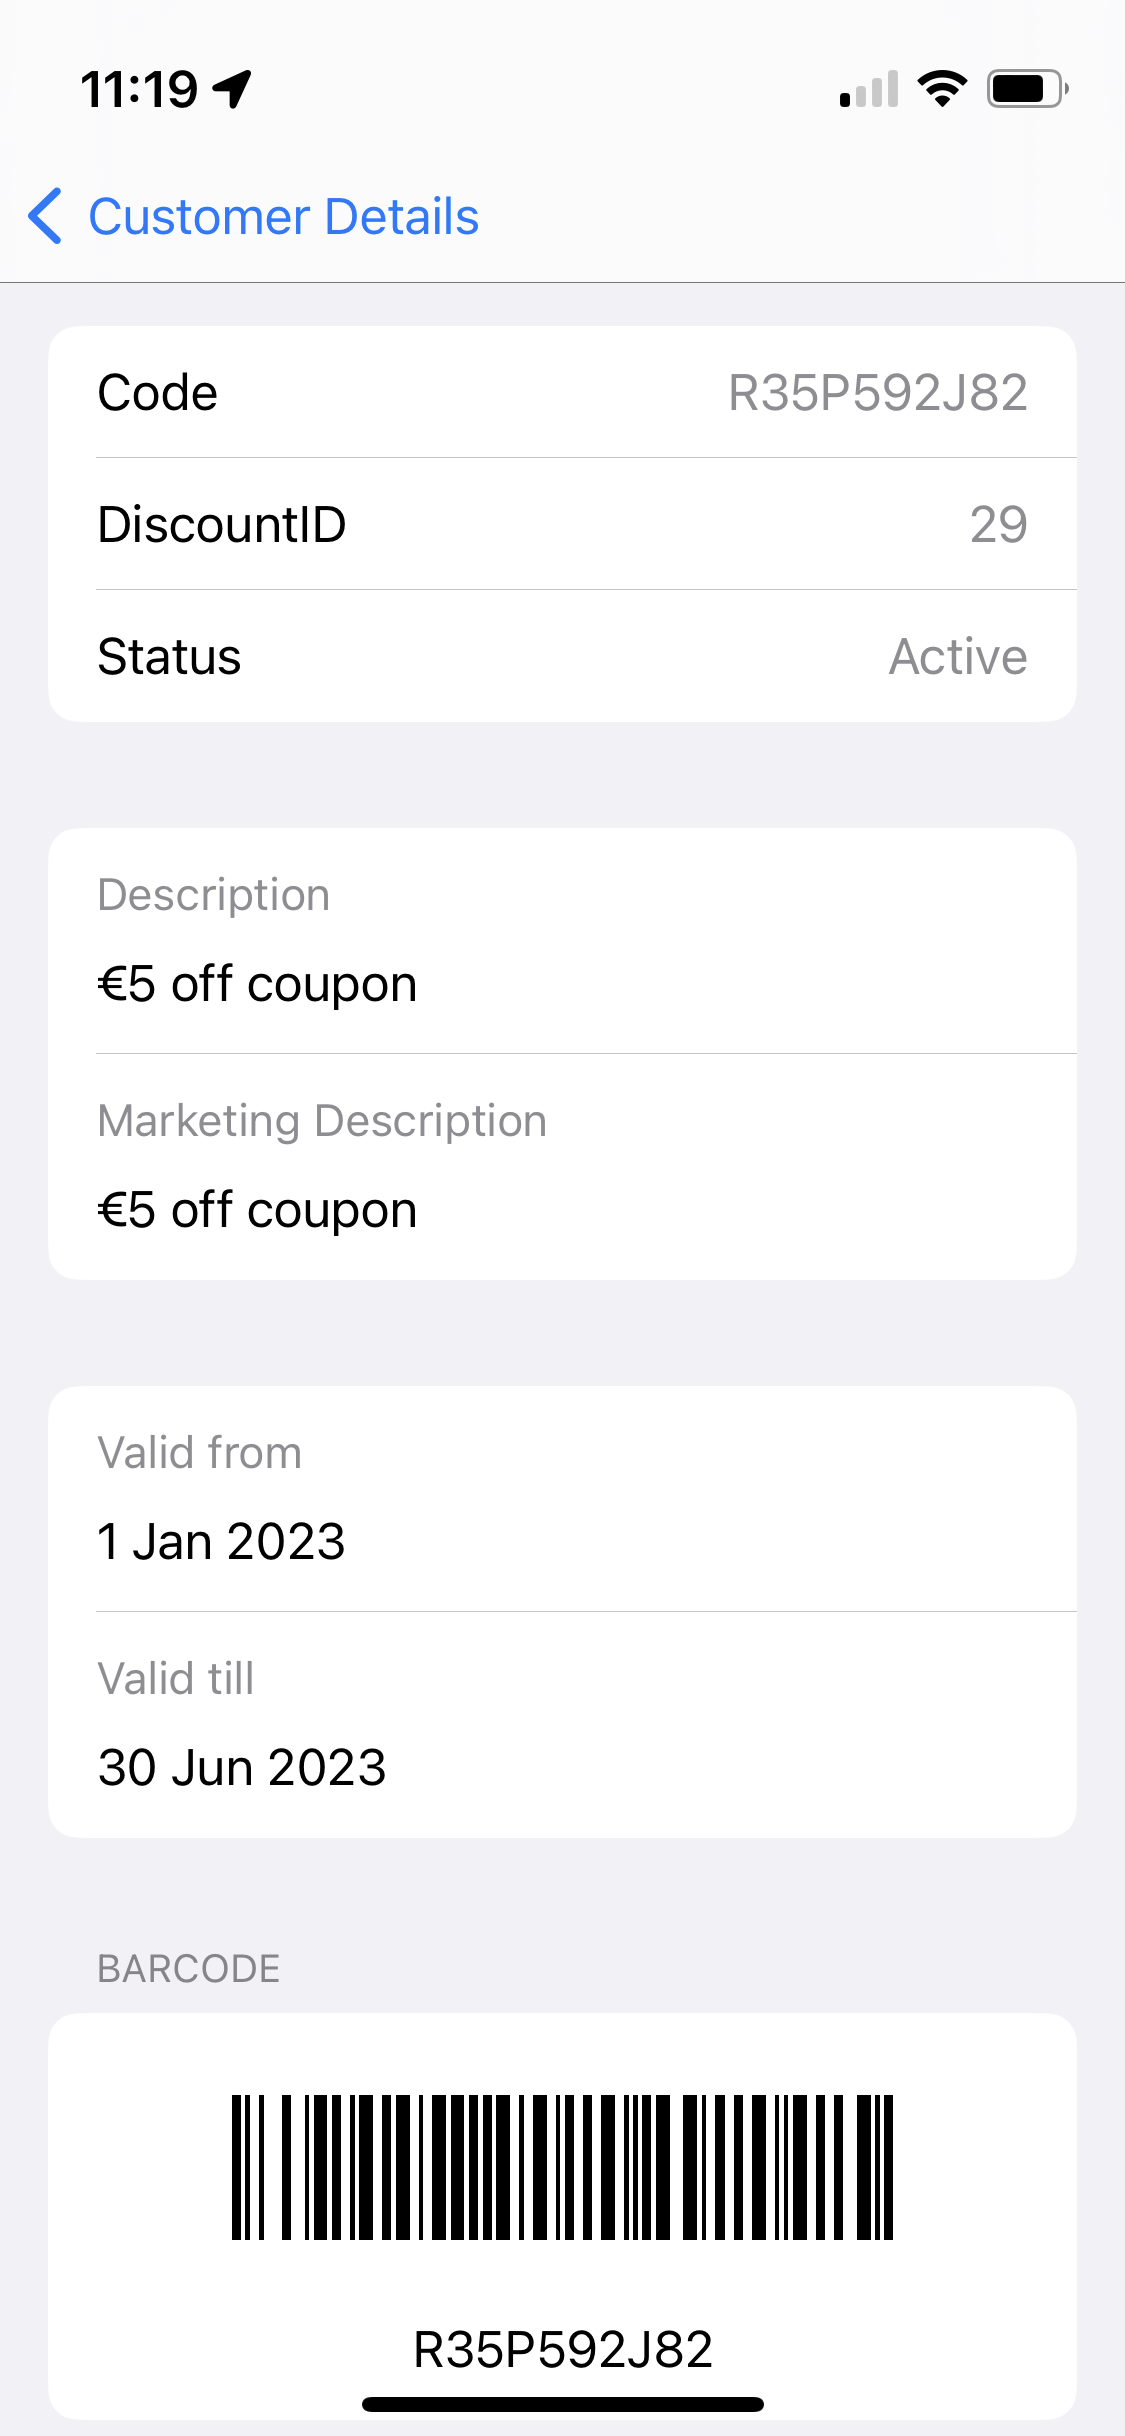
Coupons
In order to be able to view user coupons, you need the DiscountCoupons permission with scope View
Permissions are managed from the Roles and rights chapter namely, from the functionalities card of a users role.
View all customer coupons regardless the status (expired or active).
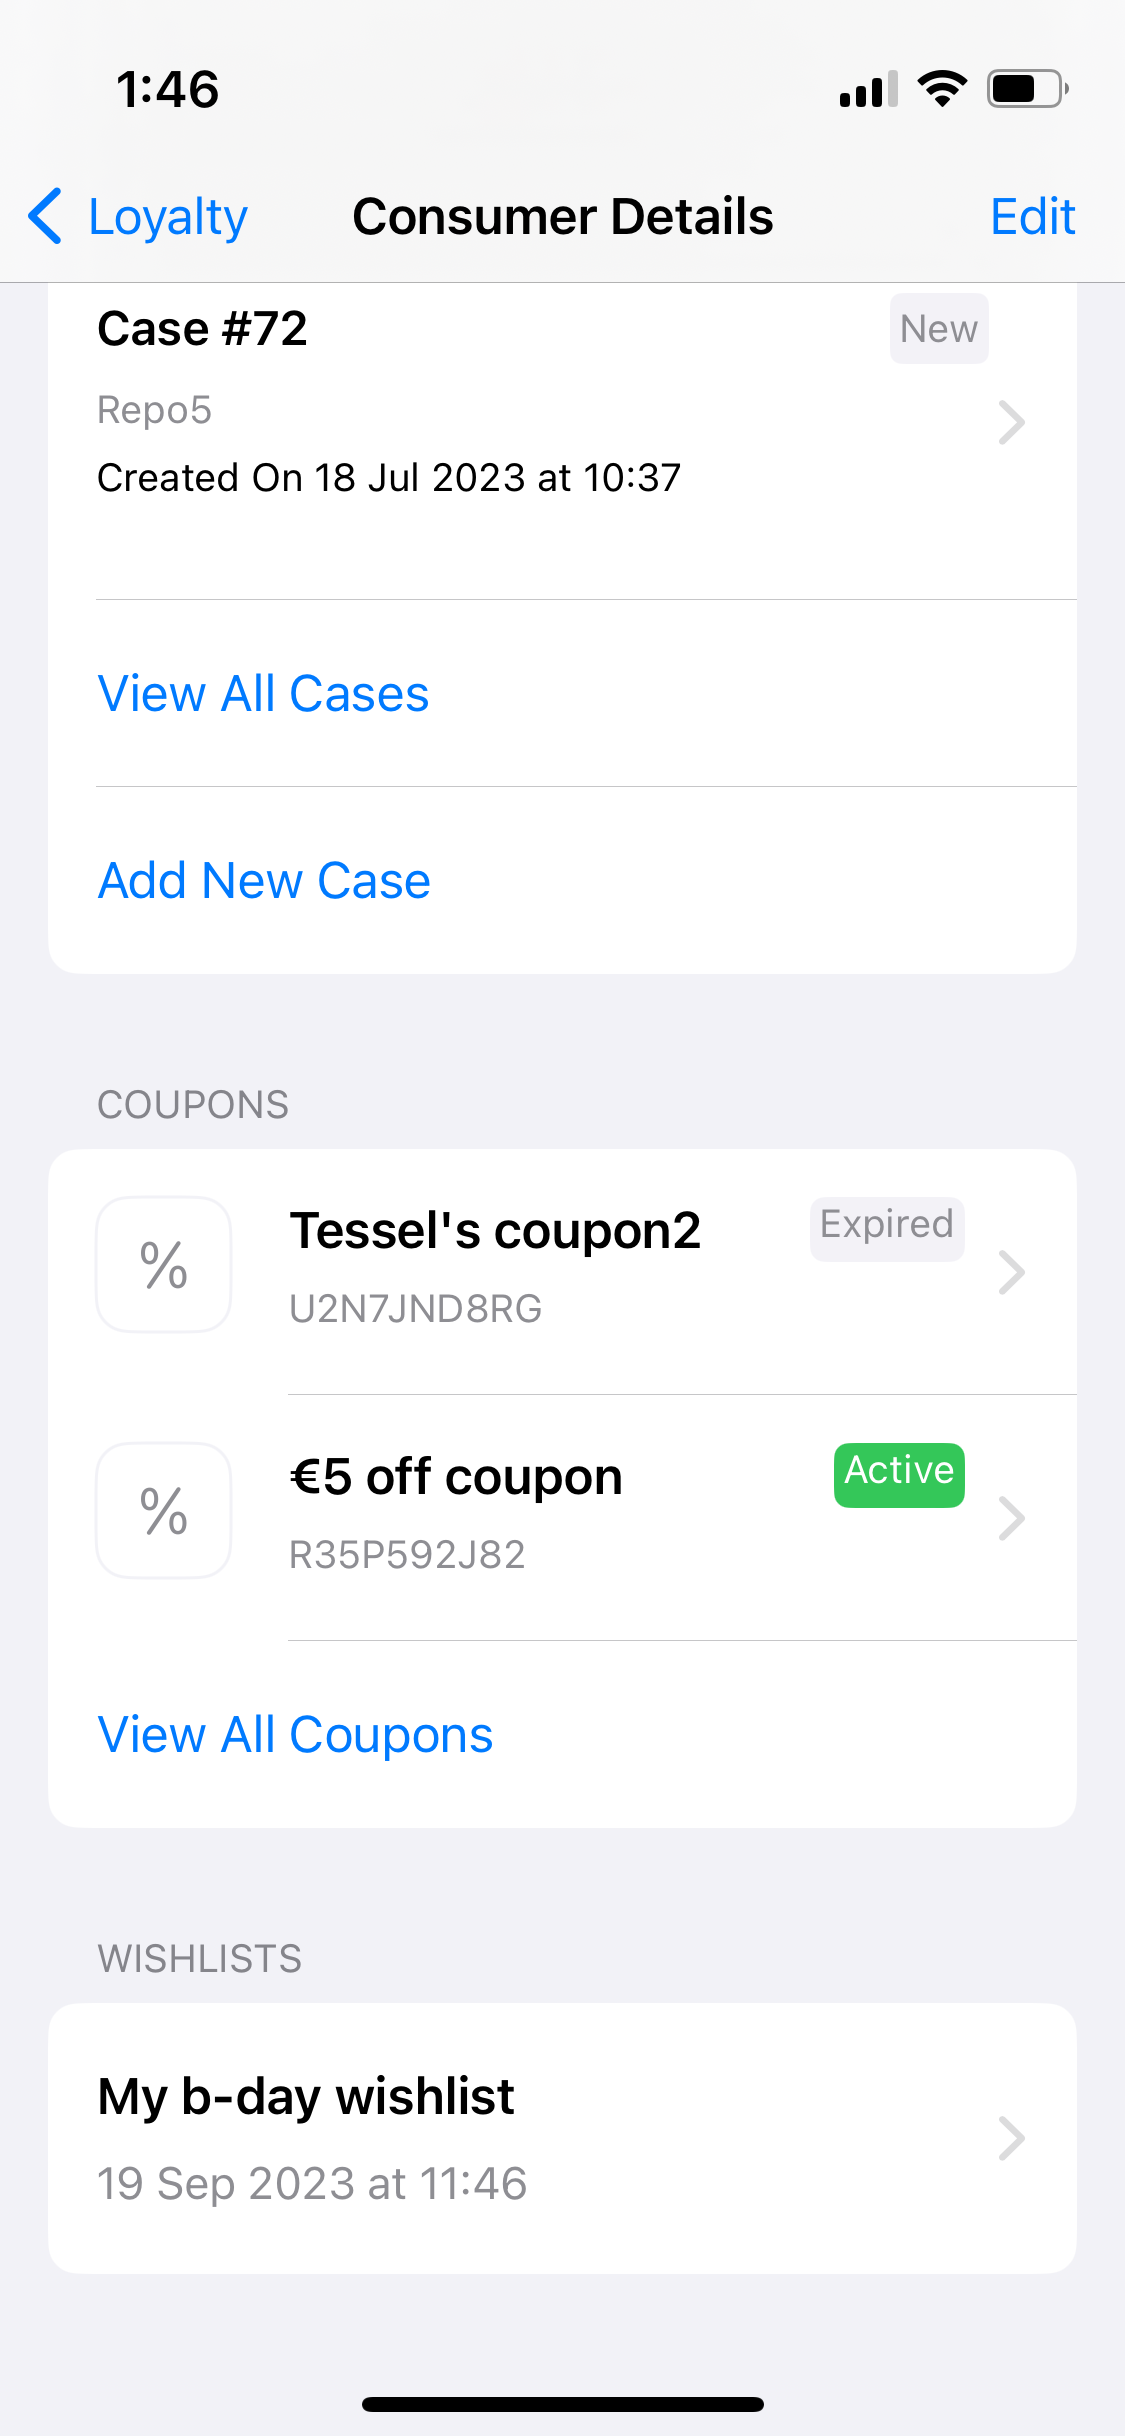
Tapping one would display additional data as shown here:
Wishlists
The Wishlists section is only shown if the App setting App:WishLists:Enabled is set with a value true, and if at least one wishlist exists. More on how to add an App setting can be found here.
View customer wishlist(s) (if any) in the Wishlists section.
By tapping a wishlist you'll be presented with a brief description, relative dates, and the wishlist items.
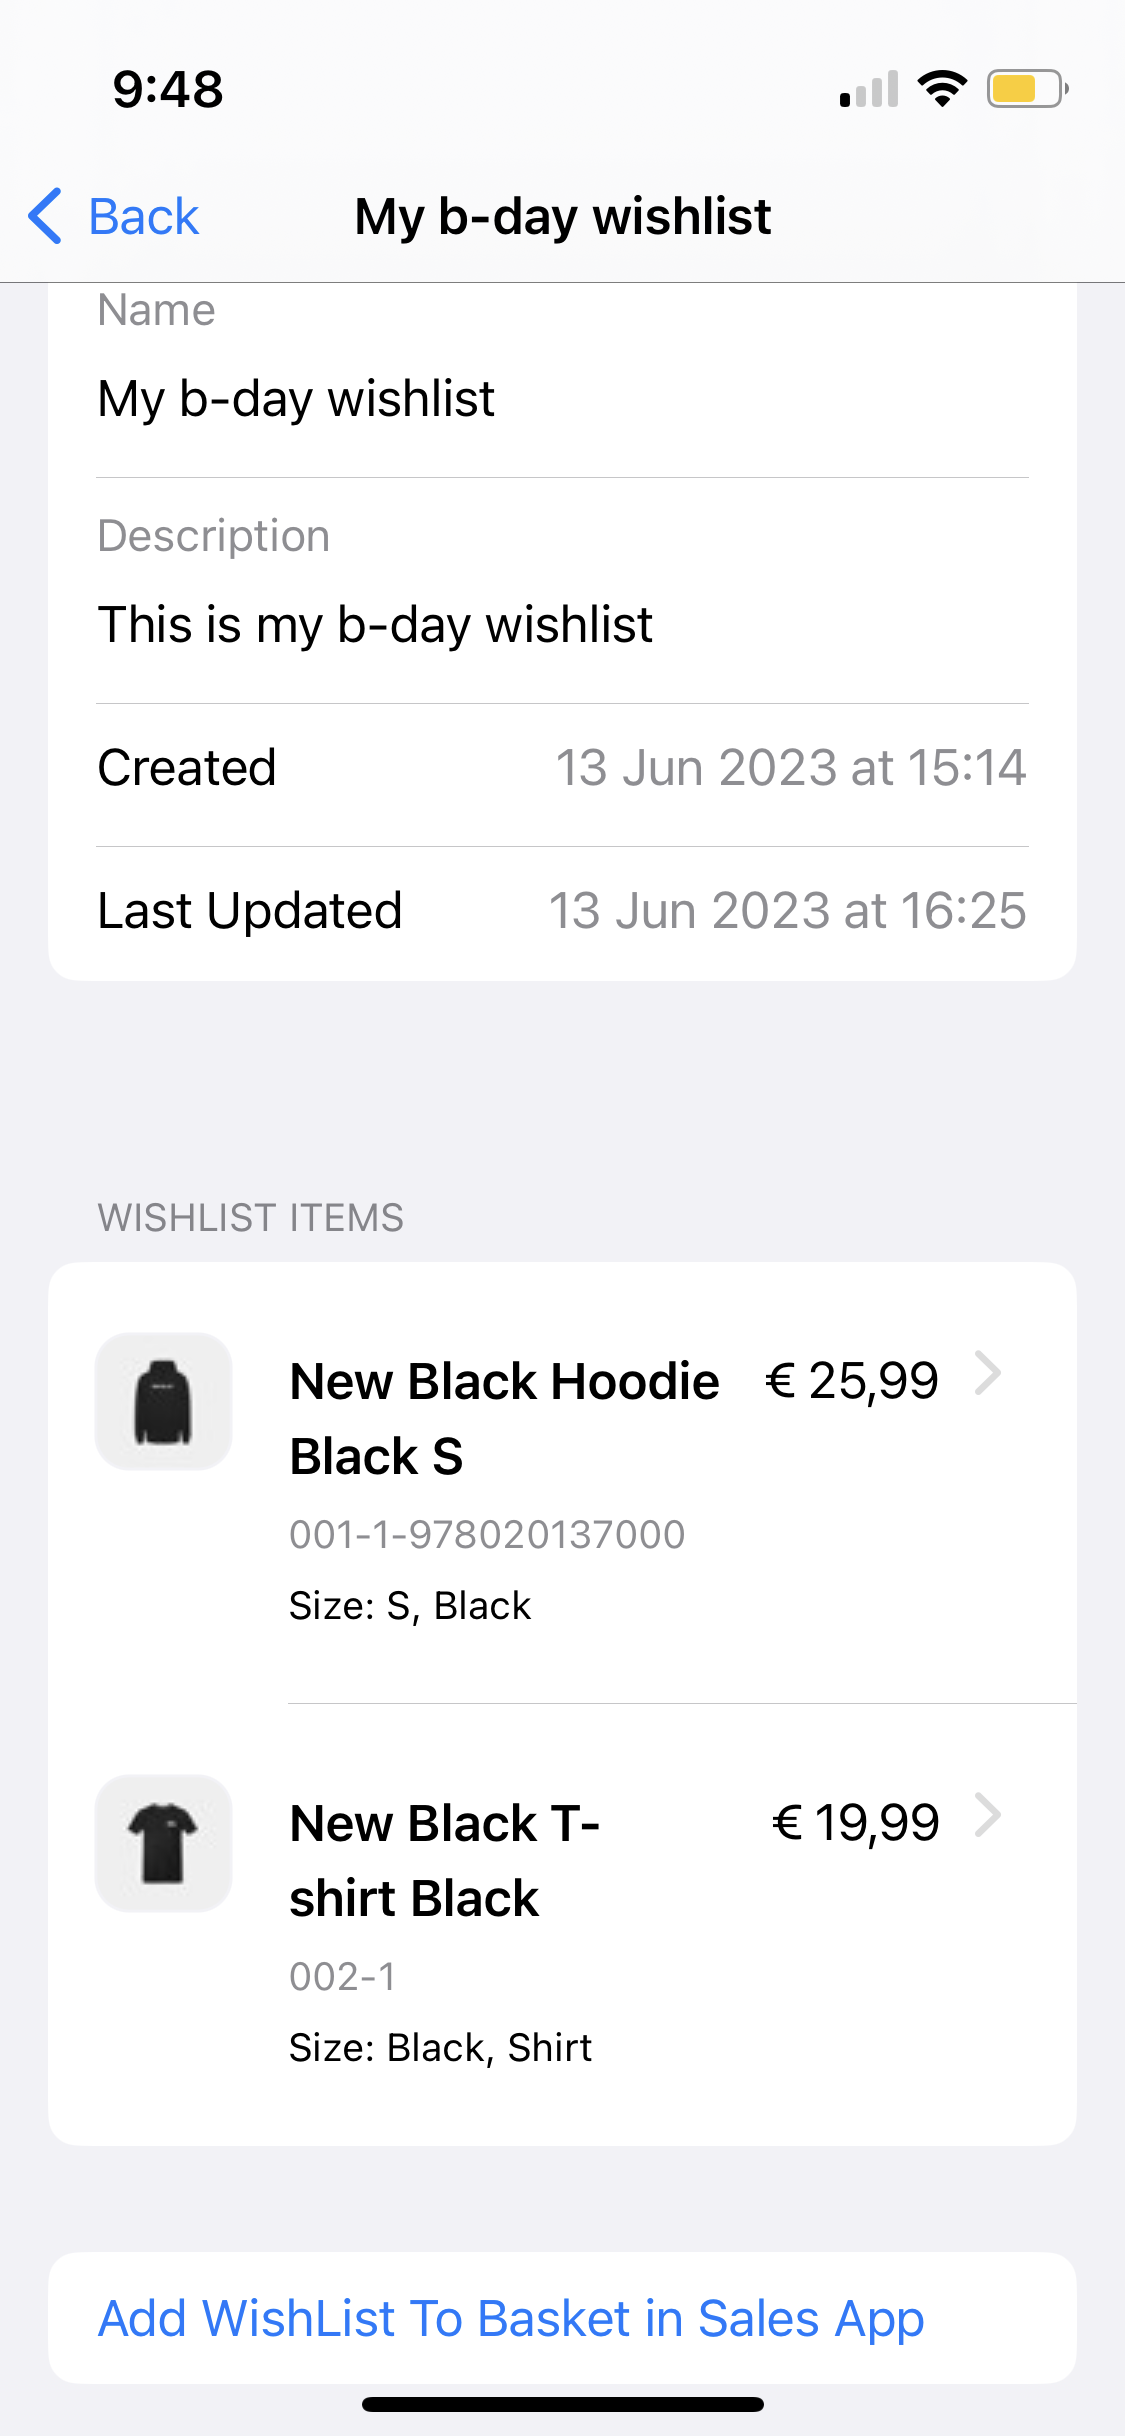
Tapping the Add WishList To Basket in Checkout App button will open the Checkout App and add all items in that wishlist to the Basket.
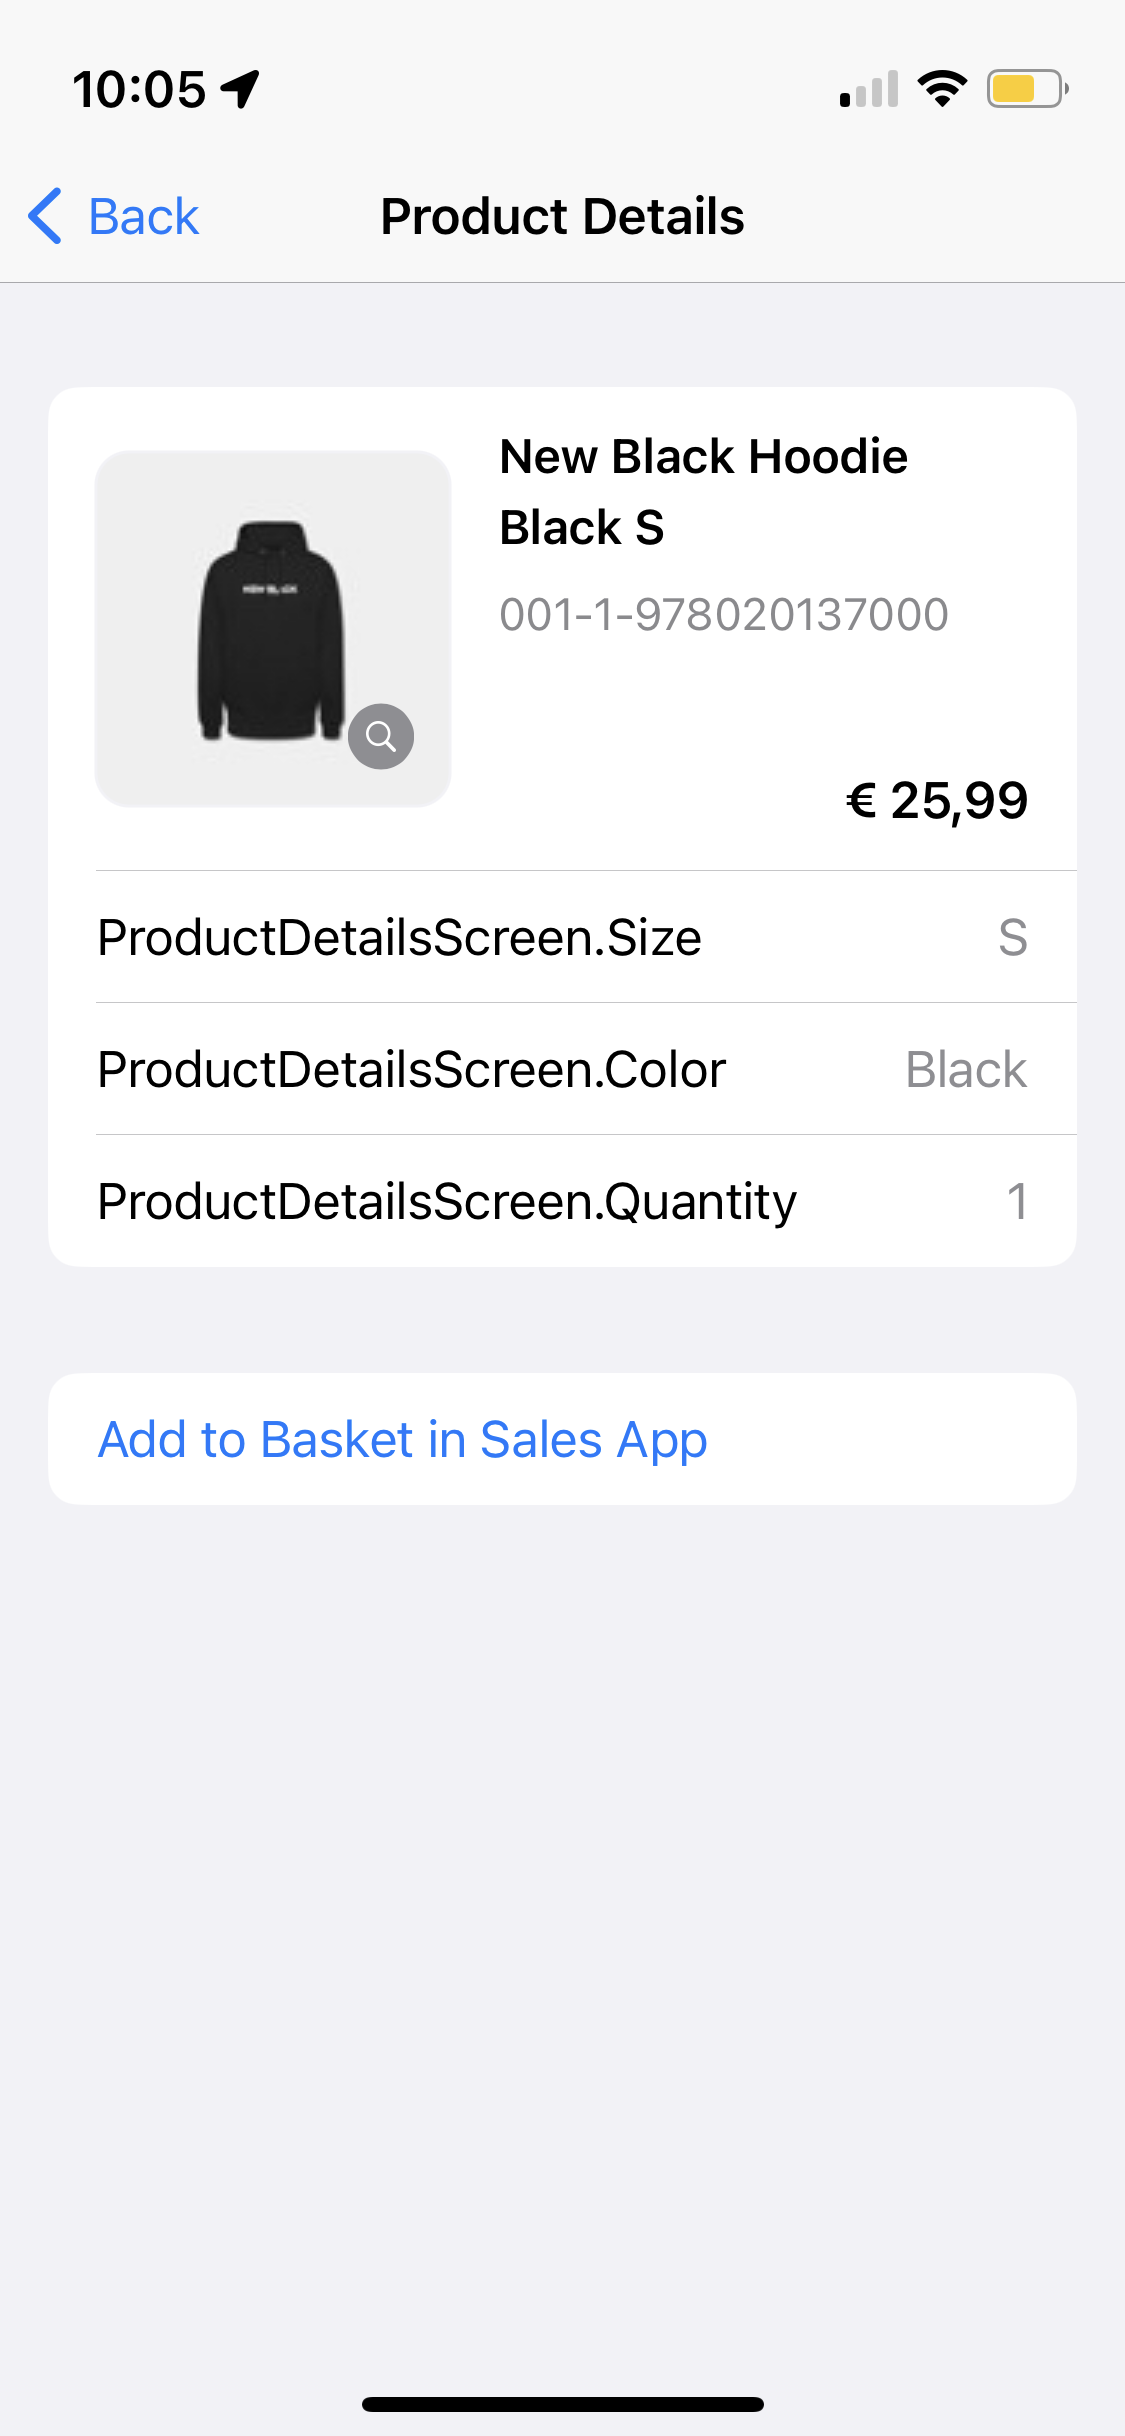
Tapping an item will open the Product Details, where you can also Add to Basket in Checkout App using the button. The Product Details page is similar to that of the Checkout App Product Details page.