Ship from Store
Ship from store - or SFS in short - is the process where delivery orders that can be delivered within a certain distance of a store are delivered from that store, instead of a warehouse. Delivery orders are sent as tasks to specific stores as a result of your Order Orchestration setup.
Once a delivery order is created in your Order orchestration, it's sent to a store as a SFS task. The task itself consists of three simple steps, which can either be performed in the Companion, the Tasks App or Suite. This page will revolve mostly around the latter, but most of the settings mentioned on this page are applicable to SFS in general.
In Suite, the tasks are clearly displayed by means of the following tabs in the SFS overview:
- Picking
- Shipping (and packing)
- Deliver (optional)
- Printing (optional)
With the recent redesign of Suite we've not only updated the looks of the SFS chapter, we also made some changes to how it works behind the scenes. This page will focus on the new version, since it's what we advise our customers to use.
For the time being however, you can still find important information pertaining to the old version here as well. You can manually revert to the old version by setting KeepOldSfsFunction to true.
The most notable differences are:
- The new version has the barcode field displayed in the ship-task
- The new version lets you complete a ship-task without actually shipping all items
In order to be able to access this chapter, you need only the CustomUserTasks permission.
Things that affect your SFS
Order orchestration
Many of the options that influence SFS are configured in the Order Orchestration's SFS-sheet, such as allowing partial fulfillment or not.
There's two minor things to keep in mind when it comes to SFS Order orchestration:
- The route calculation currently avoids ferries, so the distance shown in the task can be different than expected.
- Pickup Point locations are excluded only if the PickupPointID is set.
SFS settings
There are many settings that relate to your SFS tasks and flows. You can find most of the general ones in the clickable titles below, while the ones specific to flows or functionalities are added there directly.
Product information overlay
No matter which part of SFS you're in, each task allows you get the details of the included products. Simply click the products directly to summon a product information overlay. You can even influence which product properties are shown inside by applying the following setting:
| Name | Example values |
|---|---|
| App:ProductDetail:Properties | { "EVA-Admin": ["product_name", "brand_name", "display_price", "size_range"] } |

Partial pick
Both flows we mentioned are affected by whether or not you allow partial picking. By enabling partial picking you allow your store associates to complete a task even when some of the necessary products are not available. Only after enabling this setting will the quantity field in the pick-task become editable and allow for picking and shipping less than the required quantity.
| Setting | Default value | Description |
|---|---|---|
| App:ShipFromStore:AllowPartialPick | false | Set to true to allow completing a pick-task with less than the required products |
If not all products in the task are picked, completing the pick-task will lead to a split order line. The picked amount will remain on the original order line, while the unpicked quantity will be set on a new order line. This new line will then go through Order orchestration once more - which may lead to another SFS task in a different OU for example.
Multiple shipments
These settings influence your shipping.
| Setting | Default value | Description |
|---|---|---|
| App:ShipFromStore:SupportMultipleShipments | true | Whether or not you can select and distribute the products via more than one package. |
| ShipFromStore:DeliveryConfirmationBaseUrl | not set | Webpage used for delivery confirmations during delivery. Ask your customer manager if you want to set this up. |
Deadlines
You can configure deadlines in your SFS-sheet as well as via settings.
| Setting | Default value | Description |
|---|---|---|
| ShipFromStore:StartDeadline | 45 | Time in minutes a store has to start any SFS task. Only used if no time is specified with DeadlineInMinutes in orchestration sheet. |
| ShipFromStore:CompleteDeadline | 15 | Time in minutes a store has to complete any of the SFS's pick/pack tasks after starting. |
When your SFS is configured to generate a pick- and ship-task separately, once the pick-task is done, automatic cancellation is off the table. Ship-tasks are not cancelled automatically: only Pick and PickAndShip are cancelled after the deadline has expired.
Printing
| Setting | Default value | Description |
|---|---|---|
| ShipFromStore:DisablePrinting | false | Whether or not to disable printing of any labels for the 'ShipFromStorePrintPickedReceipt' and 'ShipFromStorePrintDeliveryReceipt' |
| App:ShipFromStore:PrintReceiptAfterCompletion | true | Disable the printing of receipts during the pick task for orders shipped or collected from stores - reducing the risk of personal information ending up where it should not. |
| SFS:SeparatePrintTaskForExternalLabelHandlers | - | Only here for backwards compatibility. Is used when working with external shippers such as Shipcloud. |
| ShipFromStore:ExternalLabelHandlerPrintType | InProcess (0) - will print immediately during the ship-task | Determines how external label handlers (Consignor, PostNL, ShipCloud) will be processed and can be overwritten by setting here above - Async (1) will generate a separate Print subtype task (in the Print tab) - Disable (2) will not print anything (a Print task can then optionally be created via the CreatePrintTask service - mind that this creates general Print tasks and not SFS specific Print tasks) |
Combining pick- and ship-tasks
In most cases you'll want to skip this setting and just leave it at it default value.
This setting relates to the combining of your pick- and ship-tasks, which by default is set to combine both into a single task. When combined, your ship tasks are included in the task's deadlines and is included in automatic cancellation. For backwards compatibility it's still available as a setting.
| Setting | Default value | Description |
|---|---|---|
| ShipFromStore:Composition | 2 | - 1: Group pick and pack, but leave ship as a separate task. - 2: Group pick, pack and ship into a single task. |
Scanning
Scanning is a useful tool in your SFS tasks, regardless of your SFS version or flow you're using.
Sequence of tasks displayed when scanning
Scanned products might be included in multiple orders/tasks, the task first returned by EVA upon scanning will be based on these conditions:
1: any tasks already assigned to you;
2: unassigned tasks;
3: tasks assigned by others.
Within this order, additional sorting can be achieved, based on the following value.
| Setting | Default value | Description |
|---|---|---|
| App:ShipFromStore:determinationType | not set | - 0: oldest task first. - 1: smallest task. - 2: largest task |
Where scanning will take you - based on SFS version
Scanning works best in the new SFS version, where - if configured with the following setting - it will take you to the ship-task directly and auto-complete the pick-task for you. The previous version of SFS will always take you to the pick-tasks.
| Setting | Default value | Description |
|---|---|---|
| ShipFromStore:PrintShouldCompletePickTask | false | Set to true to go to the corresponding ship-task directly. Will likely default to true approximately around core drop 2.0.705. |
Auto-assign
You can have the next part of the SFS task automatically assigned to the current user with the following setting. So if you complete a pick task, you automatically get assigned the Pack > Ship > Print (if applicable) task.
| Setting | Default value | Description |
|---|---|---|
| ShipFromStore:AutoAssignNextUserTask | false | Set to true to enable auto-assign. |
The Ship from store overview
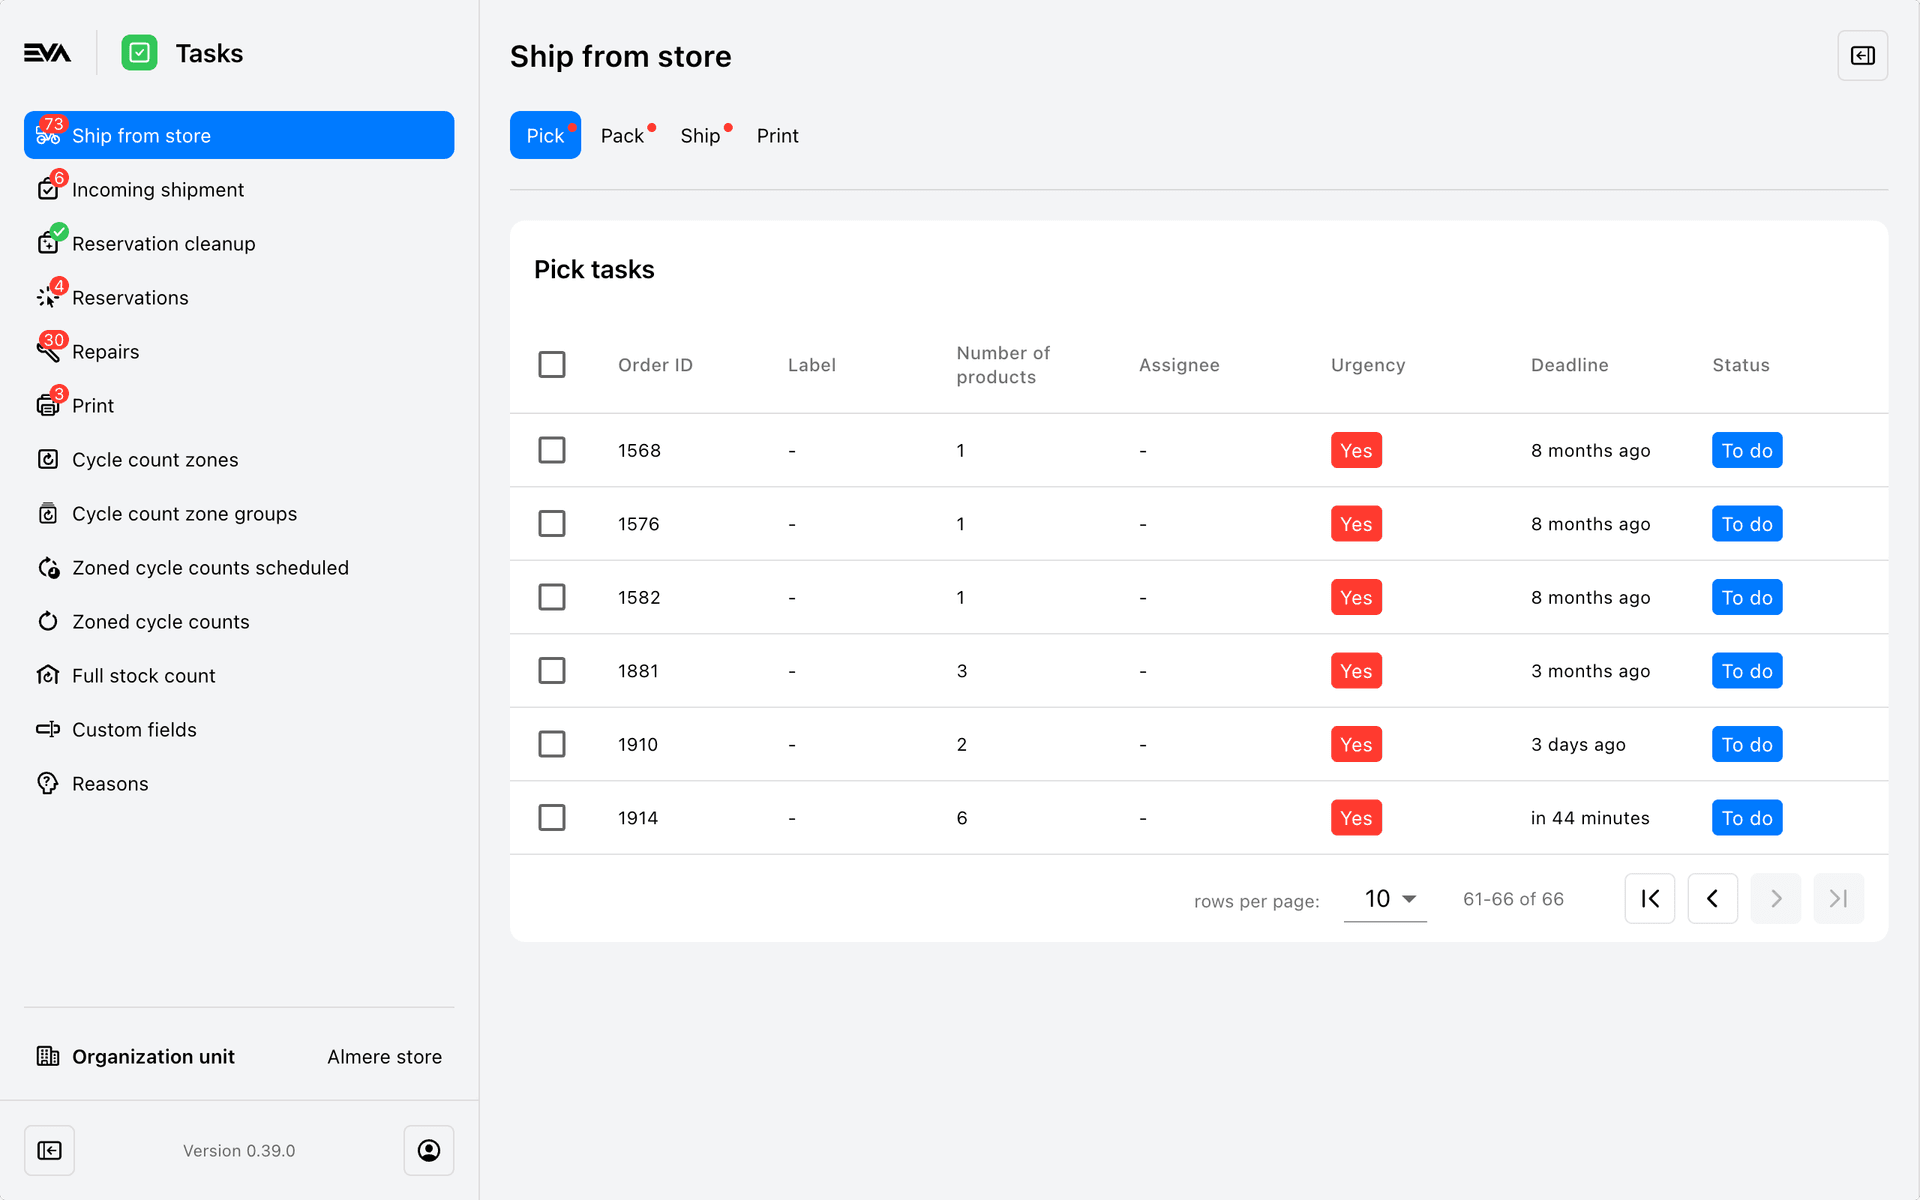
The SFS overview displays all tasks based on their Deadline, so any tasks that just came in (and have the most time left) will be displayed last.
In the top right corner you have the option to filter tasks based on Label and Number of products.
Number of products
The default state includes All, which represents tasks with quantity greater than one and/or product lines greater than one, while Single products only represents tasks with a quantity and product line count of only one.
Labels
Task labels can be used for a variety of reasons. For one they allow you to categorize items, such as "Swimwear", or to indicate locations in stores, such as "First floor" for example. By making use of these labels in your SFS tasks, you can perform multiple related tasks in one go.
There are two ways of creating labels. For one you can create labels by adding them to your products as product properties. Once added there, specify them in the ShipFromStore:LabelProductProperties setting to include them as labels in the SFS flow.
Secondly you can have labels added to your SFS tasks by configuring them in your SFS sheet directly. You can then create labels based on sales channel for example. See our SFS with TaskLabels example.
Pick-tasks
Generally speaking we've got two flows to handle the SFS tasks, one of which is starting a specific task while the other concerns (multi-)selecting a bunch of them and downloading a PDF containing all corresponding products.
Flow 1: Picking specific tasks
You can kick off a specific task by opening it in the Pick overview. The task's status will change to In progress and the task will become assigned to you - this is also displayed in the overview. You can access tasks already assigned to others, but you can't open them without the task getting assigned to you directly.
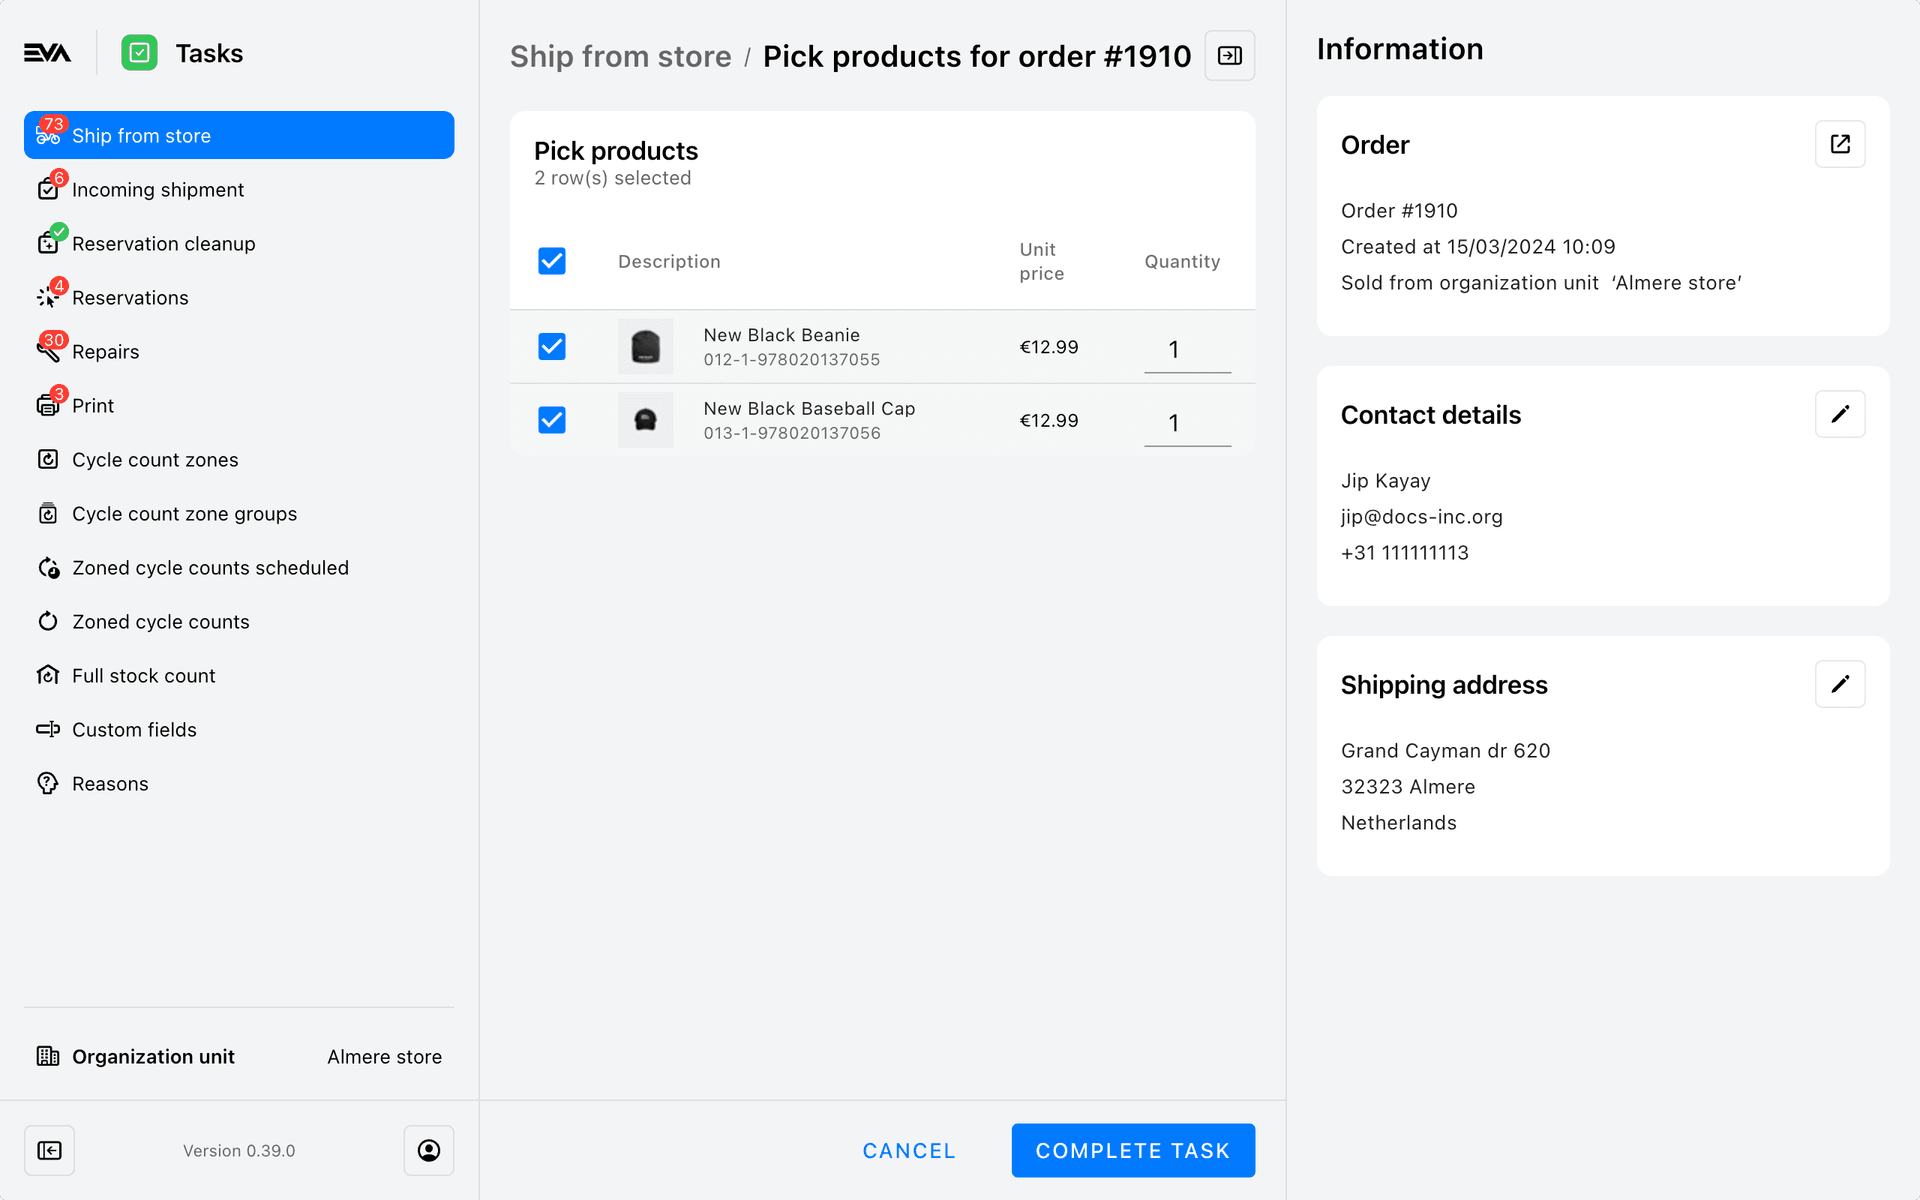
While in the pick-task you can alter contact details and the shipping address.
Depending on your settings you can complete the pick task with less than the required items: a partial pick. By completing the pick task, you'll be automatically forwarded to the shipping task depending on the Combining of pick- and ship-tasks.
Flow 2: Multiple tasks simultaneously
You may want to do a collection of SFS tasks in one go. This can be especially useful when you've got labels attached to your products.
After selecting the tasks you want to perform, a 'pdf' icon will show up. This action lets you start those tasks and will display a printable pdf as a combined pick slip for all the lines you selected. You can now go through the stores and pick all of these items in one go.
Once you're done collecting items, take out your scanner. Every time you scan an item, either its corresponding pick-task or ship-task will pop up - this depends on which SFS version you're using. See the scanning settings.
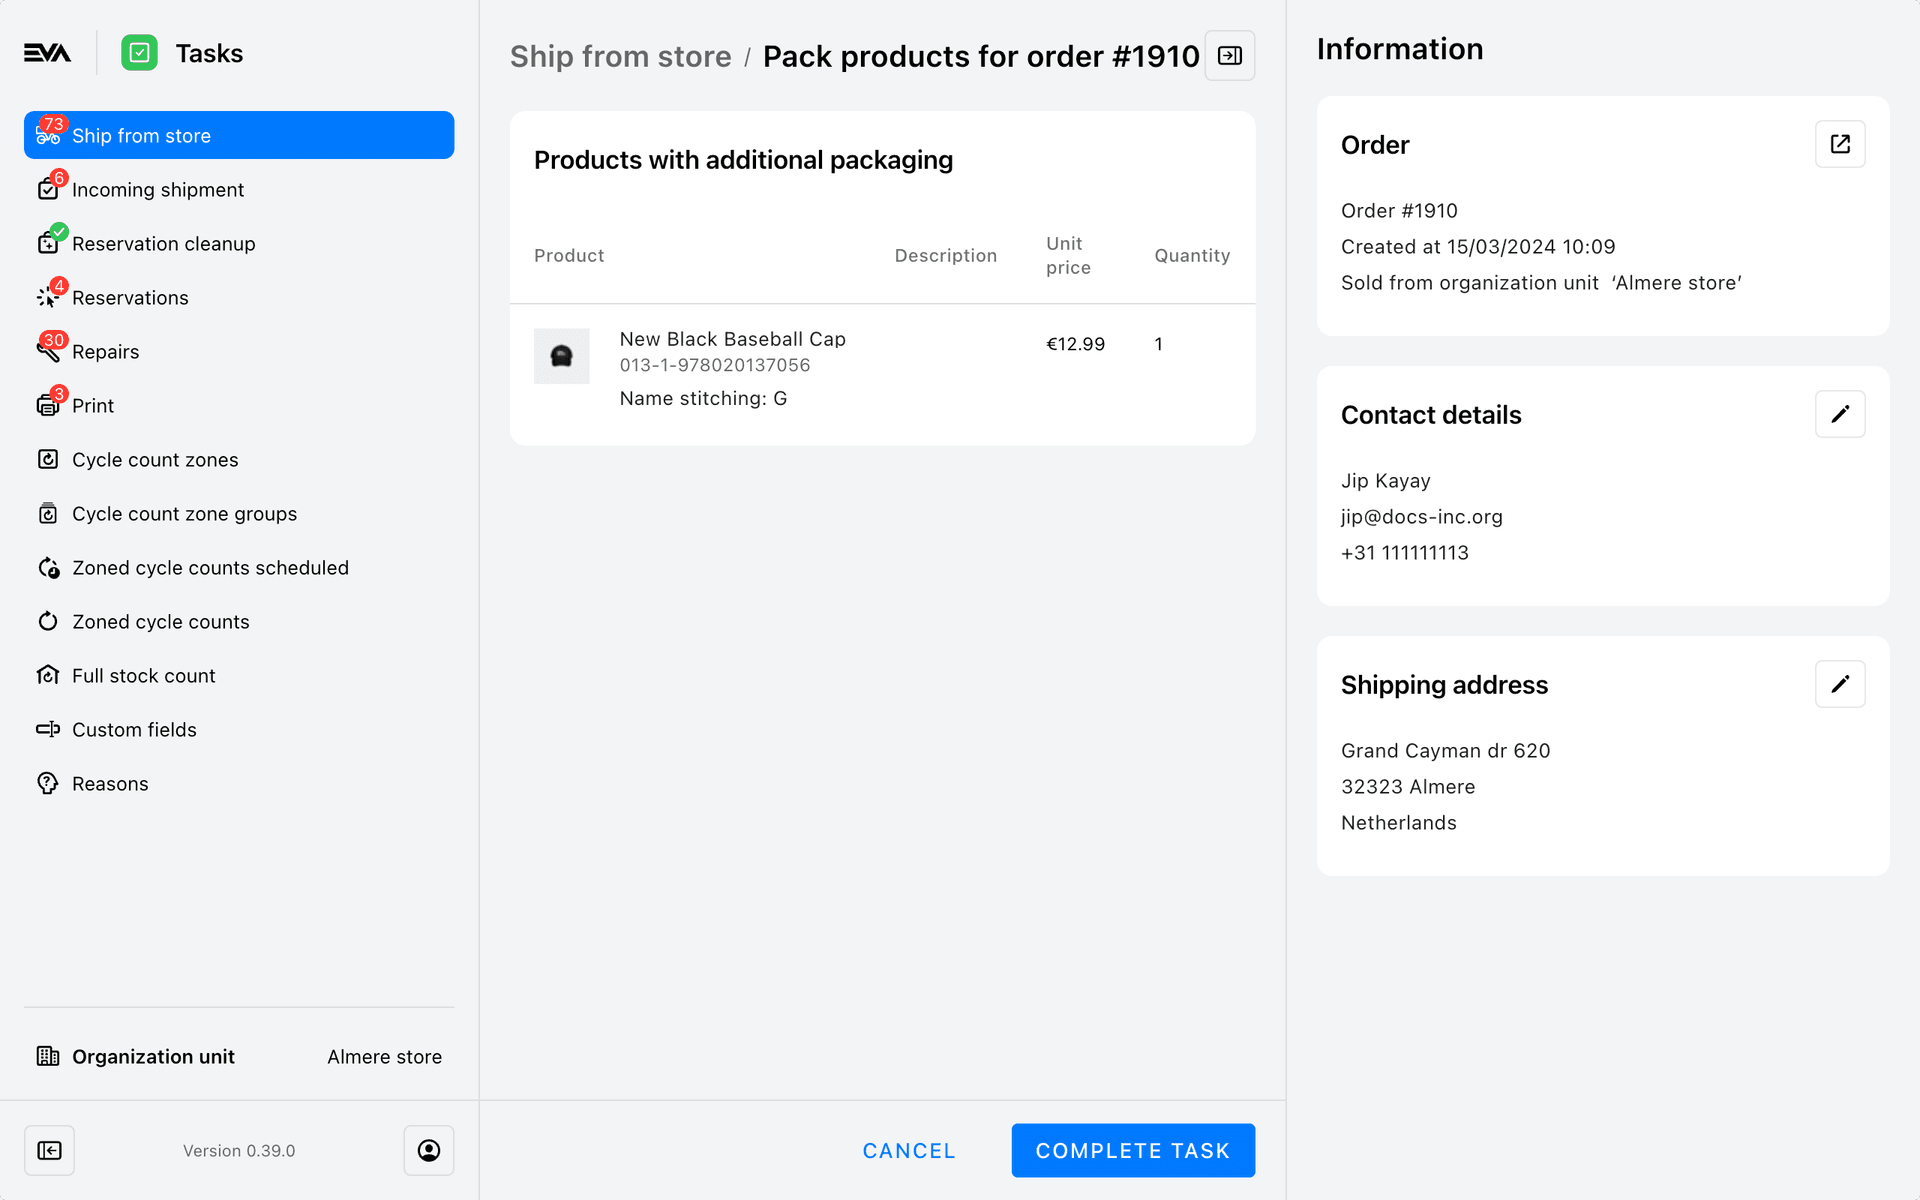
Pack-tasks
These tasks will only appear for orders which contain Service products, gift wraps, cards and product requirements in general.
The tasks themselves will contain multiple cards for each gift wrap set.
Ship-tasks
To access the related chapters fully, you need the Packages, ReceiveShipments, and PrintTask permission.
The ship task is very similar to the pick-task, and just as intuitive.
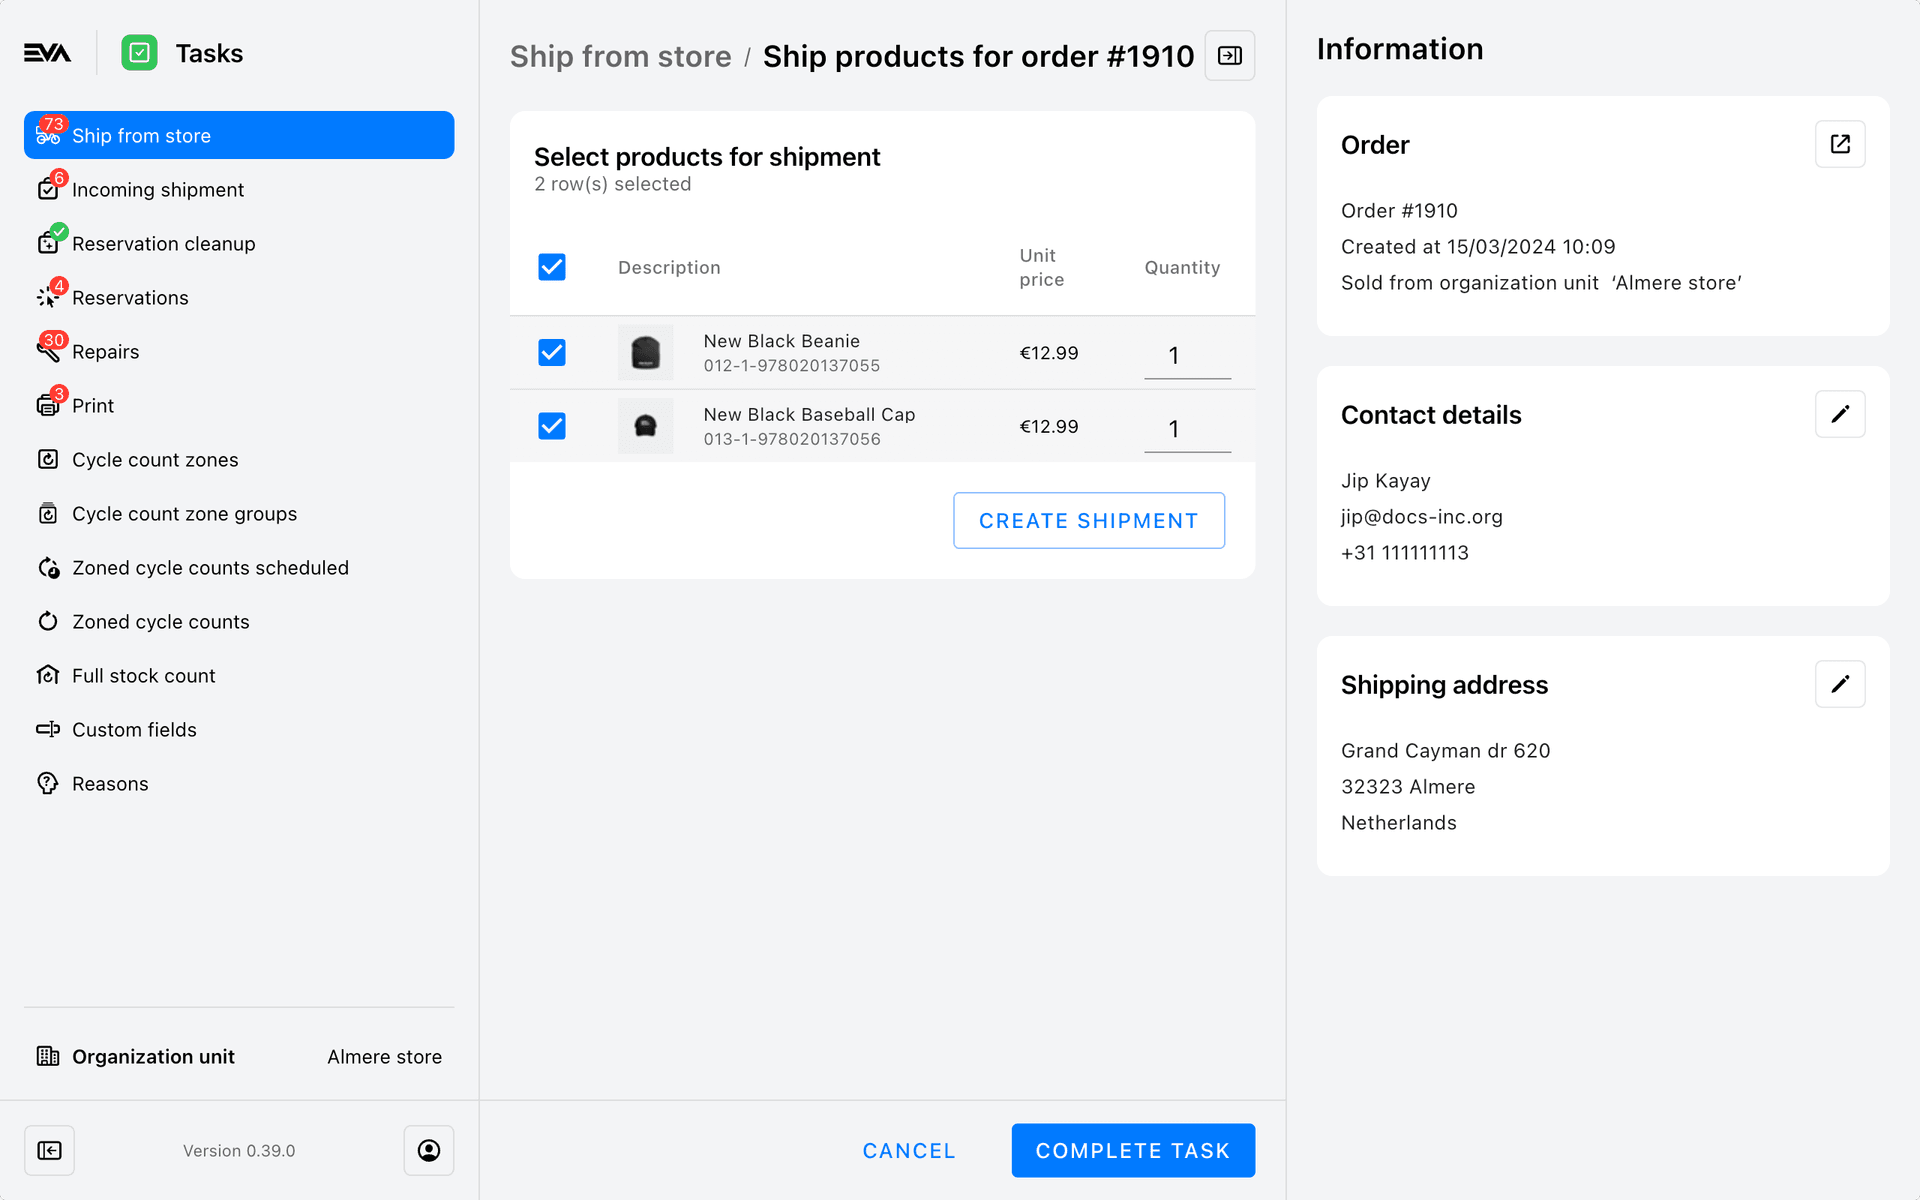
Your products start off pre-selected for you. Once you've created your shipment, - or shipments depending on the setting - it will be displayed in a card below your selection screen. Select a Shipping method and type of Package (per shipment). You need to select both before you can finish this task.
Don't forget you need to have your Shipping methods and Carriers set up to be able to select them in the task.
Packages are currently still created via our packaging CRUD services.
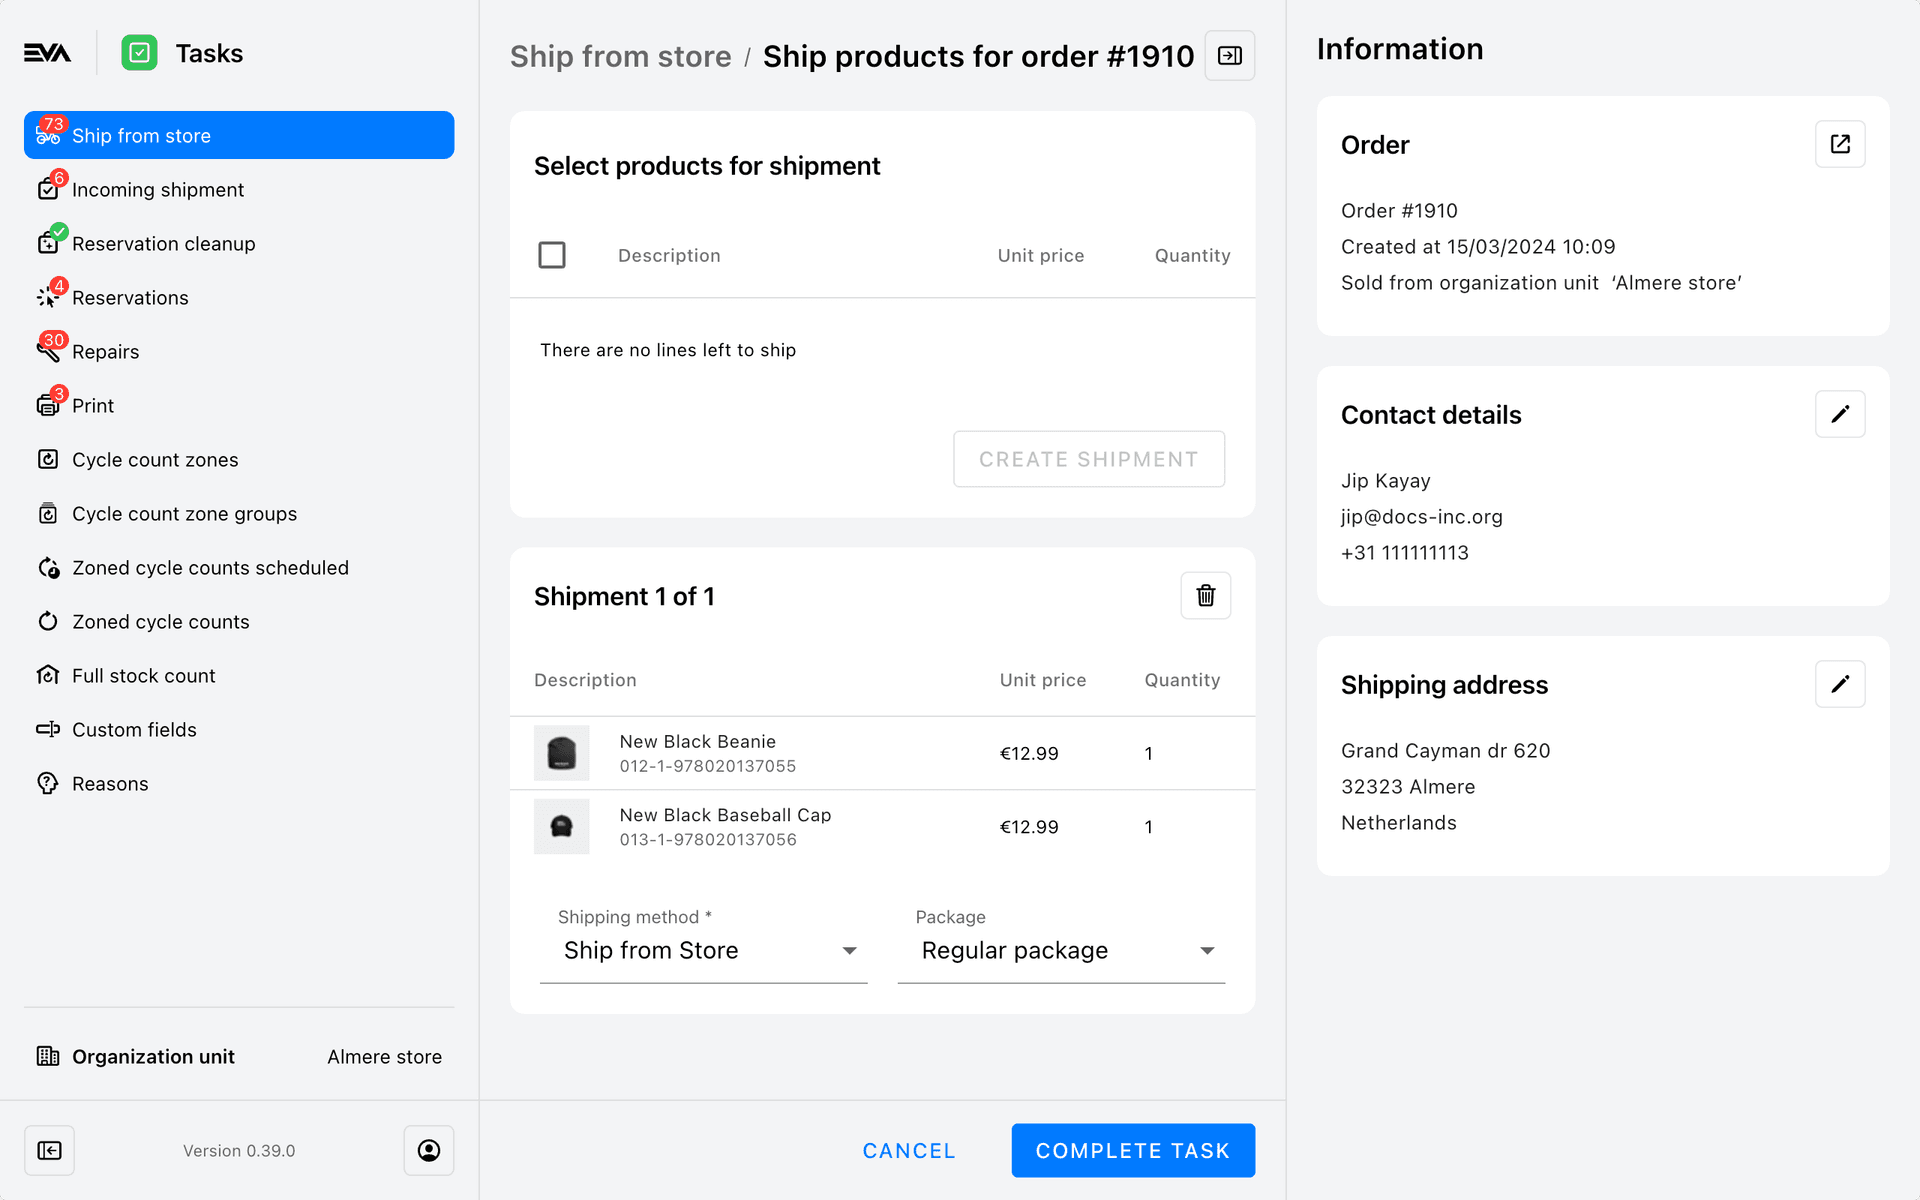
If you've created a shipment by mistake, it's possible to delete it using the 'trash bin' icon. The product line(s) included in that shipment will then be returned to the previous 'Select products for shipment' card.
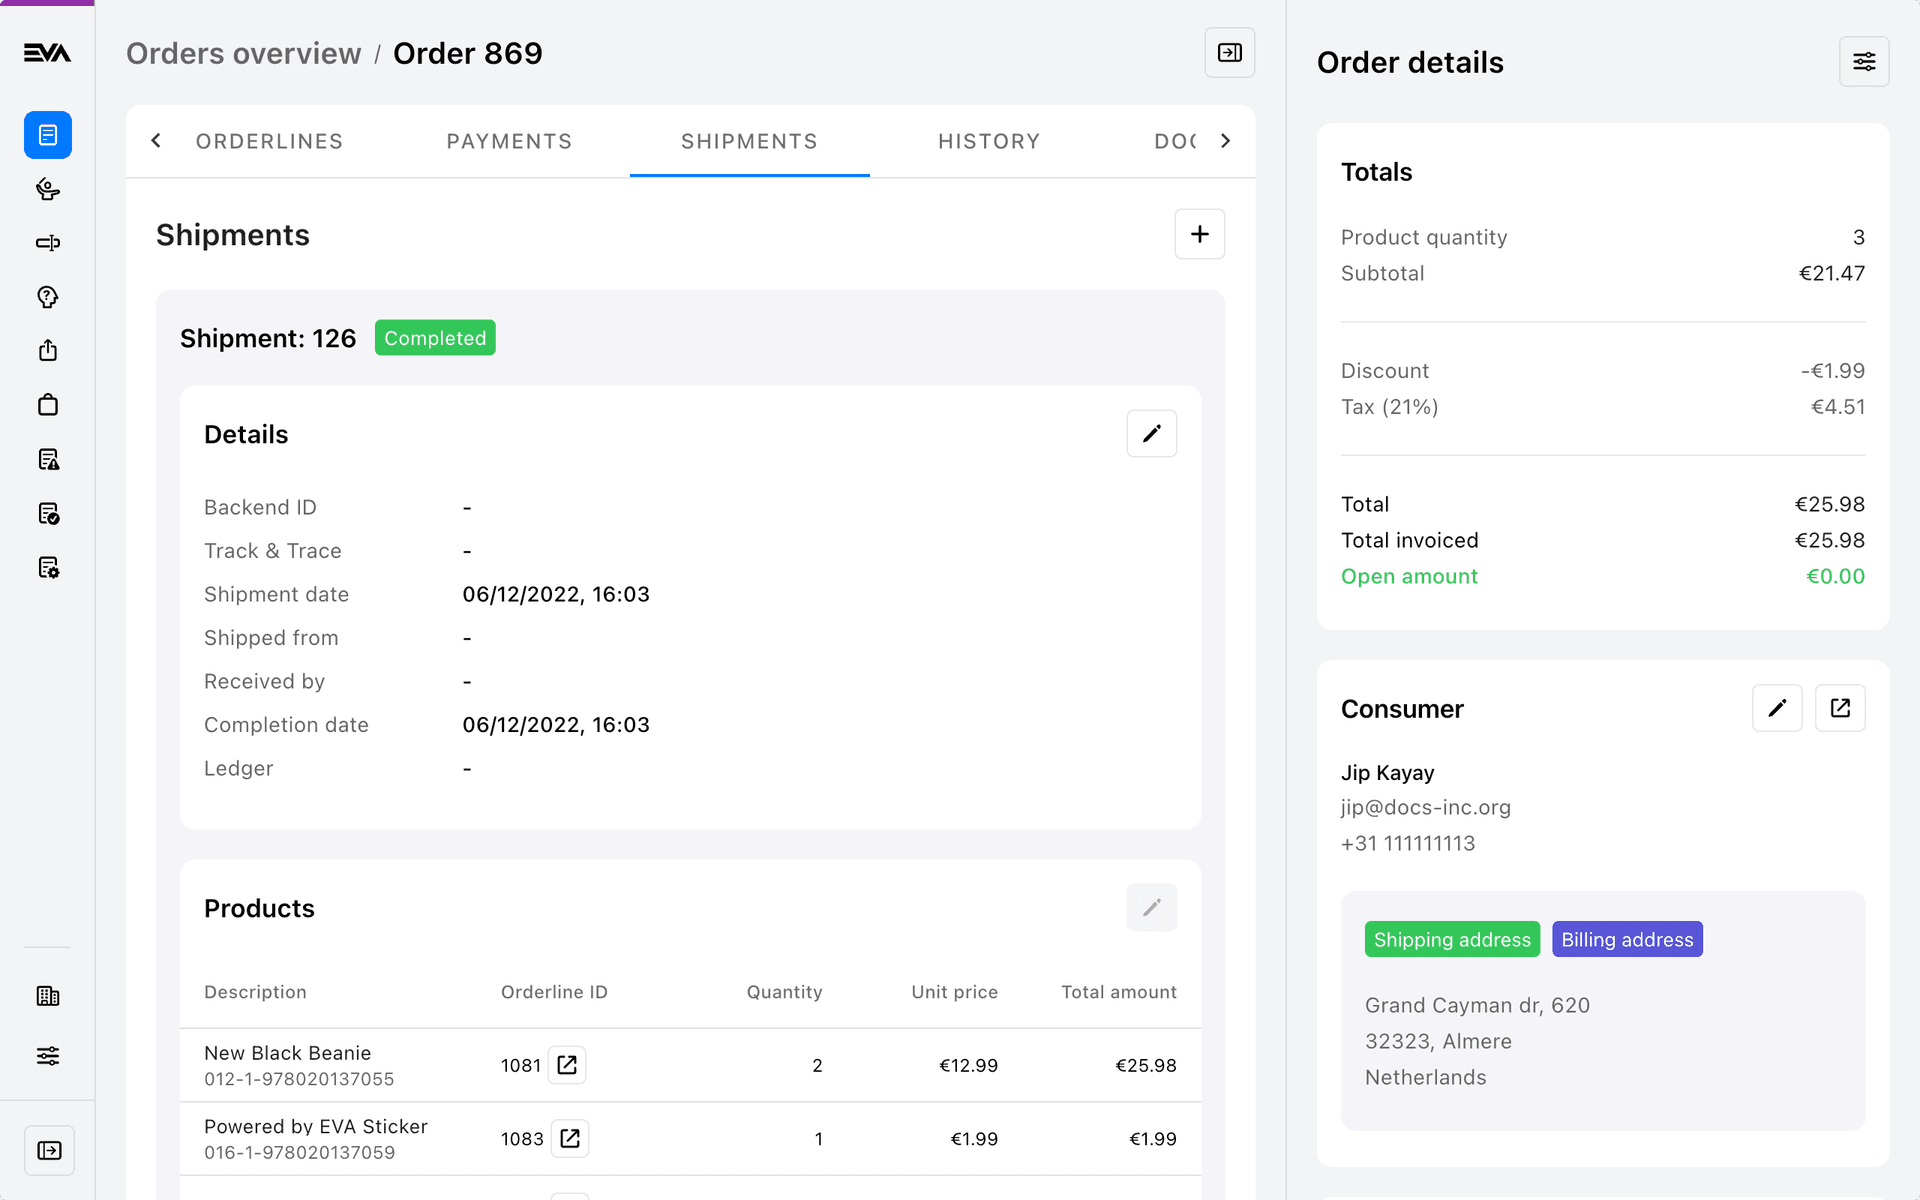
You can always retrieve the corresponding order and shipment details by clicking the 'arrow and square' icons in the sidebar, or by going to order's Shipments tab in the Orders chapter manually manually.
Deliver-tasks
Deliver-tasks are not part of EVA's default SFS flow and you will have to alter the Deliver-task settings to enable them.
If you do enable it, then EVA's default flow of automatically receiving after shipping will be disabled for the SFS tasks. Receipt will instead wait for your manual confirmation of the shipment(s) having been picked by the carrier. You can do so in the Deliver-task overview.
To ensure these tasks do not start stacking up, any Deliver-task older than 3 days (default value) is automatically completed.
Print-tasks
If the OU contains a SFS task that requires printing, it will show up in the third and final tab of the overview: Print.
A Print-task shows all available information of the order and it's the final chance to edit any of the details such as Shipping address. All related print documents are listed here and can either be printed separately or combined and then printed. To combine and print, first select all the files you need. A Combine files action button will become available in the top right.