More Options
The "More options" menu item is split into the following sections:
Left side
The left side of the More Options tab gives you many options you can configure for your account or store.
Financial period
For a detailed walk-through on how opening and closing a financial period is done from an in-store employee stance, please check our day open/close walk-through documentation.
Opening or closing Financial periods, as well as viewing earlier financial period reports, can be done from here.
With reports, you can view additional details about your financial period's date and time of opening and/or closing of the period, if closed, by whom, and the current status (open or closed). Further, clicking on a specific report line will display the period's total revenue, cash drawer count, safe count, income and expenses, bank deposits, and seal bag numbers. Sample as follows:
Opening a financial period
Opening a financial period always starts with a prompt to count the contents of your cash drawer. This can be done by tapping the respective drawer you wish to open for this financial period.
Depending on your store setup, this could include opening and counting more than one cash drawer.
Closing a financial period
After closing all the stations and cash drawers, you will be reminded via pop-up to close the current financial period.
As the case is with opening a financial period, closing a financial period also requires a cash count of your cash drawer(s) and possibly safes if your setup is as such. You will also be presented with a few more details about the period, like total revenue and other cash-impacting events. Further, you'll notice some verification steps as a prerequisite to closing any financial period.
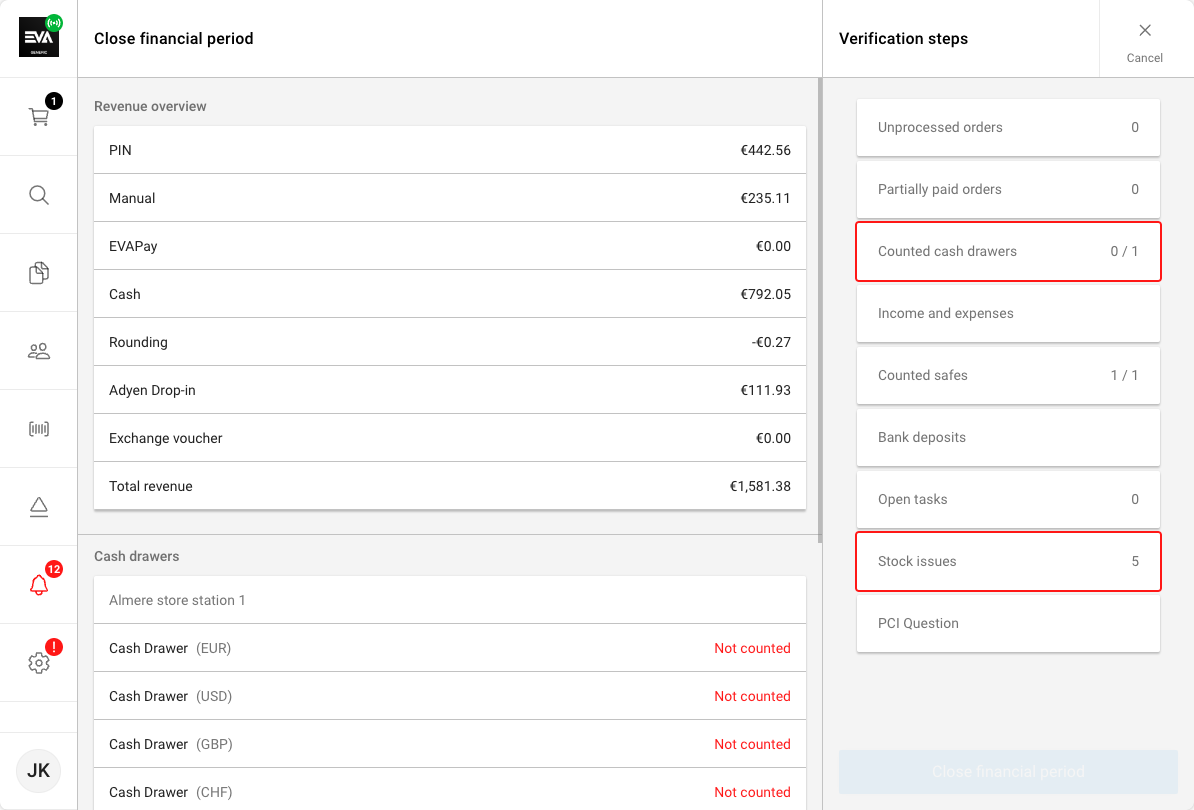
Counting cash drawers and safes are the main steps here however, unprocessed orders could also be one. Although non-blocking to closing a financial period, the stage serves as a notification or reminder that order(s) exist where total payments were made on order types deliver or mixed that include one or more not shipped order lines.
A notification box will appear to notify employees if the financial period is ready to be closed. You can close the financial period directly with the Close period button.
You can tap the unprocessed orders step to view such order(s) and complete the checkout process properly by tapping Create active shopping basket or Create return.
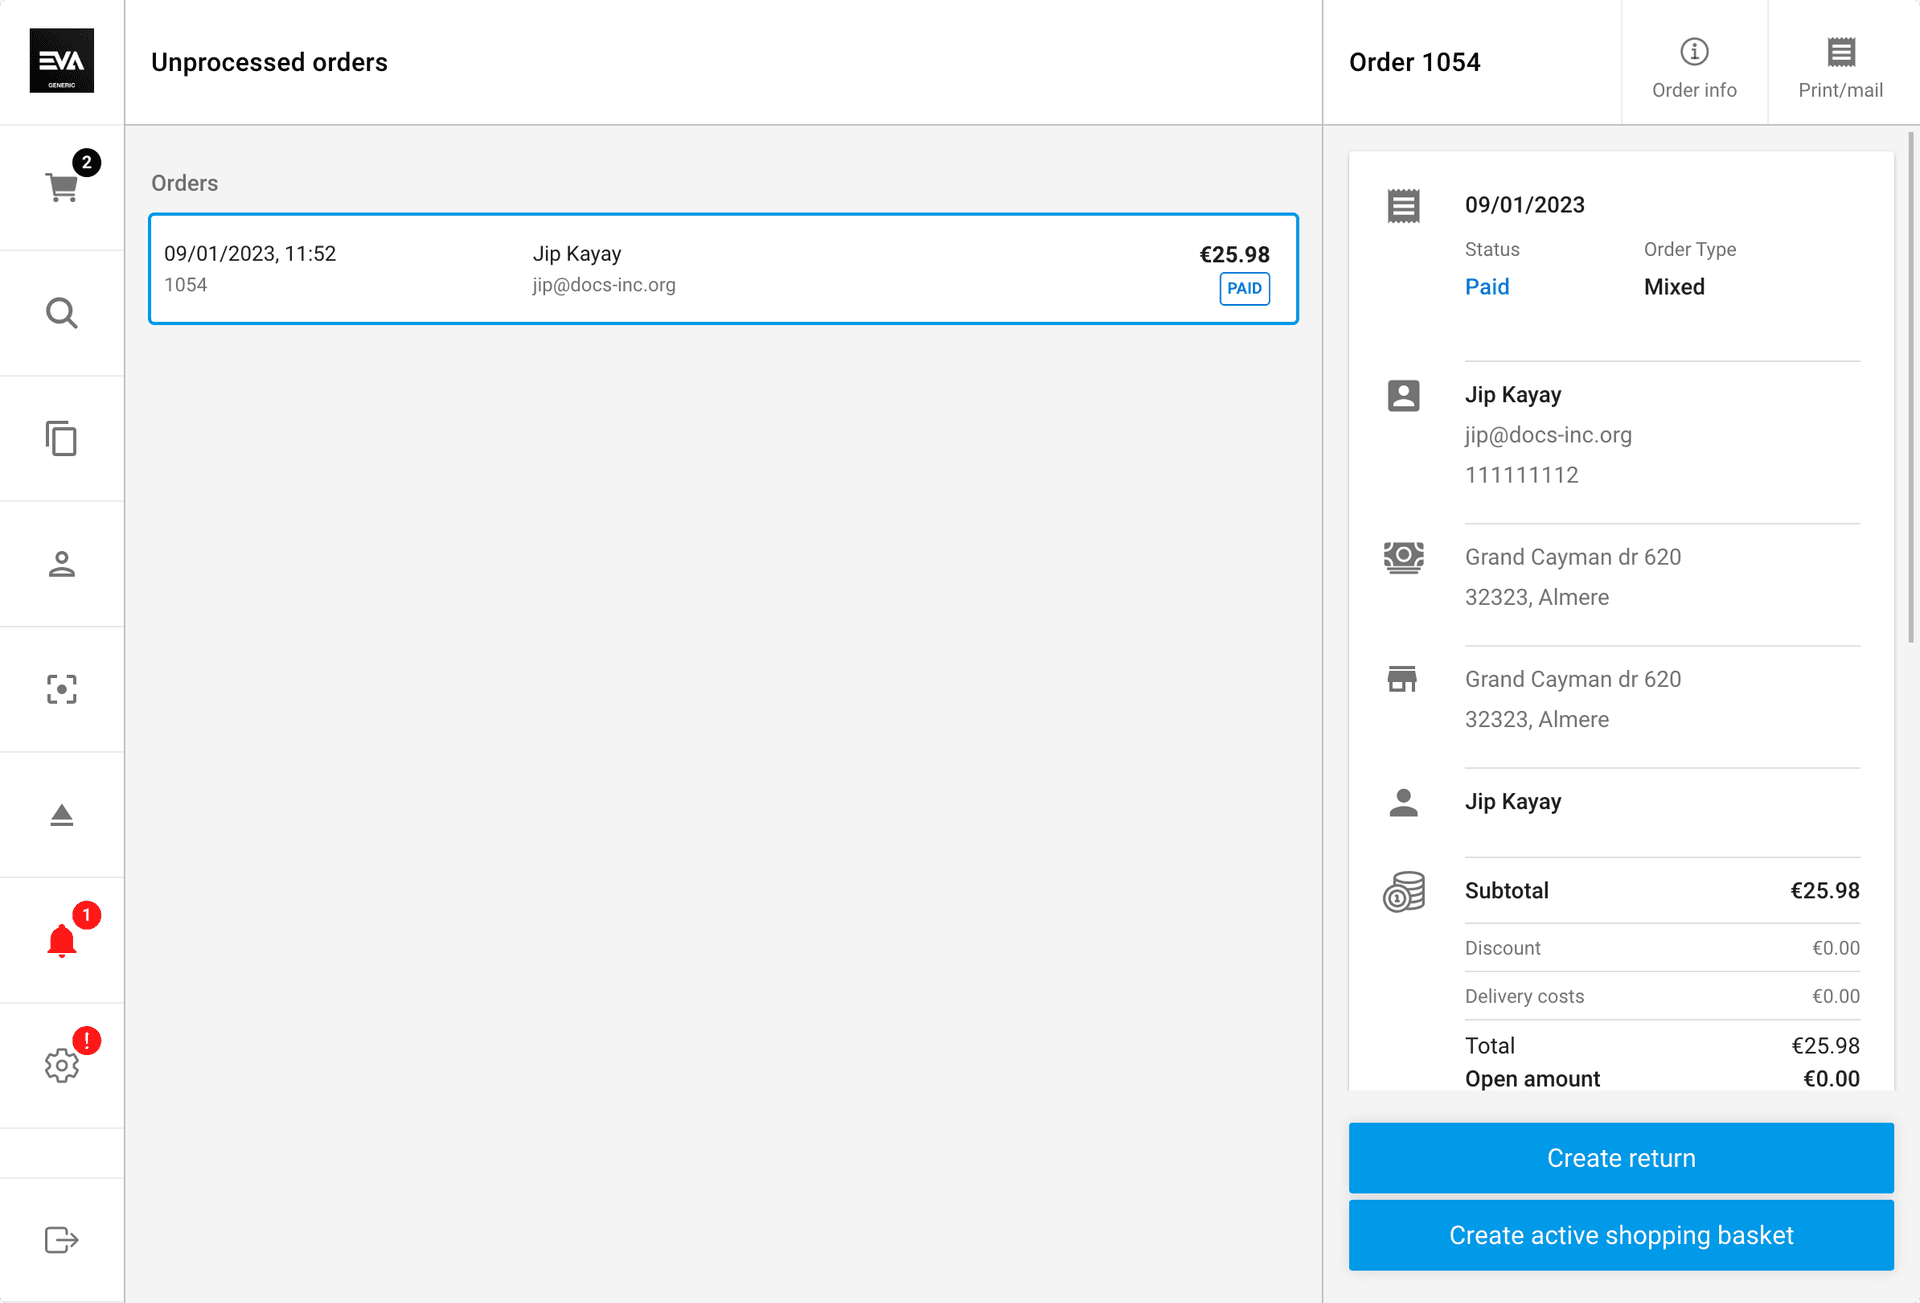
Either choice you make here, you'll be navigated back to the basket with that order open and the respective flow to conclude it. For Create active shopping basket (the example shown in the screenshot below), you'll need to change the order lines from order type deliver to carry out to clear it from being an unprocessed order.
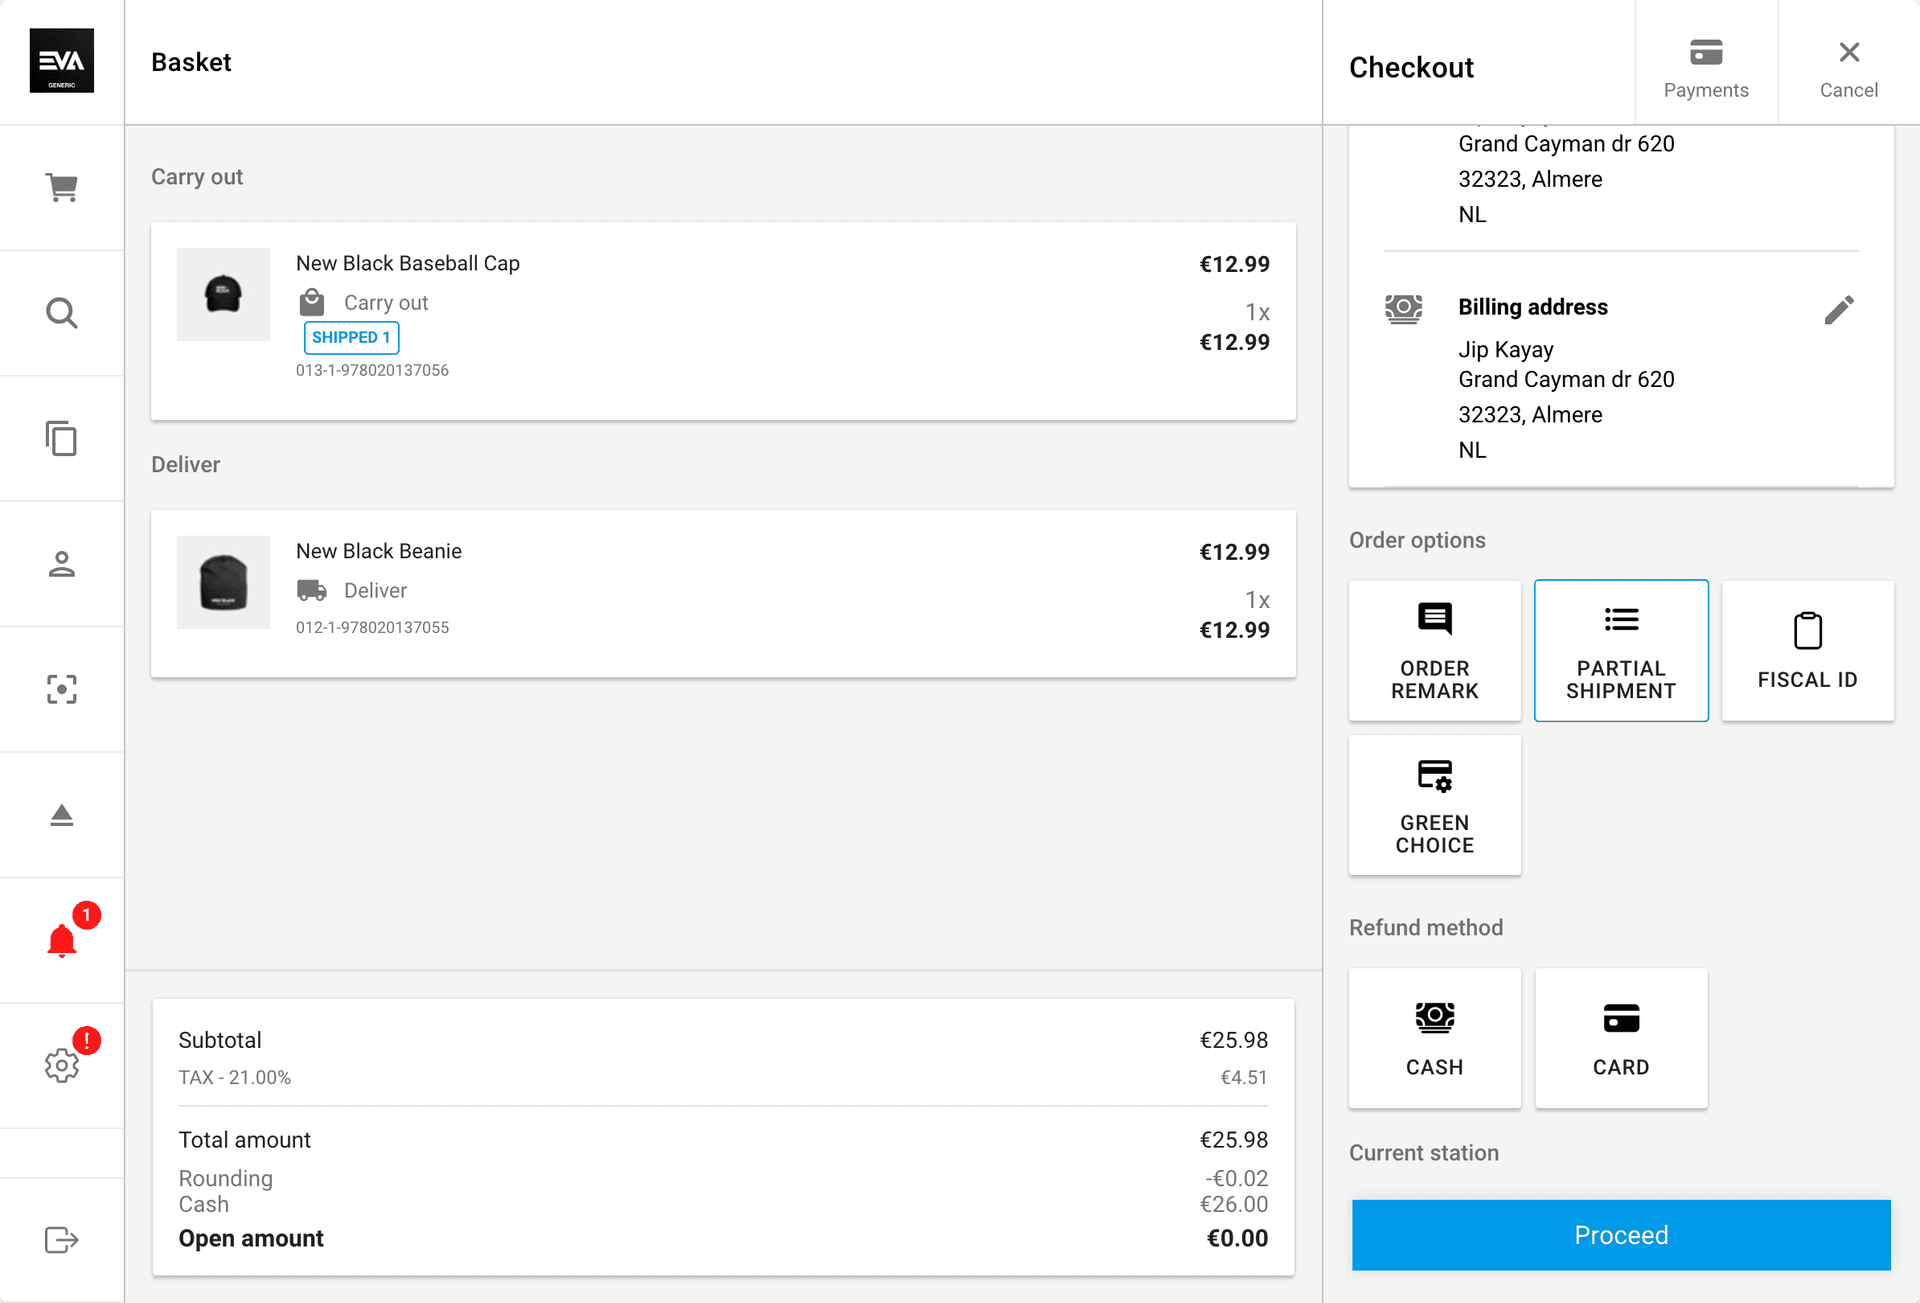
Or go for the create return option and refund the payment for that order line! It's a messed up scenario anyway, so it should be rectified.
Reports
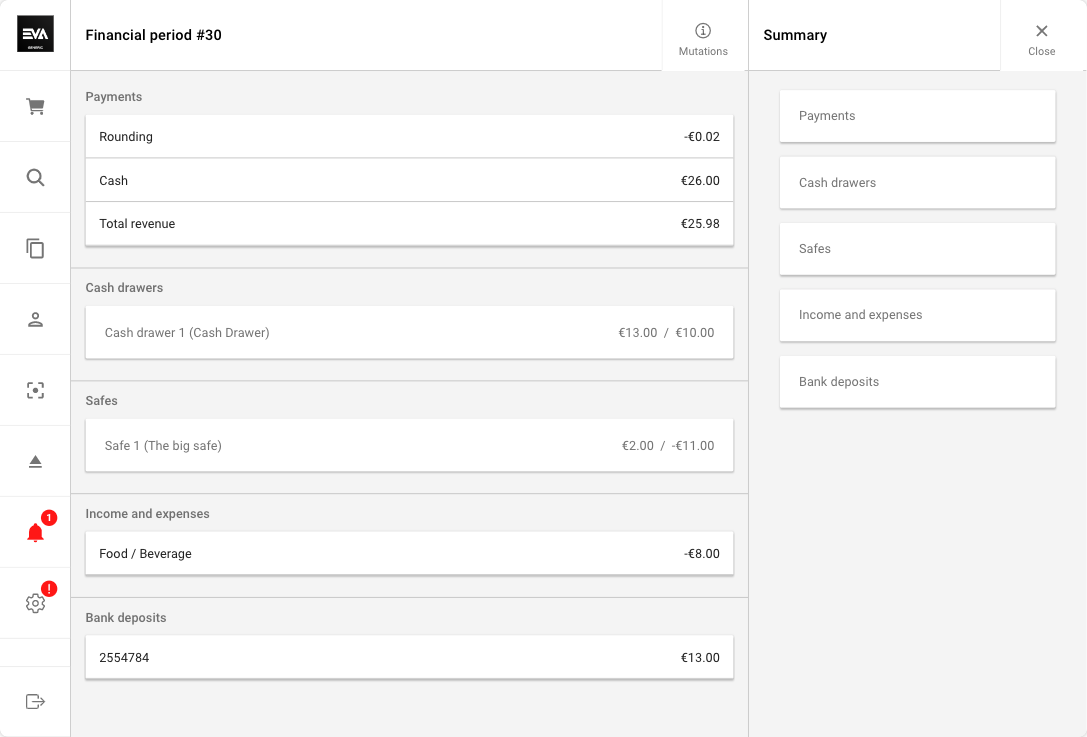
From the More options tab on your POS App, tapping Reports under Financial period (organization unit name) will display your list of historically closed financial periods and the currently open one.
You will be presented with the respective summary by tapping any closed financial periods or the currently open ones. The summary would include five categories:
- Payments depict the totals of all sales transactions in cash.
- Cash drawers, which depict the opening and closing balance.
- Safes, which would also depict the opening and closing balance.
- Income and expenses, which depicts any recorded income or expense transactions.
- Bank deposits, which depict any bank deposits made.
X report (AKA TerminalReport)
In the top right, you also have the option to Generate X report.

The report's purpose is to summarize the day’s activities so far, thus for currently open financial periods. So things like your store sales totals (categorized by payment methods), refunds, discounts, and more (as seen in the below screenshot). The report can be generated at any time without resetting the day’s information and can be printed if a configured thermal printer exists.

Some things to keep in mind:
- The initial display shows a list of historically generated X reports and by whom it was created with date, time, and the underlying station it was generated for.
- In scenarios where more than one station is available, you have the option to select which one you would like to generate an X report for by tapping on Station (right pane).

Printing an X report requires setting up a stencil. The stencil configuration should be done as follows:
- Type: Template
- Organization: Leave blank
- Name: TerminalReport
- Country: Select following your setup
- Language: Leave empty
- Destination: Thermal printer
- Content: Sample below
<report>
    <scope bold=*true* align="center" size="1,1">
        {{>Document.Type == 0 ? 'X Report' : 'Z Report'}} #{{>Number}}
    </scope>

    <scope align="center" font="FontB" tabs="21">
        {#partial TerminalReportHeader}

        {{>Document.Supplier.Name}}
        {{>Document.Supplier.Address.Street}}
        {{>Document.Supplier.Address.Number}}, {{>Document.Supplier.PostalCode}}
        {{>Document.Supplier.Address.City}}
        {{>Document.Supplier.Address.Country}}

        Org.Nr {{>Document.Supplier.RegistrationNumber}}
        Tax. Nr {{>Document.Supplier.TaxRegistrationNumber}}
    </scope>

    <feed amount="32"/>

    Date: {{:~date(Document.CreationTime, 'DD.MM.YYYY', 'se-SE', 'Europe/Stockholm')}}
    Time: {{:~date(Document.CreationTime, 'HH:mm:ss', 'se-SE', 'Europe/Stockholm')}}

    <feed amount="32"/>

    <grid positions="0, 30">
        <row>
            <col width="20">
                <bold>Total cash sales</bold>
            </col>
            <col>{{:~currency(Document.GrandTotal, ~root.CurrencyID)}}</col>
        </row>

        <row>
            <col width="20">
                <bold>Change</bold>
            </col>
            <col>{{:~currency(Document.Change, ~root.CurrencyID)}}</col>
        </row>
        <row>
            <col width="20">
                <bold>Cashdrawer openings</bold>
            </col>
            <col>{{>Document.CashDrawerOpenings}}</col>
        </row>

        <row>
            <col width="20">
                <bold>Payments</bold>
            </col>
            <col>{{: Document.Payments ? Document.Payments.length : 0}}</col>
        </row>

        {{for Document.Payments}}
        <row>
            <col width="20">
                {{>Type.Name}} ({{>Count}})
            </col>
            <col>{{:~currency(Amount, ~root.CurrencyID)}}</col>
        </row>
        {{/for}}

        <row>
            <col width="20">
                <bold>Taxes</bold>
            </col>
            <col>{{: Document.Taxes ? Document.Taxes.length : 0}}</col>
        </row>

        {{for Document.Taxes}}
        <row>
            <col width="20">
                {{>Name}} ({{:~rateToPercentage(Rate)}})
            </col>
            <col>{{:~currency(Amount, ~root.CurrencyID)}}</col>
        </row>
        {{/for}}

        <row>
            <col width="20">
                <bold>Payments per employee</bold>
            </col>
            <col>{{: Document.PaymentsPerUser ? Document.PaymentsPerUser.length : 0}}</col>
        </row>

        {{if Document.PaymentsPerUser}}
        {{for Document.PaymentsPerUser}}
        <row>
            <col width="20">
                Employee {{>UserID}} ({{>Count}})
            </col>
            <col>{{:~currency(Amount, ~root.CurrencyID)}} ({{>Description}})</col>
        </row>
        {{/for}}
        {{/if}}

        <row>
            <col width="20">
                <bold>Product groups</bold>
            </col>
            <col>{{>Document.ProductGroups.length}}</col>
        </row>

        {{for Document.ProductGroups}}
        <row>
            <col width="20">
                {{>Code}} ({{>Count}})
            </col>
            <col>{{:~currency(Amount, ~root.CurrencyID)}}</col>
        </row>
        {{/for}}

        <row>
            <col width="20">
                <bold>Number of discounts</bold>
            </col>
            <col>{{>Document.DiscountCount}}</col>
        </row>
        <row>
            <col width="20">
                <bold>Total amount of discounts</bold>
            </col>
            <col>{{:~currency(Document.TotalDiscounts, ~root.CurrencyID)}}</col>
        </row>

        <row>
            <col width="20">
                <bold>Number of returns</bold>
            </col>
            <col>{{>Document.ReturnCount}}</col>
        </row>
        <row>
            <col width="20">
                <bold>Total amount of returns</bold>
            </col>
            <col>{{:~currency(Document.TotalReturnsAmount, ~root.CurrencyID)}}</col>
        </row>

        <row>
            <col width="20">
                <bold>Number of copies</bold>
            </col>
            <col>{{>Document.CopyReceiptsPrinted}}</col>
        </row>
        <row>
            <col width="20">
                <bold>Total amount of copies</bold>
            </col>
            <col>{{:~currency(Document.TotalCopyReceiptsAmount, ~root.CurrencyID)}}</col>
        </row>

        {{* Grand totals *}}
        <row>
            <col width="20">
                <bold>Grand total (cash)</bold>
            </col>
            <col>{{:~currency(Document.GrandTotalCash, ~root.CurrencyID)}}</col>
        </row>
        <row>
            <col width="20">
                <bold>Grand total</bold>
            </col>
            <col>{{:~currency(Document.GrandTotal, ~root.CurrencyID)}}</col>
        </row>
        <row>
            <col width="20">
                <bold>Grand total (returns)</bold>
            </col>
            <col>{{:~currency(Document.GrandTotalReturns, ~root.CurrencyID)}}</col>
        </row>
        <row>
            <col width="20">
                <bold>Grand total (net)</bold>
            </col>
            <col>{{:~currency(Document.GrandTotalNet, ~root.CurrencyID)}}</col>
        </row>
    </grid>

    <feed amount="32"/>

    Terminal ID: {{>TerminalCode}}

    <feed amount="16"/>
</report>
Cash drawers
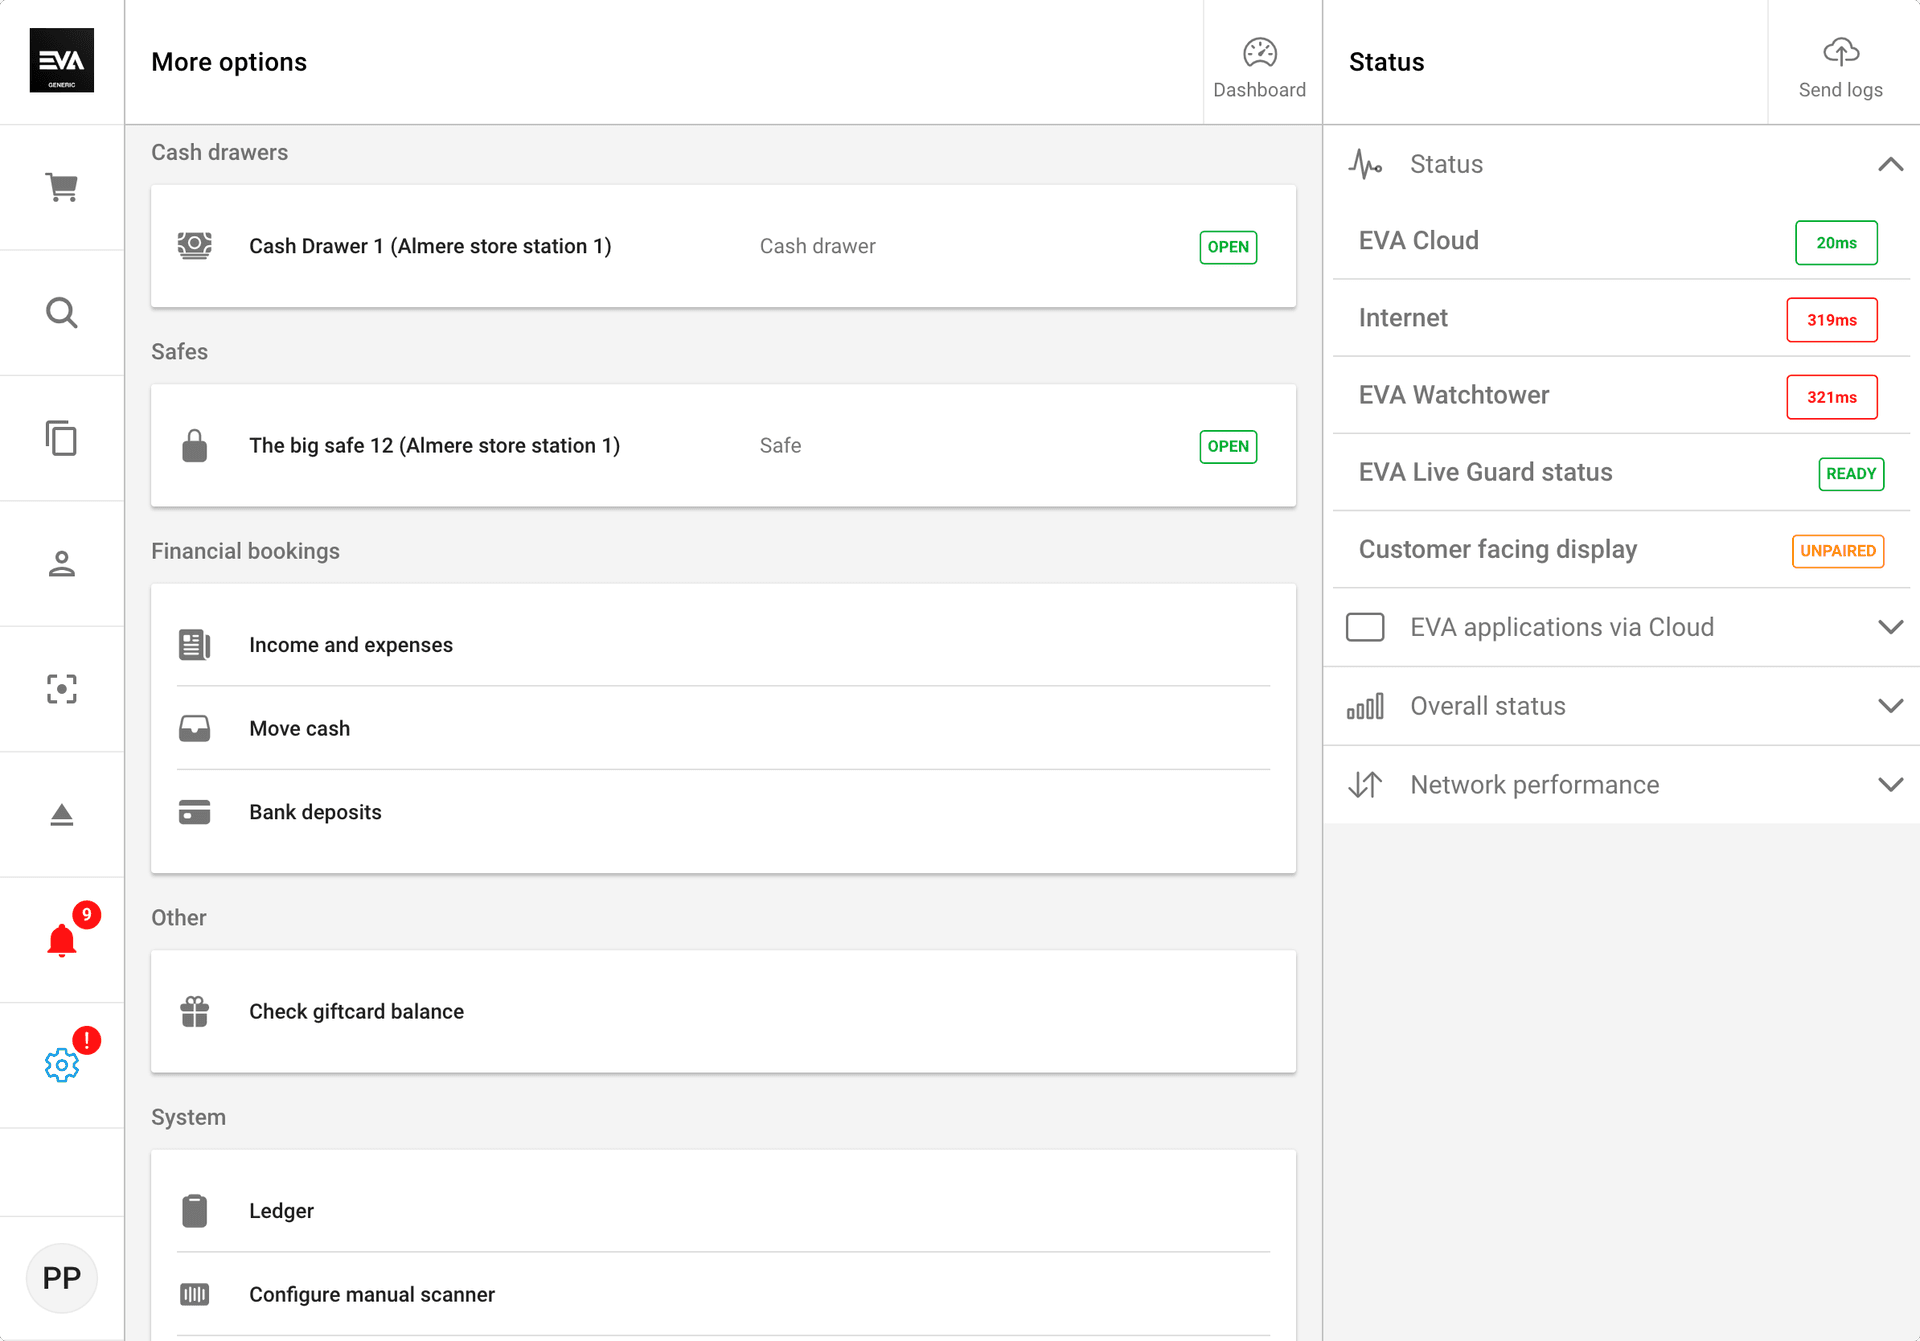
Under cash drawers, you will see all your available cash drawers and their current status (open or closed). In this example, we have only one cash drawer and its current status is open.
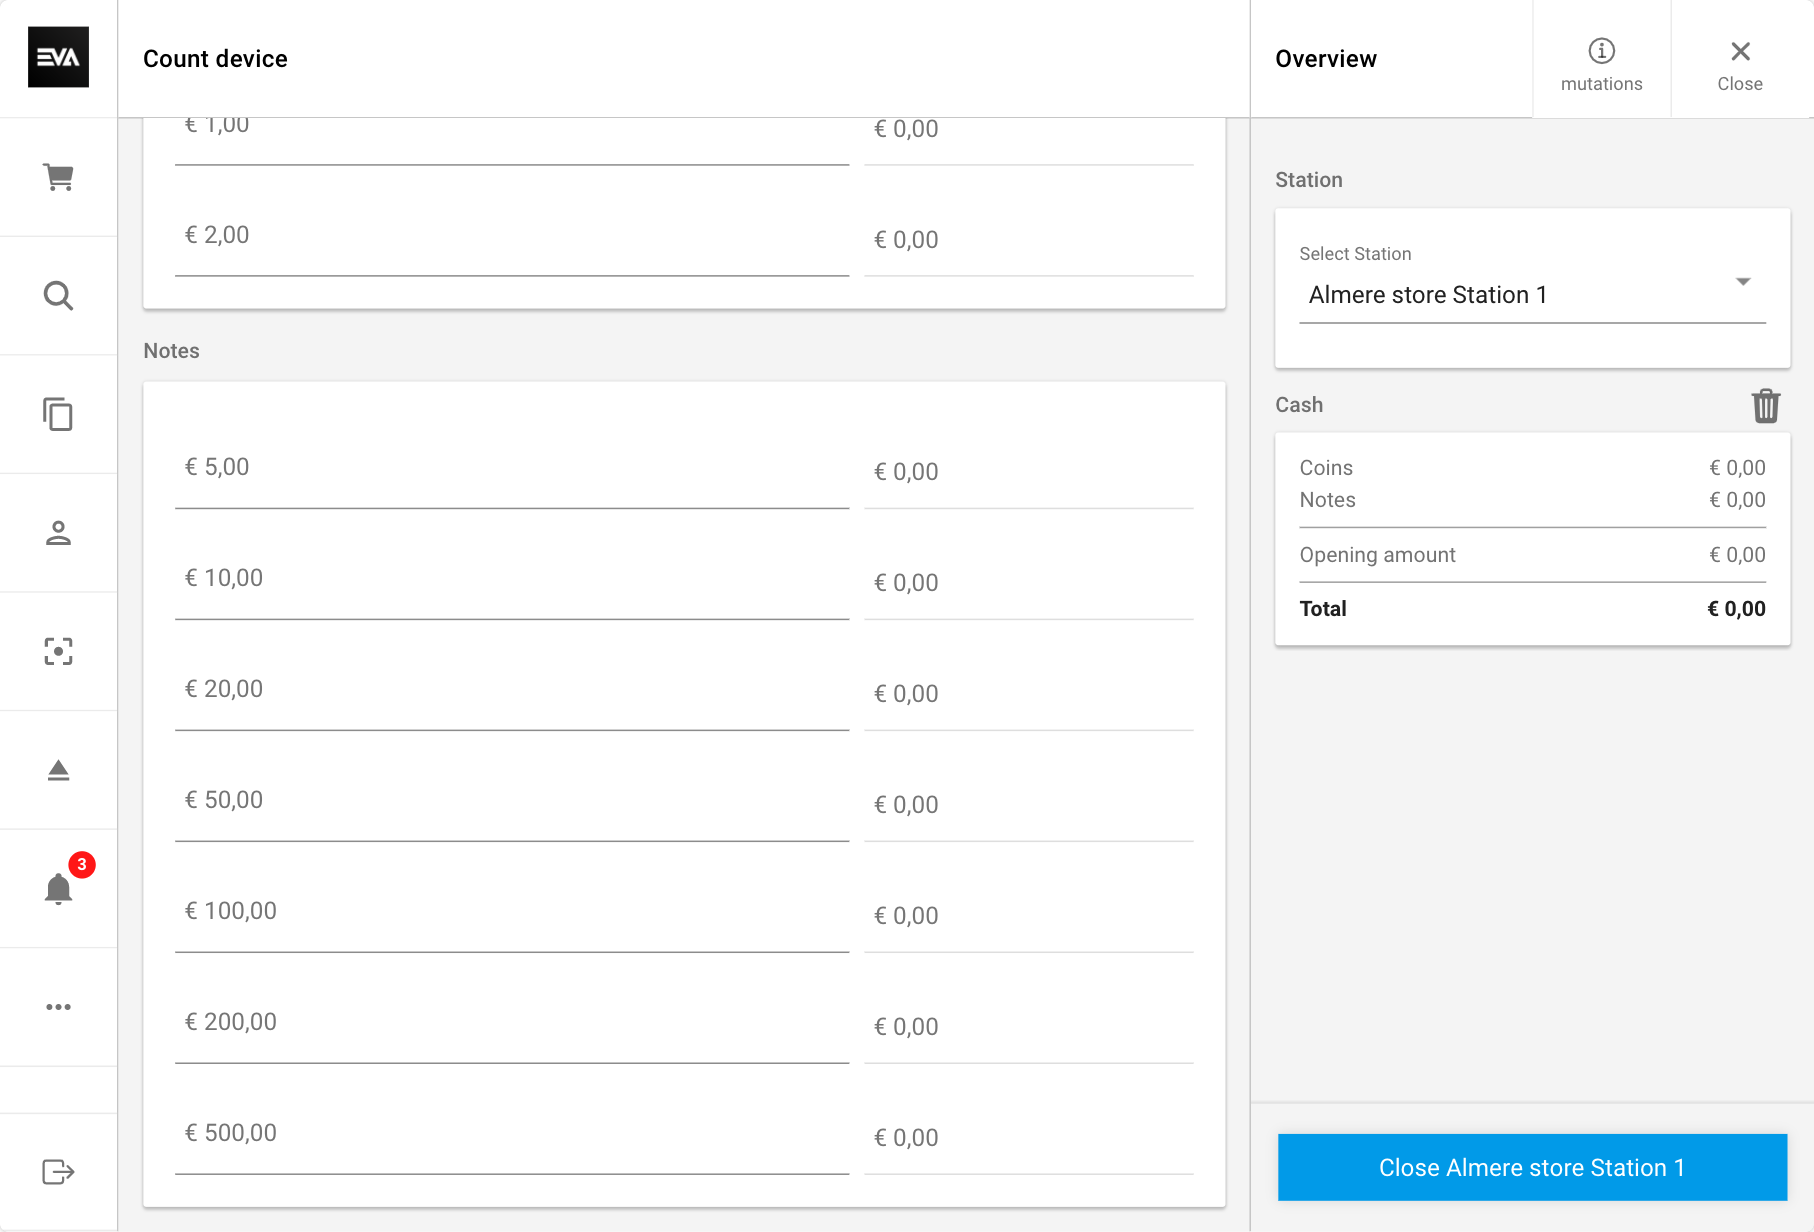
Tapping cash drawer
By doing so, you are redirected to the 'Count device' page. In this step, you physically count your cash drawers and input your count details here (coins and notes). You also see on the right pane some valuable information to make it more transparent and easier for the user performing the count.
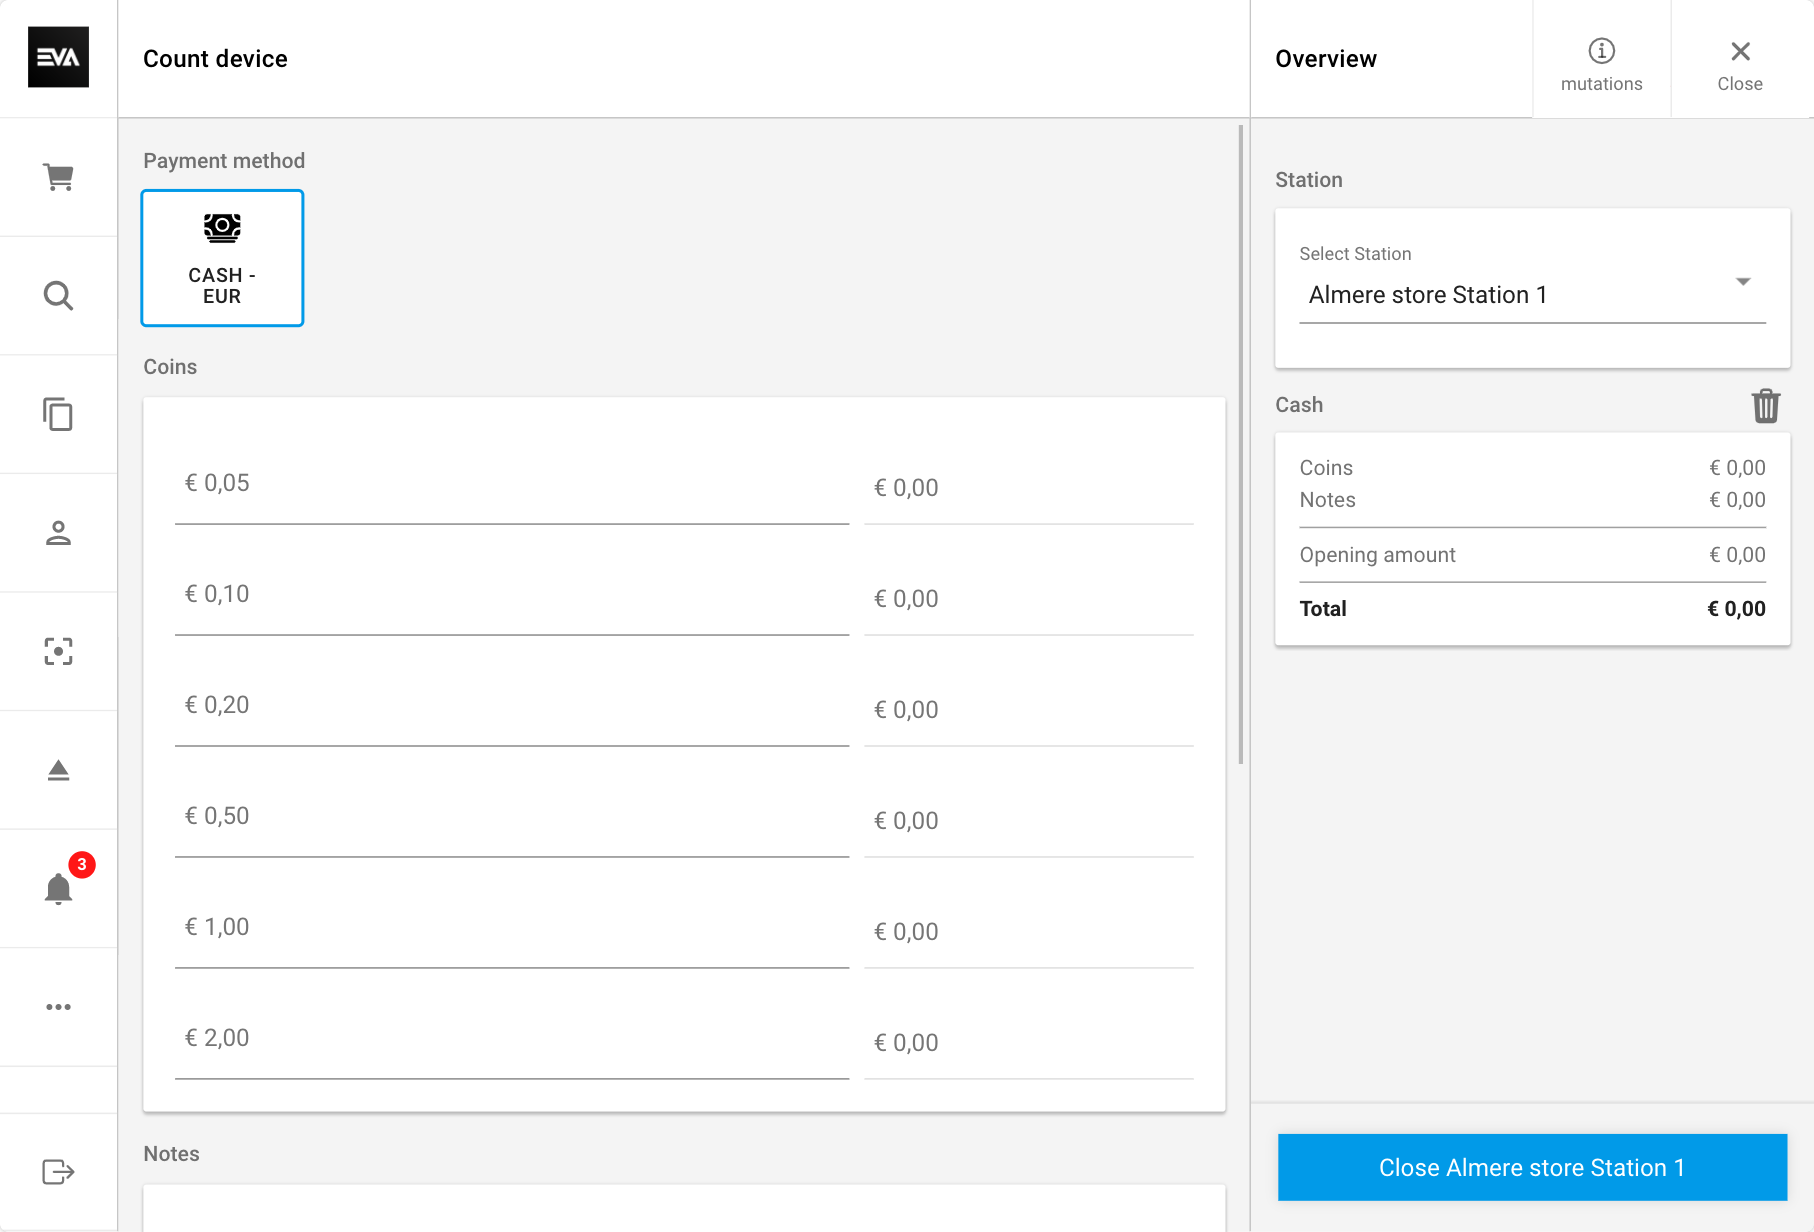
The coin and note options you are getting here will be based on your Cash handlers setup.
Any deviations between the physical count and reported cash transactions would prompt a 'Count correction' message and an input field called 'Correction reason' where you need to justify such deviation. Make sure you're ready to explain if such a scenario arises.
Safes
Under safes, you will see all your available safes and the current status (open or closed). In this example, we have only one safe, and its current status is closed.
Please check our store infrastructure to learn more about POS peripherals.
Financial bookings
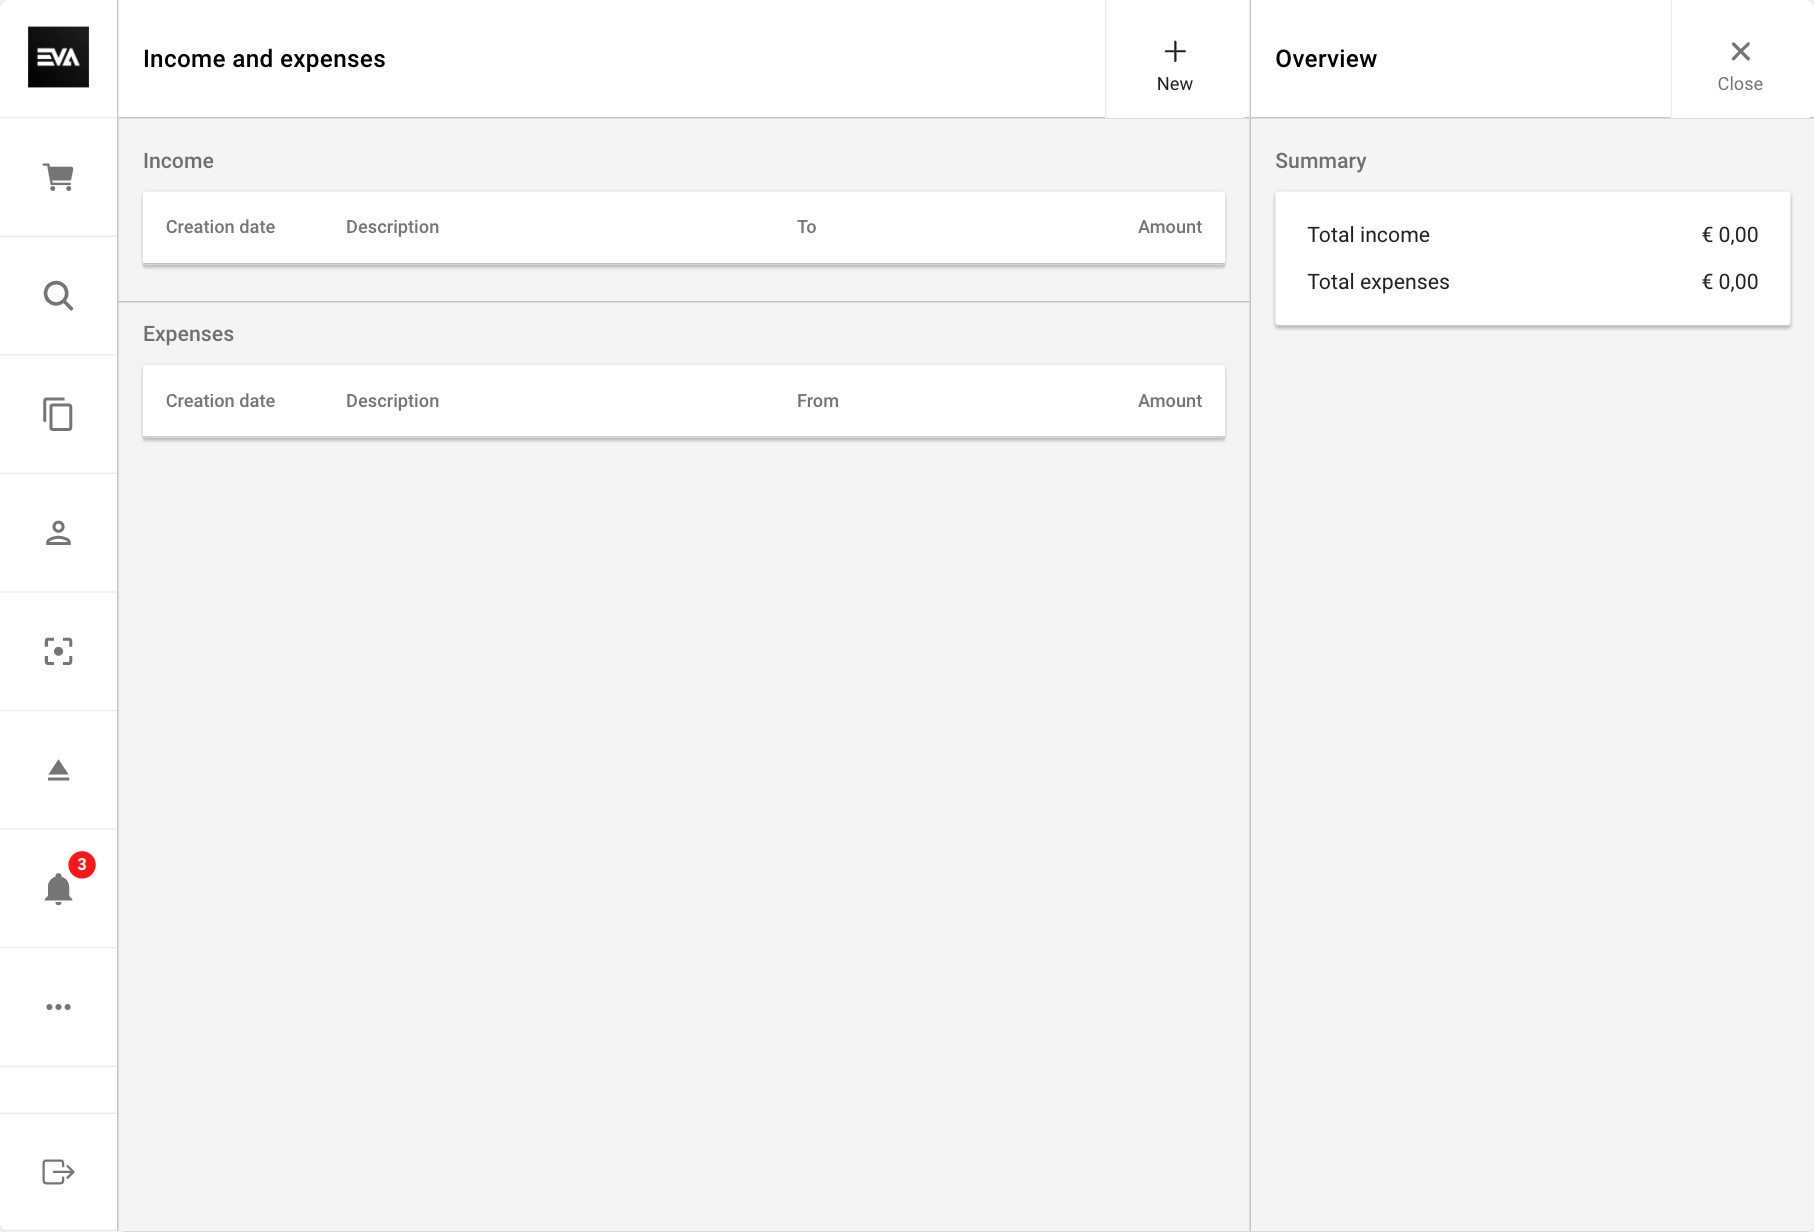
Income and expenses
Other than sales, stations can also have other income and expenses, such as income from change money or withdrawals for an employee's lunch. The income and expenses option is thus used for all 'other' transactions, which can add or withdraw money from the cash drawer or safe.
When you go to the income and expense interface, you first see an overview of the number of income and expenses in this financial period, including the reason and the amount. To add a new payment or expense, tap the '+ New', select the classification income/expense type from the pop-up, select the tax type, and then enter the amount and the description. On the right, select the station you will be adding or withdrawing from.
Adding a setting called App:CashExpense:Image:Enforced with value true. You force the user to add an image (for example, a receipt copy) to proceed with that expense booking. In other words, the add expense button remains greyed out if no image is added.
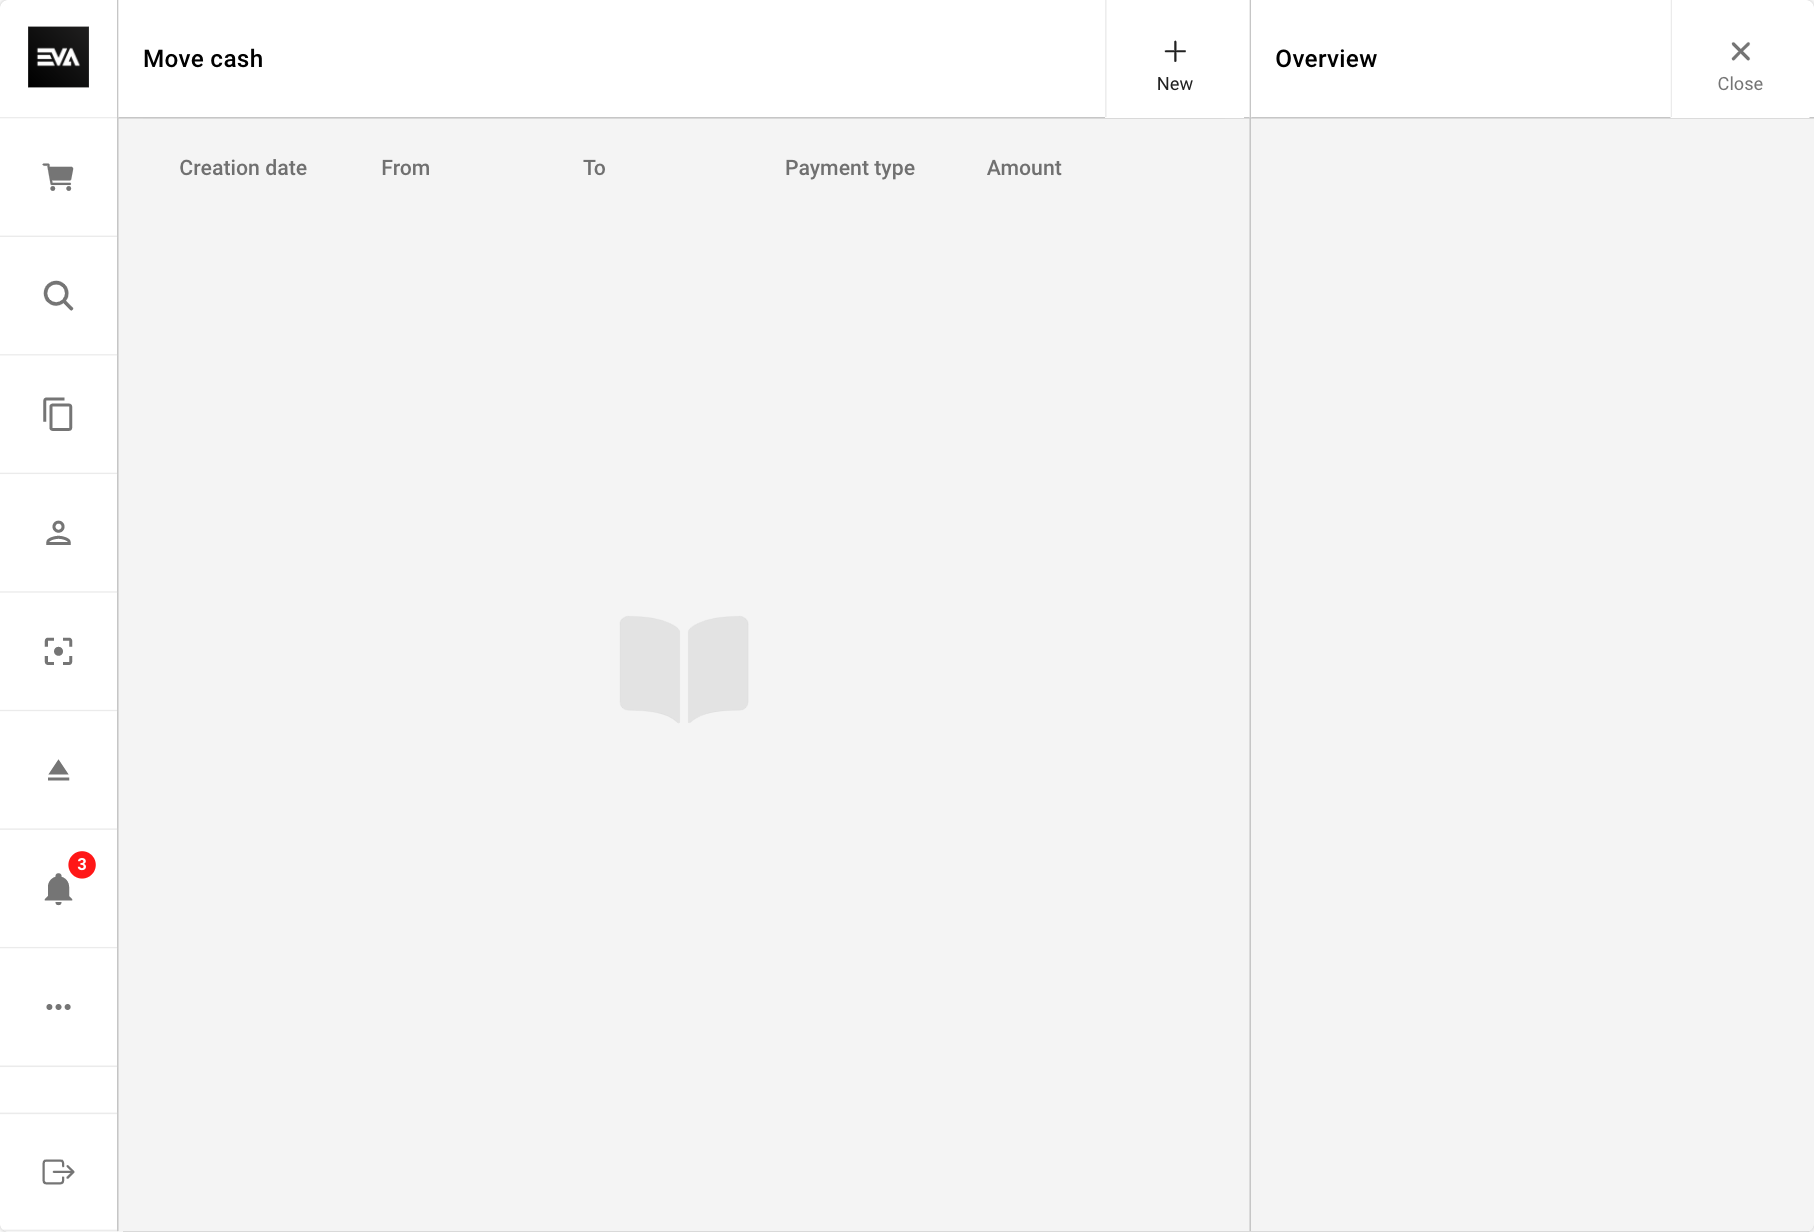
Move cash
When at least two stations are opened (a station can be both a cash drawer and/or a safe), it is possible to move cash from one station to the other.
When you go to the 'Move cash' page you first see an overview of the cash movements in this financial period including where it was moved from and to and the amount which was moved. To add a new cash movement, select '+ New'.
Enter the amount you want to move and select the Source station and Destination station. Tapping 'Move cash' will then complete the movement.
For ease of reference, here is a guide on how to add a station.
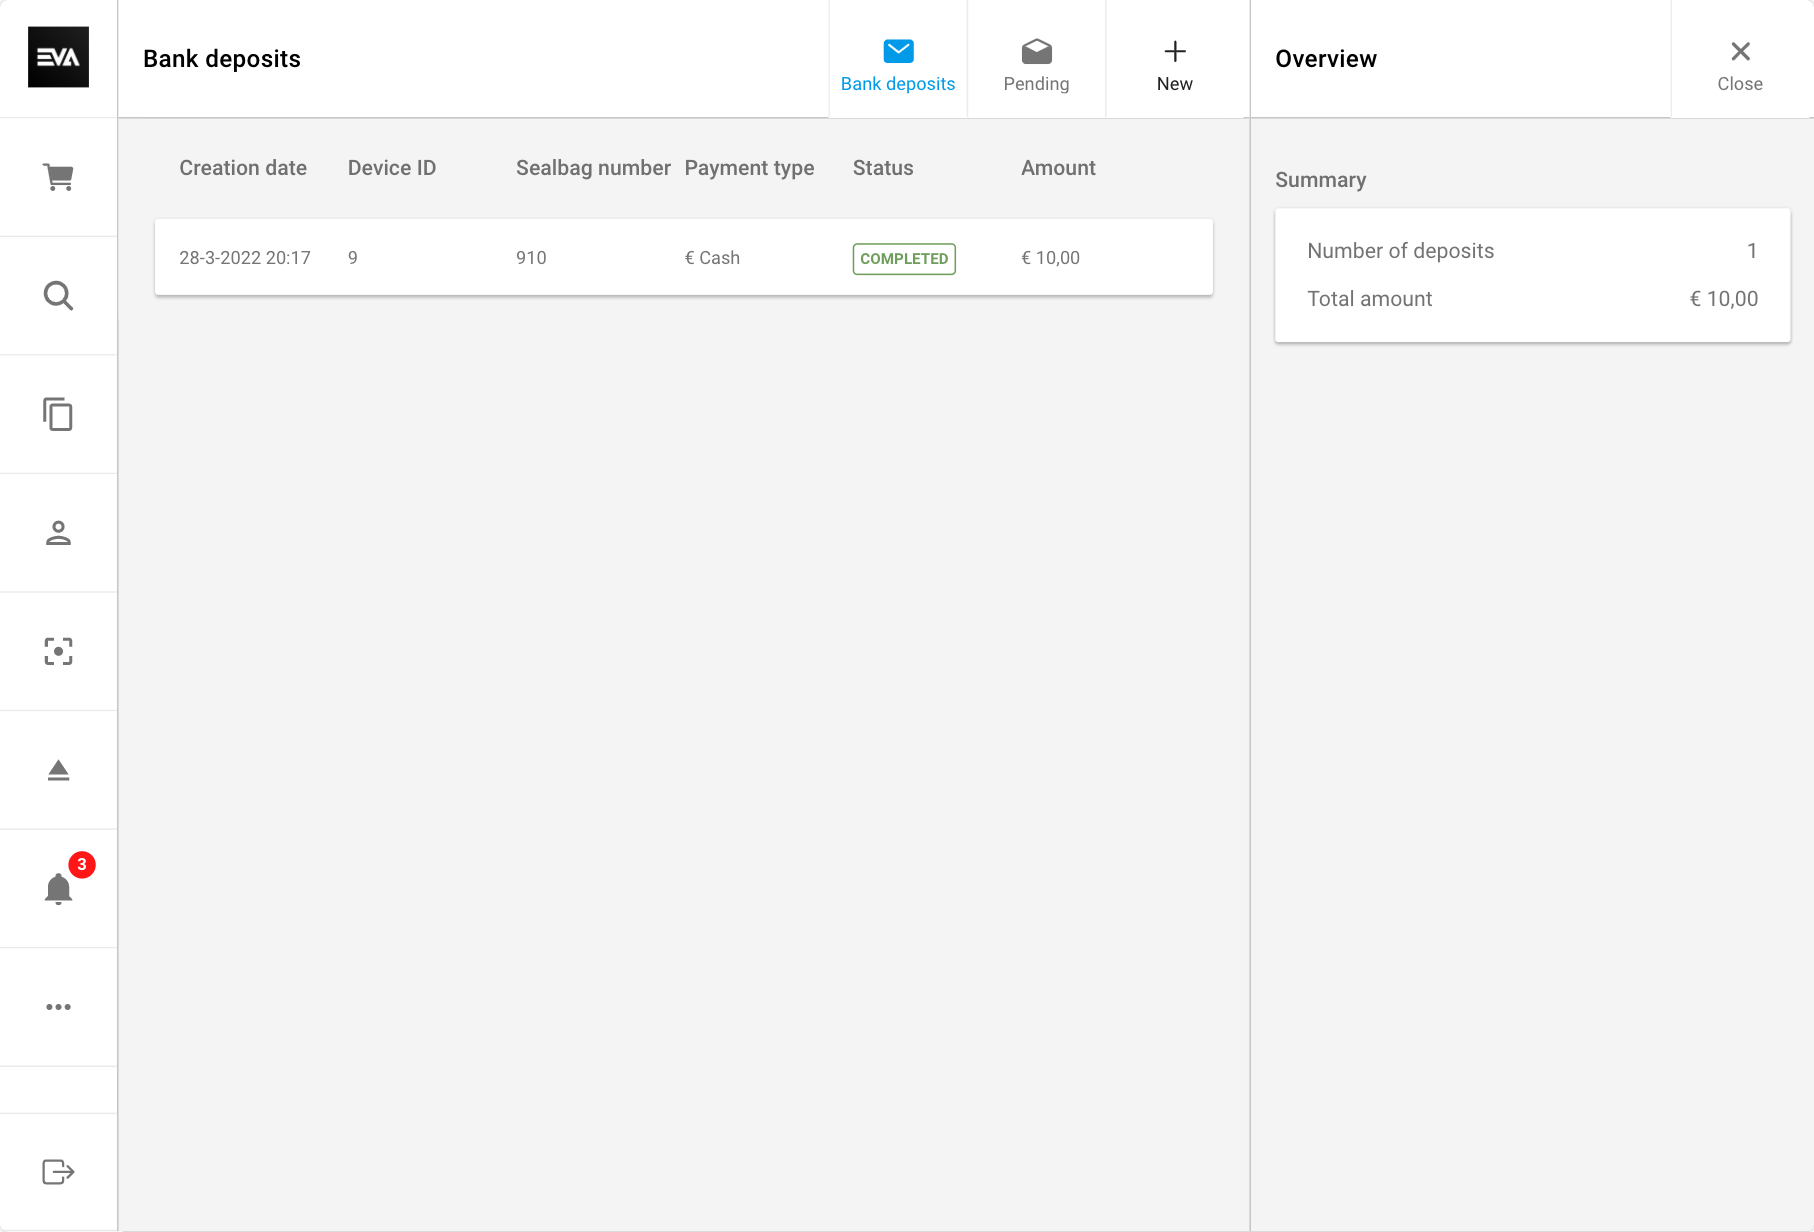
Bank deposits
The bank deposits option is used when you want to send a cash amount to the bank.
When you go to the Bank deposit page you first see an overview of the number of bank deposits in this financial period, including the seal bag number and the amount which was moved. To add a new bank deposit, select '+ New'.
First, enter the seal bag number you should have received from the bank. Then enter the amount you want to move to and select the station where you will get the money. 'Add new deposit' will complete the movement.
Signature on bank deposit
You can make signatures mandatory when performing bank deposits.
By setting App:BankDeposits:RequireSignature to true (default is false), a signature becomes mandatory before completing a bank deposit.
Sealbag number
If you insert a seal bag number already used, you will be prompted with a warning message. You will also see the date when that specific seal bag number was used for easy traceability.
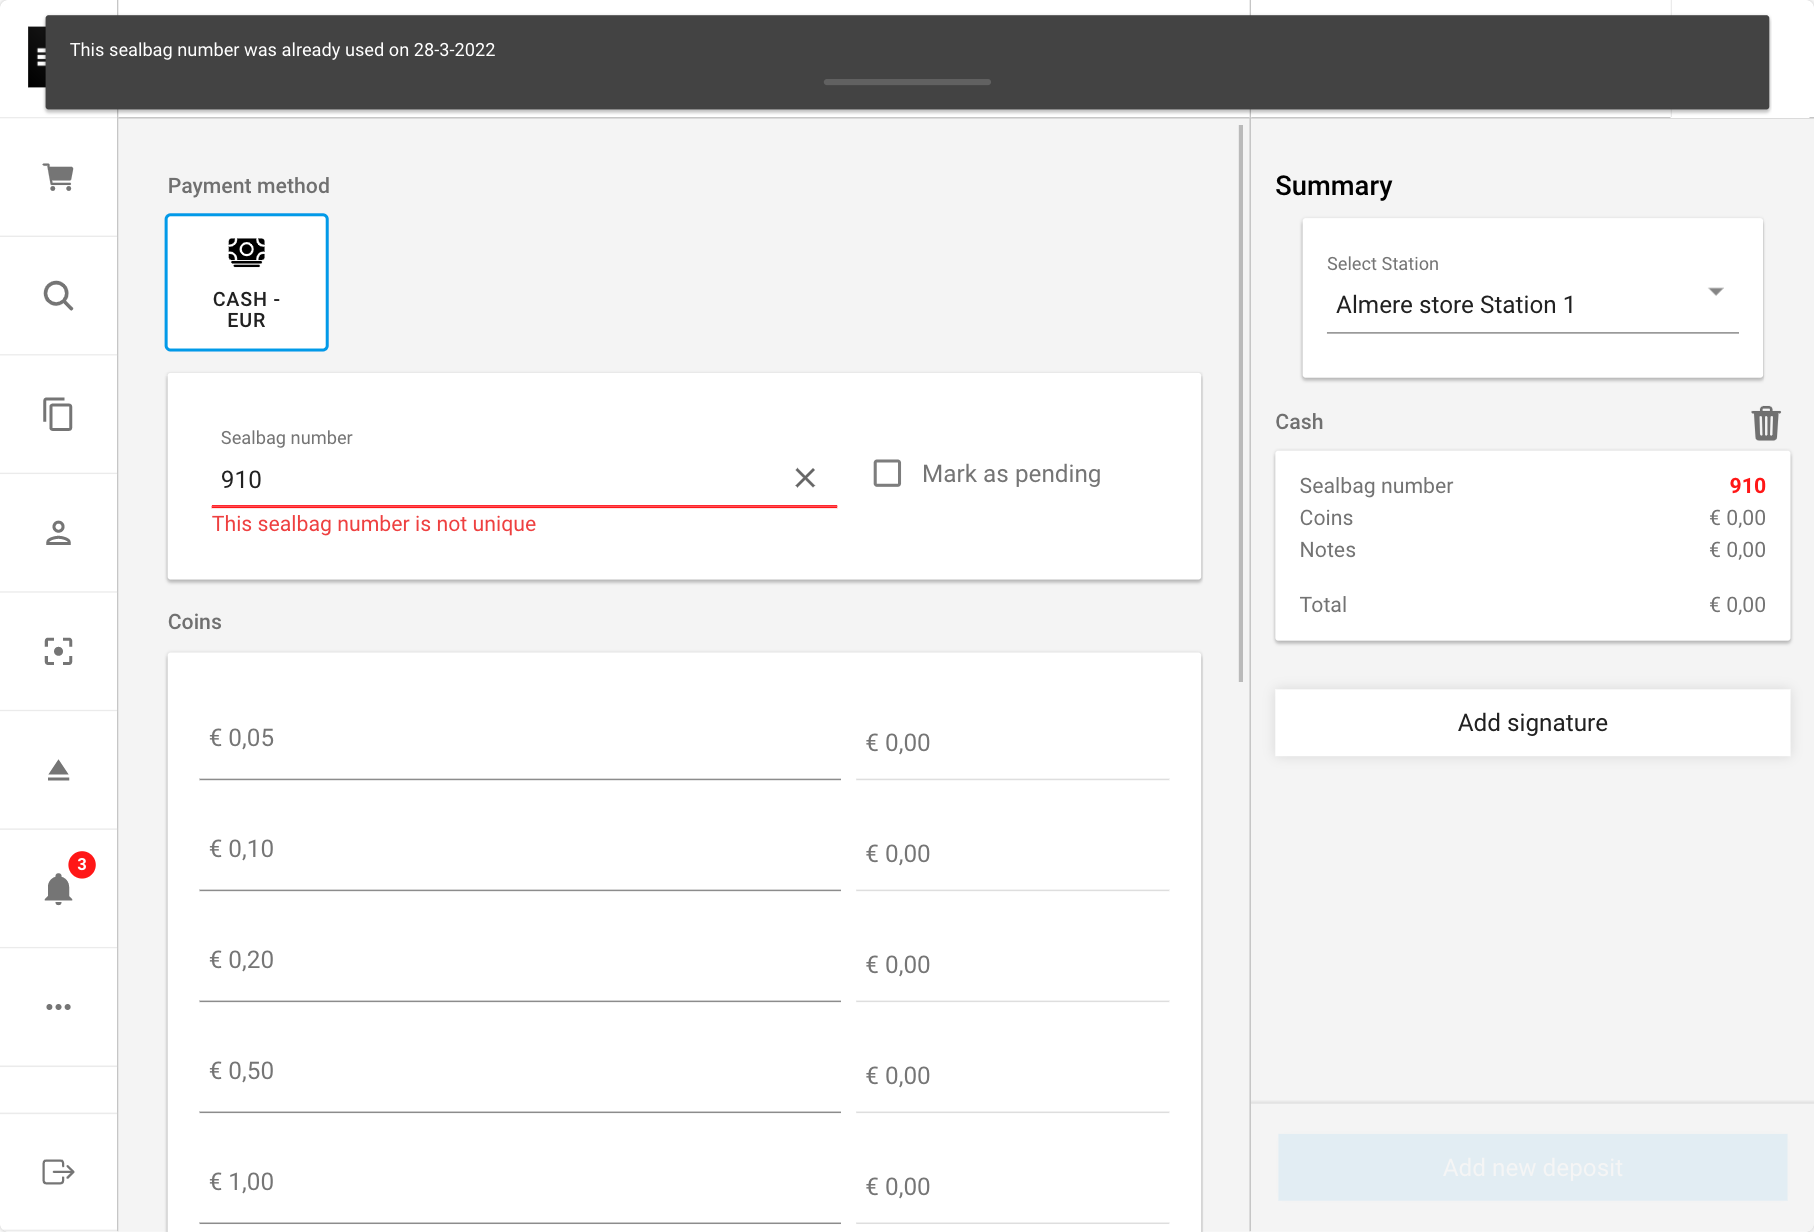
If you remove seal bags or your signatures, the Add deposit button will be enabled automatically when you input new values that meets all the requirements.
Other
Check gift card balance
Scan or input the gift card number in the respective field to check the balance. If you want to know more about gift cards, check our Gift cards documentation.
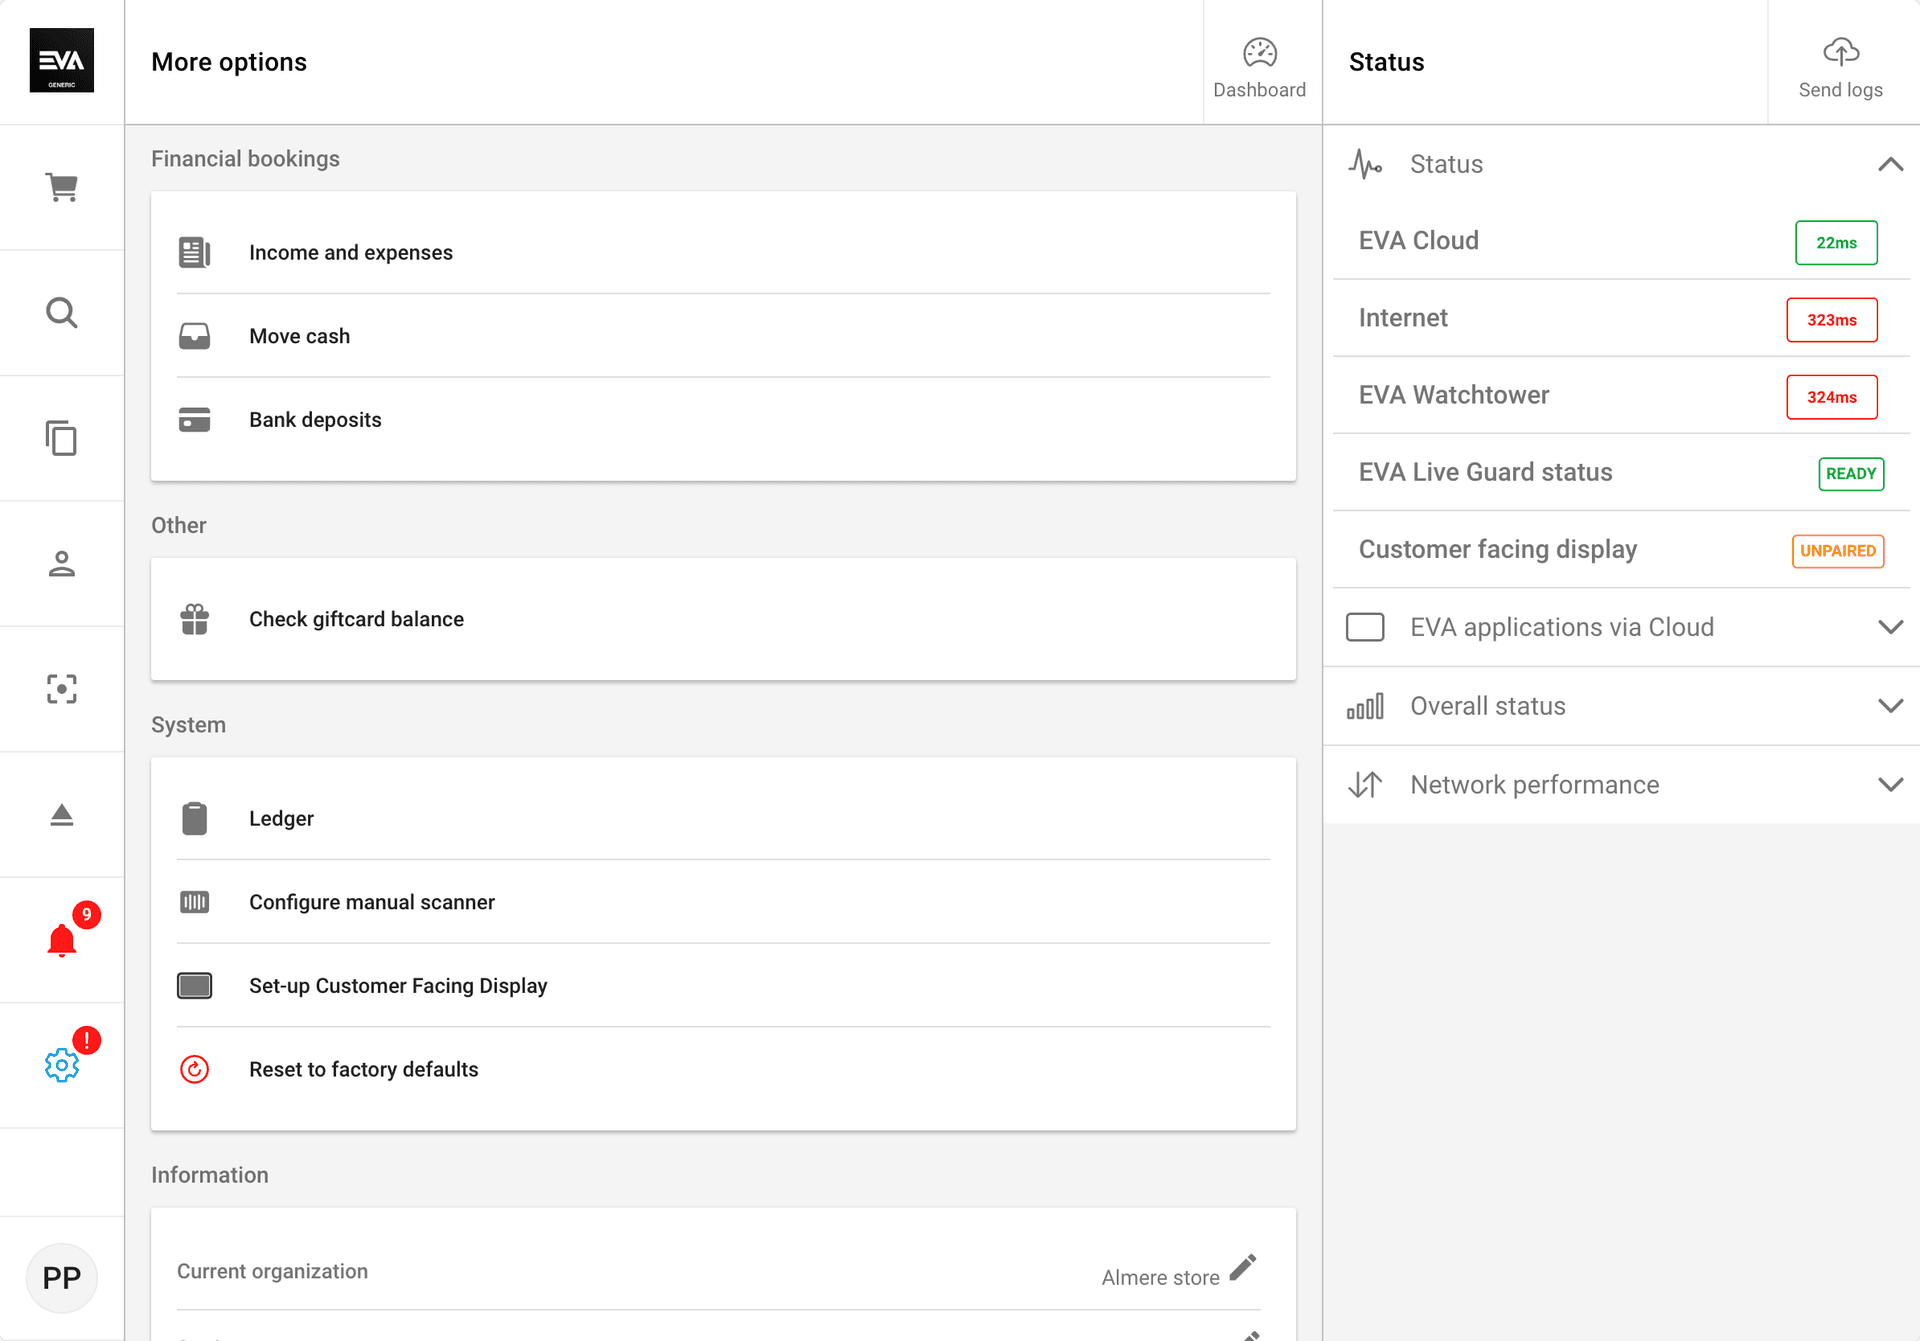
System
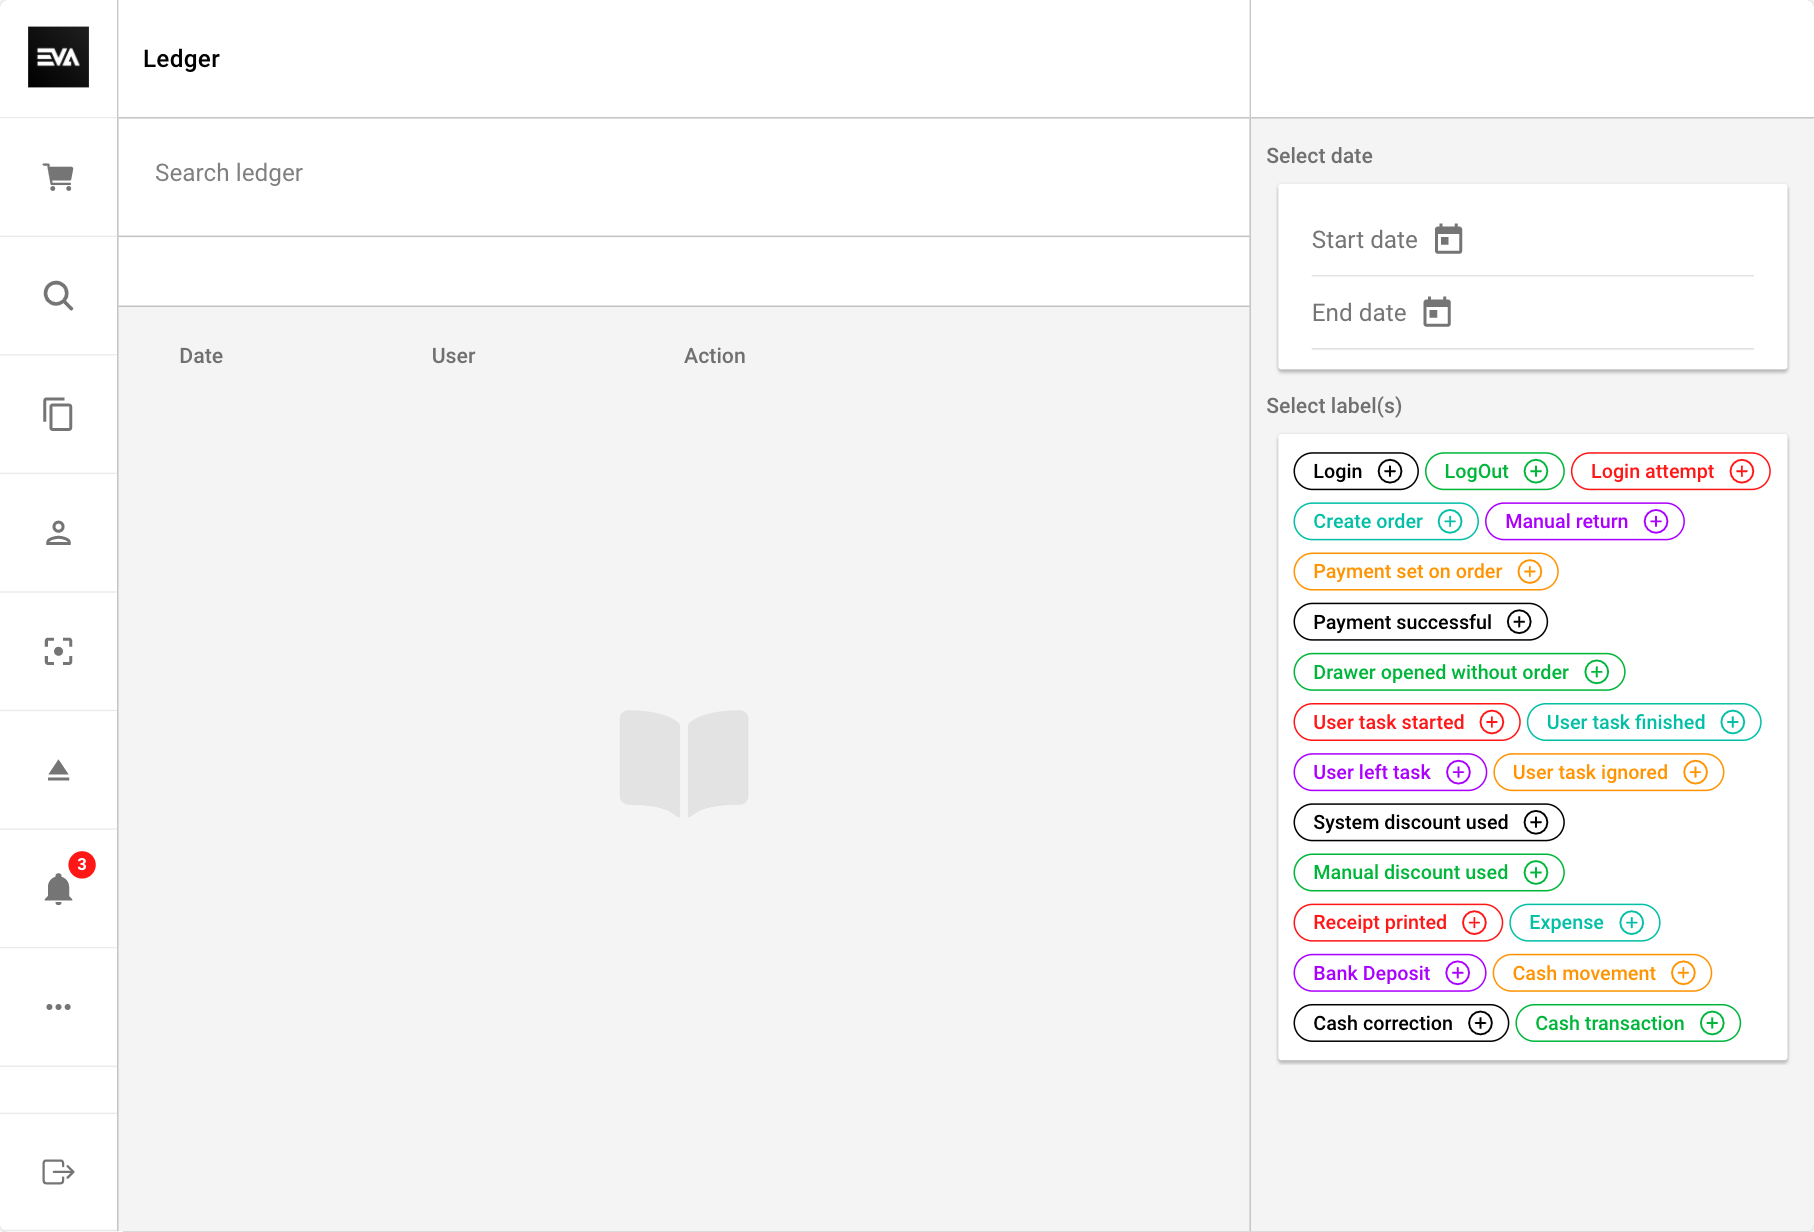
Ledger
With the Ledger option, you get an opportunity to generate various types of events. These can be for tracking, reporting, or recording purposes and are based on specific labels you can choose from.
You can see here the various labels you can choose from. For example: selecting the label "Login" and date January 1 until January 31 will give you all successful logins made on the POS within that time frame. If you combine labels, say "Login" and "Login attempt" the result would give you all successful and unsuccessful login attempts.
Feel free to play around here and combine labels to refine your results further. Enjoy!
Configure manual scanner (or POS itself)
For pairing your Companion App, Checkout App or a dedicated scanning device, please see our POS Scanning docs. The same documentation also explains how to use the POS itself as a scanning device.
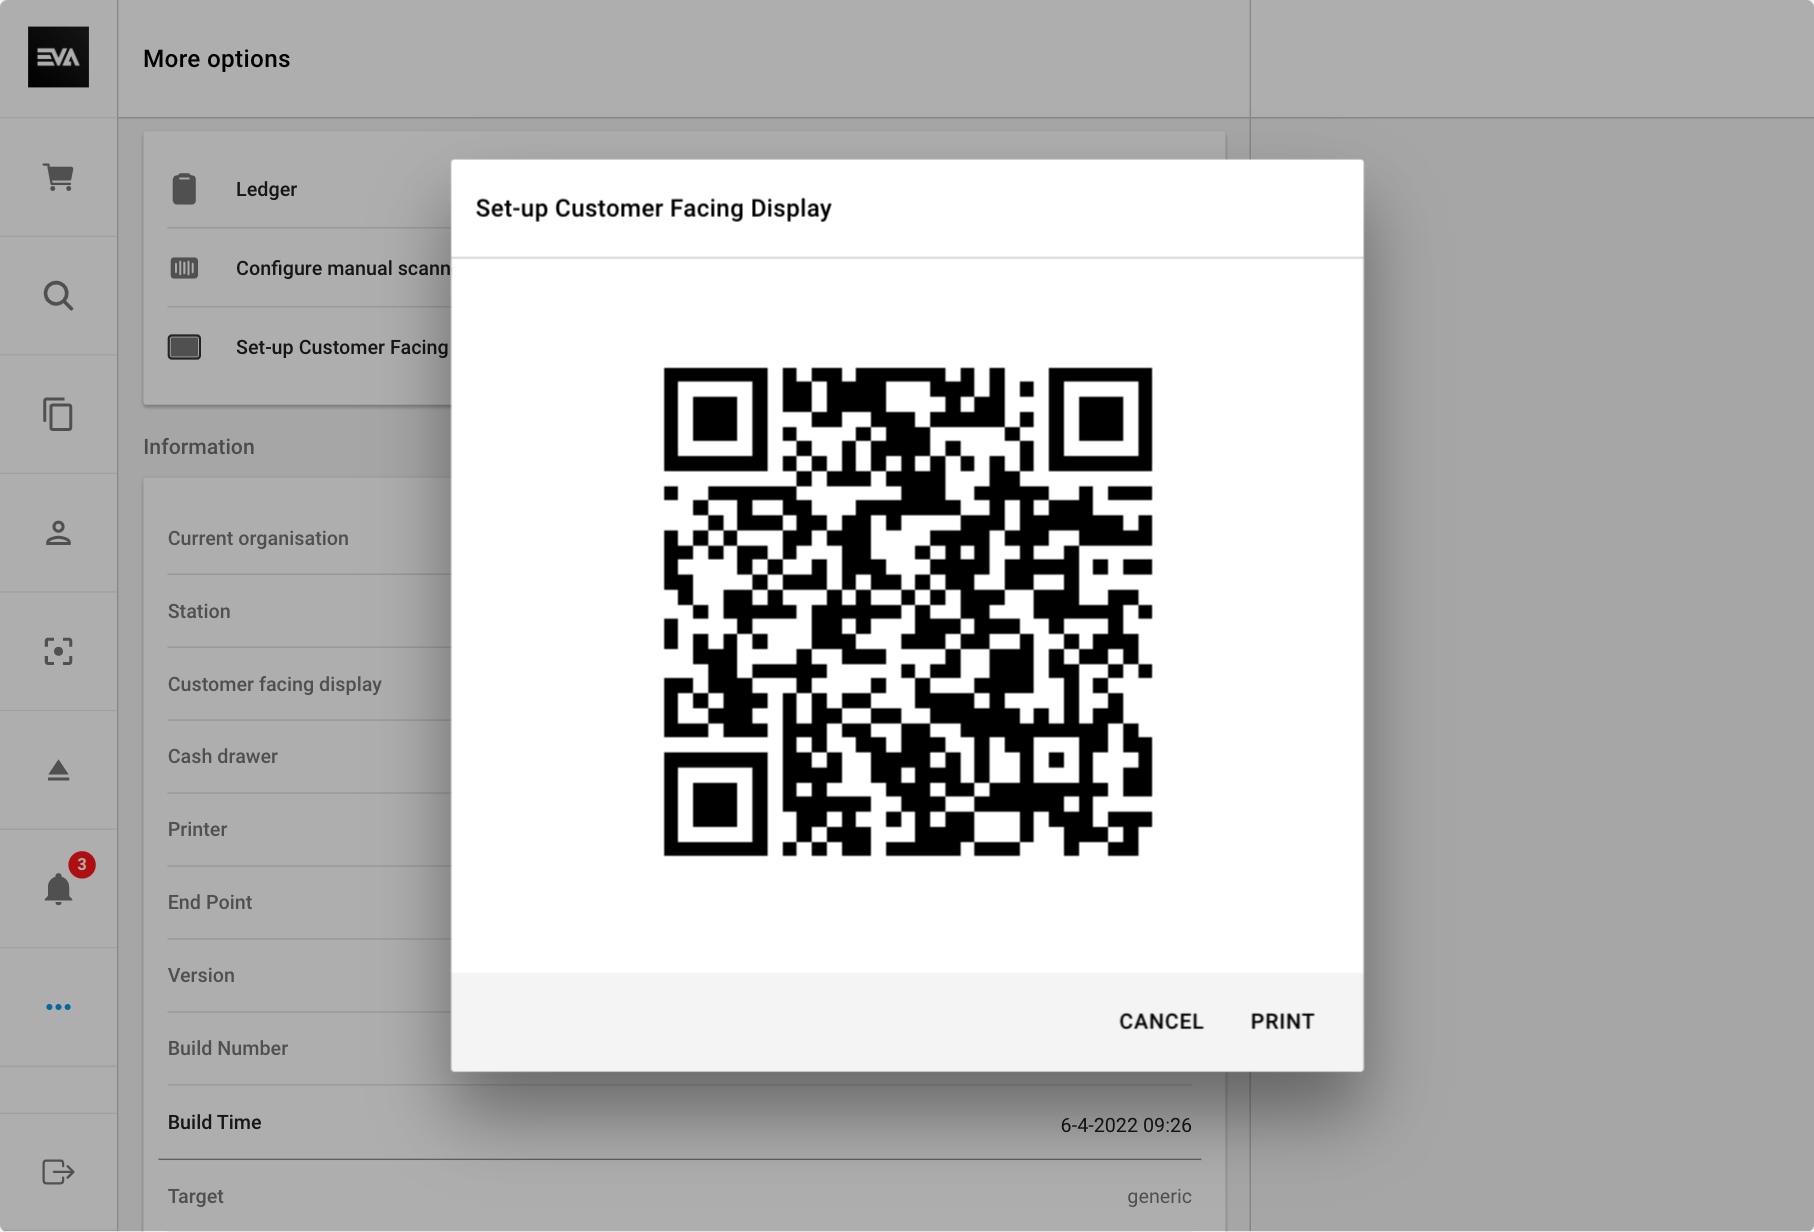
Set up Customer Facing Display
Watch our tutorial on CFD:
When setting up a Customer Facing Display, you will first be prompted to select a Station. In our example scenario, we only have one station for this store. If, in your environment, you have more than one, then they would all be displayed here.

Pairing can be done in two ways:
- Clicking "Create pairing QR" will display a QR for you (example below). Scanning this QR with your Customer Facing Display (CFD) device using the CFD App is enough for the magic to happen. Your CFD is now operational.
Make sure to make it look cool with your own customized and branded visual display.
- Clicking the WiFi symbol starts the wireless pairing process of POS with CFD. You will be prompted with an alert to give local network the permission to discover EVA CFD devices that are also connected to the same WiFi network. Once allowed, an alert on EVAs CFD will be also be prompted requesting permission to pair.
Once both POS & CFD prompts are allowed, the pairing is successful and Contentful will begin downloading the respective data.
When attempting to pair POS with CFD wirelessly, an alert is prompted on both devices requesting permission to wirelessly pair. If permission was initially declined, and later you wish to give it, this would then need to be done from the iOS device itself by selecting the respective App (CFD/POS) from iOS settings, and then tap the allow access toggle for Local Network. This applies to pairing with QR-Code as well, if permission was initially declined to access the camera, the toggle to allow Camera access would also be needed, otherwise scanning of the QR-Code would not be possible.
Debugging modes
There are two debugging modes to help find bugs. One of the modes is in the CFD, the other is in the POS. Here you can learn more about debugging modes.
Reset to factory defaults
This button prompts a first-time login flow.
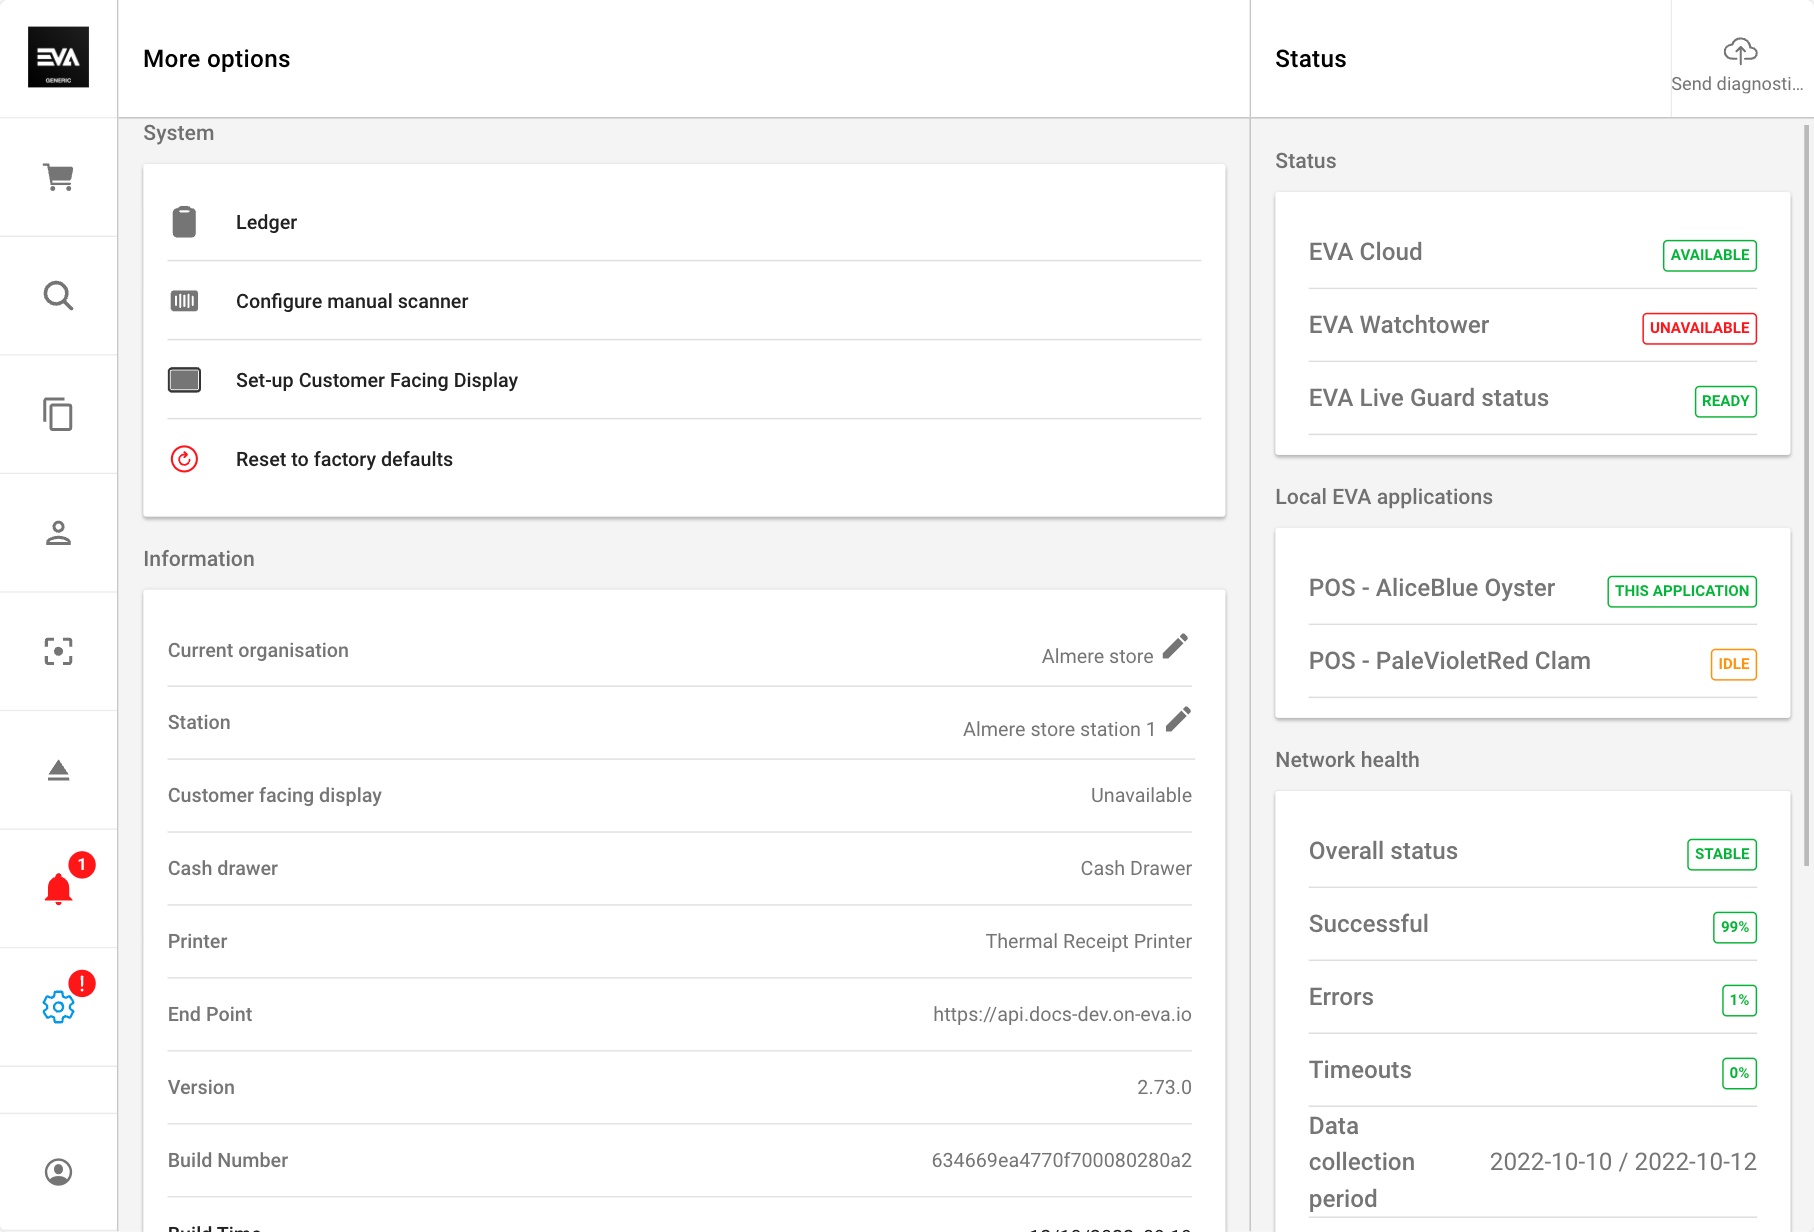
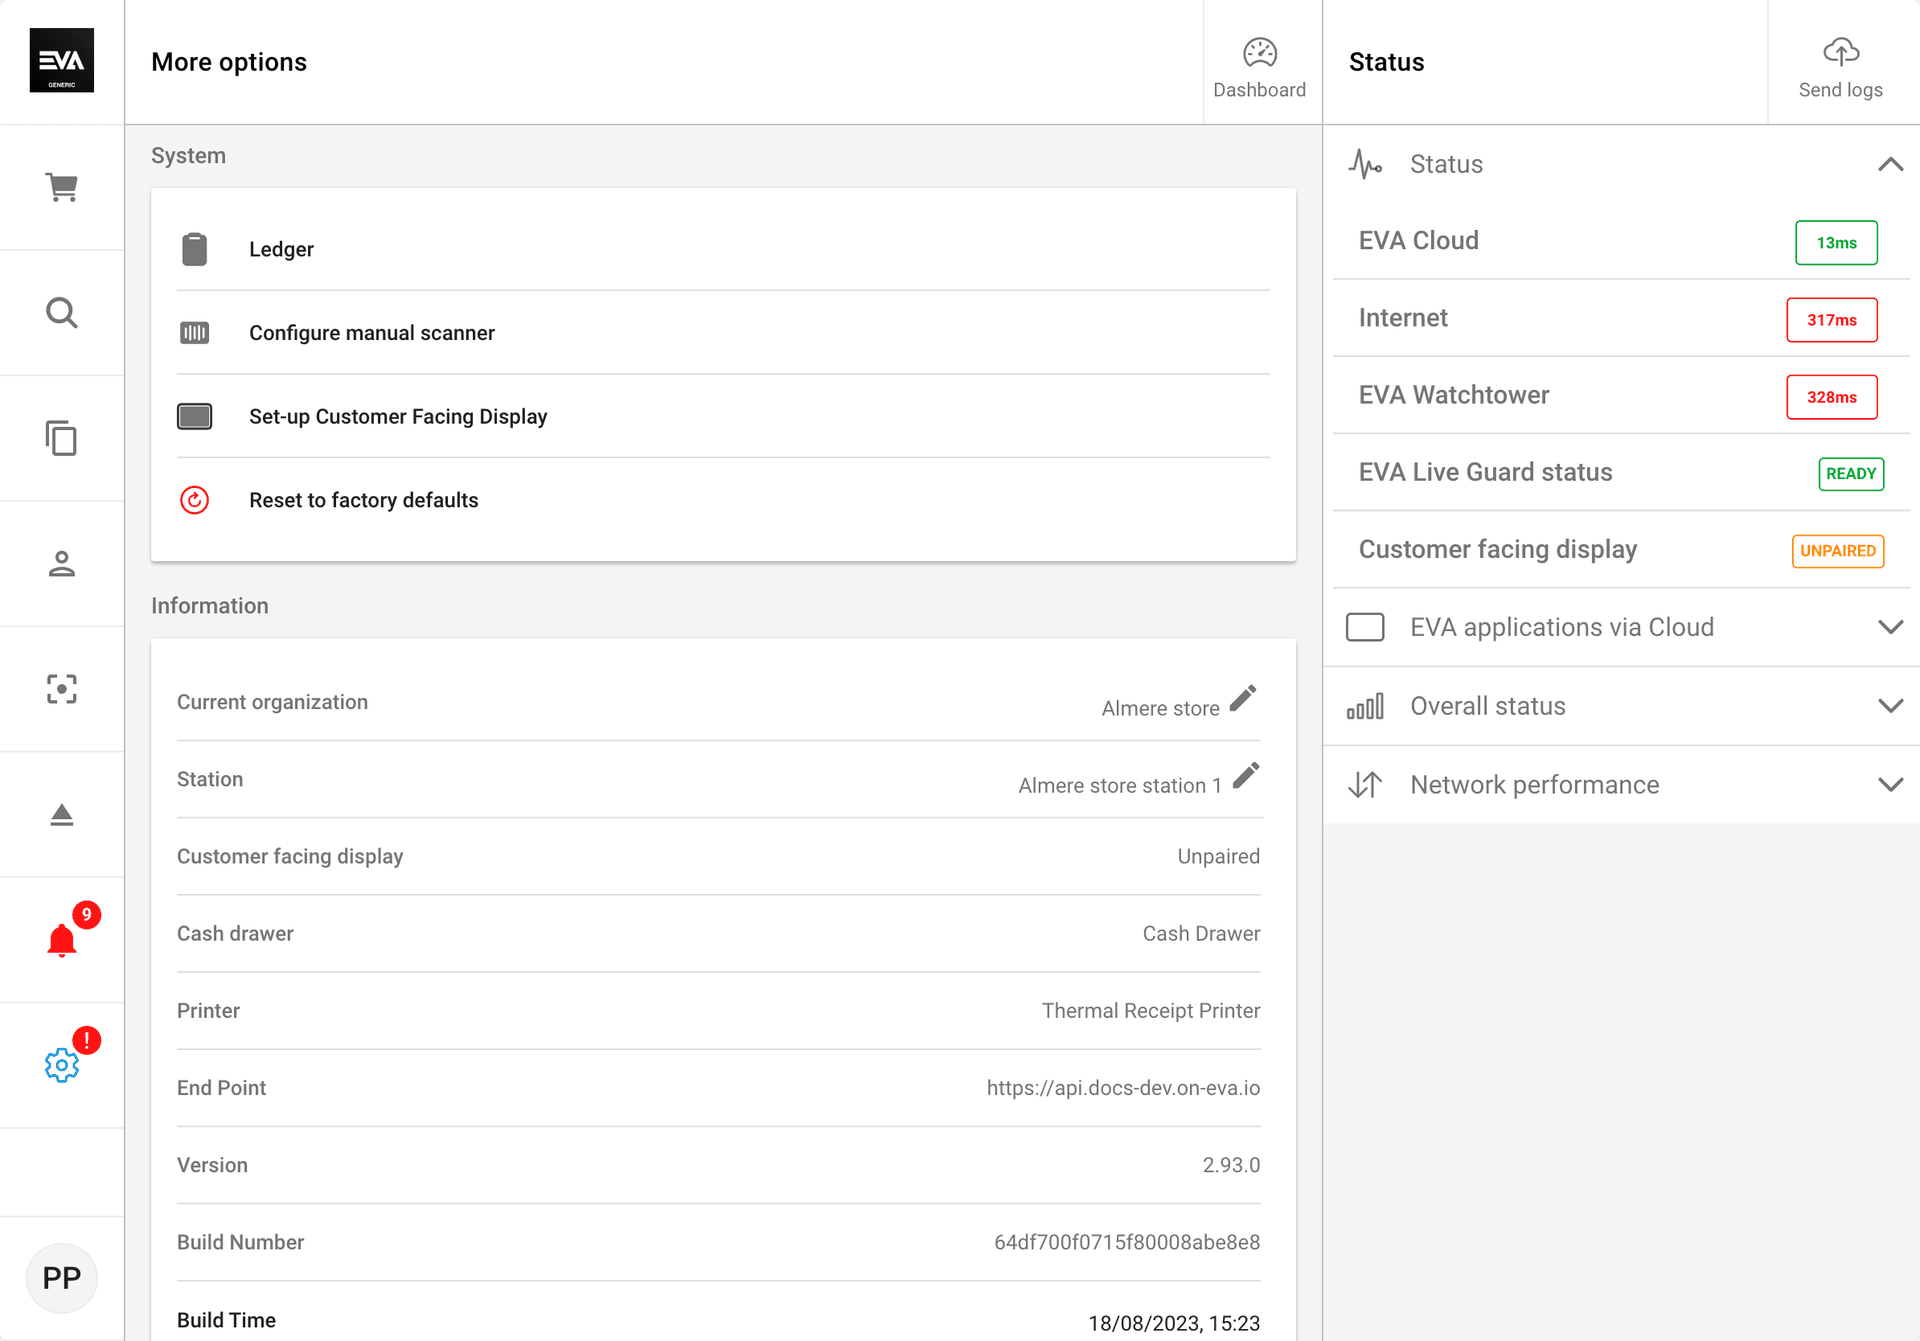
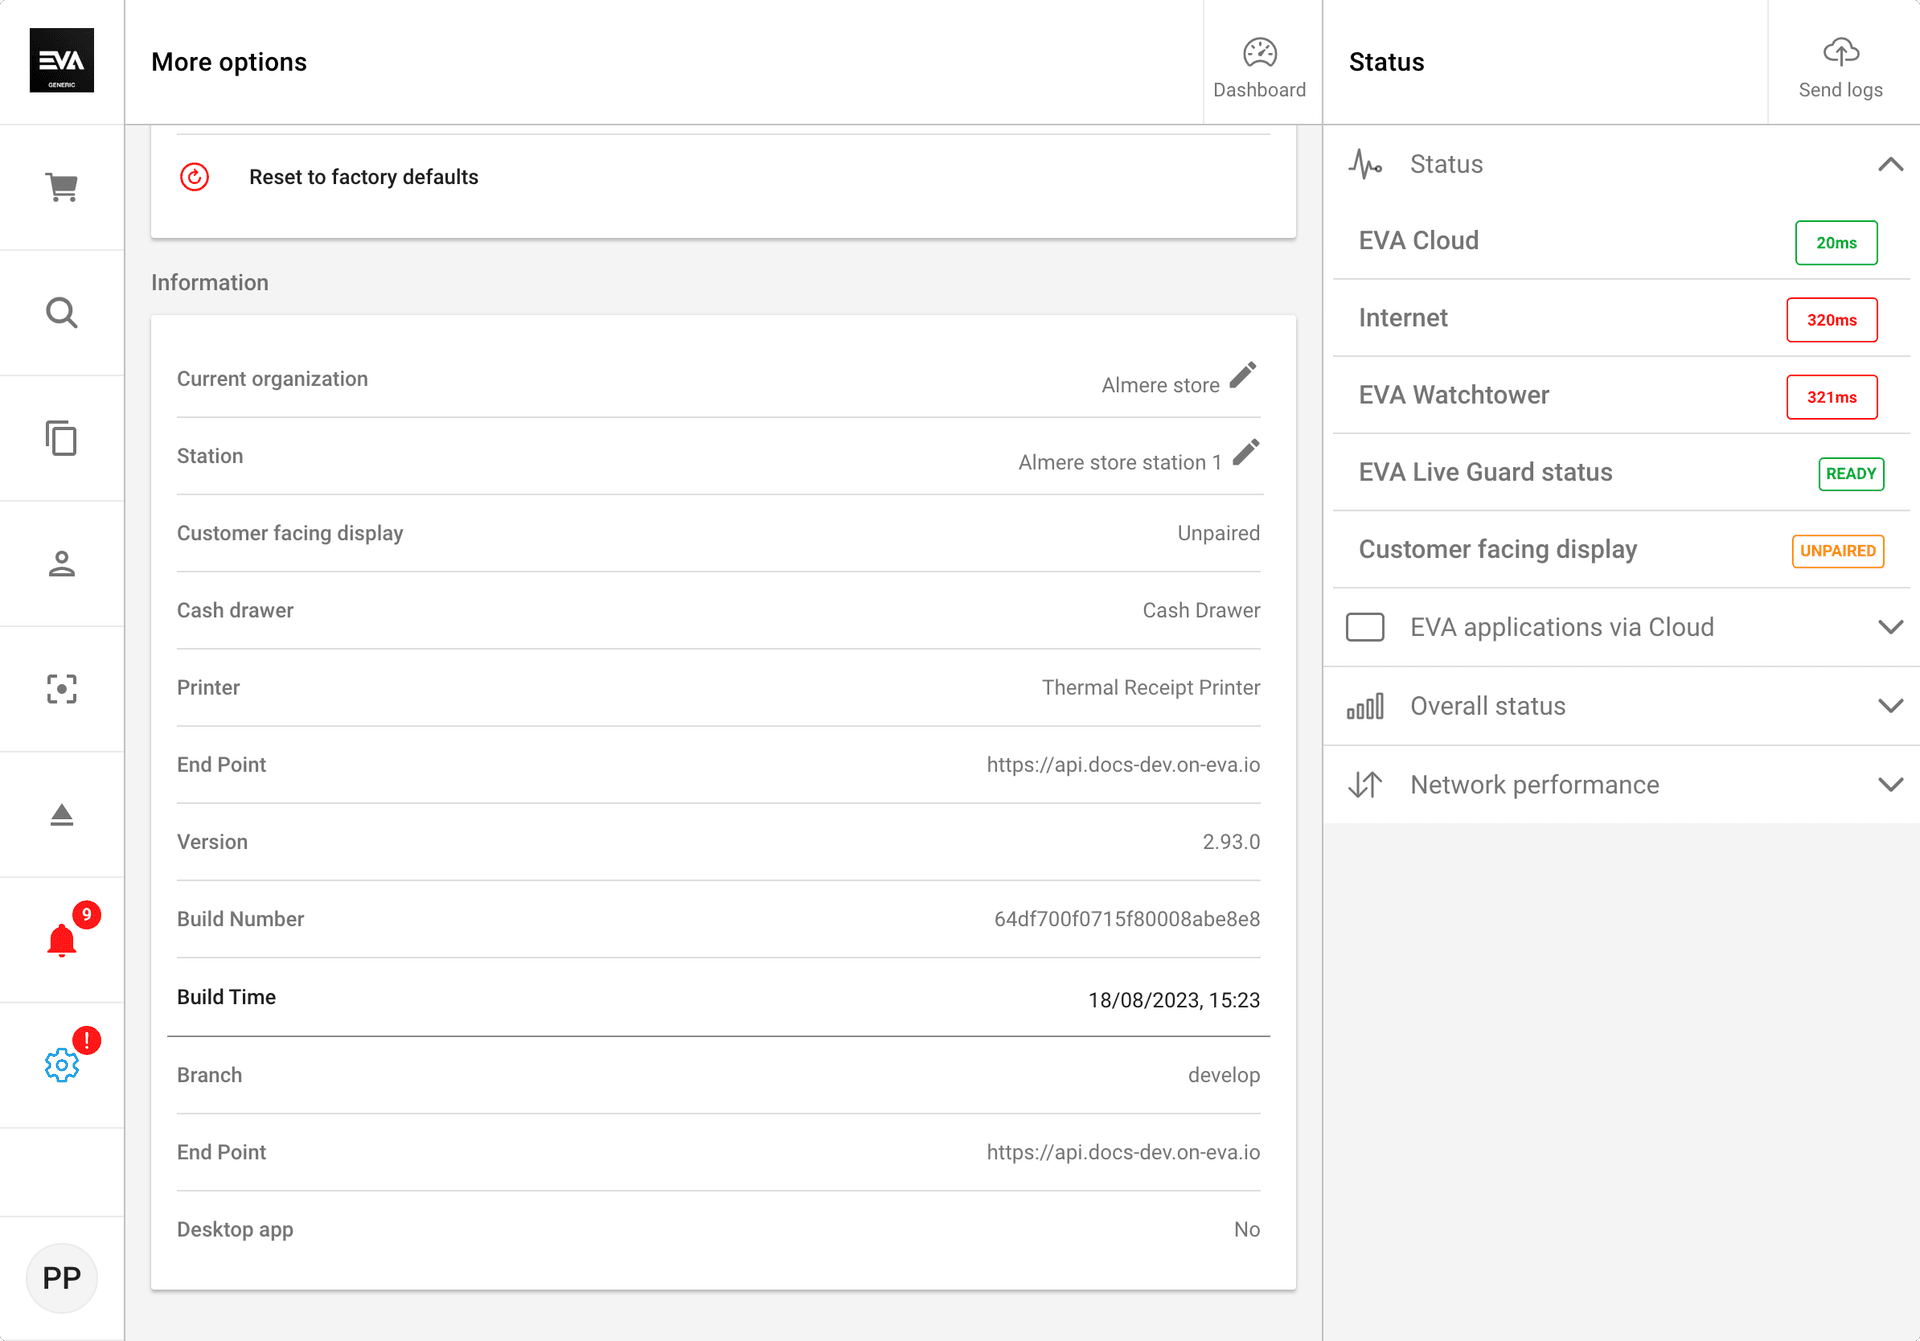
Information
Here you will find an overview of the applied settings and some self-explanatory general information. You can also change your station or organization unit (if needed).
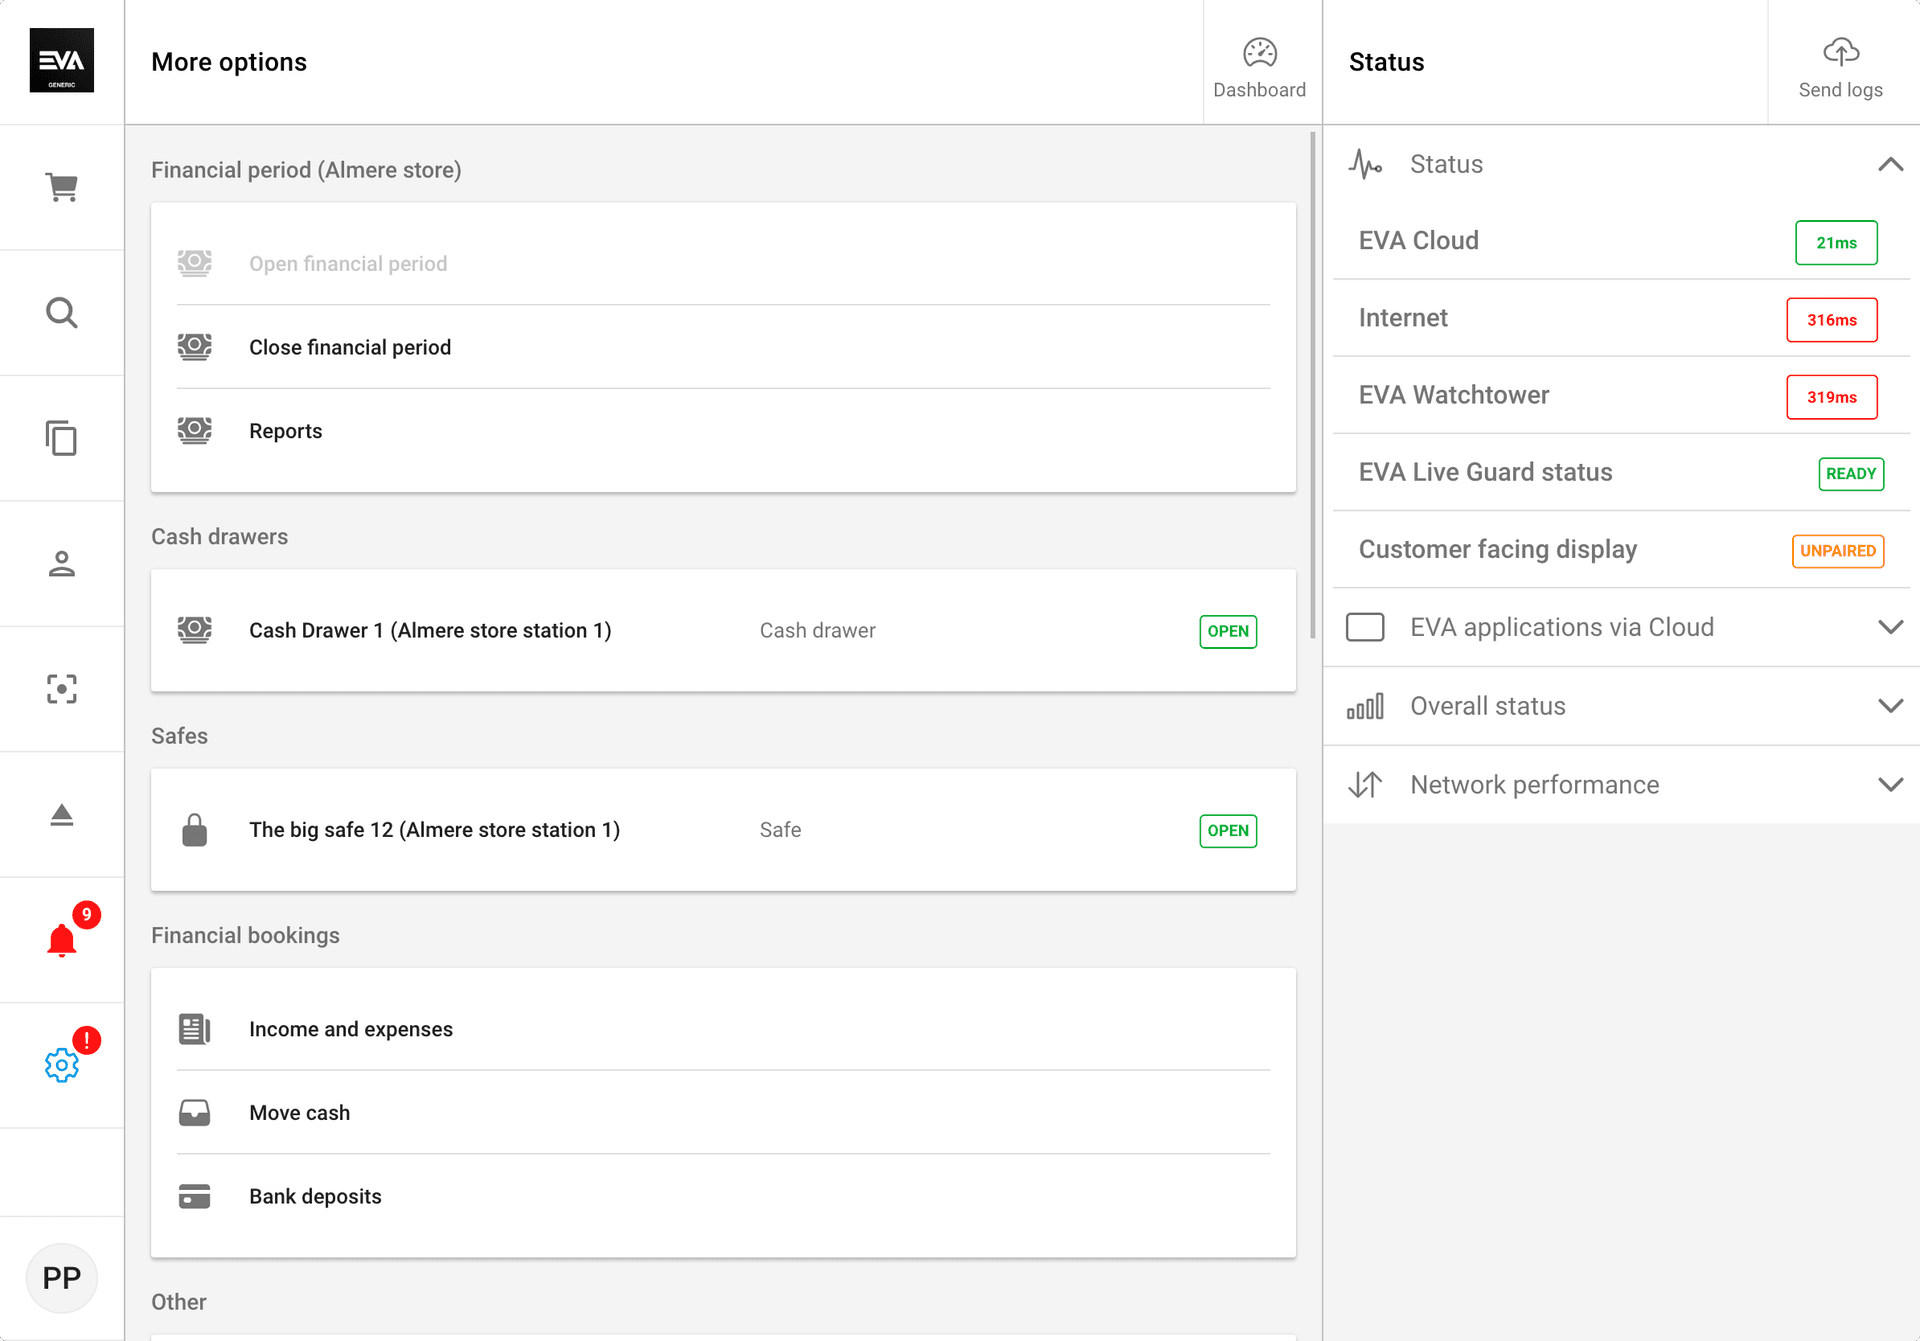
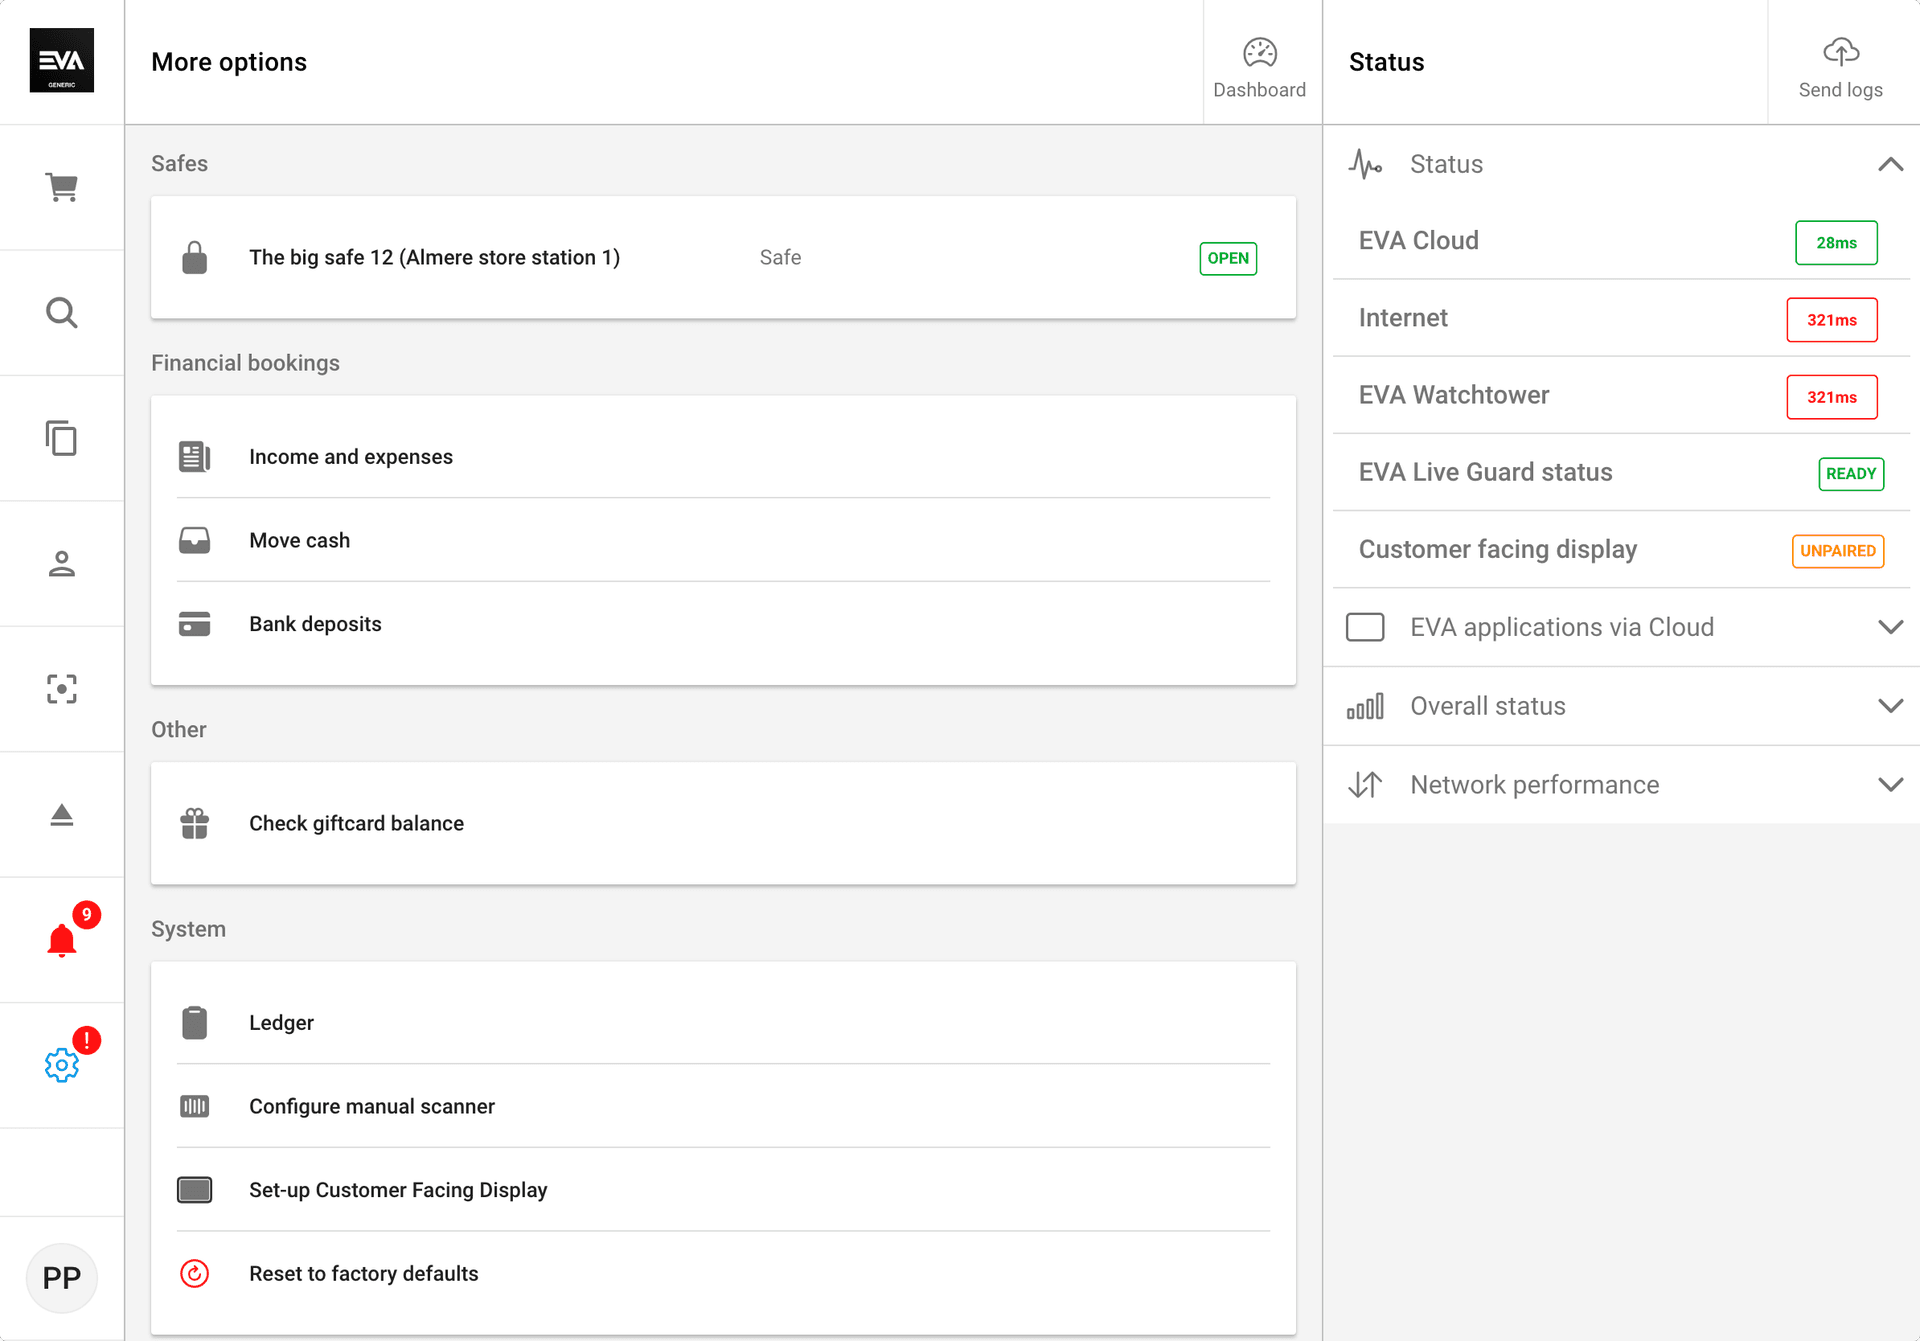
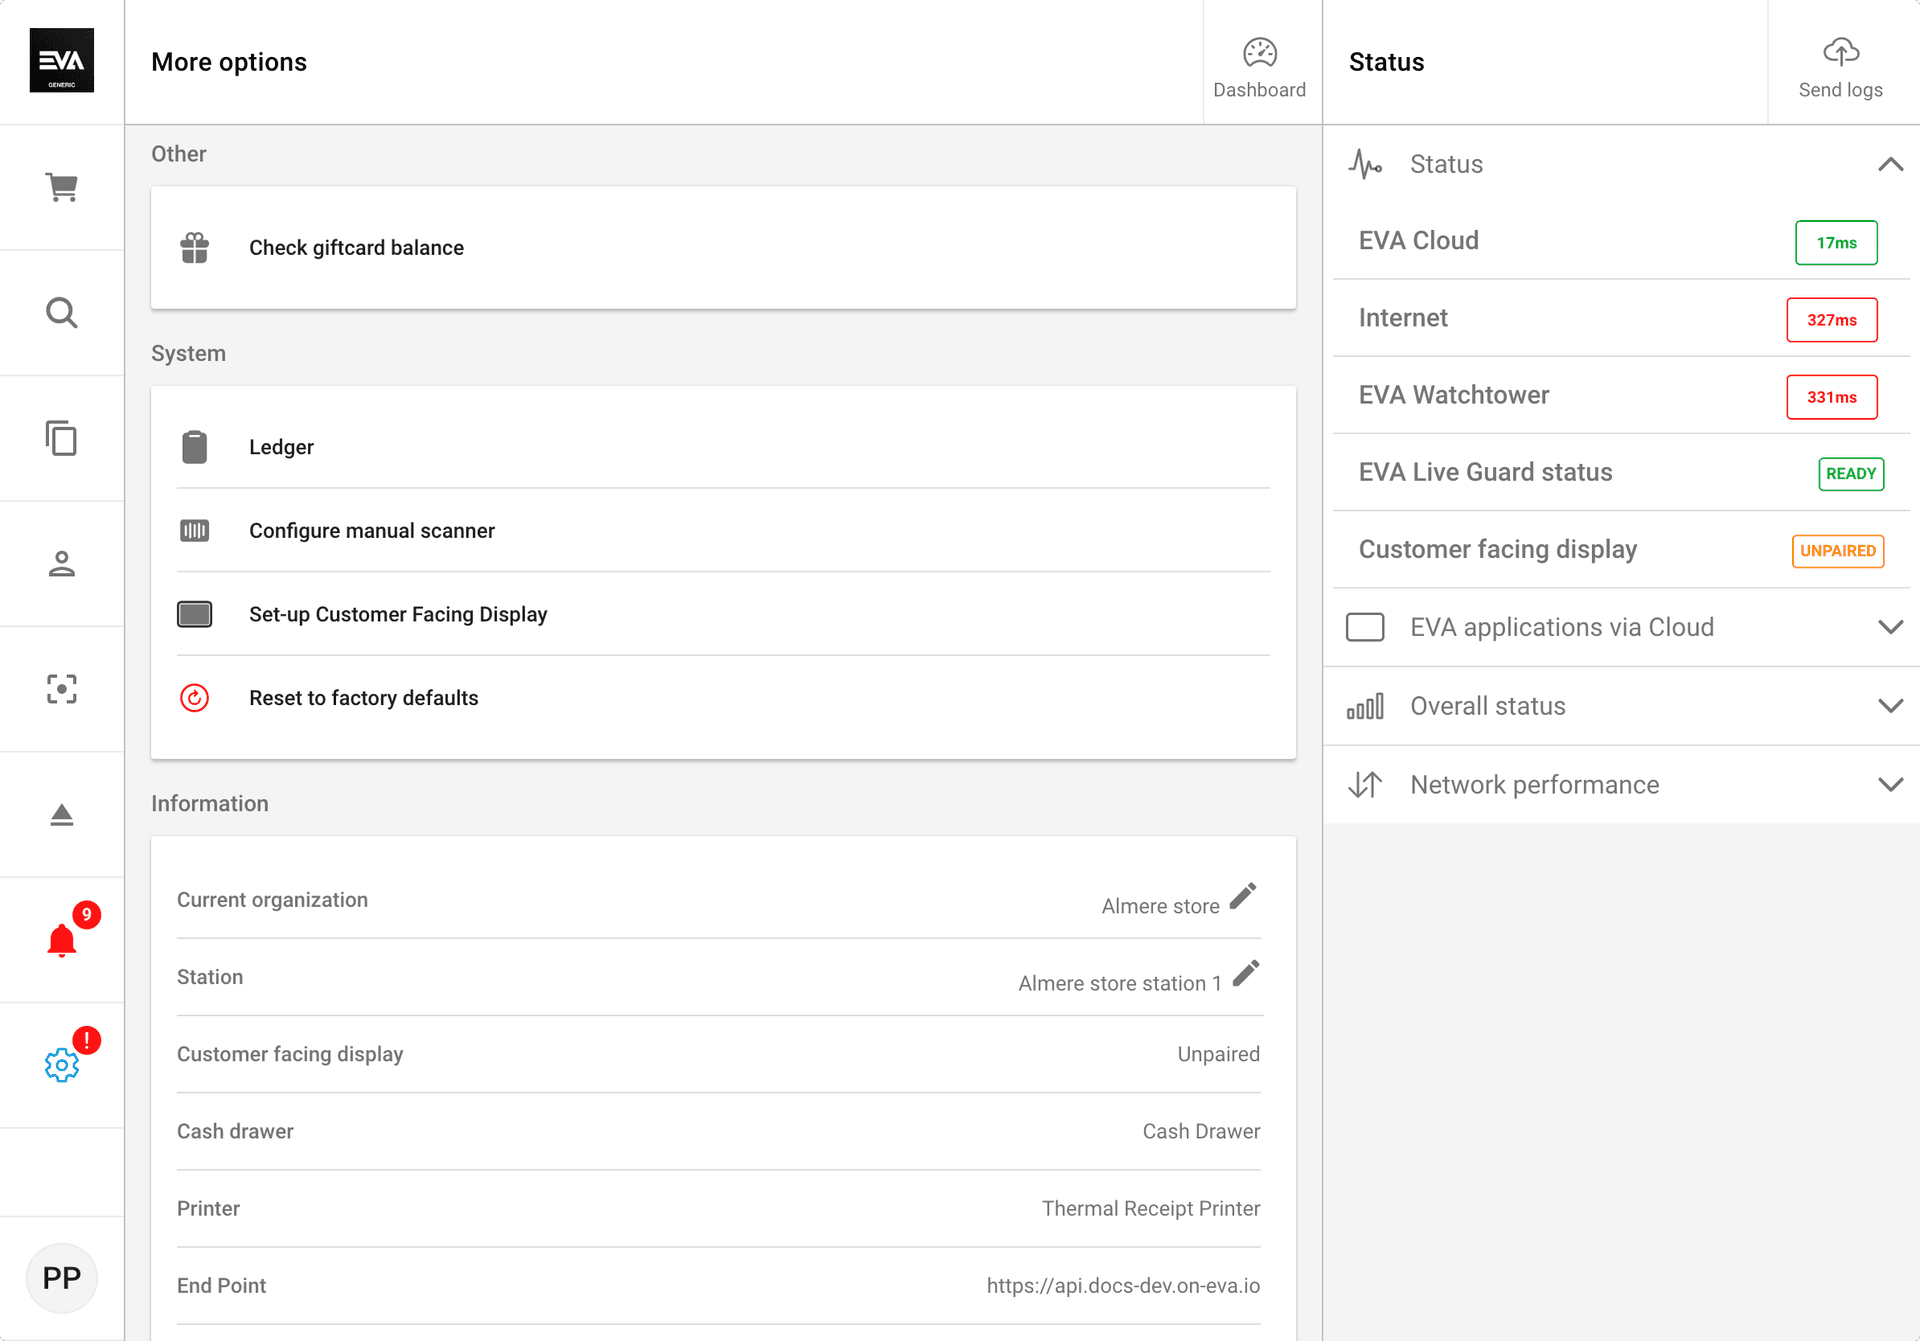
Right side
The right side of the More Options tab, allows you to monitor your environment and check for errors.
Status
This pane gives you an overview of your different configured services in the store and their availability. This includes information about the watchtower and the status of your customer-facing display.
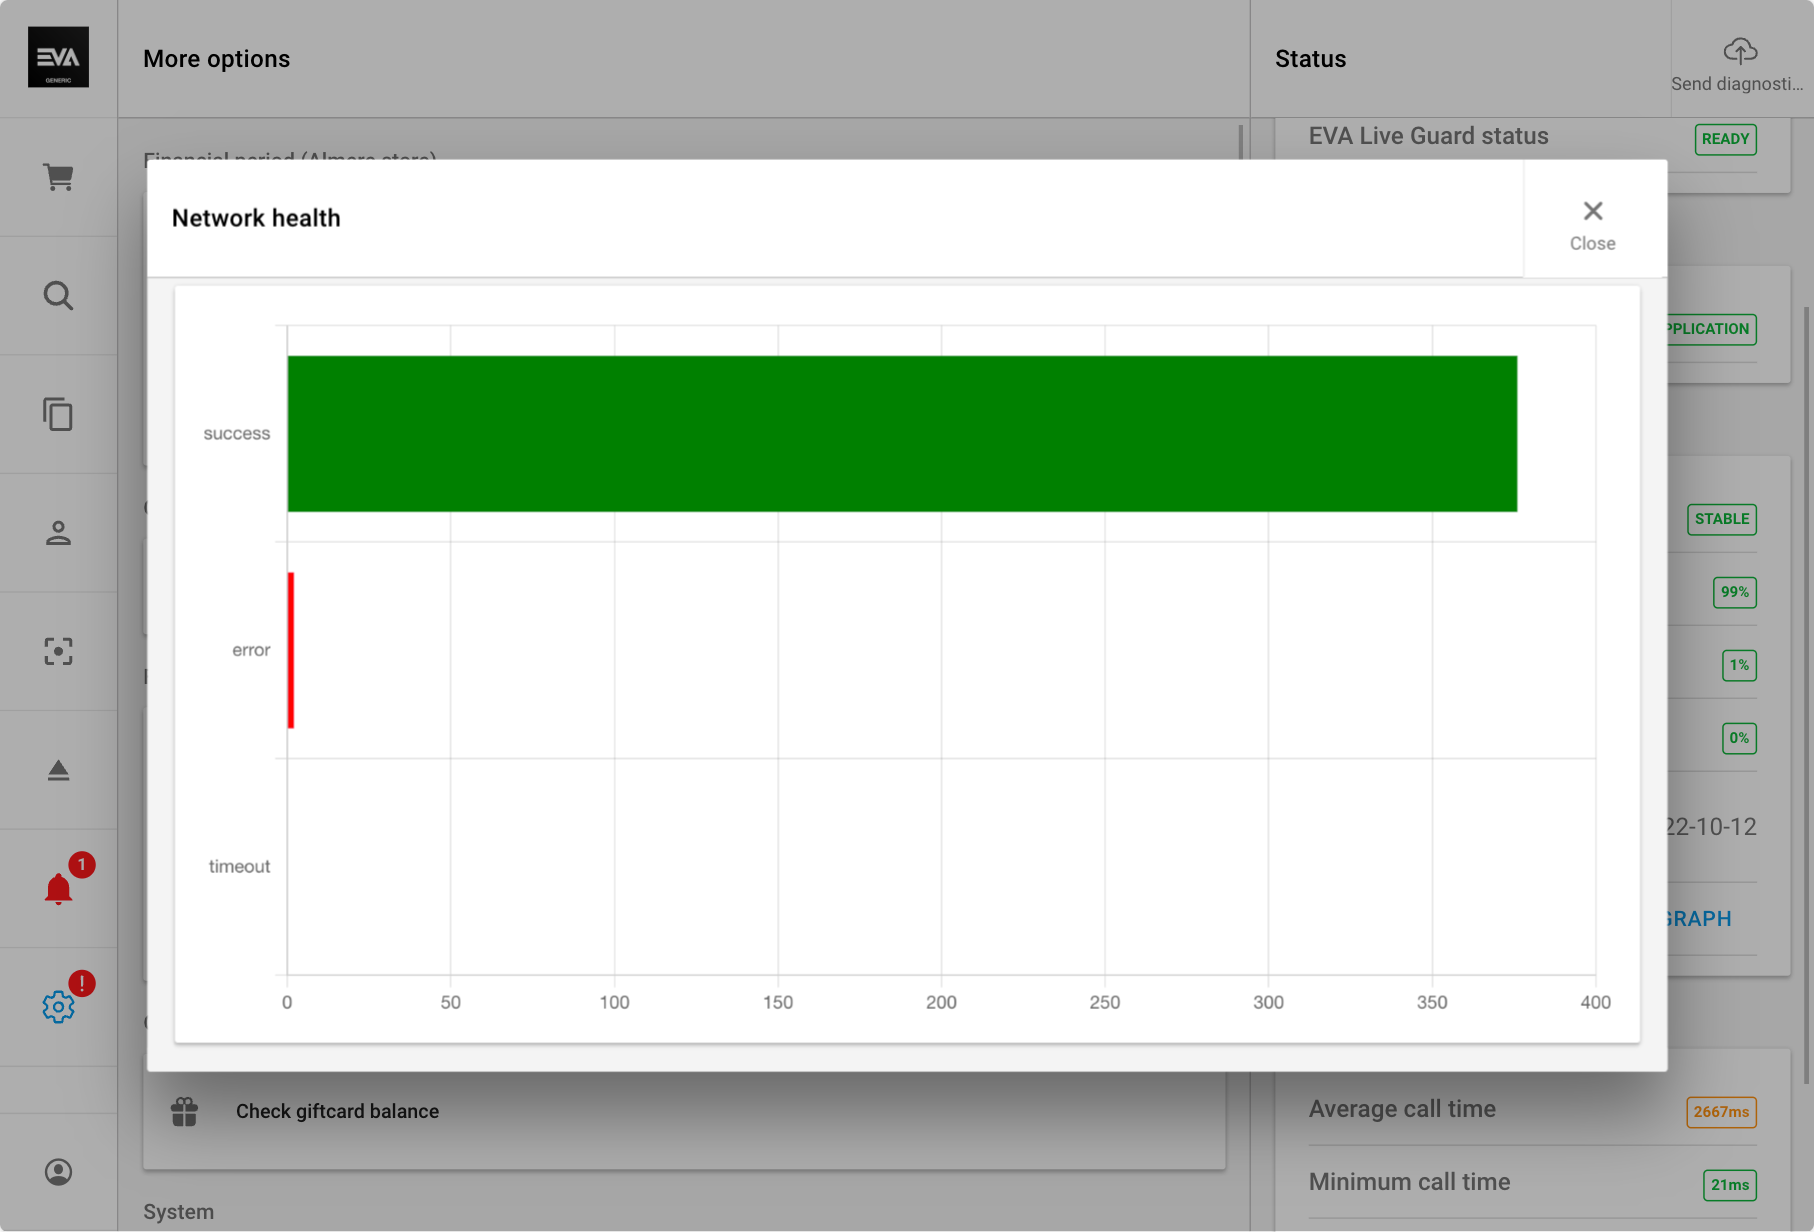
Overall status
This pane gives a high-over indication regarding requests to EVA using a success and error rate comparison. For error criticality, segregation is made on errors due to timeout. The network information is on the right side of the More Options screen.
Errors: A small error percentage can be expected here and should be no cause for concern. It could be due to invalid calls, transient issues, or EVA deployments.
Timeouts: Occasional timeouts can occur; however, if it persists for long periods could mean an issue with your WiFi coverage.
Overall status: This shows your network status (stable or unstable) regarding the most recent calls made with EVA.
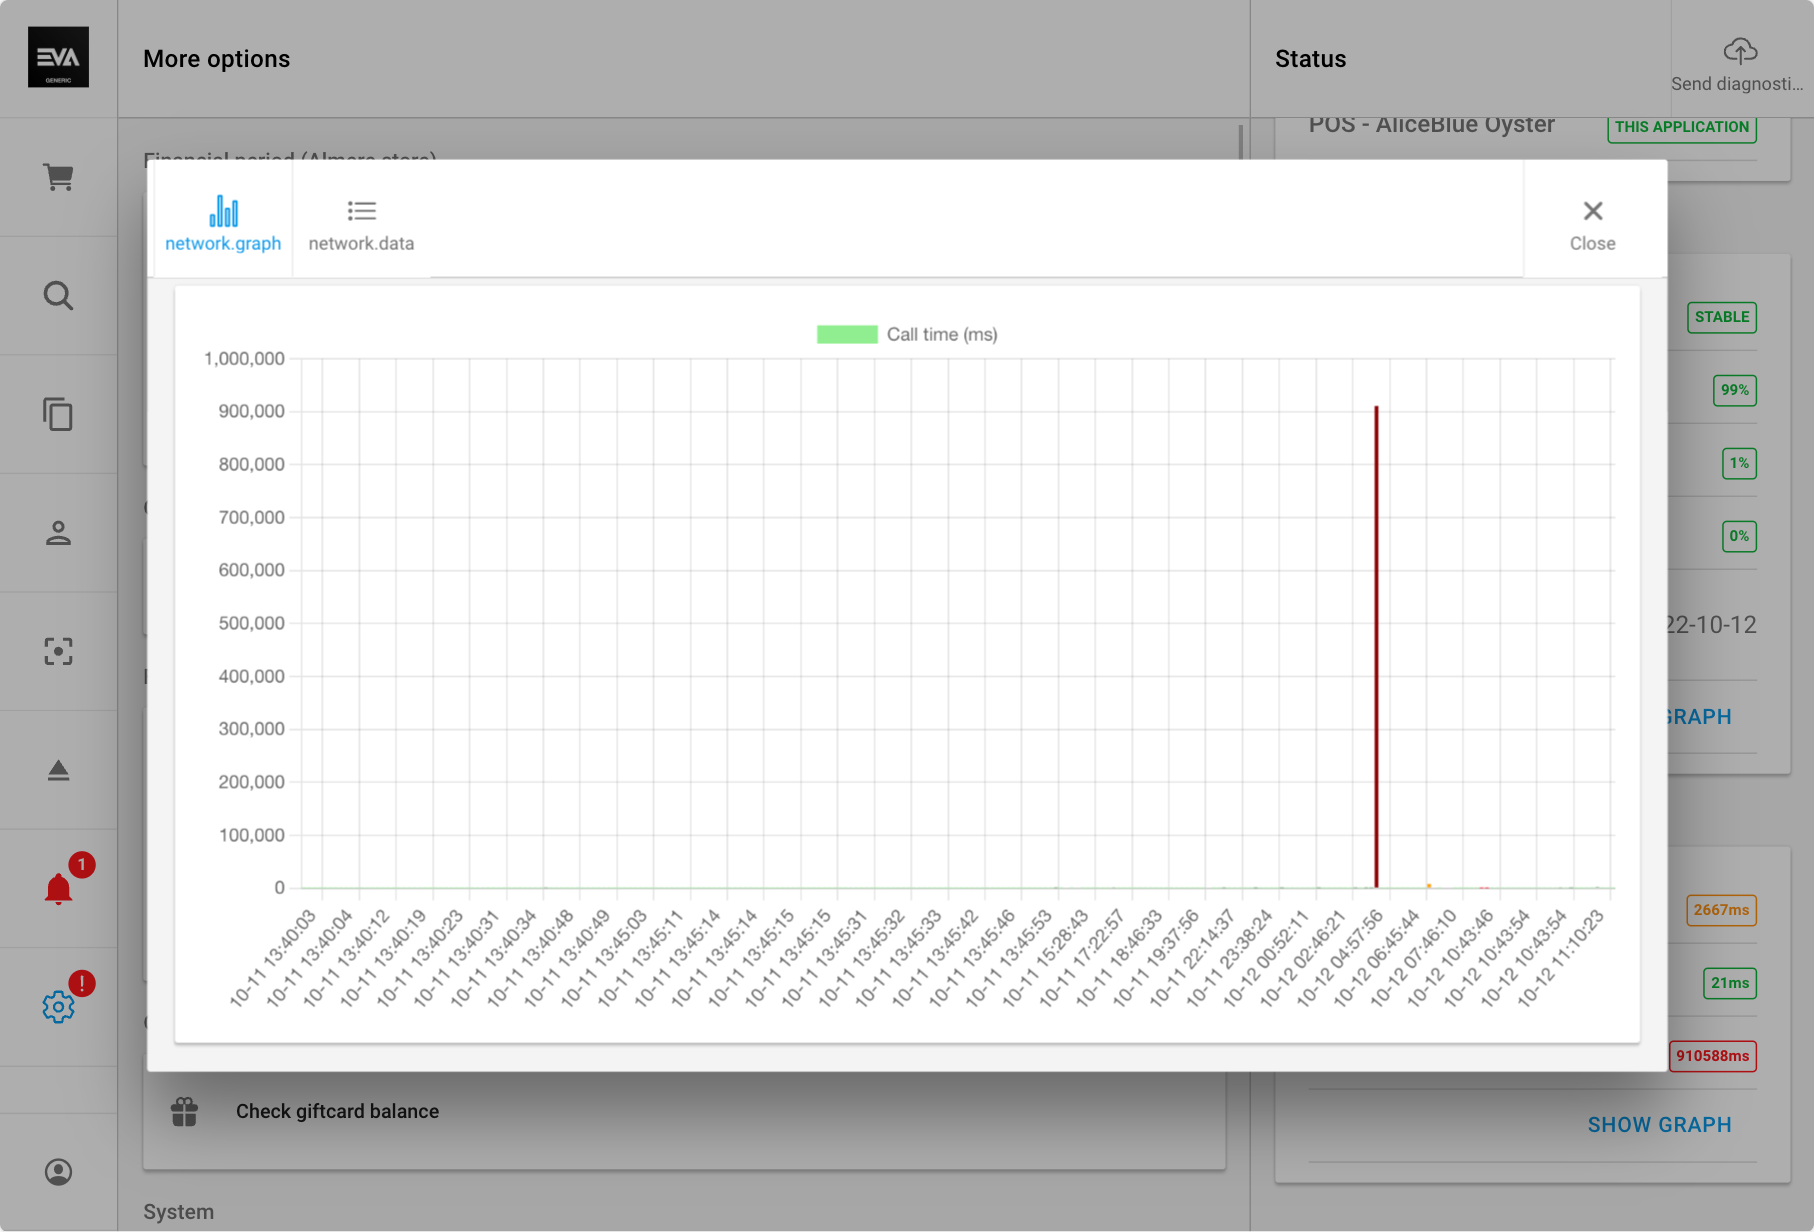
Network performance
Network performance shows how long requests to EVA take to be completed. Time varies depending on the request; however, it should not be excessively long.
If you have a deep urge to keep an eye on something here, then keep an eye on the average call time so that it stays within your familiar range. Otherwise, leave the rest for us, as the graph is there mainly for ease of traceability in case we need to dig deeper into a specific slowdown.
The button Send diagnostics to EVA sends a diagnostic dump to us, which includes information about the application version, EVA endpoint, and any locally collected network and logging data. Please use upon advice only. If successful, it will say "Completed" below the 'Confirm' button. Next to that, the ID of the diagnostic will appear.