Click & Collect
Click & Collect
All about Click & Collect
This page is your definitive guide to setting up and using Click & Collect with EVA. It covers key decisions, configurations, and provides an overview of general concepts.
Overview
Click & Collect, also known as Call & Collect, is a convenient ordering method that allows customers to order products online and then pick them up at a physical store location. This is initiated by customers who prefer to pick up their goods in person.
Step-by-step guide to Click & Collect on EVA
While Click & collect is relatively straightforward, it comprises various components that influence its behavior within EVA. In this step-by-step guide, we will break down the Click & Collect flow, offering detailed insights into each stage of the process. From initiating the flow to managing reservations, communicating with customers, setting up pickup reminders, and optimizing the entire experience, we will guide you through the entire journey of Click & Collect on EVA.
- Initiating the flow
- Webshop initiation
- (In-store) Reservation task
- (In-store) Informing the customers
- Pickup reminders
- Required reservation time
- (In-store) Clean up reservations
1. Initiating the flow
Click & Collect orders are always initiated by the customer, who decides to pick up their purchase in a specific store. Because we know all of this information, initiating a Click & Collect flow is fairly straightforward. The initiation can occur through one of two places:
2. Webshop initiation
External webshops use PushSalesOrder to communicate orders to EVA. In order to mark orders as Click & Collect, we need to set a PickupOrganizationUnit. In PushSalesOrder, this can be achieved by specifying the PickupOrganizationUnitBackendID.
An example order would look like this:
{
  "BackendSystemID": "pickup_test",
    "BackendID": "externalorderid8",
    "CurrencyID": "EUR",
    "SoldFromOrganizationUnitBackendID": "nl_webshop",
    "PickupOrganizationUnitBackendID": "almere_store",
    "Customer": {
        "EmailAddress": "johndoe@email.com",
        "Gender": "M",
        "FirstName": "John",
        "LastName": "Doe",
        "PhoneNumber": "+31612345678"
    },
    "BillingAddress": {
        "Street": "Grove street",
        "HouseNumber": "7",
        "ZipCode": "1234AB",
        "City": "Amsterdam",
        "CountryID": "NL"
    },
    "Lines": [
        {
            "BackendID": "linebackendid8",
            "ProductID": 33,
            "Quantity": 1,
            "Amount": 49.95,
            "TaxRate": 0.21
        }
    ],
    "Payments": [
        {
            "BackendID": "paymentbackendid8",
            "Method": "PIN",
            "Amount": 49.95
        }
    ]
}
{
  "ID": 153,
  "CustomerID": 5,
  "AlreadyExists": false
}
Get the correct SoldFromOU
To ensure that the SoldFromOU reflects the location where the payment is made in case of unpaid orders of type Reserve with a pickup point (read: OU) different from the OU where the order was created, you can enable the following setting:
RequiredData:RequireOrderTransferForNonPaidPickup- must be set to true (defaults to false
In addition to the pickup OU, we also need a customer with a billing address - a shipping address is not needed, obviously.
Afterwards, the request will provide you with the new order's OrderID.
3. (In-store) Reservation task
How do I configure the reservation task?
There are several settings important to enabling reservation tasks - let's start off with enabling the basic functionality.
Enabling reservation
The 'Reserve in store' functionality itself can be enabled with the following setting:
Orders:Reservations:ClickAndCollectEnabled- must be set to true
Blocking unpaid C&C orders
You can also block the creation of just unpaid pickup orders. By setting a value in the following setting, you make it mandatory for the order to be paid whenever the amount is higher than the specified value.
ClickAndCollect:Payment:Limit- to be entered with any amount
Minimum quantity available
To ensure that a store is deemed suitable for Click & Collect orders (especially when there is a limited number of the required products in stock), you can customize the minimum quantity of products that stores must have in inventory before they become visible as options for pick up:
Orders:Reservations:ClickAndCollectMinQuantityAvailable- to be specified with a quantity
Displayed Pick up OUs based on product and quantity in stock
The App setting App:PickupAvailability:IncludeOrganizationUnitsWithoutStock determines which pickup locations are shown when reserving products based on their stock levels. If this setting is true or not specified, all pickup locations, including those without stock, will be listed. If set to false, only locations with available stock will be displayed.
Default reservation strategy
You can adjust the default reservation strategy using the following setting.
InsufficientStockForReservationStrategy- to be set with ORDER or CANCEL- By default, this setting is configured as ORDER, which means that even if a product is out of stock, the sales order is still sent to the designated organization unit as a Click & Collect order, initiating the reservation flow.
- Alternatively, you can set it to CANCEL. With this, any order line with no stock will be automatically canceled, eliminating the possibility of initiating a reservation flow when there's no available stock.
Checkout option
Aside from enabling the setting(s), you must configure it as a checkout option.
The checkout option will then appear as a selectable tile called PickupPoint during the checkout process, both on POS and the Checkout App
Performing the task itself
Once a Click & Collect order is created, the specified store will receive the order as a reservation task under Click & Collect Tasks in the Tasks App.
Selecting the task will open an overview of all the items that require picking for this order. These items can be gathered either by scanning them or by manually inputting their barcode.
Printing a receipt
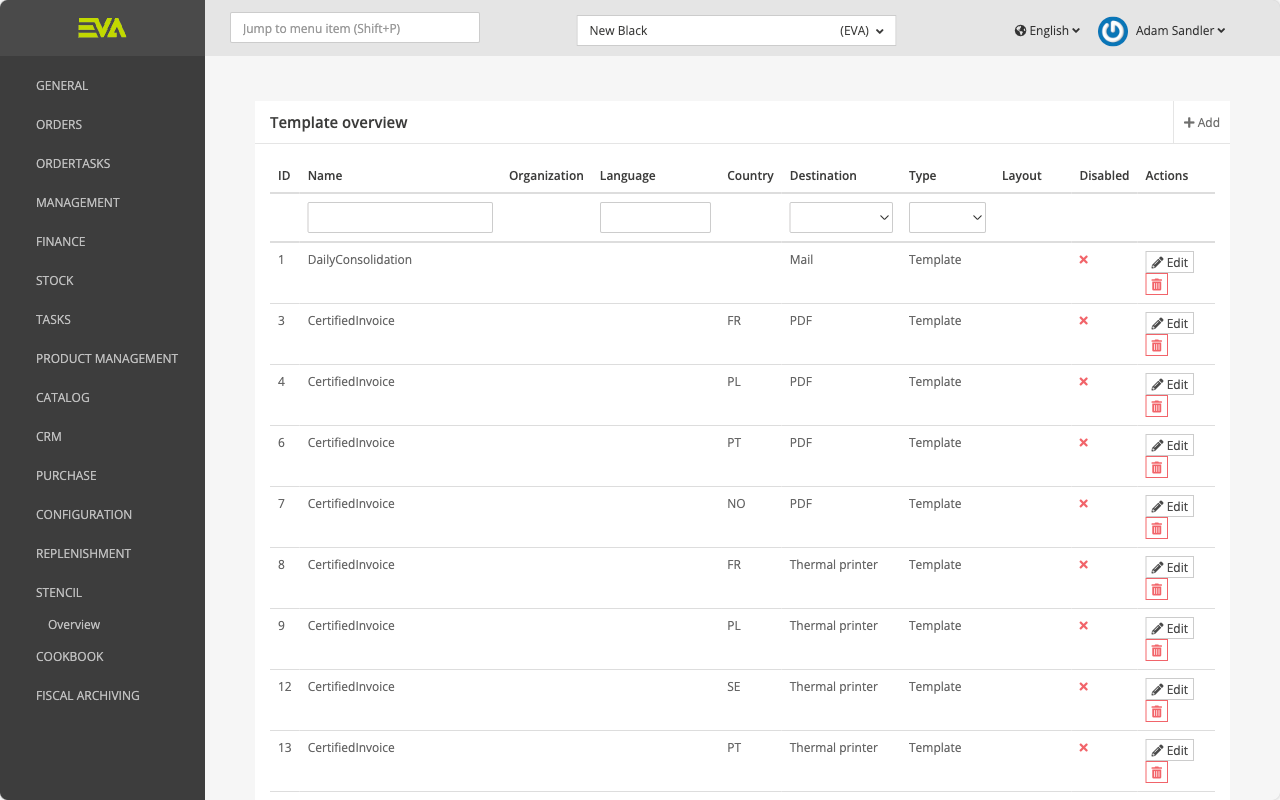
Once all the items have been picked, we can complete the reservation task. When completing the task, there is an option to print a reservation receipt. You can configure the receipt using the OrderReservationReceipt stencil template.
You might consider printing a reservation receipt as it offers a tangible, itemized list for ensuring order accuracy and serves as a useful reference for customers when they come to collect their order.
Useful link(s)
- Settings.
- How to configure Stencils.
- Checkout options.
- Click & Collect Tasks.
- Picking.
4. (In-store) Informing the customer
How can I let the customer know their order is ready?
Once the task has been completed, EVA will send an email and/or SMS to notify the customer that their order is now ready for pick up.
Email
To establish this email flow, you must configure two settings:
Mail:StockReservationCreated:EnabledVerifyPaidPickupOrders:Enabled
Both must be set to true. The latter is essential for displaying a QR code in the email. You can configure the email using the StockReservation stencil template. Once set up correctly, the customer will receive an email with a unique QR code, which only they can access.
To release the (paid) pickup order, the customer can simply show this QR code to the employee. If, for any reason, the employee needs to release the order without the customer's QR code, their role must have the ReleasePaidPickupOrders permission.
SMS
Additionally, you can set an SMS message to be sent to the customer to inform them. This requires the following three steps:
- Set up SMS configuration with MessageBird
- Set up a StockReservation template with destination SMS
- Set
Sms:StockReservation:Sendto true
Useful link(s)
- How to configure Stencils.
- Stencil template.
- Roles and rights.
5. Pickup reminders
How can I set up pickup reminders? How frequent will they be sent out?
To remind customers to pick up their reserved order, we can configure the following setting:
PickupReminder:ReminderDays - must be specified with the days when you want to send out a reminder
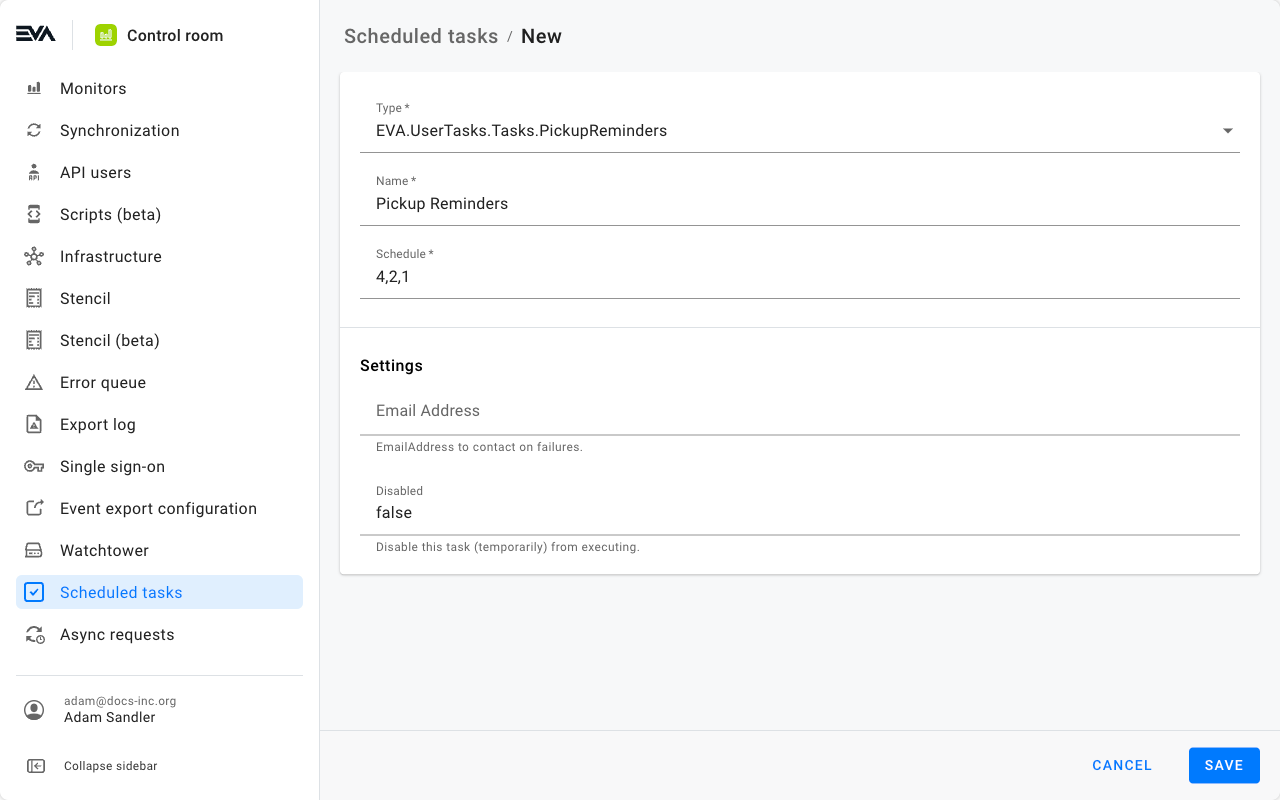
If we set this to 4,2,1, EVA will automatically send a reminder email when there are four days left for the customer to pick up their order. It will then send another reminder when there are only two days left and yet another when there's just one day left. You can customize the reminder email using the PickupReminder stencil template.
To support these reminders, we need to set up the EVA.UserTasks.Tasks.PickupReminders task in the Scheduled tasks chapter in Admin Suite's Control room module.
If we configure it to run at 24-hour intervals, it will periodically check if any reservation orders match the number of days that corresponds with the PickupReminder:ReminderDays setting and trigger the e-mails.
Useful link(s)
6. Required reservation time
Why do you need a required reservation time?
You might want to set a required reservation time to manage the flow of customers and ensure that items are prepared for pickup when customers arrive.
To set a specific time for a store to prepare a Click & Collect order, you can use the following setting:
Orders:Reservation:RequiredReservationTime- specify a number of minutes the store needs to prepare a Click & Collect order before it becomes available for pick up.
The calculation will also consider opening hours. If this setting pushes the Click & Collect order past the end of the day, it will automatically roll over to the following day.
Useful link(s)
7. (In-store) Clean up reservations
What happens when customers don't pick up their orders?
It's not ideal, but it happens. At some point, some people are going to forget to pick up their reserved orders, or simply just had a change of mind.
To prevent reserved orders from hanging around indefinitely, we've implemented reservation cleanup tasks. These tasks allow us to set a maximum reservation duration. Once this duration is exceeded, a reservation cleanup task is triggered.
ReservationCleanupTasks:Enabled- must be set to true- The previously mentioned scheduled task
PickupReminderis responsible for generating these cleanup tasks at 30-minute intervals
- The previously mentioned scheduled task
MaxReservationTime- can be customized with a maximum amount of days, but is set to 7 days by defaultRefundAfterReservationOrderLineCancelled- when set to true EVA will automatically refund the order after completing a cleanup task